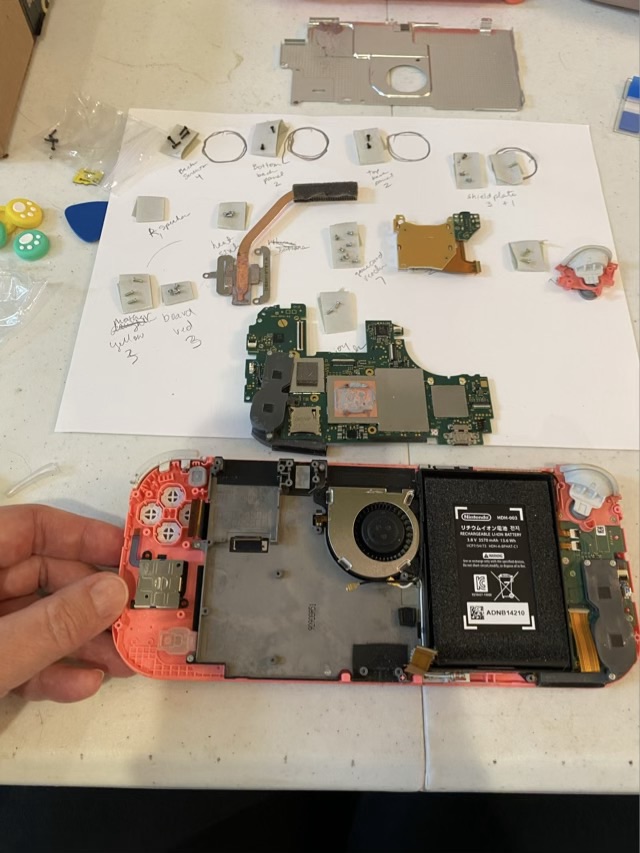
My youngest’s Nintendo Switch lite broke. The left joystick actually flopped around, not just drifted. She received a new to her full size Switch for her birthday, so the old one was a wash. Since it didn’t hurt anything to try, I bought an under $20 joystick repair kit and found directions. The directions had 28 steps just to get the joystick out, then the same 28 steps were retraced to put it back together. The kit came with two joysticks, which looked identical, except for part numbers on the back. There was no indication anywhere which was left, and which was right. I picked one. The disassembly didn’t go too bad for the left joystick, although I did break the left speaker connection because I didn’t realize that the plug was a teeny tiny white part in a slightly larger tiny white socket.
Feeling brave, and while the device was open anyway, I decided to replace the right joystick as well, after all, I had the part. Oh dear. The right joystick is a whole different set of steps, and involves removing a motherboard. I didn’t break the right speaker, and I had to replace the motherboard three times before all the cables were in the right spots, I thought. I missed the fan cable, and when I tried to retrieve it through the motherboard, it tore. Nuts.
Photo description: motherboard removed from a Nintendo Switch lite, all the removed parts placed on a sheet of cardstock and labeledPhoto description: broken end of a fan cable
Things I learned in this process: don’t force it (honestly I really should have known this, this is not my first rodeo). The engineering and durability of these devices is amazing. If I hadn’t been ham-handed, this is a doable repair. Inverted washi tape rings make great holders for tiny screws. Label everything. I saw my eldest set up for a deconstruction this way with wells embossed into card stock and it is brilliant.
The number one thing I was forcefully reminded of in this project: stop when you’re ahead.
The pieces and parts are now marked for a trip to tech recycling.
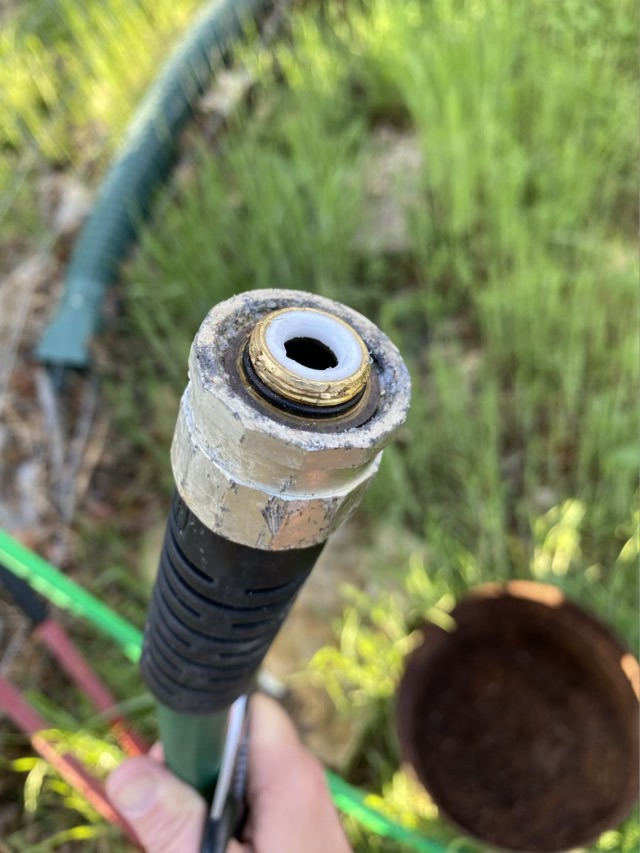
The brass manifold I use to route water to the coop and raised bed garden started to leak. I went to unscrew a hose from the manifold and part of the manifold broke loose, lodged inside the hose. It is not the first time this has happened. The hose on the top of the manifold was also corroded and frozen in tight.
Photo description: garden hose with the end ruined by a broken off manifold junction.
This time I ordered new hose ends, solid brass with a metal band clamp. I cut off the offending ends of hose with kitchen shears so I could replace the connectors.
Photo description: heavy duty garden hose cut off above the manifold, since it wouldn’t unscrew.
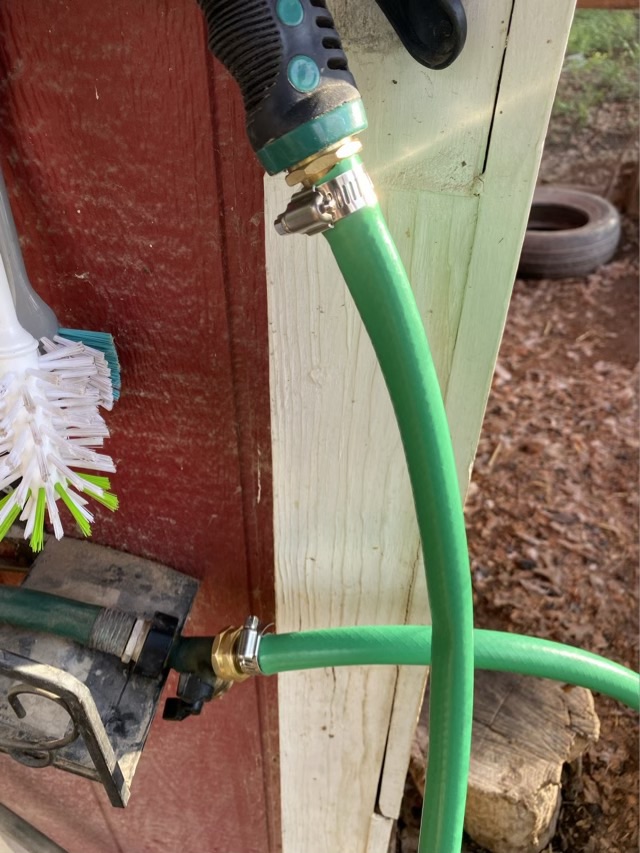
Pressing the connector against the fence post helped me wedge it into the cutoff hose. The female end was a little tricky with the loose ring, but attaching the male end made it stable enough to use the same technique. It really helps if you remember to put the band clamp on before attaching the new connector. Spoken from experience. I also used silicone tape in the threads this time.
Photo description: new brass manifold with repaired hose connectors.
The whole procedure was relatively painless and quick. It was definitely better than replacing the whole hose. I even replaced both ends on the hose in the chicken coop, that never did connect well.
Photo description: new hose connectors on the hose in the coop.
Ok, so this is probably the silliest I’ve ever made, and that’s saying something. I repaired the broken leg in an old side table that had been used as a bench (yesterday’s post), and rather than tempt fate by putting a solid top back on, I made it into a cat hammock.
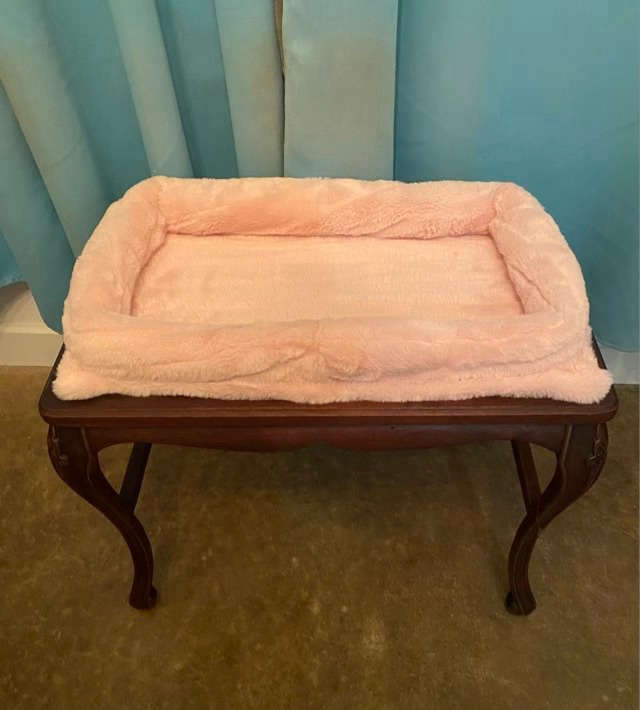
Photo description: elegant wood table with curved legs with a light pink fuzzy padded edge cat hammock attached.
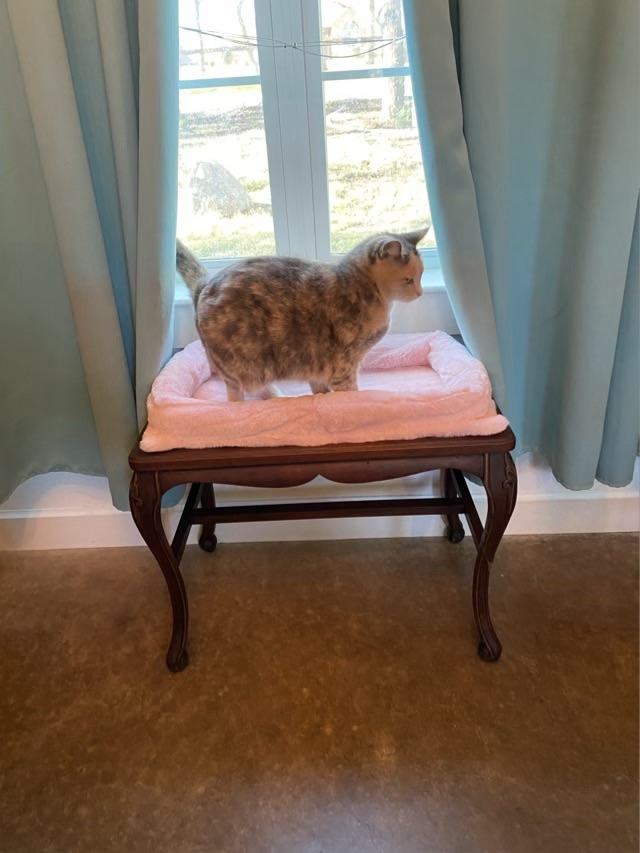
I had a pink fuzzy blanket that had already been cut into for another project (we couldn’t find the fabric by the yard, so bought a blanket), and sewed a two sided mat. I stapled the mat down to the table top, over the central opening. I then sewed a long tube of the fabric, stuffed it with polyfil and sewed that down on the mat. It is quite the sight. The cats are not too sure of it, so I put it beneath the front window where it will get some sunlight. I’ve sequentially put all three cats on the bed; all have rejected it. I’ll give it some time.
Photo description: Thor the gray tabby standing on the new fancy cat bed.Photo description: Sophie the dilute calico standing on the new fancy cat bed.Photo description: Izzy the calico sitting on the new fancy cat bed. After the photo she moved up to the window sill.
One of my neighbors put out an upholstered stool on the side of the road. It had elegant curved legs, but one of them was broken. I picked it up and glued the leg back on.
Photo description: clamp holding together the broken portion of the leg
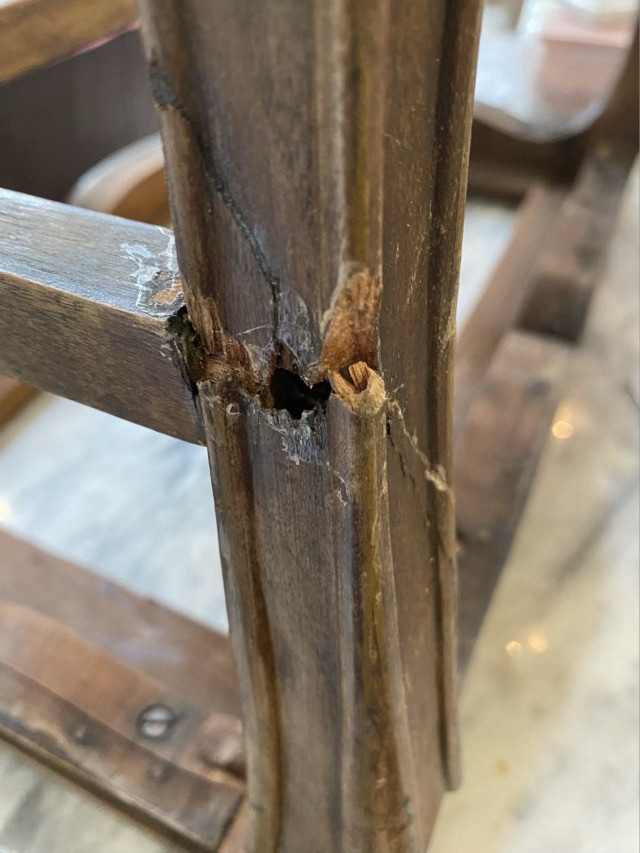
There was still a large gap in the leg after I fit it together.
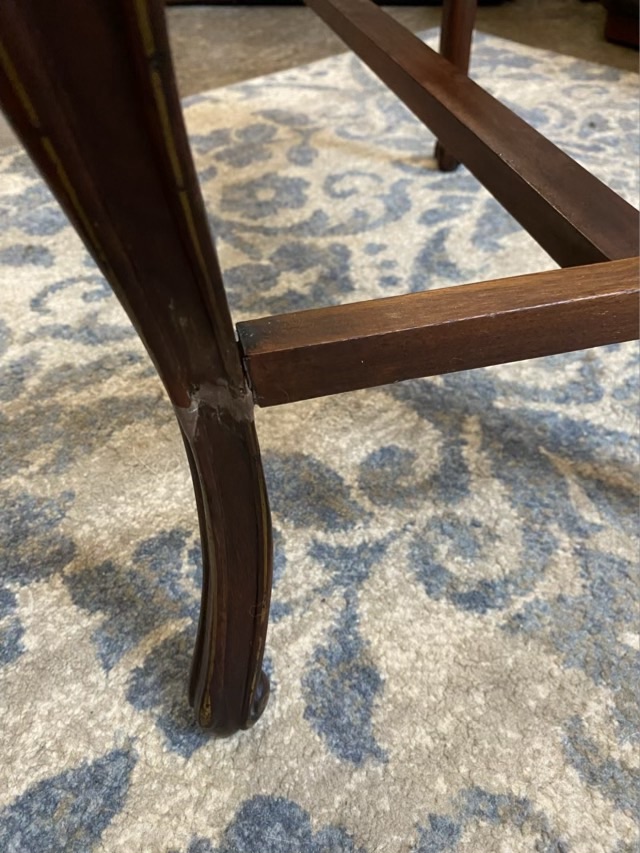
Photo description: closeup of the wooden leg showing a deep hole and ragged gash.
I bought some Apoxy sculpt modeling compound, which is a two-part epoxy clay that hardens without baking. I bought the color called “bronze” because I was inspired by the Japanese method of Kintsugi, or making a visible gold repair. The “bronze” was not metallic at all and actually was a fair match to the stained wood. Huh.
Photo description: same wood leg, but upright on a blue and gray rug, showing the filled hole, which is slightly lighter and more gray in color. I treated the whole base with Howard’s Feed and Wax (I love this stuff).
I removed the water stained upholstered top and found something interesting.
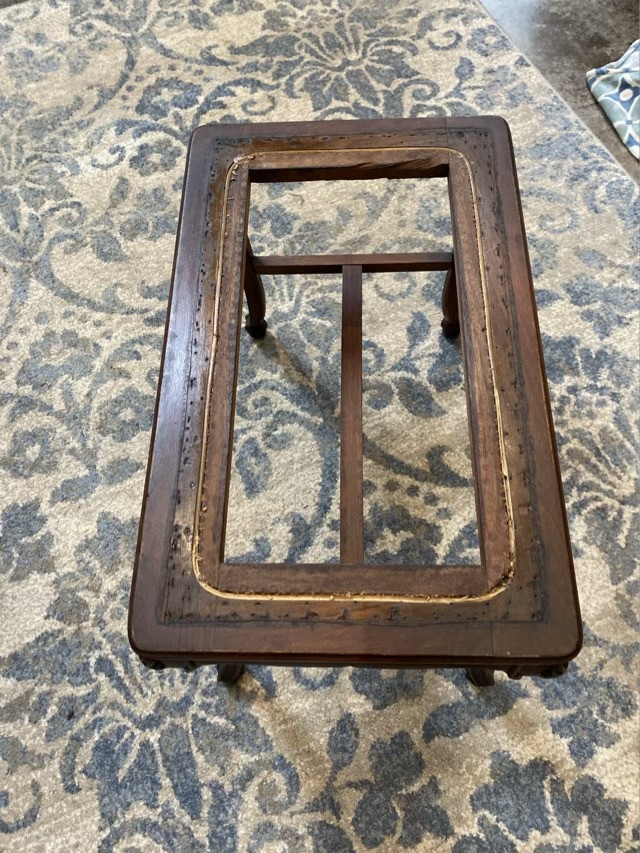
Photo description: top of the stool with the upholstery removed.
This little piece of furniture has been many things. At one point it had a rattan top that had been cut out. I’m guessing the rattan was original and this was intended to be a side table. Then there is a round of staple or tack marks around the old rattan groove, which I assume was the second and maybe even third life of the piece. When I picked it up, it had green velvet fabric stapled to a plywood board, that was then screwed in place from underneath.
I have no doubt that those legs would break again if someone sat on it. So what to do with elegant legs that can’t take much weight? Oh, I came up with something, and it is probably the silliest thing I’ve ever made. I’ll share the results tomorrow.