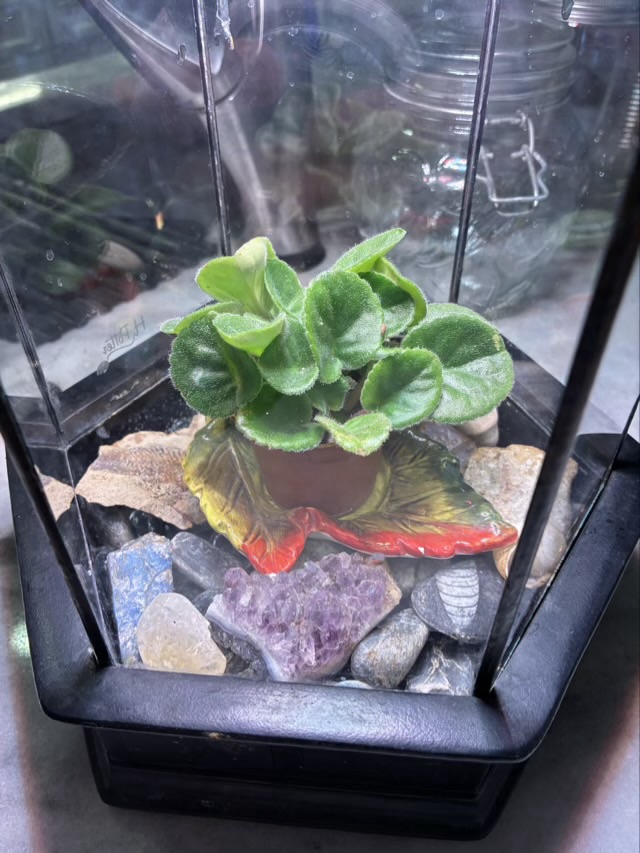
The mossarium I made in a case was not doing well. I tried adding a plant light and it was too much for some of the moss. After six months of steady decline, I decided to clean out the container and put in something else. I have a young African violet that I received from a friend that currently fits.
Photo description: small African violet sitting in a leaf shaped tea light saucer on a variety of rocks and stones inside a closed glass terrarium
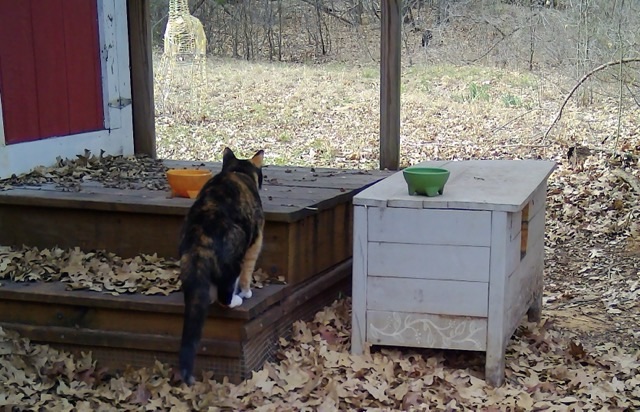
Izzy the calico cat is kept indoors, except for the catio. She is allowed in the yard under supervision, but is not allowed outside the fence. She protests to this gilded cage, but she is an urban princess and not prepared for the things that live in our woods. Still she tries, and did manage to slip out the door when I was distracted. I only found out when I let the dog out and she came sauntering back in covered in dust. She was quite pleased with herself. When I checked the trail cam, there were photos of her adventure, all the way out behind the chicken coop.
Photo description: calico cat with collar in the fall leaves by a wooden stepPhoto description: calico cat on the steps looking across the meadow at the neighbor’s cat
The pictures didn’t show any encounters with other critters. The series stopped after the one where she spotted another cat.
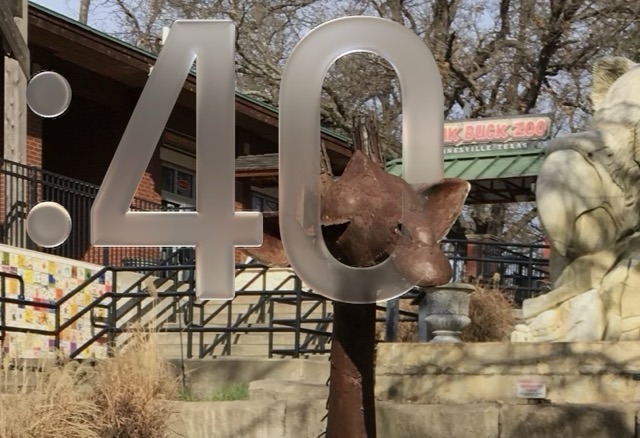
Photo description: bronze giraffe sculpture with its head sticking through a digital zero from a cropped screen shot from an iPhone with the liquid glass update and a dynamic screen saver
This gave me a chuckle when I looked at my phone. It isn’t perfect, but the AI attempt was surprising. My lock screen is set to show random pictures of my kids, and usually the program stretches the numbers and tucks them behind the head of my eldest, who is tallest. I enjoy seeing the different presentations of the current time digitally inserted into glimpses of past times. On this particular grab from the folder of the past, the app floated the numbers way above my kids’ heads (not shown because I don’t post their faces on this blog), but dimmed the bottom corner of the number zero to show the head of a giraffe statue. The way it chose to not reveal the neck and just one ear makes the giraffe look like it is putting its head through the number. Ha.
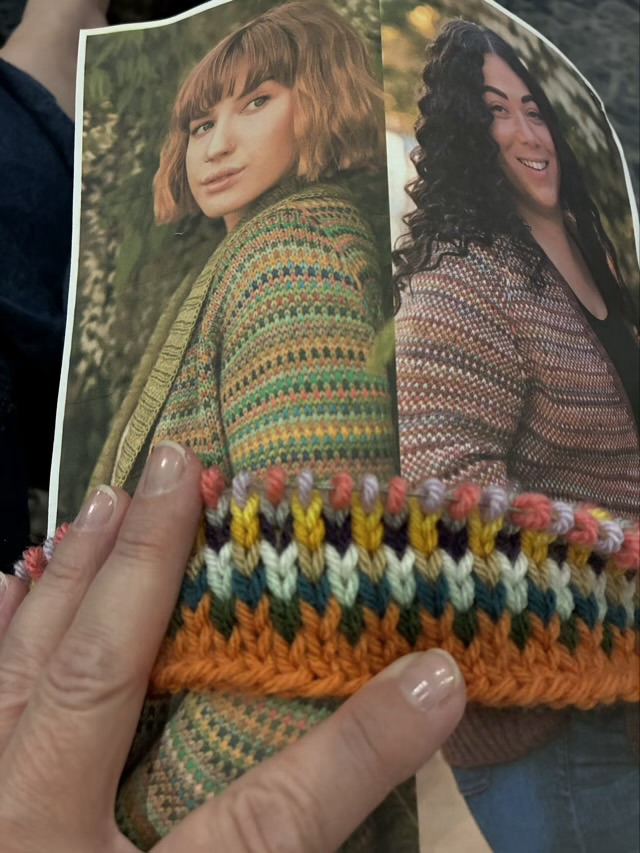
I have been fascinated with Wool & Pine’s “Seaglass” series of knitwear patterns and have been collecting patterns, but haven’t tried knitting them, until now. A friend gave me a bag of skein ends, which are all the same yarn size, but a variety of colors, which was perfect for the pattern.
Photo description: start of test piece of 1×1 color work laid against photos of cardigans from Wool & Pine
I am currently randomly choosing two colors for each row. The original pattern was in the round, but for the cardigan they have a clever way of knitting and cleaning up the edges. Here is a link to the pattern. My test piece is a good opportunity to test my understanding of their method and play with color to see what I like, and what I don’t. I already know that for me I need to not stack similar color intensity, or have rows with the same hue, even if they have different shades.
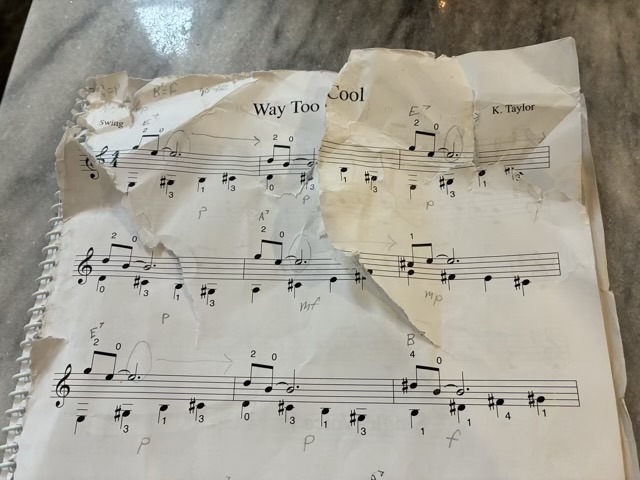
The roomba ate a page of my kid’s guitar lesson book. I’m not sure how the book ended up on the floor, but I suspect a cat.
Photo description: classic guitar lesson music with multiple messy, wrinkled tears
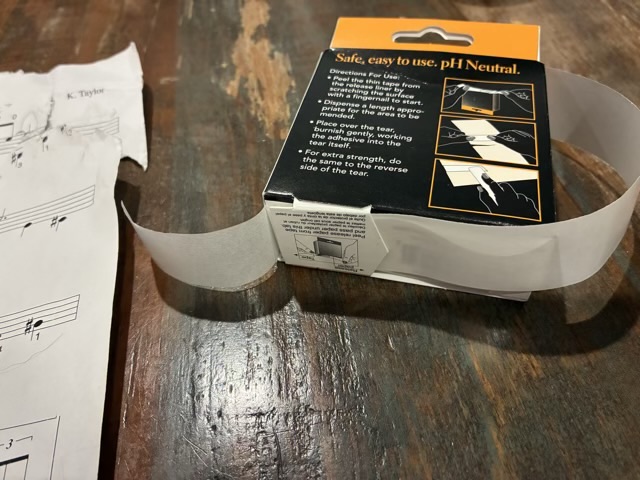
I ordered document repair tape, because I didn’t have any, and regular transparent tape applied at this magnitude would put further stress on the paper.
The hardest part was getting the tape away from the liner the first time. The box is conveniently set up to dispense the tape and manage the separation process. Getting is started is just a little tricky.
Photo description: paper repair tape set up with the box as the dispenser, with the tape on the left and backing on the right
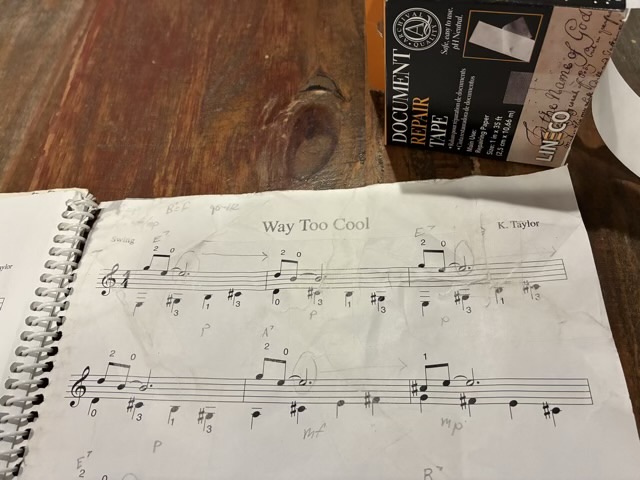
The tape doesn’t look transparent, but when applied to the paper the ink and pencil marks show through clearly. The tape is also thin, which is why it needs the backing, but is nearly imperceptible when applied. I made sure the tears lined up and where the paper split, that the ink side was visible. To reinforce the repair, I put the tape on the back of the page as well. The damage to the page was extensive, however, I was able to get it stabilized and usable, but not pristine.
Photo description: repaired page with all notes intact and readable
Overall, I can recommend the document repair tape for quick repairs on paper that is referenced frequently, or eaten by the robot vacuum.