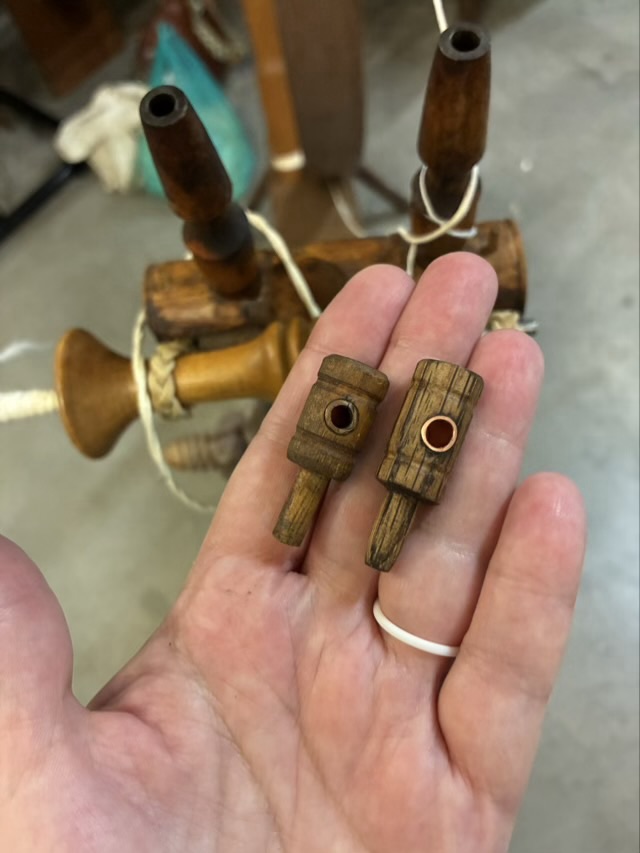
The new bearing that I made for an antique great wheel works! It is slightly longer than the original, but since the maidens adjust separately, the fraction of an inch difference doesn’t affect functionality.
Photo description: my hand holding the original bearing on the left and the new one on the right
The shaft of the bearing ended up being a little thick. It was a tight fit, but needed to be able to rotate to hold the accelerator wheel as the maiden post was twisted up or down. I used my pocket knife to shave off some of the wood so the bearing could rotate.
Photo description: bearing with the shaft narrowed held in my hand next to the maiden post, spindle visible belowPhoto description: fully assembled accelerator head on a great wheel with new bearing on the left side of the picture and the original bearing on the right
I spun for about an hour, working on my yarn width consistency and testing out my new part. It worked just fine! And rotated in the socket when it came time to stop and release the tension on the drive bands. I always lighten the tension between spinning sessions so the bands don’t stretch. I don’t loosen them enough to come off when stationary, which is standard practice for spinners. I can see though, how someone coming along and turning the wheel might be startled by the drive bands coming off or the parts not moving. The bands just need to be tightened before use.
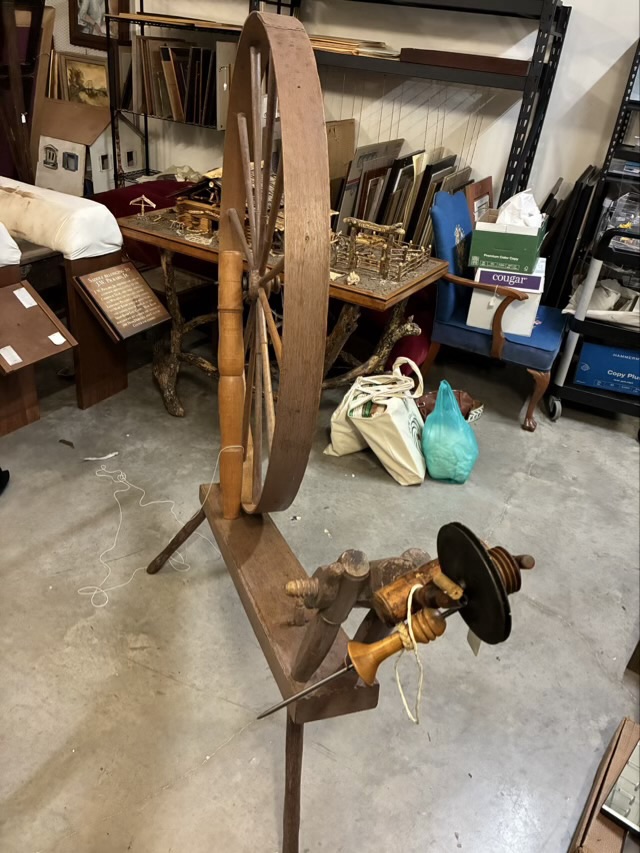
I had the opportunity to make friends with another walking wheel! I went to the Doss Heritage and Culture Center in Weatherford, Texas and met with the lovely people working there with the collections and events. They let me go down to the basement where there were two antique walking wheels, one with all the parts, albeit with some field-expedient repairs, and another missing the spindle and accelerator wheel.
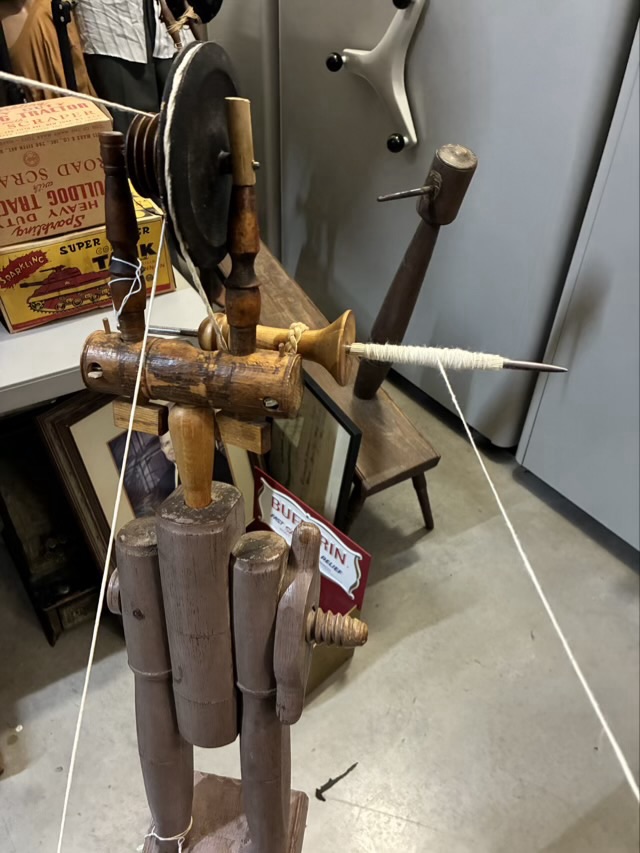
Photo description: great wheel before I startedPhoto description: mother-of-all with spindle and accelerator head
I took off the mother-of-all, which holds the maidens, accelerator head, and spindle, to get a good look at the condition. I’m fairly certain that this mother-of-all is not the original one that went with the wheel, or the wheel was painted at some point, but the colors don’t match. The top of one of the maidens has also been lost to time, replaced with a dowel and metal spike, which certainly does the job.
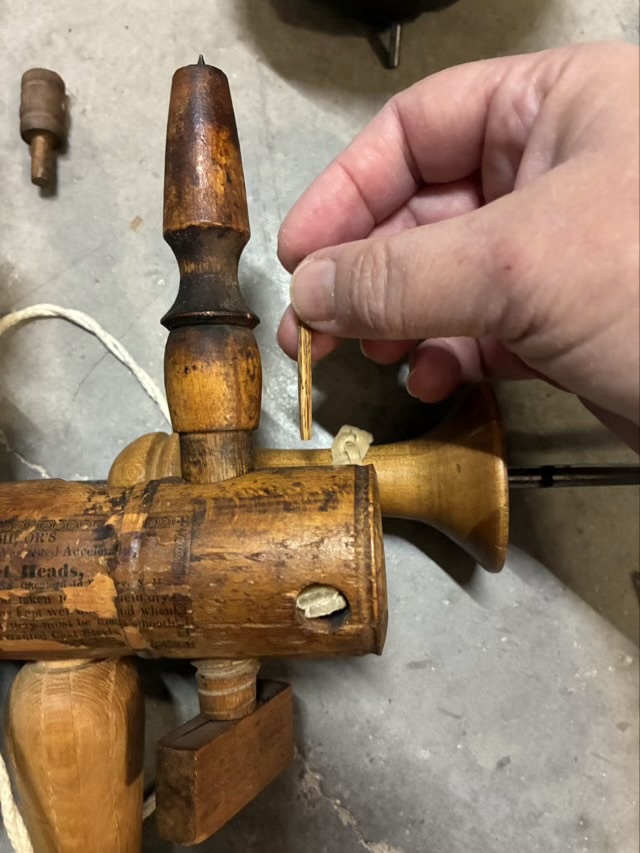
Photo description: small wood stake that goes into the mother-of-all to hold the braided rawhide straps in place
Where the last great wheel I worked with had waxed linen that held the spindle, this wheel had rawhide magic braids that were nearly as hard as the surrounding wood. I was surprised that the pegs holding the rawhide in place could still be pulled out.
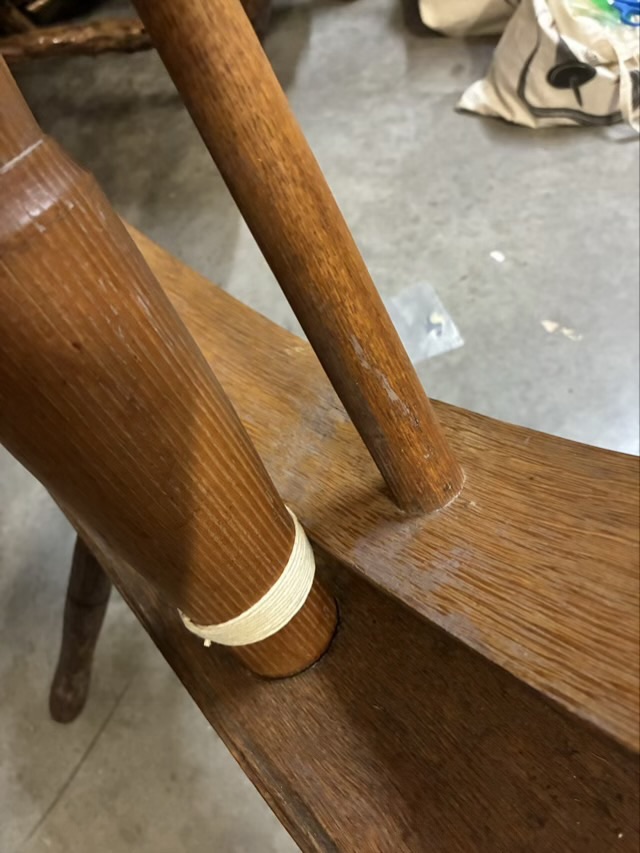
After looking over the mother-of-all, I put it back on the wheel, upside down. Oops. It took me about an hour of tinkering and fussing before I figured it out. In that time, though, I gave her a new cotton drive band waxed with beeswax, waxed the accelerator band, aligned the wheel with the base, and adjusted the wheel spacing against the post. The wheel rubs against the post, so I wrapped the post with waxed cotton cord to protect it from abrasion.
Photo description: waxed cotton cord lashed around the base of the post where the wheel rubs against itPhoto description: great wheel mother-of-all and tension system set up and spinning, there is another great wheel base in the background, which has a wheel, but the hub hole has worn away and it needs refitting
I love the tensioning system on this wheel. The wood nut on the right in the picture loosens to allow the center post to rotate forward and backward, decreasing or increasing tension. I think I actually like this set up better than the double nut Great Wheel, although both are more reliable over time than a greenwood tension system that relies on the bend-ability of fresh wood.
I did put a corn husk quill over the spindle to make it easier to remove the cop of yarn. For a leader I pulled three strands from my cotton twine, and did a larks-head knot over the corn husk quill. I spun Texas grown cotton sliver for a while before time called me away.
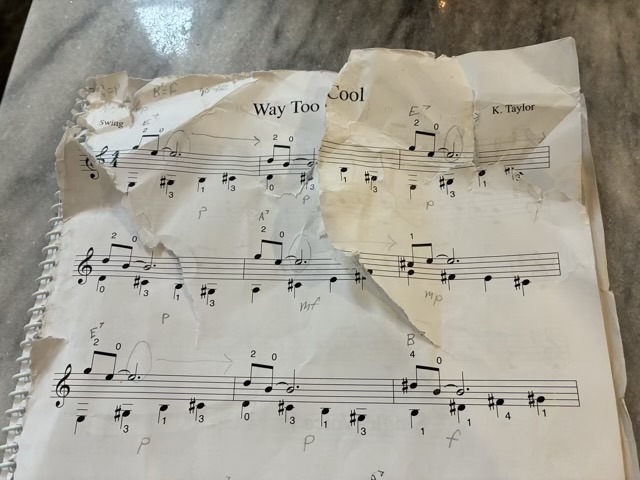
The roomba ate a page of my kid’s guitar lesson book. I’m not sure how the book ended up on the floor, but I suspect a cat.
Photo description: classic guitar lesson music with multiple messy, wrinkled tears
I ordered document repair tape, because I didn’t have any, and regular transparent tape applied at this magnitude would put further stress on the paper.
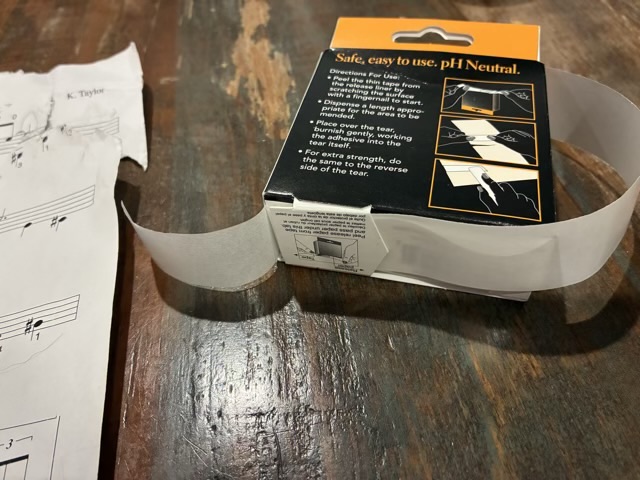
The hardest part was getting the tape away from the liner the first time. The box is conveniently set up to dispense the tape and manage the separation process. Getting is started is just a little tricky.
Photo description: paper repair tape set up with the box as the dispenser, with the tape on the left and backing on the right
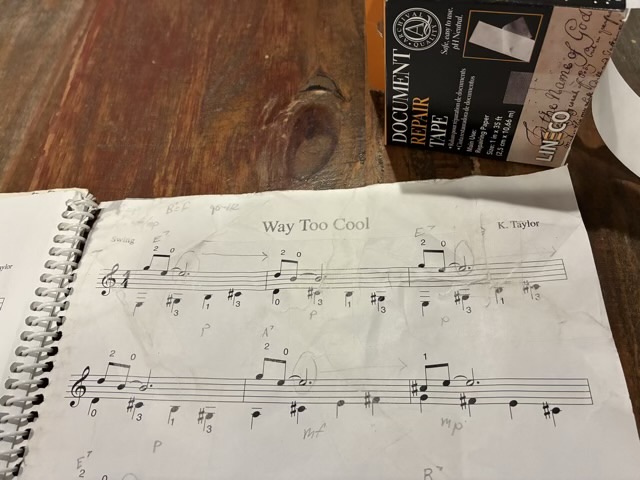
The tape doesn’t look transparent, but when applied to the paper the ink and pencil marks show through clearly. The tape is also thin, which is why it needs the backing, but is nearly imperceptible when applied. I made sure the tears lined up and where the paper split, that the ink side was visible. To reinforce the repair, I put the tape on the back of the page as well. The damage to the page was extensive, however, I was able to get it stabilized and usable, but not pristine.
Photo description: repaired page with all notes intact and readable
Overall, I can recommend the document repair tape for quick repairs on paper that is referenced frequently, or eaten by the robot vacuum.
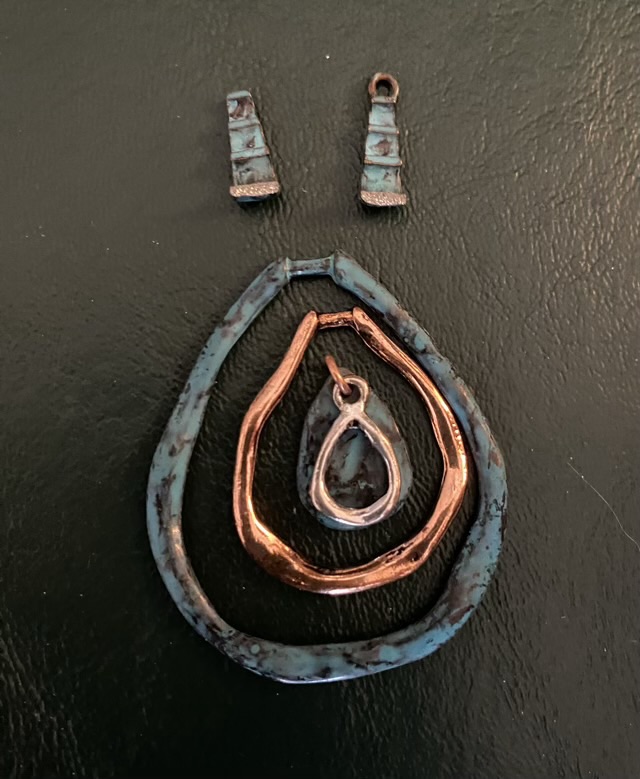
Here is another requested repair from my mother-in-law. This is a pretty nested tear drop design made from several colored loops. Here, the component holding all the loops broke in half.
Photo description: four layer teardrop pendant with broken connecting link (upside down)
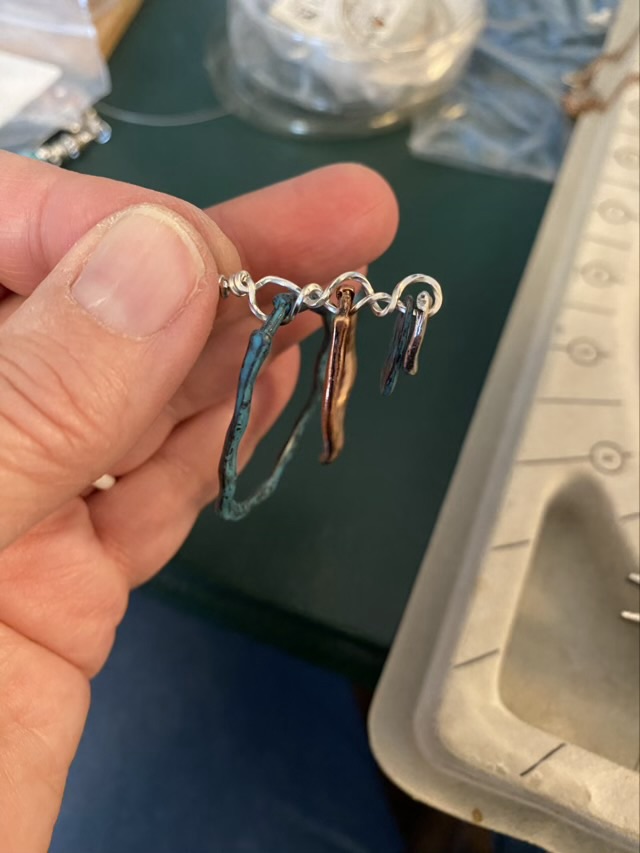
Rather than glue the link back together, which surely would have broken again, I crafted a new linkage from twisted square sterling silver wire. I liked the rustic look of the twisted wire, and how it coordinated with the existing loops.
Photo description: looped twisted square sterling silver wire holding the tear drop loops
I did accidentally break the silver colored tear drop, but a little sanding removed the burr and I was able to still use it in the repaired pendant.
Photo description: repaired pendant as it would hang on the chain
Did I remember to take a photo of the pendant on the chain? Sigh, no.
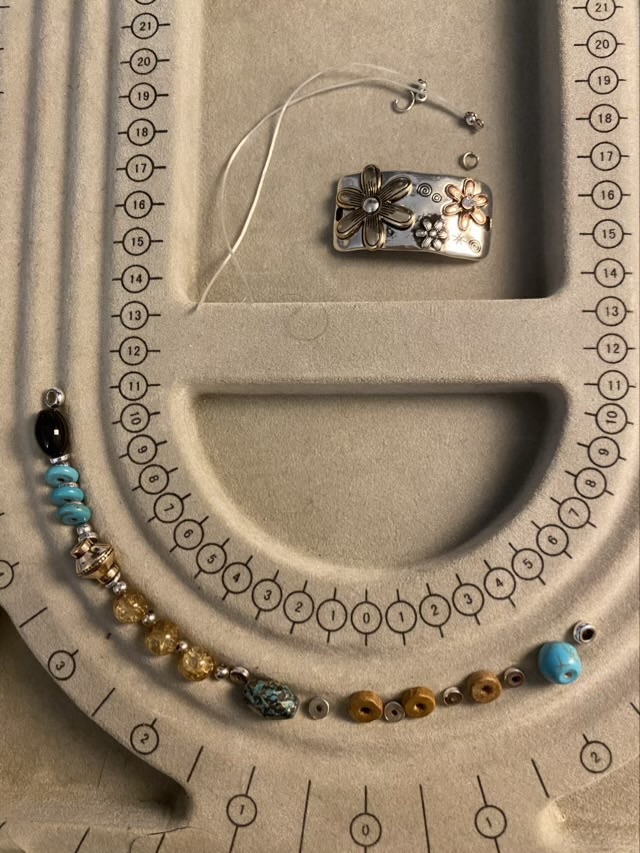
My mother-in-law asked me to take a look at a broken bracelet. It is a lovely piece with metal beads and a metal focal, that was strung with elastic. The elastic had been knotted and fitted with knot covers that then connected to jump rings, and those knot covers were where the elastic failed. Knot covers are risky jewelry components. They work well for silk strung lightweight beads with a large solid knot that will hold inside the knot cover. Elastic is hard to knot securely, especially at the end. Metal beads are also hard on both elastic and silk, and tend to fray the stringing material faster than smooth beads.
Photo description: broken bracelet laid out on a bead board with remaining components
Rather than risk another elastic mishap, I switched the bracelet to a clasp style. The focal actually works well to receive a lobster style clasp. I used 49 strand beading wire with double crimp beads for durability and added some coordinating metal beads to make enough length that the bracelet is loose when clasped.
Photo description: repaired bracelet on a bead boardPhoto description: bracelet shown clasped
I can’t guarantee the bracelet won’t break again. It is one of the reasons I don’t make and sell jewelry anymore: even well made jewelry wears out and is prone to breakage. I don’t mind this kind of fixing, though.
The other reasons I don’t make jewelry: over a third of booths at every craft show I’ve been to sell jewelry, and I don’t wear necklaces and rarely bracelets so I’m not even advertising my own work.