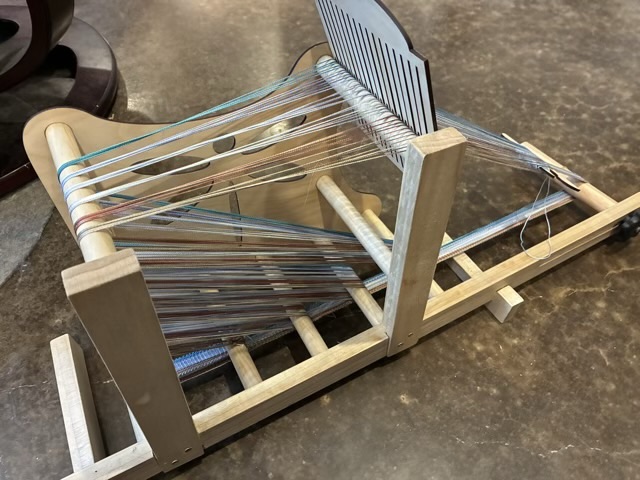
I was able to wait for the finish to dry before warping up my new inkle loom, but I didn’t take pictures until I had woven for a while.
Photo description: inkle loom warped with size 5 pearlized cotton in variegated colors of brown, blue, and teal, set up with a rigid heddle
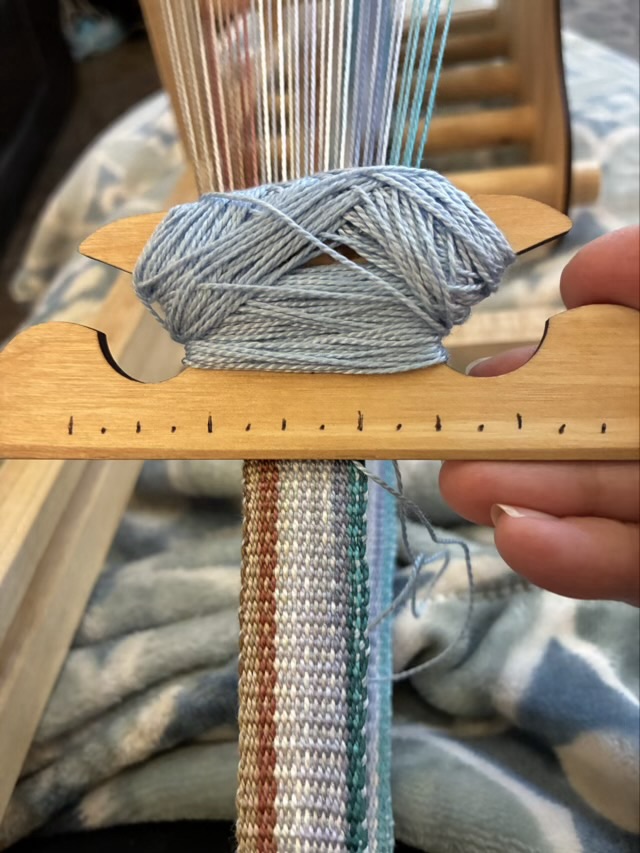
I made my rigid heddle a little taller than it needed to be, but it fits nicely between the upright supports and the removable side. It spreads the threads out quite a bit, and I’m struggling with keeping the band a consistent width, so I marked my shuttle with quarter inch ticks. On the next shuttle design I’ll engrave a ruler. I’ll also make adjustments to the size; I don’t like how the thread builds up on this design.
Photo description: shuttle wrapped with pearlized cotton and with ruler marks
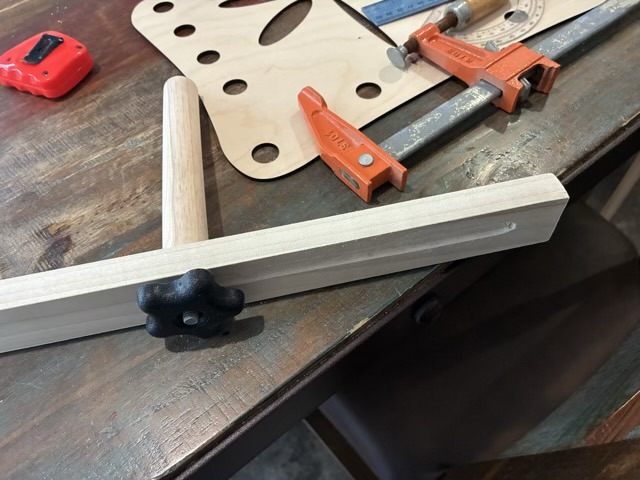
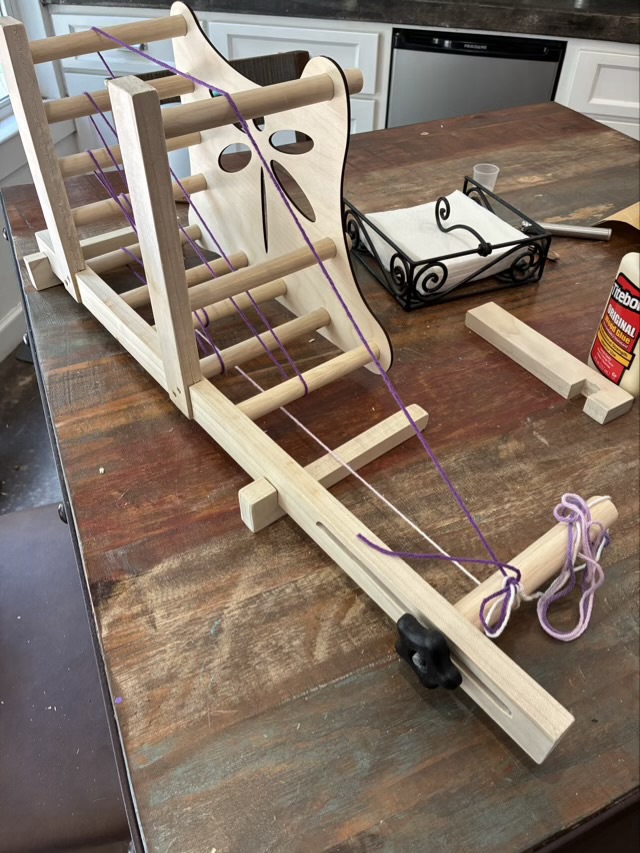
I made a new inkle loom that can make longer bands. The design is based on a picture from an Estonian band weaving book that I saw on a blog post by Durham Weaver. I used poplar 1×2 boards and 3/4” dowels, predrilled wood pipe, carriage bolt and knob, small screws, 1/8” birch plywood which I laser cut for the side, a 3/4” Forstner bit to drill the holes, gimlet to make a starting hole, coping saw to cut the channel, and sand paper. The toughest part was cutting the channel for the tension rod, my coping saw skills are rusty, and sawing along the grain is difficult.
Photo description: channel cut in a 1×2” board to accommodate a carriage bolt holding a drilled dowel
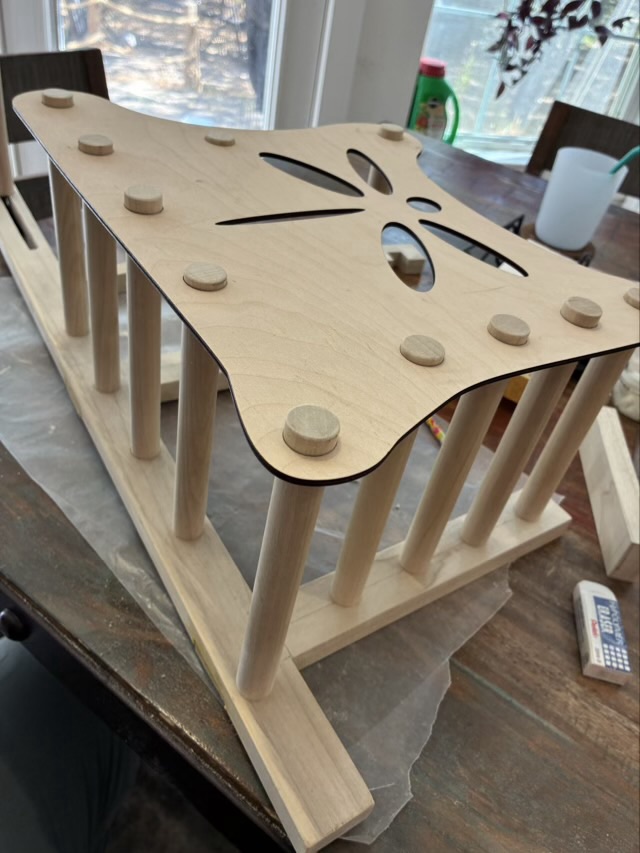
I laser cut the removable side panel first, then missed my angles during assembly by 1 degree, so had to recut the panel. To get everything to dry in the right position, I glued in the dowels, then wiggled them into place in the side panel.
Photo description: side panel friction fit onto the glued-in dowels to hold them in place while they dried, dragonfly hole shapes added for decoration Photo description: assembled inkle loom with scrap cotton yarn tracing the warp path
Next step is to apply a finish coat to protect the wood from finger oils.
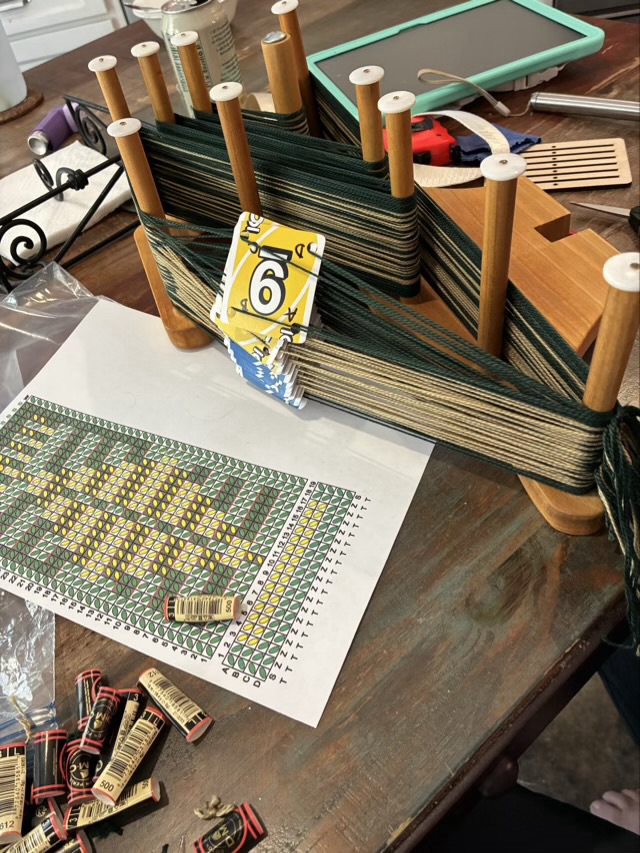
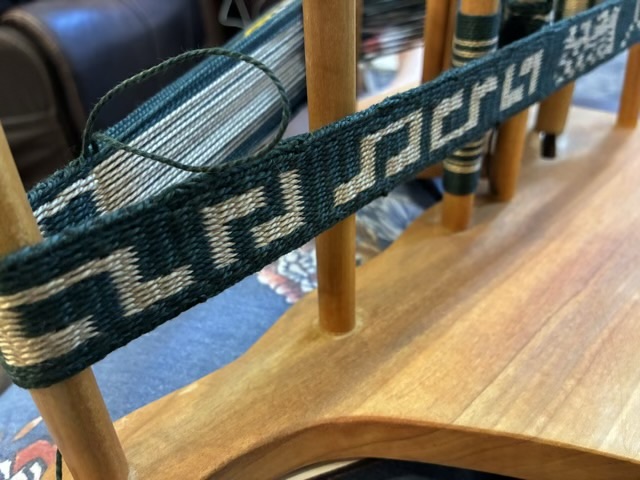
It has been awhile since I pulled out my inkle loom and did some tablet weaving. I wanted to try a double-sided design and use some size 3 pearlized cotton from my stash.
Photo description: inkle loom warped with tan and green pearlized cotton with 19 4-hole tablet cards
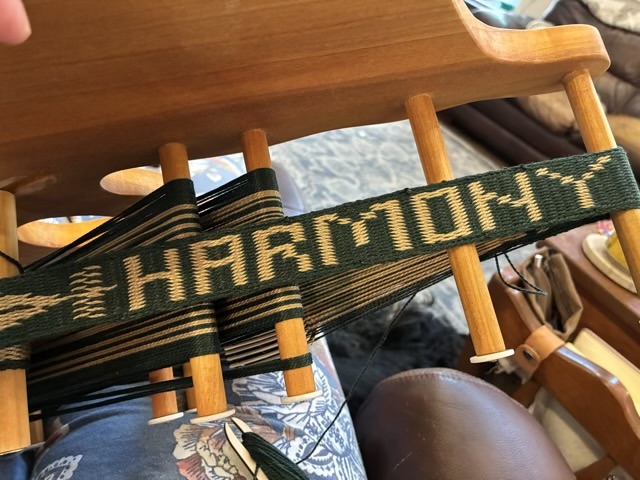
I used the online pattern maker Tablet Weaver Designer App and made several designs as I went. The band ended up being more of a sampler piece as I experimented with letters and music notes.
Photo description: “HARMONY” woven on an inkle loom with 4-hole tablet cards using size 3 pearlized cotton
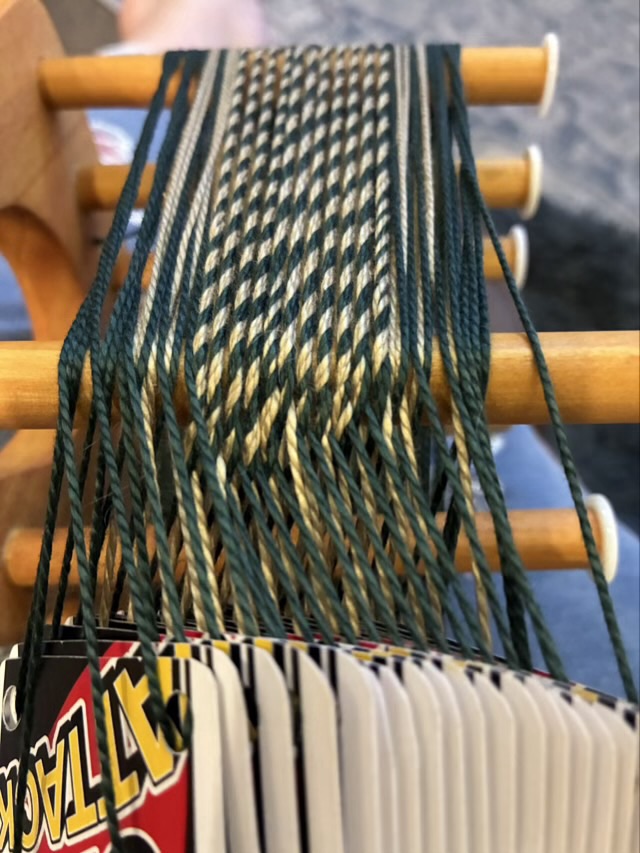
The designer app now also shows if the pattern is balanced— that each card has the same number of forward and backward turns across the pattern. As weaving progresses for tablet weaving, twist builds up in the warp.
Photo description: twist in the warp across the top posts of an inkle loom
There are a number of ways to deal with warp twist, I find making a balanced pattern the easiest. Using the design app I discovered that adding an extra row between two of the same motifs reverses all the forward and backward turns, balancing the pattern in double sided weaving.
Photo description: music notes tablet woven on an inkle loom
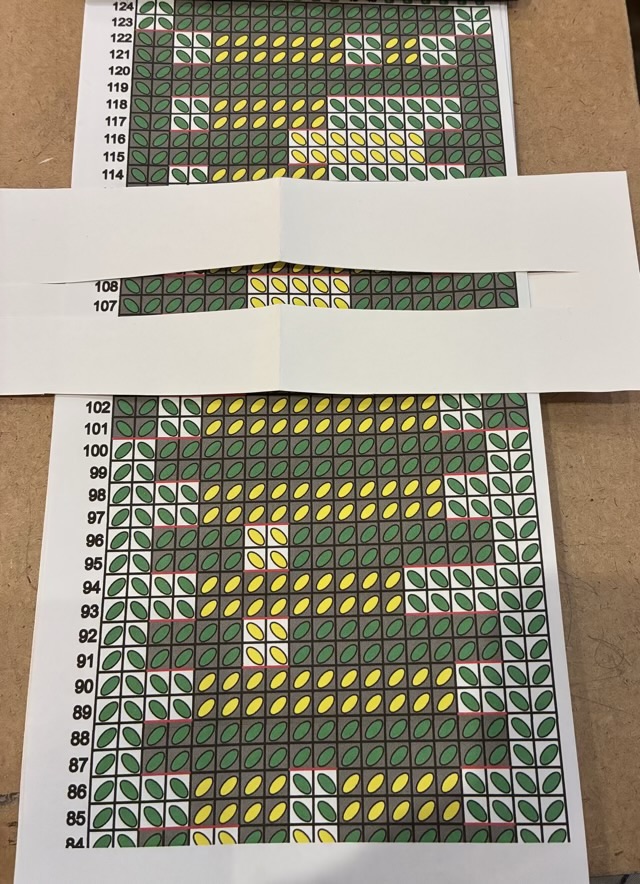
To keep track of rows, I cut two slits in a piece of cardstock and slid it over my printed pattern.
Photo description: paper row tracker
I did keep track of time for this project. It took me 1.5 hours to warp the loom, and I wove for 6 hours and 10 minutes. I used a timer in a knitting app to track the time.
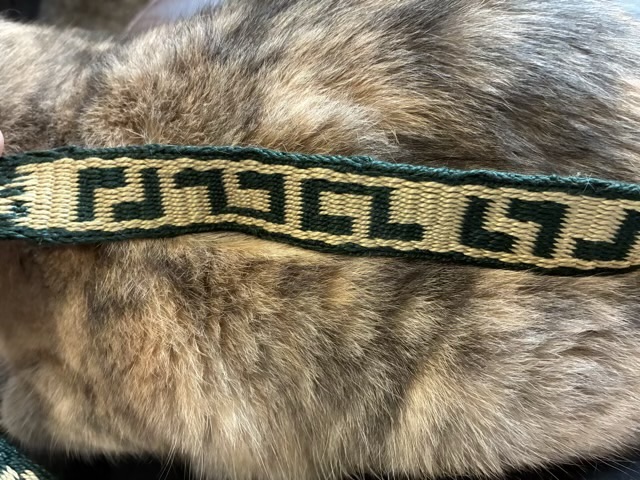
Photo description: band removed from the loom, showing the reverse side of the music notes
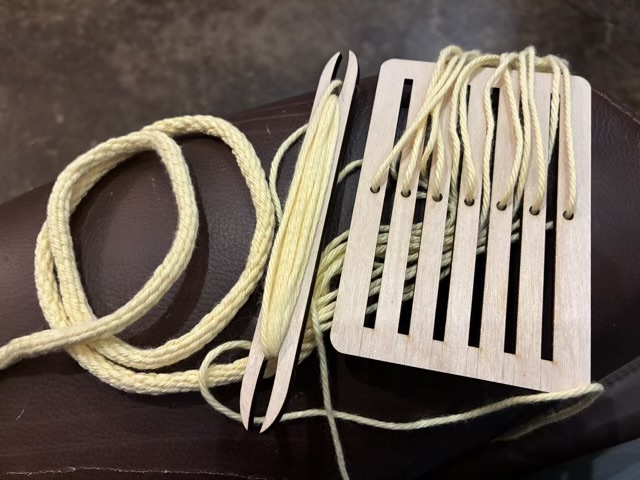
I have read about weaving a round cord, and I’ve been wanting to laser cut a heddle to experiment more with back strap weaving, so I combined the two with my 30 minute series.
Photo description: laser cut rigid heddle and shuttle, with yellow worsted weight yarn woven into a cord
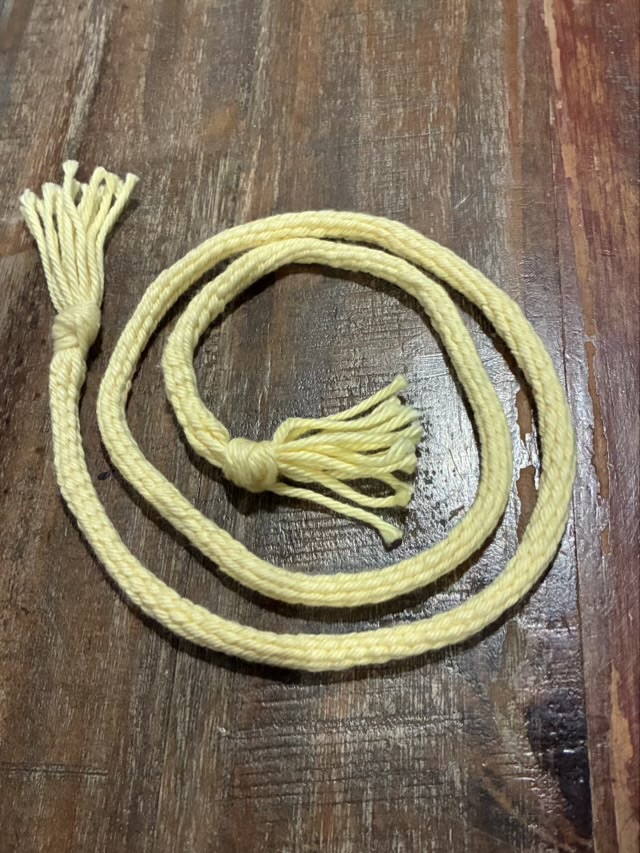
I cut 13 lengths of yarn and threaded them through the slots and holes in the rigid heddle, then tied knots at each end of the yarn bundle. I secured one end to my foot, and the other to my belt. I loaded the shuttle with yarn and started weaving. To weave a round cord the weft thread only goes one direction, rather than back and forth for a flat piece. It took a little time to get my rhythm, but once I learned to pull the weft yarn nice and tight, the cord making went smoothly.
Photo description: yellow woven cord with knots and tassels at the ends made from worsted weight cotton yarn
In 30 minutes I made 27 inches of cord. The cord is strong and dense with 6% stretch (27” stretched to 28.5”). Unlike i-cord or lucet cord, though, this type of woven cord has a limited length because the yarn needs to be cut before weaving begins. This is the kind of cord I would want for bag handles or load bearing clothing elements. It is also possible to weave around a core, which gives more strength and body options.
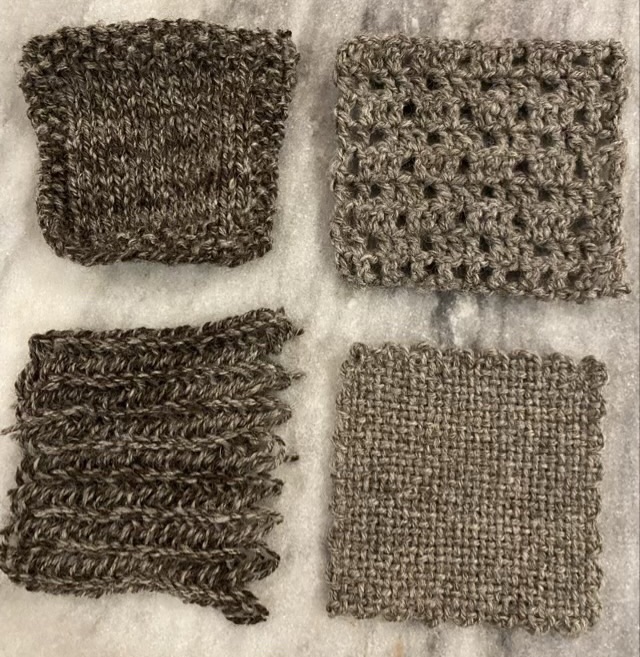
I started on the swatches for Jacob’s wool, and then finished them all in a day, even the nålbinding. I must have thirty other projects I’m not working on. Hm.
Photo description: four squares made from hand spun Jacob’s wool: knit (top left), crochet (top right), cut open nålbinding (bottom left), woven (bottom right)
I had two large cakes of yarn, and two small nostepinne balls, so I used the smaller amounts to make the swatches. I hope to make something wearable out of the larger cakes of yarn.