In December 2015 I made my youngest a playing card holder from thin card board and duct tape.
Photo description: card board and “Minion” duct tape card holder sitting on my knees holding thirteen playing cards
The concept is simple, a slot made from two folds of card board, the back fold slightly higher than the front, then a wide base so the cards stay steady. The duct tape holds it all together. I left the card board exposed where the cards are inserted, so the cards will slide in and out easily.
Photo description: side view of the same card holder ten years later, looking a little worn, but still perfectly functional
My youngest can use this to play Uno, even when the hand has nearly thirty cards. I am amazed that it is still working well ten years after I made it, and that it gets frequent use.
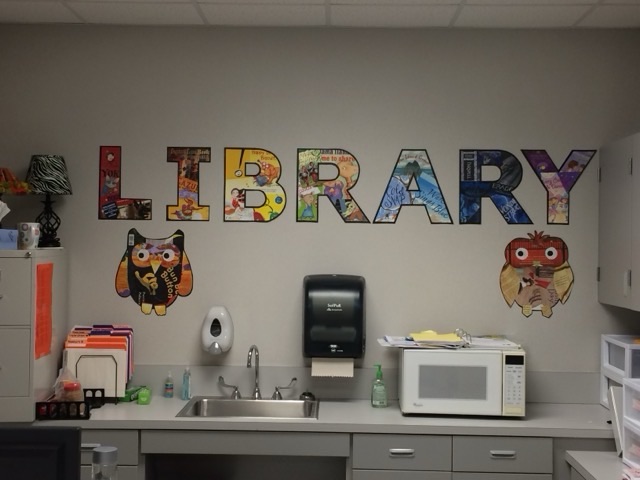
In October 2015 I was volunteering at my kids’ elementary school library. They had stacks of old dust covers for books and we had the idea of making a library sign using the colorful printed paper. I selected portions of book covers with coordinating colors and made each letter of the word “library” a different color of the rainbow.
Photo description: large paper based letters spelling “library” and two cartoon owls made of book dust covers and chip board hanging on the wall of the library officePhoto description: closeup of the letter “R” showing how many individual book covers were used for their colors, and outlined with black chip board
I did write on the back of each letter the names of the books that went into making up the color. The owls were made to coordinate with a backdrop of a collection of owls that was already displayed at the library.
It hurts sometimes. I’ve been struggling with my printer for longer than I care to admit, trying to maximize paper use and minimize waste. I try lying out a print double sided so that I can then cut them apart, but the printer doesn’t print consistently and the double sided is off set at best, or unusable.
After a particularly frustrating waste of 20 sheets of card stock, I walked away from the problem for a while.
Photo description: using a paper cutter to cut double sided 3.75×5.75 inch cards, card on the left is useable, but offset so that the text is right on the edge.
I don’t know why I’ve never considered cutting the card stock first. First. Then feeding it into the printer, which can handle small stock. I tested it the next morning, and had a 95% success rate. Much better than the 20% success rate of printing first. Bonus, I can get cut three 3.7×5.75 inch cards from a single letter sized piece of card stock. That is one extra per sheet than if I printed (which with my printing tolerances would be impossible to achieve).
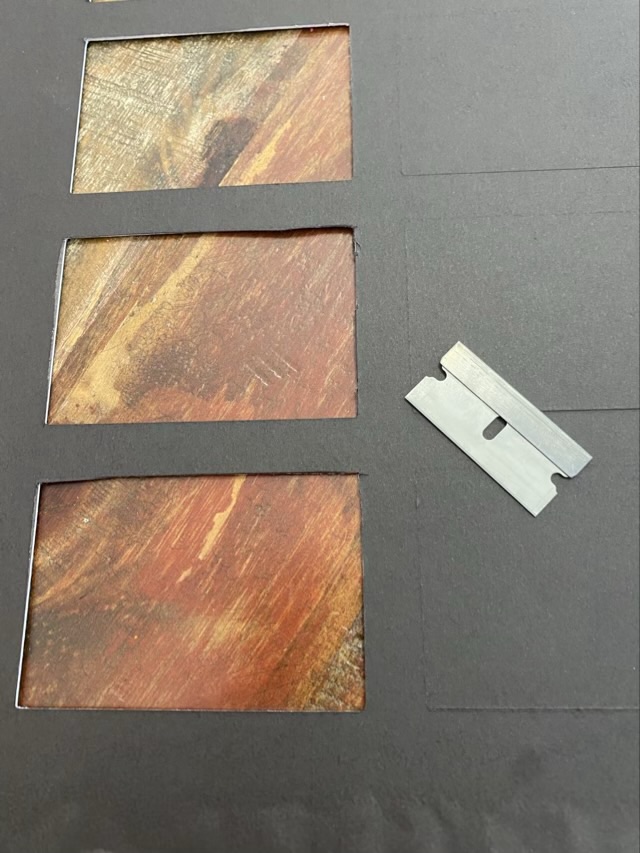
I took my Cricut cutter to extremes to cut a photo mat. The material is a little thicker than recommended. I used the deep cut blade, a 12×24 inch mat, more pressure, and a setting that traced the pattern twice. It didn’t quite get all the way through the mat board, so I used a safety razor blade to finish the cut.
Photo description: using a safety razor blade to finish cuts in mat board, the matboard cover lifted a bit when removed from the Cricut mat, but it is on the back
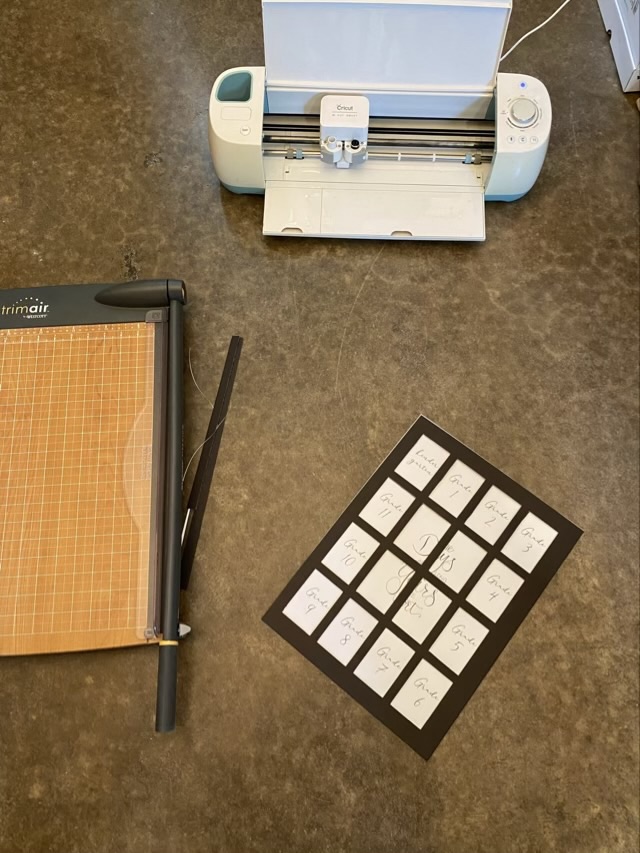
The resulting mat has spaces for 16 2×3 inch photos for my youngest’s school photos. All the commercially available mats only had 13 spaces, kindergarten through 12th. I needed spaces for preschool too. I bought mats larger than the frame, which allowed me to trim down the outside with my paper cutter and make sure the Cricut cut rectangles were centered.
Photo description: finished mat over the original 13 space backing to show the new divisions, my paper cutter and my Cricut on the floor because that is the only space that can accommodate a 24 inch cutting mat (not pictured)
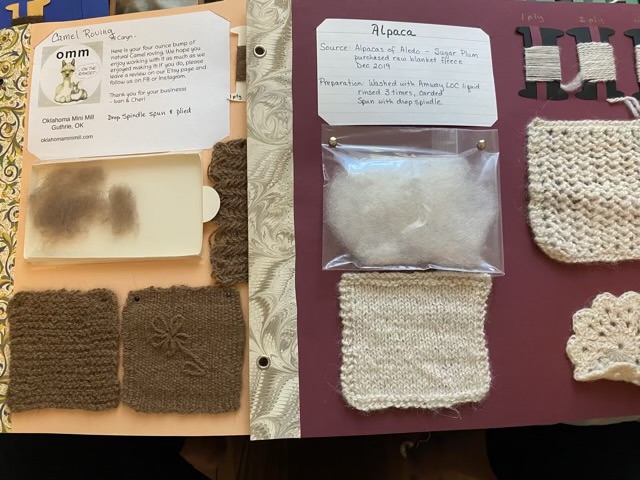
For my fiber study, I’ve been making fiber pages that have a small amount of fiber, then examples of spun, plied, knitted, crocheted, and woven fiber. I designed a small drawer for the natural fiber with the idea that it would protect the fiber from getting flattened and felted, but would still allow access to touch the fiber. It was a neat idea, but didn’t function the way I hoped. The drawer was too tall even at a quarter inch, and the stack of drawers took the brunt of the pressure and crushed, flattening the fiber. Hm. So I switched out the drawer for a plastic bag. The fiber can at least still be seen, and if necessary, the bag can be opened for closer examination of the fiber.
Photo description: two fiber pages, the one on the left shows the original drawer design, the one on the right shows the plastic bag
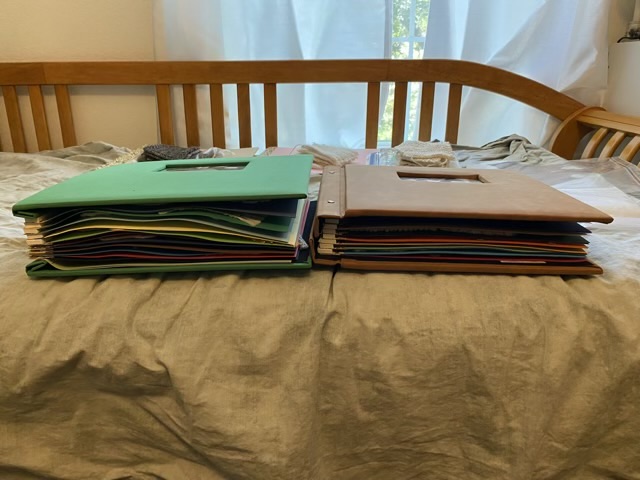
The advantage of the plastic bag to hold the fiber is that the pages lay nicer when stacked. The thickness of all the samples is similar and the pages lay flatter.
Photo description: two fiber pages books, the one on the left has distorted pages from the drawer stack, the right one shows how much neater the pages are when the drawer is replaced with a plastic bag.
I secure the bag to the page with brads. By keeping all the connections mechanical and avoiding glue or adhesive, it should give the pages a longer life.
I kept the foam spacers at the post side, and also added space for a 12×12 sheet after each fiber page, where I plan to put a description of each fiber, and some of the blog posts I wrote when spinning each fiber. This is definitely still a work in progress.