I recently attended a paper weaving class co-taught by my fabulous weaving neighbor at the local library. We made a woven heart from two-sided paper strips, the glued it into a card frame. The pattern is called a Cherokee Chief‘s Heart, but of course those of us without registered Cherokee heritage were making these weavings in the style of the pattern, as a learning exercise. My neighbor is a registered Cherokee and an awarded weaver and artist and is so generous with her teaching and knowledge.
Photo description: woven paper heart made from strips of paper that are green on one side and white on the otherPhoto description: opposite side of the same weaving, showing an inverted heart
We did have to use copious amounts of glue to keep the unwoven sections of the sampler in place. The weaving is neat in that the back image is the same as the front, just with the lines going a different way.
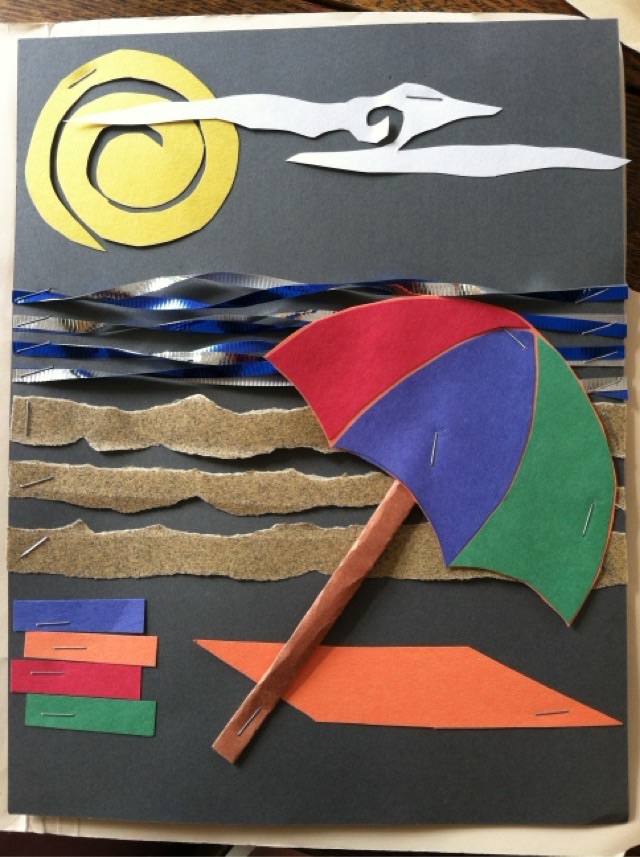
Today we look back at August 2013 and the library bulletin board to welcome kids back to school. I did a concept test on a regular sized sheet of paper, using strips of sand paper for sand, and ribbons for water. The kids love running their hands on the bulletin board, so I thought the sand paper would give them something nice and tactile.
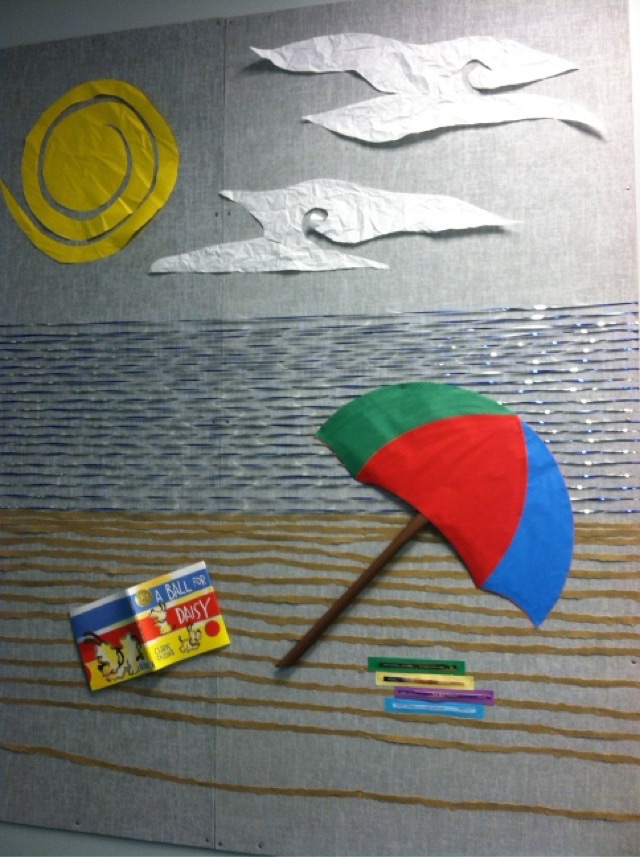
Photo description: beach scene on black paper with paper umbrella, paper book stack, strips of sand paper, twisted ribbons, and paper sun and cloudsPhoto description: full sized bulletin board with a bonus book cover and I added a crumpled texture to the sun and clouds
The fun part of the full board is that there was a vent that blew air across the surface, making the ribbon move and giving motion to the ocean. I did not use backing paper; I was still fire shy after the previous year’s board was deemed a hazard by the fire marshal.
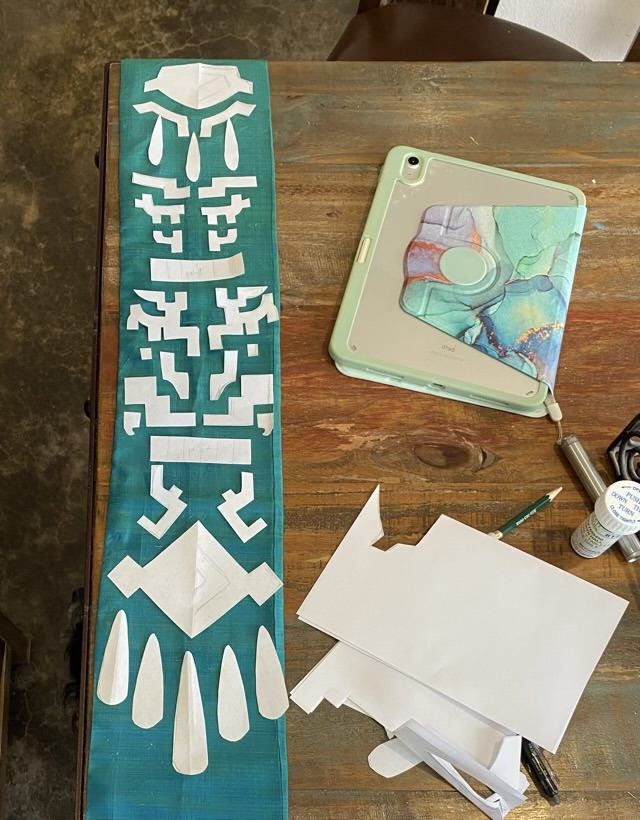
My eldest had a fantastic idea for a cosplay costume and I volunteered to help. (Ok, I may have begged, and “I’ll be in charge of this part” may have passed my lips. I’m definitely a Zelda fan, especially Tears of the Kingdom.) One of the parts I claimed was an elaborate panel that hangs on the front of Zelda’s Zonai dress. The panel has two layers, a silk banner and a copper beaded piece. To make the copper pieces light, I wanted to use EVA foam sheet and paint them. I cut shapes from paper first and laid them out on a banner of green/blue recycled silk.
Photo description: blue/green silk banner with white paper pieces laid out on top of a table with an iPad for reference and scraps of paper on the side
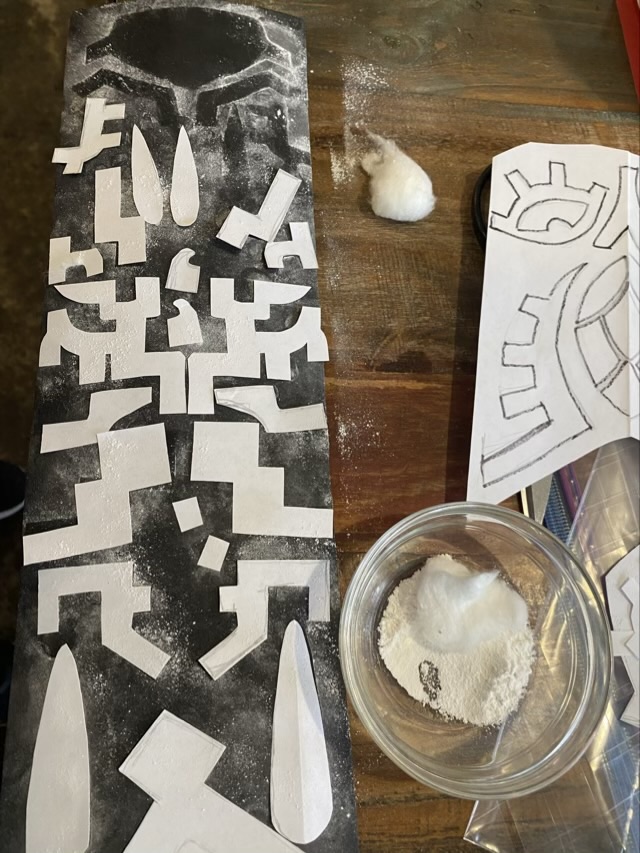
To transfer the paper pattern to the foam, my Mom suggested dusting the pieces. I laid them out on paper on the EVA foam, and used tapioca flour and a cotton ball to dust the surface.
Photo description: black EVA foam sheet with paper pieces covered in a thin layer of flour, bowl of tapioca flour and cotton ball to the side
The flour settled where the pieces weren’t, leaving a dark outline that was more precise than tracing. When I do this next I’ll use a foundation brush or something other than a cotton ball, because the cotton caught on the edges of the paper and did not lay down an even coat of flour.
Photo description: black EVA foam sheet without the paper
I was able to cut out most of the pieces using the flour shadows, and only on a few needed to use the original paper piece.
I’m going to break this project into several blog posts. My apologies to those who are not Zelda fans, I’ll be geeking out for a while. I hope there will be some techniques you will find interesting or useful.
Back in February 2013 I was volunteering at my youngest’s elementary school library, shelving books and decorating their bulletin board. I really wanted to use my CRICUT cutter to make giant flowers and thought they would make a neat wall display.
Photo description: colorful bulletin board with large paper flowers labeled by name and The Cat in The Hat on an elephant with the words “The more that you read, the more things you will know. The more that you learn, the more places you’ll go.” from Dr Seuss
This is now a rare sight, because paper with that much dimension was deemed a fire hazard and it had to be taken down. The rest of my designs had to be 2D.
My youngest needed Valentine cards for school, but didn’t want store bought. I like toy-type cards, and if I can sneak some science in all the better. This line of pursuit led us to create a Thaumatrope, which is a spinning toy invented in the 1800s with two different pictures on each side of a disc. When the disc is spun, the pictures appear to combine. The original thaumatropes used string to suspend the circle, but a similar action can also be achieved with a stick mounted disc, and rolling a stick between two palms is easier than twisting string. My youngest chose the elements to go on the card, and I drew them up in Adobe Illustrator. Pro tip for getting colors right from screen to print: don’t go by screen color. If you want a bright yellow, go into the color picker and make sure that your CMYK color is all Y, with no cyan or magenta. High contrast images work better for this visual trick as well. I printed the images on card stock, and used my laser cutter to cut the circles (so much more precise than my old electric cutter). I used hot glue to secure the paper stick (I used a 6” stick marketed for cake pops), and keep the front and back together.
Photo description: finished stick-style thaumatropes in the background, glue gun to the left and the front and back of the disc in the foreground
I like that when the disc spins, the bee and sun are smiling at each other. It came out cute. What wasn’t cute was making 35 of them. Phew.