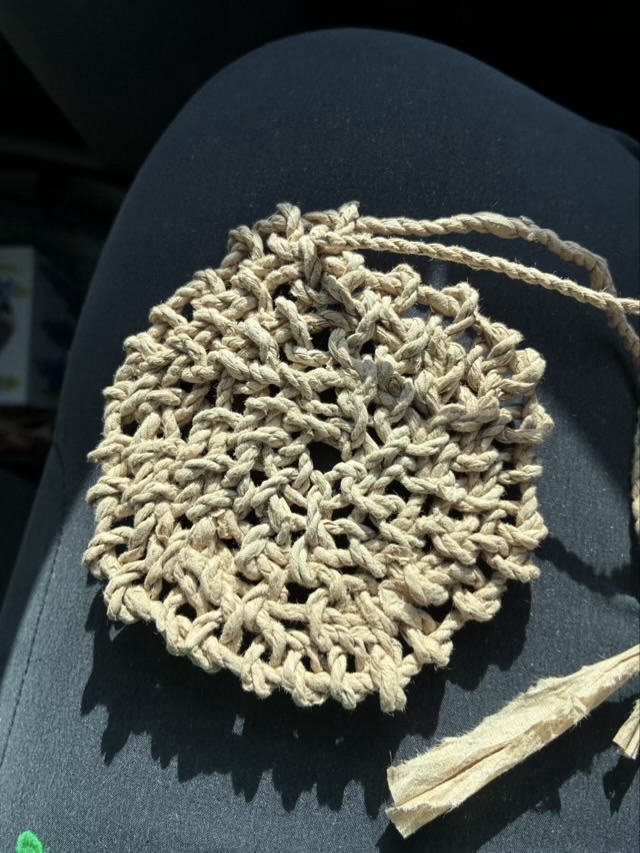
I have a car project for which I tear unbleached fast food napkins into one inch strips, twine the strips together, then add stitches to a loop and core basket. Well, I intended it to become a basket, but I am doing my stitches (button hole loop or Coptic stitch) upside down. It makes it hard to add the stitches because I’m going through a smaller loop.
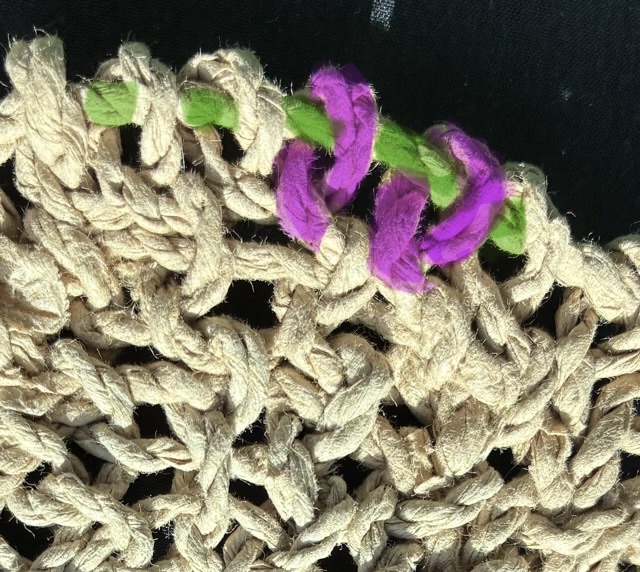
Photo description: round loop and core base make from paper napkinsPhoto description: close up of the stitches with the core twine marked in green, and two loops highlighted in purple
Opening up the smaller loop to add the next row of stitches weakens the twine at that point, and paper twine is not robust stuff to begin with. I will probably continue to the end of the core twine (there isn’t much left), and experiment with preservation methods with the finished object. The feel of the fabric is quite nice, flexible but firm with an interesting texture.
I had my first encounter with textured metallic vinyl for my electric cutter. My youngest wanted new bookmark/ornaments for teacher appreciation week and I thought using the gold vinyl would look great for lettering and stars. I did look up what settings other crafters used to cut the vinyl so cut cleanly on the first pass (on my CRICUT air: Vinyl + setting and a deep cut blade. (Note: cutting cleanly on a first attempt with a new material is almost unheard of, it was a deceptive introduction.))
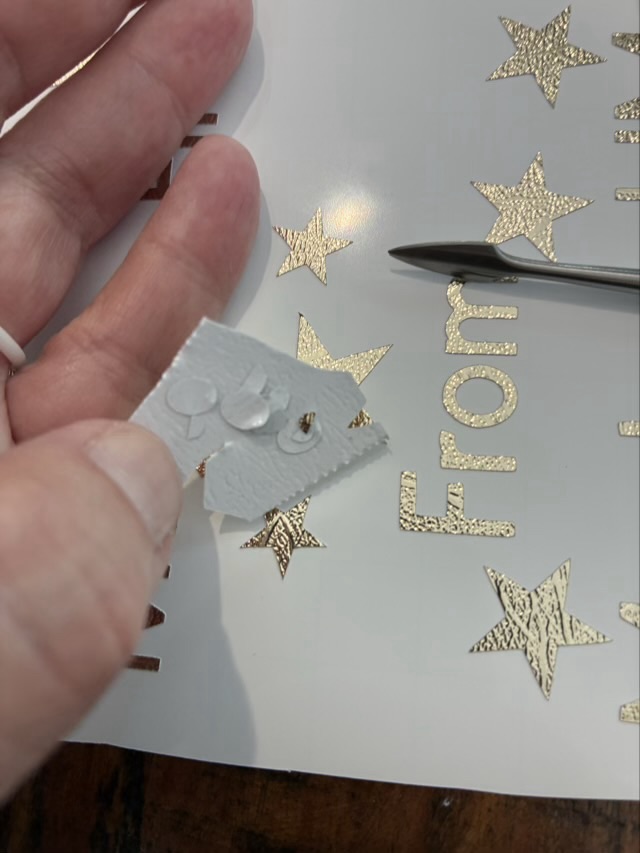
I find it easiest to weed the cuts (take out the bits you don’t want) using a metal pick, and then use a larger waste part as a sticky holder for the smaller fiddly waste parts.
Photo description: weeding gold-colored textured metallic vinyl with a pointed metal tool and a section of waste vinyl to hold the tiny pieces from the inside of letters
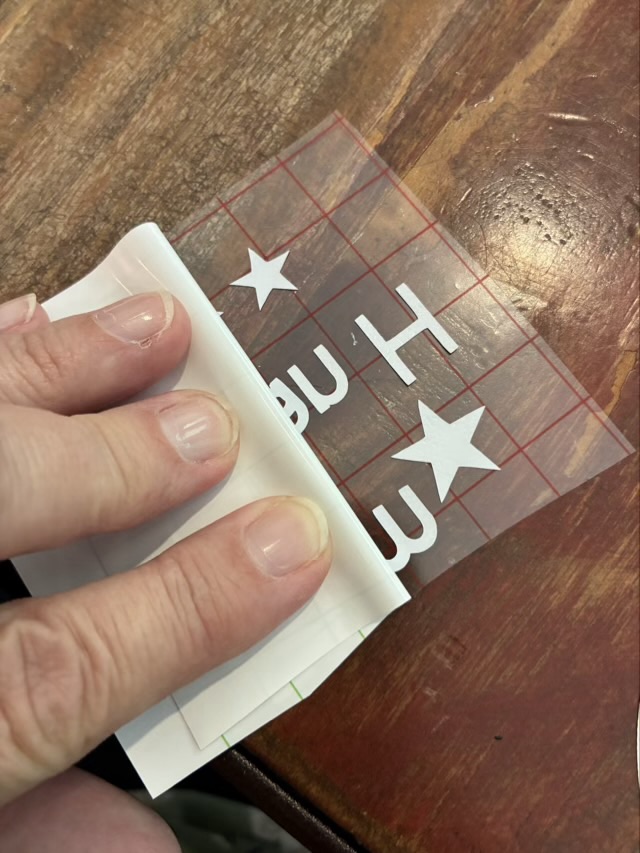
Weeding was a little fiddly, but not terrible. The terrible part came when I placed the transfer sheet on the cuts. The purpose of the transfer sheet is the hold the cut vinyl from the front so the nice layout is preserved and you can then move the cut vinyl to the final project location. Transfer sheets are usually clear sticky film with grid lines. The textured metallic vinyl doesn’t like to stick to the transfer sheet. It would much rather stick to my fingers or the pick or really anything other than the transfer paper.
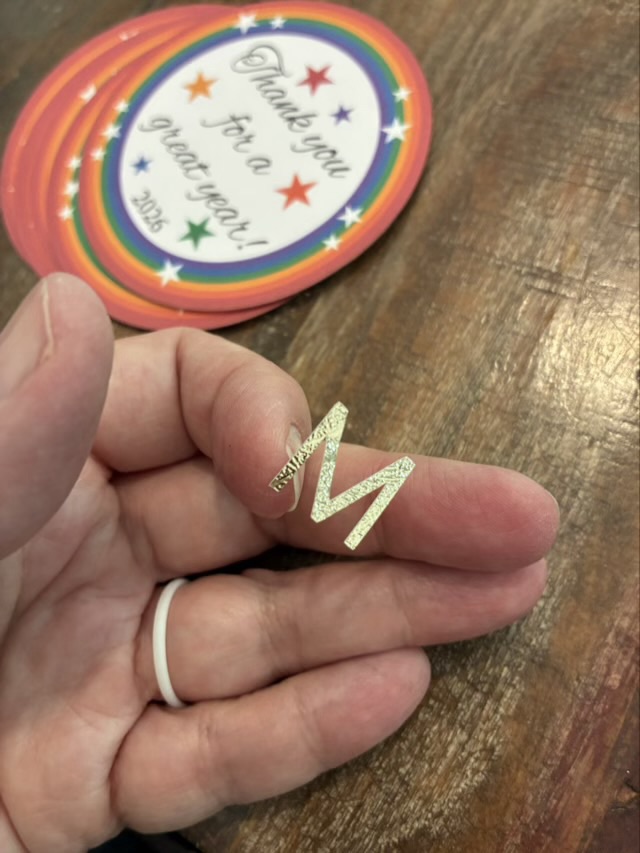
Photo description: Textured metallic vinyl letter “M” stuck to my finger, Teacher gift project in the background
The first transfer was a complete disaster and I ended up with most of the letters stuck to my fingers and had to place each individual component onto the back of the printed circles by eye. It was readable, but not neat. I then took more time peeling off the backing paper, bending it sharply back, and using the metal tool to detach the letters.
Photo description: bending the backing paper sharply back and rolling it off the cut vinyl
The transfer sheet and vinyl didn’t stick well, but the transfer sheet loved the card stock and if I used any pressure at all, the top layer of the cardstock would come away with the transfer sheet. Ugh. I finished the rest of the lettering by very lightly touching the transfer sheet with its precious cut vinyl cargo to the cardstock to place the letters. It is one of the fiddliest craft things I have done. If I use textured metallic vinyl again, it will be large cutouts, rather than small letters.
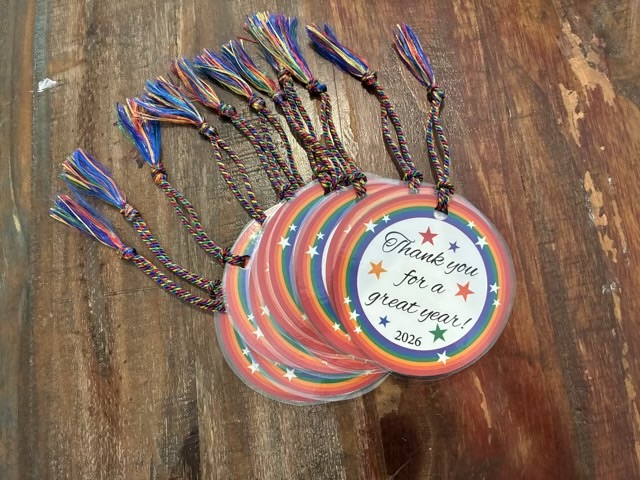
The teacher gifts came out well. I designed the graphic to my youngest’s specifications in adobe Illustrator, printed on recycled card stock, cut the circles with a blue diode laser cutter, put the “from” information on the back with vinyl (this was the time suck), laminated the circles, punched a hole, and added a rainbow tassel.
Photo description: bookmark ornaments with rainbow circle and stars and the words “Thank you for a great year! 2026” created as teacher gifts (cut vinyl personalization on the back of the circles)
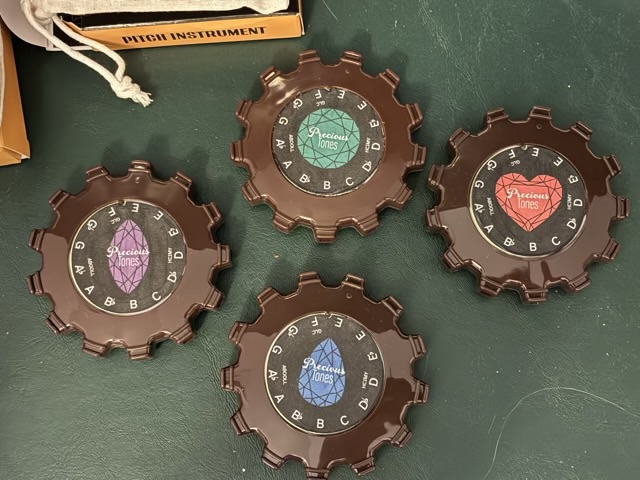
My quartet uses Tombo Pitch Pipes. I’ve see fully customized pipes with different colors and logos! I dipped my toes in the waters of customization and applied a custom paper to the decal in the center of the pipe.
Photo description: four Tombo Pitch Pipes with custom labels decoupaged in place
The Tombo label is 42mm in diameter and has a small indent to line up on the pipe so the pitches are in the right place. I used Adobe Illustrator to layout the design, then my laser cutter to cut them out precisely. To apply, I painted the bottom and top with matte Modge Podge.
I did mark three of beginning pitches with the initials of the song names, just in case. I should be able to remove these labels and put on new ones for future revisions.
Eventually I would like to make them fully customized, and not brown, but that is a future endeavor.
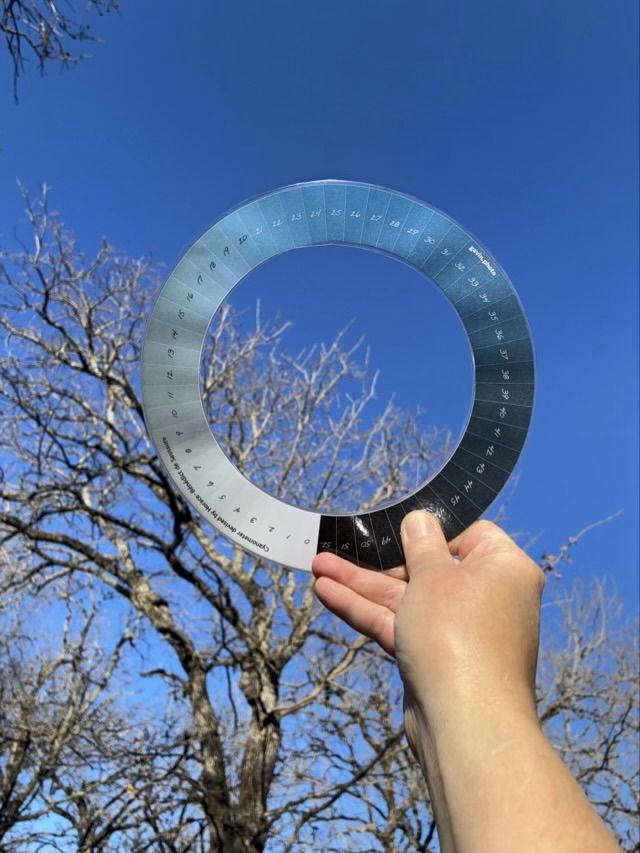
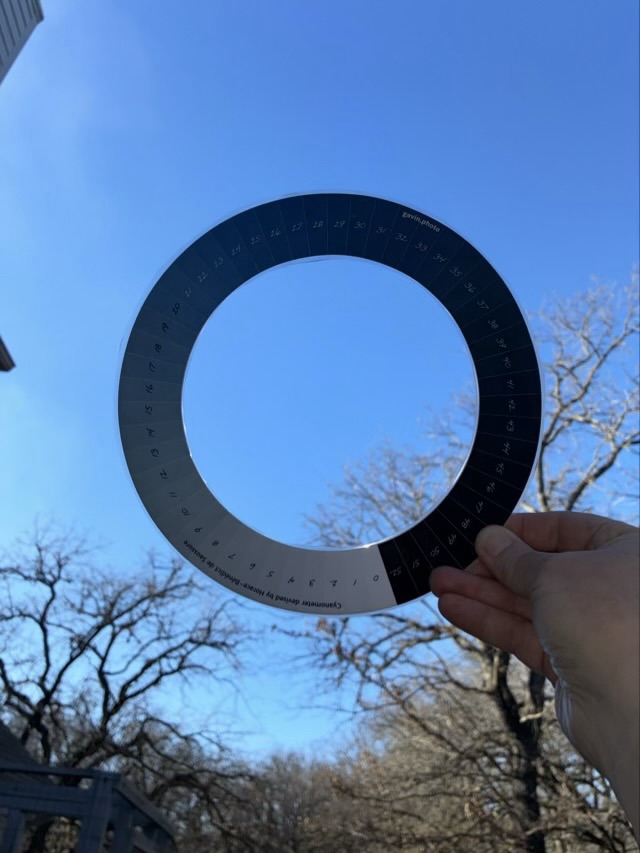
I had never heard of a cyanometer and was curious when I saw it scrolling my feed. It was invented in 1789 by Horace-Bénédict de Saussure and is used to classify the color of the sky. Gavin Gough has a good quality free printable here. My youngest is all about blue skies, so I printed her one and laminated it.
Photo description: cyanometer held up to the sky, matching color about 26, sun behind me
What my readings did not tell me, and what I had to discover in practice, was that you need a good light source on the cyanometer. Standing facing the sun, or in the shade, makes the colors too dark. I found using it with the sun at my back shining on the disc worked best.
Photo description: Cyanometer held up in the shade, which does not work well
Of course there are many other factors to collect when taking your reading: time of day, geographical location, angle in the sky, cloud cover. Painters and photographers use it as a reference. Overall an interesting little disc.
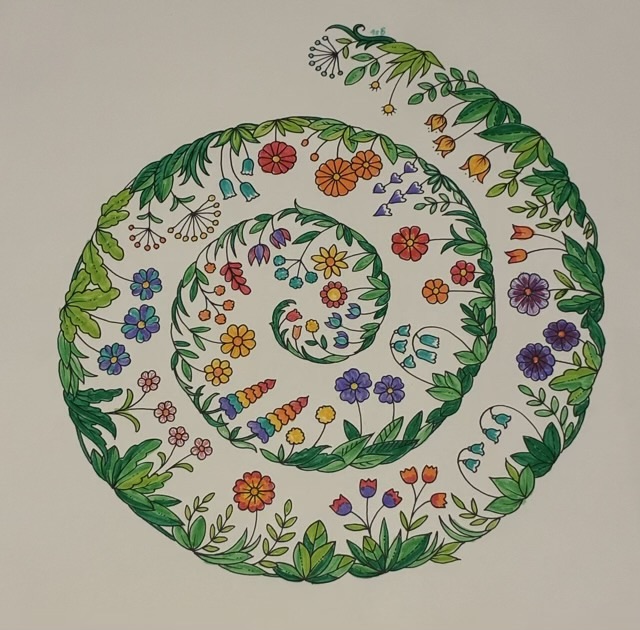
I sat and colored with my kid while we were on a call. I nearly didn’t finish because the call ended but the page still needed coloring. It takes a long time to fill in, even when the sections are tiny and there is abundant white space! But I knew if I stopped, I’d never return to it.
Photo description: spiral of botanicals colored with marker
I’m glad everyone is different. My youngest loves to sit and color for hours. It is not my zen.