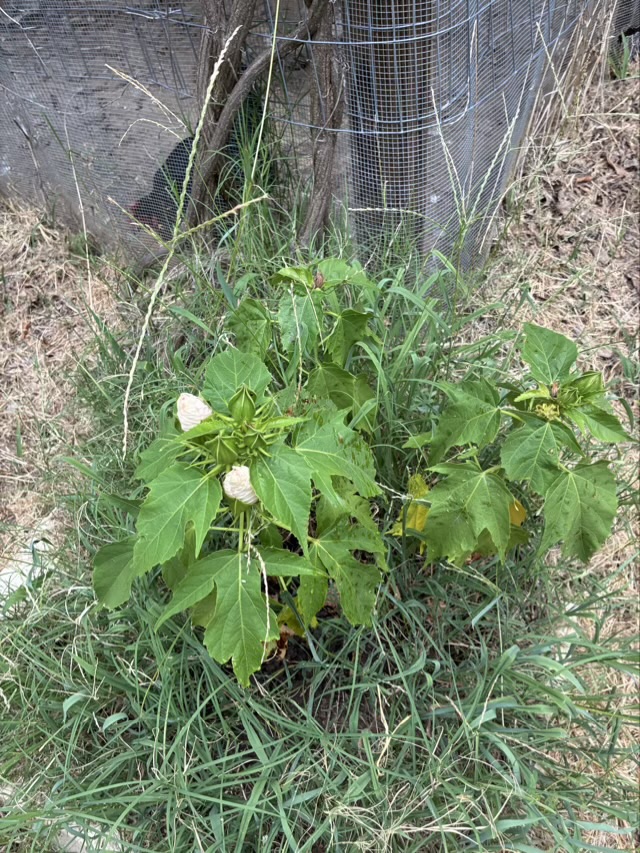
The hearty hibiscus was not doing well in the shadowed front garden bed, so in winter I moved it out to the meadow next to the coop. I wasn’t sure it was alive, but it put out leaves and buds this summer!
Photo description: hearty hibiscus with buds ready to bloom, coop and chicken in the background
I planted it near the rain runoff path, so usually I don’t need to worry about watering it. The cross vine planted there no longer needs watering, except when we get a week of 98 degrees. Then everything looks rather sad.
Watching YouTube shorts sent me down another overtone rabbit hole. There was a person with a flute with no finger holes playing a lilting beautiful tune. Wha?! Some quick internet research revealed the Koncovka, a Slavic shepard’s instrument made from a long wood tube. The flute has two overtone series possibilities, one with the bottom hole open and the other with it covered, giving this simple whistle an astonishing number of notes for something with no finger holes. My next question was how to make one, and I found this short YouTube tutorial to make a PVC version.
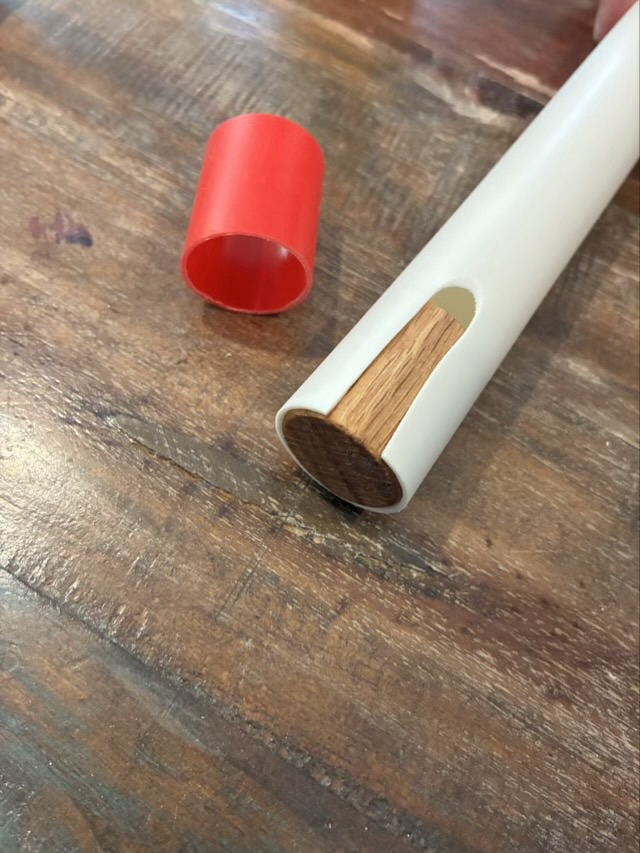
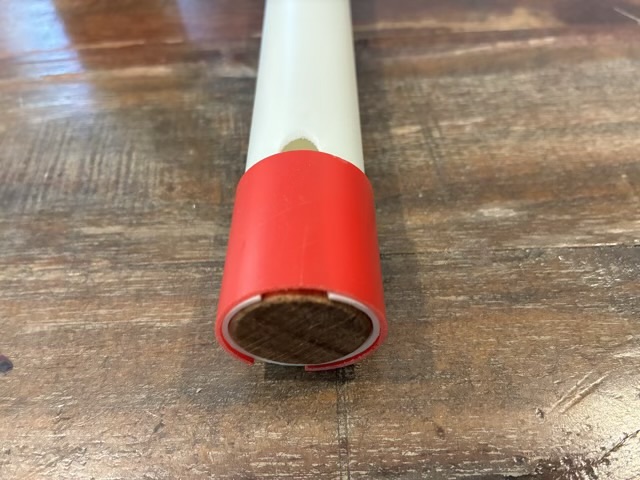
I have some thin walled PVC tubes from an old Ladder ball game. These pipes have become materials for other projects more than they were ever assembled for the game.
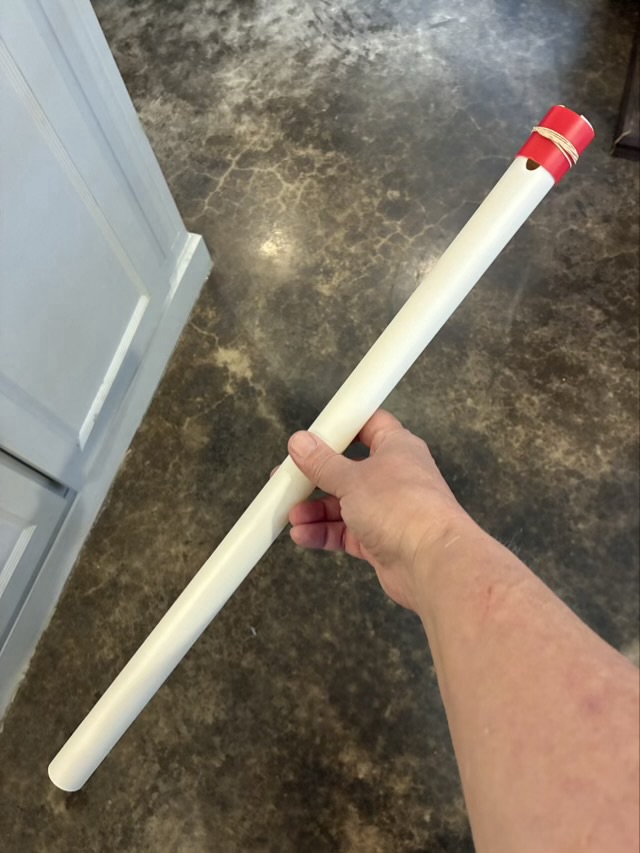
Photo description: PVC pipe with a slot cut and sanded smooth, a section of dowel sanded to fit snuggly inside the tube, and a short section of red PVC pipe the same length as the wood and split lengthwisePhoto description: wood plug finished with butcher block wax and fit into the top of the tubePhoto description: red sleeve placed over the white PVC to create a narrow holePhoto description: rubber band around the red sleeve to keep it tight and reduce air leakingPhoto description: finished PVC overtone flute
The tone of the flute is quite pleasing and very fun to experiment with. Below is an audio file of me playing the PVC overtone flute I talk about in this blog post.
I love it when my crafting and music rabbit holes merge and open a new room.
I found this copper disc lying in my washing machine.
Photo description: copper circle with wear marks
It is an old penny, by the evidence on the other side.
Photo description: badly worn penny
The year is completely worn off, as is Lincoln’s face, but the fact that it is still copper colored and not silvery zinc tells me (according to the internet) that is was made before pennies were only copper plated, around 1982.
I think it was stuck in my washer until it was worn thin enough to escape. I’m keeping it because the wear pattern looks like a tree and roots, very similar to my graphic design logo.
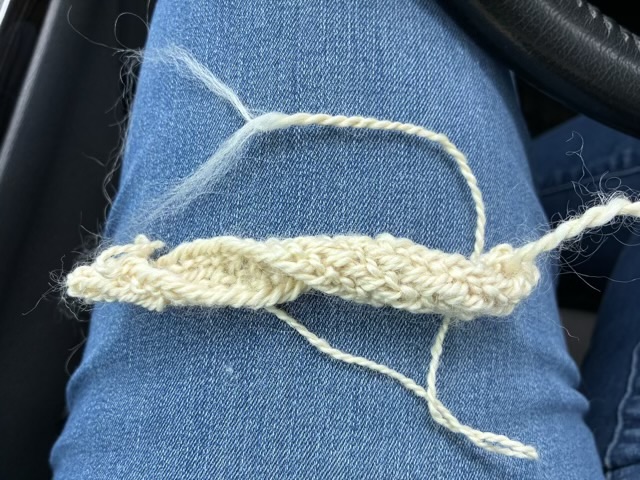
I’ve been twining with plant bast fibers (the long ones from the stems of plants), and wondered if I could twine long wool. I selected some Teeswater from my stash that has a staple length around 5-8 inches, grabbed a sponge and a spray bottle of water, and started twining. There was a bumpy learning curve, especially since I decided to learn to twine left handed to get an opposite twist. I wanted an S twist direction because my current favorite nålbinding stitch has a bias Z twist, and I thought the opposite twist yarn would help. It didn’t really.
Photo description: twined Teeswater wool and the beginnings of a nålbound pouch sitting on my jeans in the car while waiting in the pickup line
As I write this post, I’m wondering if the twist in my work is the stitch, or the method of construction I’m attempting. I’m working in the round, which is typical for nålbinding, but I’m working around a long base chain, which is a little different. I’ll keep on and see if things even out, either as I go, or after I block the finished work.
The exciting part of this project is there are no joins in the yarn, rather, the yarn is created as I go.
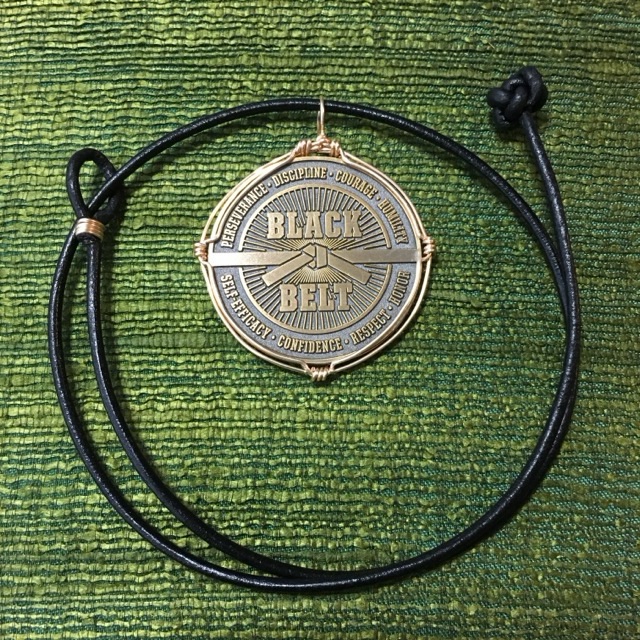
In May of 2017 I made a custom wire wrap so that a coin could be worn as a necklace.
Photo description: Black Belt coin with gold colored wire wrap on a leather cord with loop and knot closure
The wire wrap is constructed with three circles of wire just slightly larger than the coin, wrapped together at four points. The top circle crimps inward to hold the front of the coin, and the bottom layer crimps inward to hold the back of the coin, leaving the center circle to frame the coin. At the top I made a loop for the leather cord.