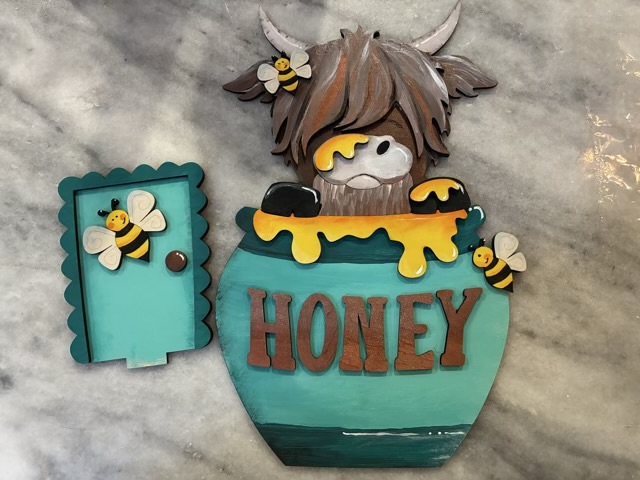
Here is the completed highland-coo-in-a-honey-pot shelf sitter, complete with clear UV coat and chunk of mesquite wood to keep it grounded.
This is a cute project offered by the local Hobby Hut. I will be looking for the next painting day!

Here is the completed highland-coo-in-a-honey-pot shelf sitter, complete with clear UV coat and chunk of mesquite wood to keep it grounded.
This is a cute project offered by the local Hobby Hut. I will be looking for the next painting day!
My youngest was wearing her yarn tension ring in such a way that her finger couldn’t bend, which caused pain issues after three hours of crocheting. So we modified the ring to make it smaller and I am encouraging her to wear it so the yarn runs along the back of her finger, and the ring doesn’t interfere with her knuckles. I have also been teaching her hand and wrist stretches to do periodically while she is crafting.
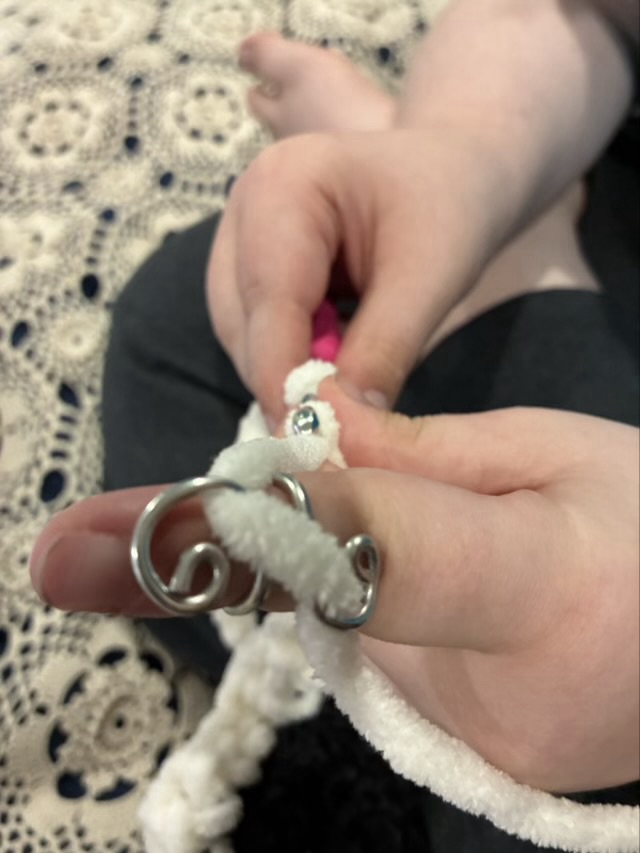
It is a good idea to look at your ergonomics as you craft, especially if you have something you enjoy doing for long stretches of time. As with computer work, there should be scheduled breaks and stretching activities. This will help you enjoy your craft longer both each day and over the years.
So yes, I can spin yarn while using a stationary recumbent bicycle.
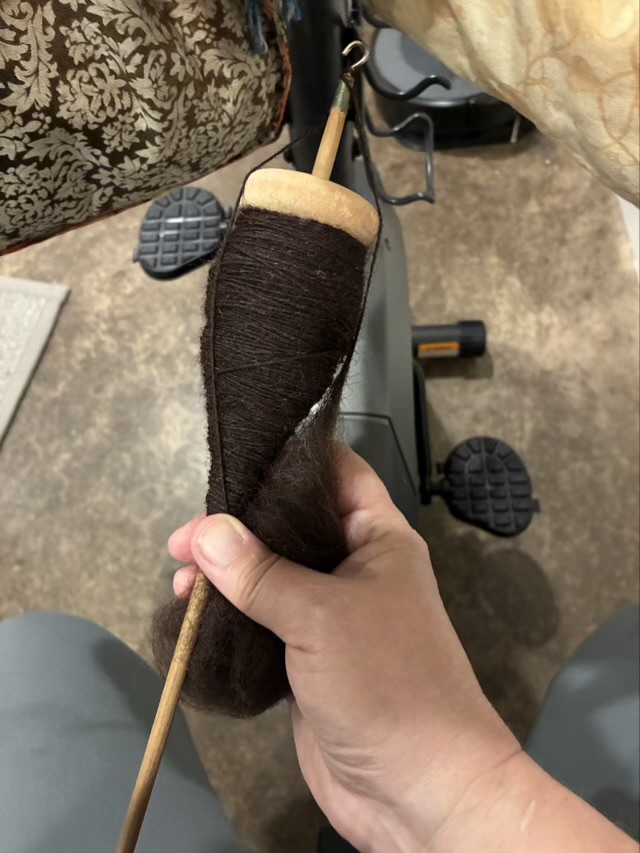
As expected, it looks different than walking and spinning, I have the spindle off to one side so it can hang down, and the floor is closer, so I have to wind up more often, but it works and gives me something to distract myself from what my legs are doing.
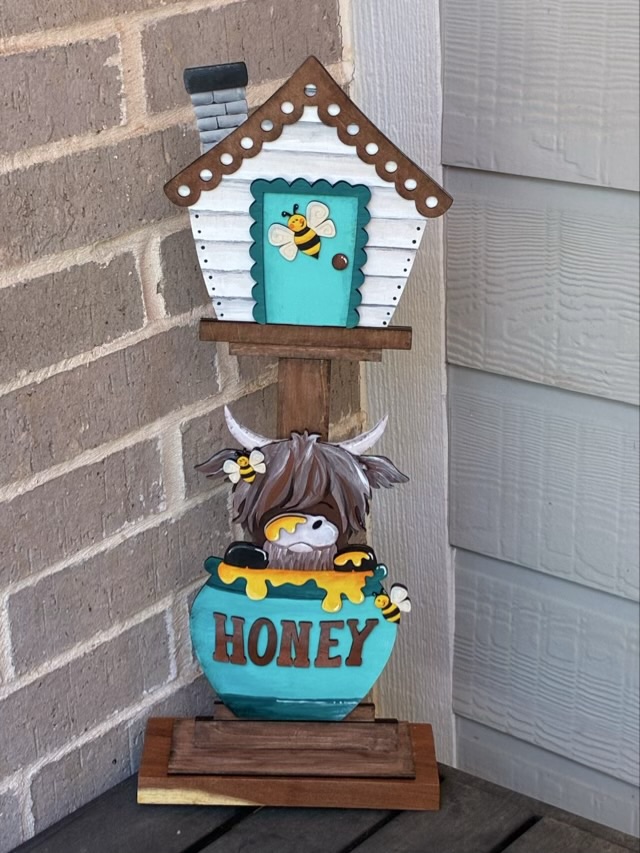
I went to a painting class at our new local Hobby Hut to do an interchangeable shelf sitter. Very cute design, there is a “bird house” base and the door and central design can be changed out. I painted the base at the studio but took the highland coo in the honey home to paint.
The original design had antenna on the highland coo, which I didn’t care for, so I cut them off before painting.
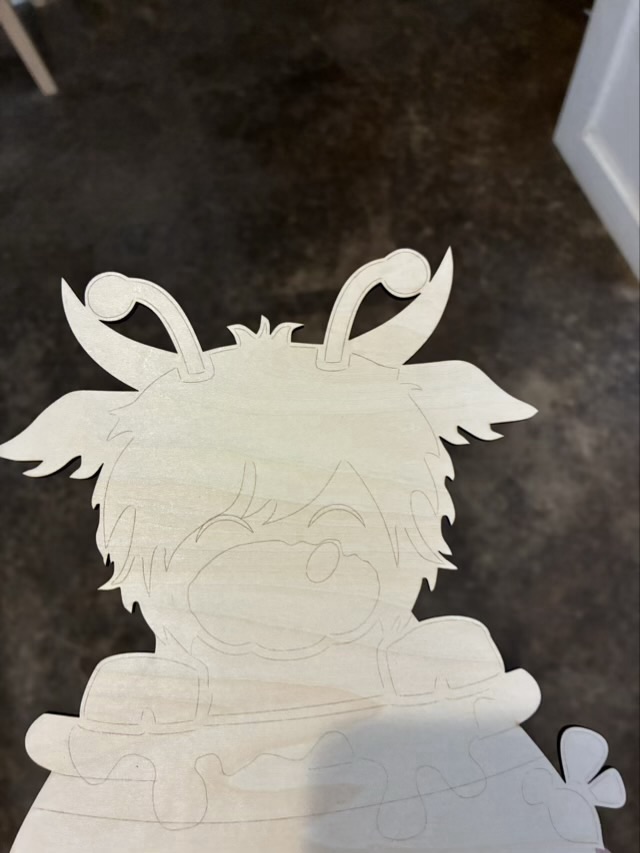
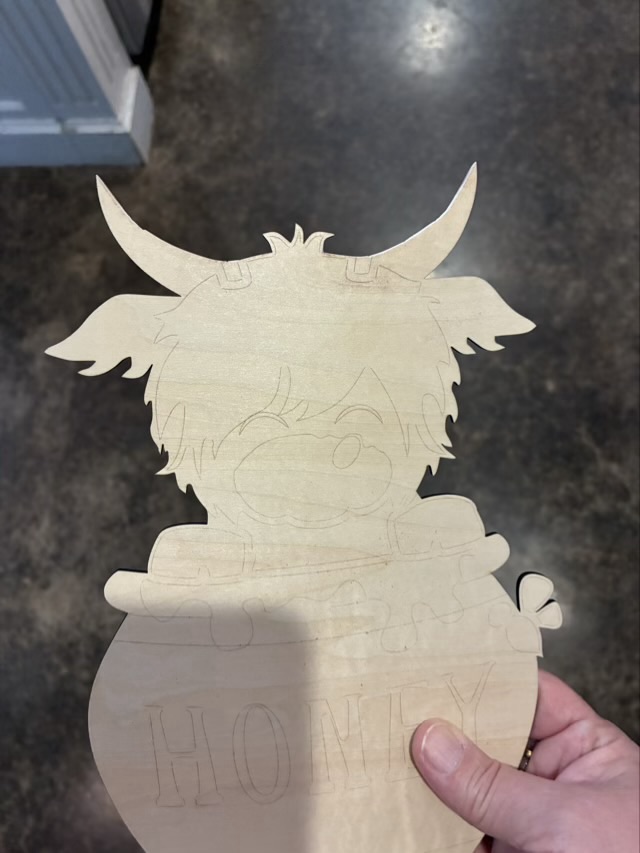
I did have to fill the space on the next layer where the antenna were supposed to go, but some cutoff bits of wood and a heavy layer of paint did the trick.
I will post the glued together finished project once I’ve done a clear UV protectant spray coat. It has been raining almost every day, so I haven’t had the chance yet.
I needed a new design for the other side of the van in the upper corner of the back window because it makes the vehicle easier to spot in parking lots. So I designed one.
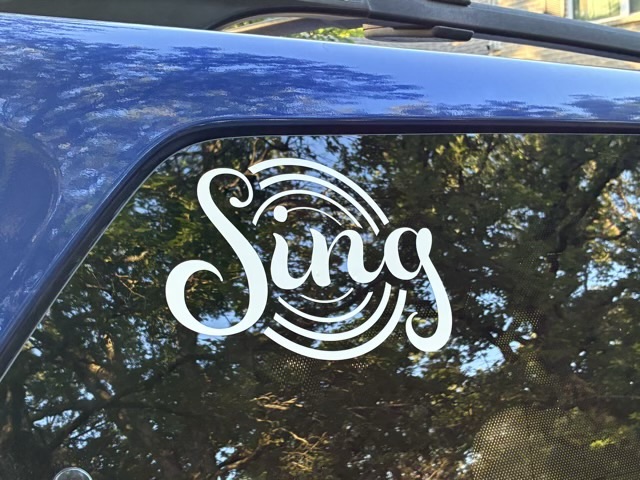
The concentric circles represent the Barbershop cone of sound, just looking down from the top, where the largest sound should be from the basses, then baritones (when their note is below the leads), then leads (who have the melody in Barbershop), and then tenors. Fun fact, in Barbershop the voice parts are not related to gender, but to the role the part plays in the harmony balance. So we use bass, baritone, lead, and tenor for low voice, mixed voice, and high voice choruses and quartets.
I designed the graphic in Adobe Illustrator and cut it out with a CRICUT electric cutter.
