Wood burning

I was gifted a professional wood burner setup last December, and it has been waiting for me to clean up my craft space and find a project to burn. The wait has ended. I liked the pencil drawing on my wooden rolling pin so much I thought wood burning would be the best next step. I read through my instructions and flipped through a detailed book, then practiced on one of the rolling pin’s cut off ends.

Practicing with my new wood burner

I am in love. The wire writing tip for the wood burner is absolutely fantastic. There is a bit of learning curve with temperature settings and speed of burn, but I am loving the results.

Partially wood burned rolling pin

The writing tip burns the line I want without making deep marks that would transfer to dough. The burn is deep enough, though, to hold up to light sanding to remove stray pencil marks. But not so deep that I can’t use a blade to lightly scrape away mistakes.

Wood burn complete

So exciting! This opens up a whole new world for my wood work.

(Part 6 of 8 in this blog series)

Arting it (or not)

I love morning glories and Celtic knots. Years ago I started on a Celtic knot style morning glory vine drawing. For my refurbished rolling pin, I wanted to add art, so pulled out the sketch and transferred it to the wood with tracing paper.

Transferring a Celtic motif to a rolling pin

Even though I’ve had success with acrylics on wood in the past, I was leery of trying to paint such small precise lines with even a small paintbrush. So I used Primacolor colored pencils instead. The color was gorgeous and the pencils were so nice!

Prismacolor pencils on wood

I was so excited to have my rolling pin done and back in use that, as soon as the drawing was done, I rushed off to start the tung oil sealing process. Tung oil is a food safe sealant and even though it takes some time and many applications, it is my first choice for wood sealant. The first coat of tung oil is diluted 50/50 with mineral spirits to help the tung oil soak deep into the surface of the wood. Mineral spirits dissolve wax. Colored pencils are made with wax. My intricate drawing turned into a heartbreaking smear across the wood. Sigh. I took the rolling pin to the sink and scrubbed off the color with soap and water, then when it was dry, sanded it down again. Though this was a rookie mistake, I did learn (as you do) if I want to seal with tung oil, I can’t use colored pencils. Also, looking at the finished design, I was not happy with the knot orientation. Since I have to redo the art anyway, I will use the opportunity to improve the design. But not today.

(Part 4 of 8 in this blog series)

Turning a maple rolling pin

I’m working on replacing the center part of my broken rolling pin. Marble is such a delicate and hard to repair material, so I am replacing it with maple (plus, I already have maple on hand). I cut a section of a 3” round maple blank (which is marketed as a baseball bat blank) to 15” in length, which is about 2” longer than I need, so after I turn it, I can cut off the marred ends. I used my center finder (that I blogged about yesterday) to find the centers of both ends, and made 1/4” pilot holes on my drill press. I was hoping to drill the center hole on my lathe, but my lathe isn’t that fancy.

Making pilot holes with a drill press

The drill press did well to start the holes, then I used a long 1/4” drill bit to drill halfway through on both ends. Miraculously, the two holes matched up in the middle with barely a jog.

Light at the end of the … rolling pin

After getting the hole drilled, I mounted the blank on my lathe. It was amazing how much work needed to be done to get the blank into round. It took me around two hours to get it roughed in and smoothed down. “Simple” straight cylinders are not simple to turn! I sanded down to 400 grit, then cut off the ends with the chop saw.

Cut off marred ends (but may turn into whorls for spindles eventually)
Broken marble pin compared to the new maple pin

I cleaned up the steel rod and nylon flanges from the old rolling pin and tried them out. The fit was a little too tight, so I reamed out the hole with a 3/8” bit, and indented the ends about a 1/4” with a 1/2” bit to accommodate the flanges. It assembles and works! Now to “art” it, as my husband says.

(Part 3 of 8 in this blog series)

Happy Mother’s day to all those that mother! I’m trying out a new format with this series of posts, and didn’t plan for holidays. Oops. Live and learn. This too shall pass. Fussy babies go ni-night. (Getting in my Mom quotes.)

Center finder DIY

I made a simple center finder for drilling holes and turning round stock. I drew concentric circles with a fine-tipped Sharpie mounted in a compass on the inside layer of a lamination sheet. (I recommend practicing making circles on some scrap paper before going to the clear sheet, especially if it has been awhile since you’ve used a compass. Yup, personal experience.)

Circles drawn on the inside of a lamination folder

I then sent the lamination folder through the lamination machine to seal in the drawing and make it more rigid, used the sharp point of the compass to poke a hole in the center, and scissors to cut out the circle. By lining up the edges of the circle with the wood, I can mark the center.
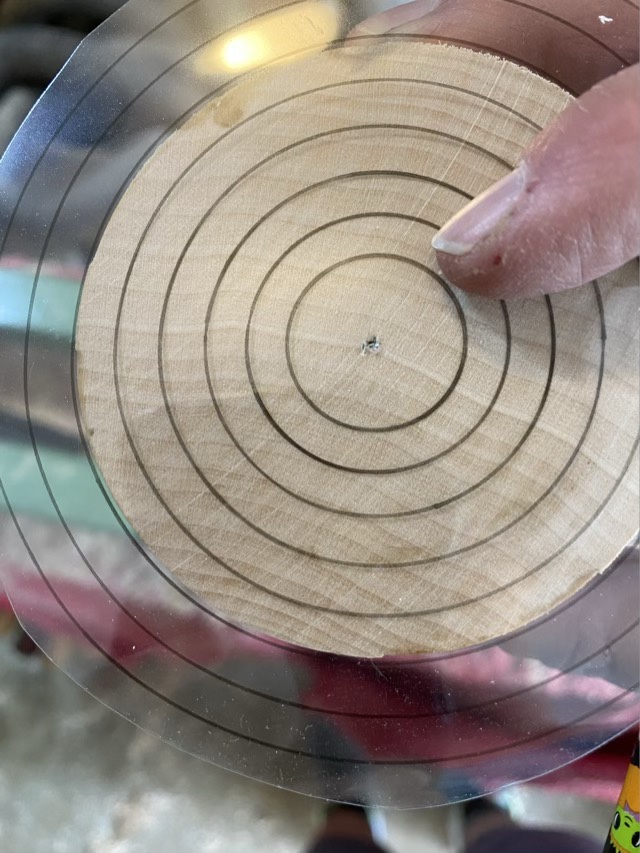
Using the center finder to find the center of a maple turning blank

There are commercially prepared center finders, but this is an easy and cheap way to make one if you have transparent material available.

(Part 2 of 8 in this blog series)
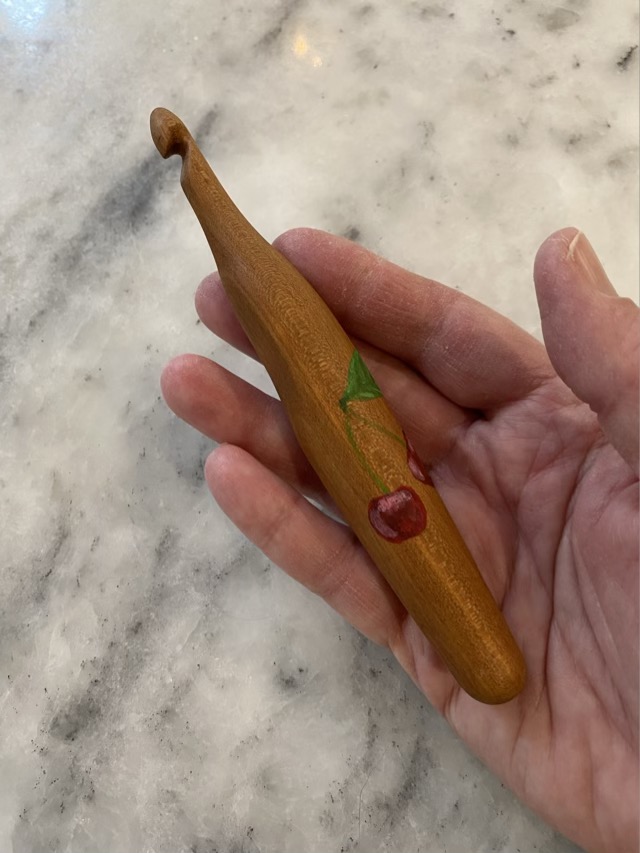
Cherry crochet hook

I hand-carved a crochet hook out of cherry wood from my Dad’s woods. I turned it on my lathe, carved in the ergonomic thumb indent, and the hook. After sanding it down to 400 grit, I painted two cherries on it (because cherry wood). When the paint was dry I started coating it with tung oil. The hook has actually been done since December, but I finally made myself make the Etsy listing. Honestly, making the hook was easier than putting together the listing with the pictures, video, and descriptions! (Yes, I even did a video, Missy makes a cameo.) I really need to do more of this so it isn’t so daunting. Oh, the hook? It is very nice, a smooth finish without being slick, and fits nicely in my hand. It is a size M, so for use with chunky yarn, and the short neck works well with single crochet stitches. The Etsy listing is here.

Hand carved ergonomic cherry wood crochet hook (with mini painting)