Reinforcing

Spindles with hooks have a weak point where the hook screw connects with the wood, especially if the shaft is slender. I like slender shaft drop spindles because I feel I can control the spin better and the light weight is more comfortable. I don’t like when I drop it and the shaft cracks. To give the metal to wood join some reinforcements, I decided the wrap the weak area with waxed silk.

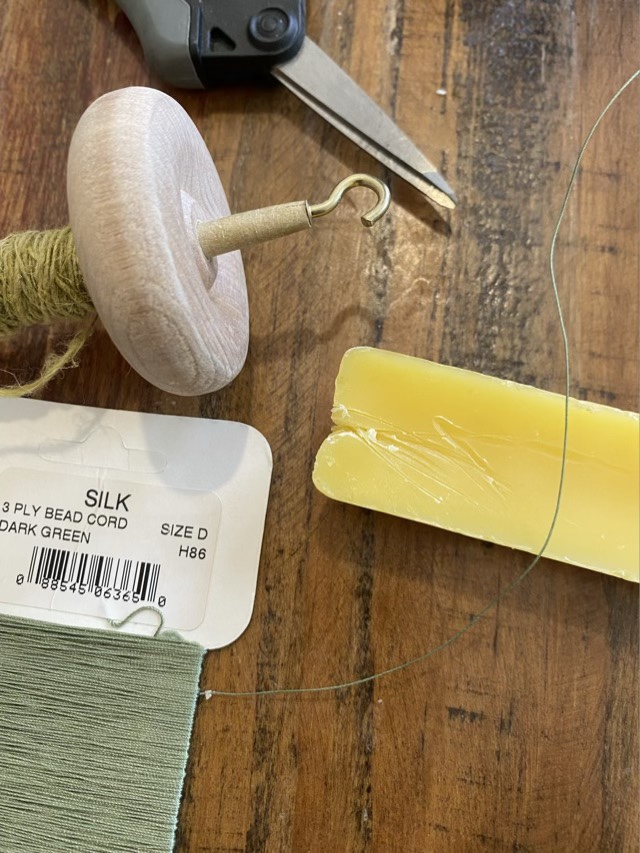
Clockwise: scissors, beeswax, silk cord size D, drop spindle

The method I used to wrap is called common whipping. Plugging those two words into your search engine will generate all sorts of illustrations and tutorials, as long as you get the words right. It took me an hour of searching to find the right words, I had a synonym of whipping in my head that I couldn’t dislodge. So, two words: “common whipping” are my gift to my readers today.

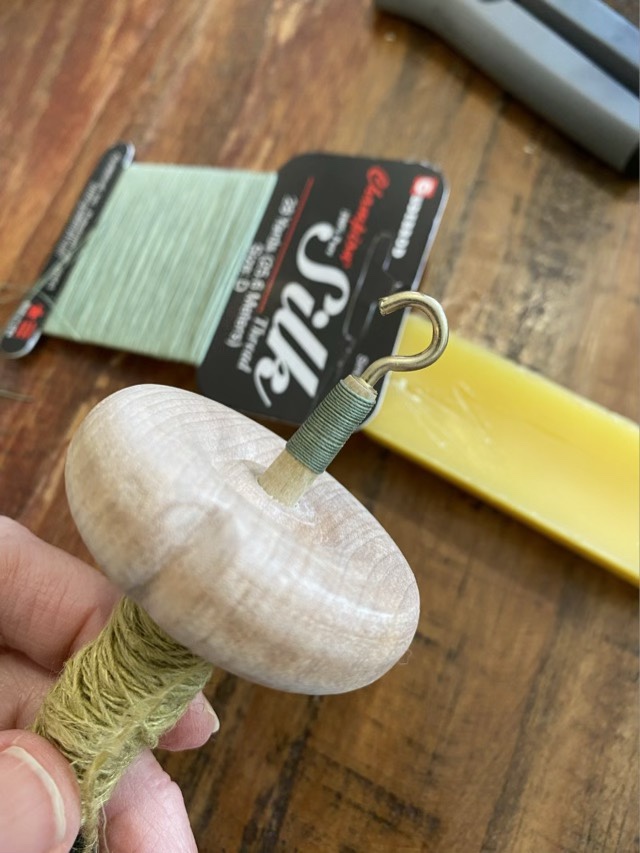
Common whipping on a drop spindle with waxed silk cord

I ran an arms span of the silk cord through my wax block three or four times to build up a layer of wax. The wax helps protect the cord and makes it stay in place better. I start my whipping with a loop laid along the shaft. I wrap toward the loop, run the end of the cord through the loop, then pull the loop end to draw the ends into the middle of the wrap. (This is where the internet search comes in handy if you are a visual learner.)

I used silk because I tried hemp and it wasn’t strong enough and the diameter made a wrap thicker than I wanted. Waxed linen is also commonly used, and is strong, but I didn’t have any on hand.

Antique spinning mule bobbin

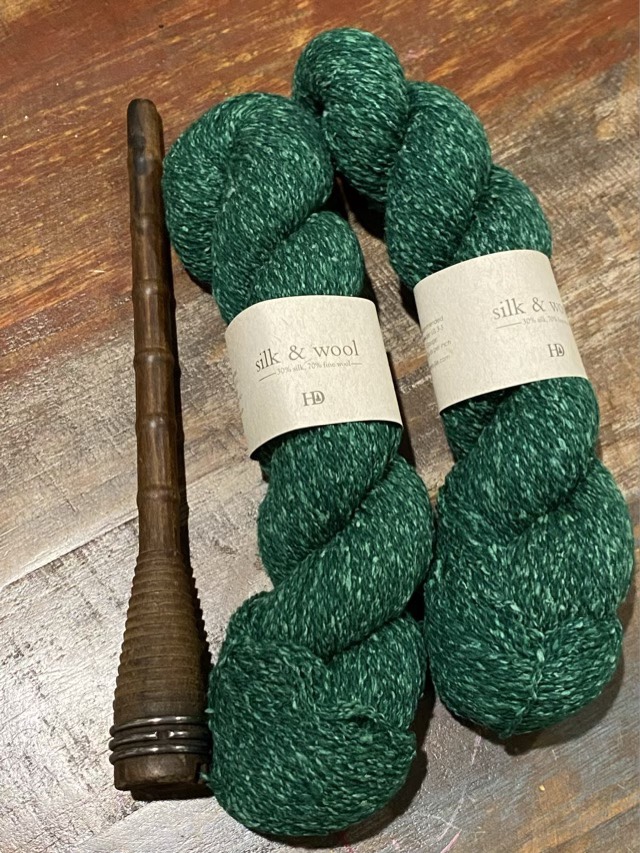
Harrisville Designs in New Hampshire has moved their machines back to the original factory floor in town, to strengthen the ties to the community, switch to renewable energy, and return the historic buildings to their original purpose. To celebrate, they offered customers a piece of history, an antique spinning mule bobbin, if you purchased a skein of yarn. I ordered yarn.

Antique maple spinning mule bobbin and new silk and wool yarn from Harrisville Designs

A spinning mule is a machine used to spin yarn on multiple bobbins as once. (Here is a place to get started on more information.) It drastically improved the amount of yarn that could be spun at one time and replaced the spinning wheel as the main production of yarn in the 1700s. This bobbin is between 50 and 100 years old. Fascinating. I can’t collect many antiques, I just don’t have the room, but this is small and will go with my hand spindles.

Finishing

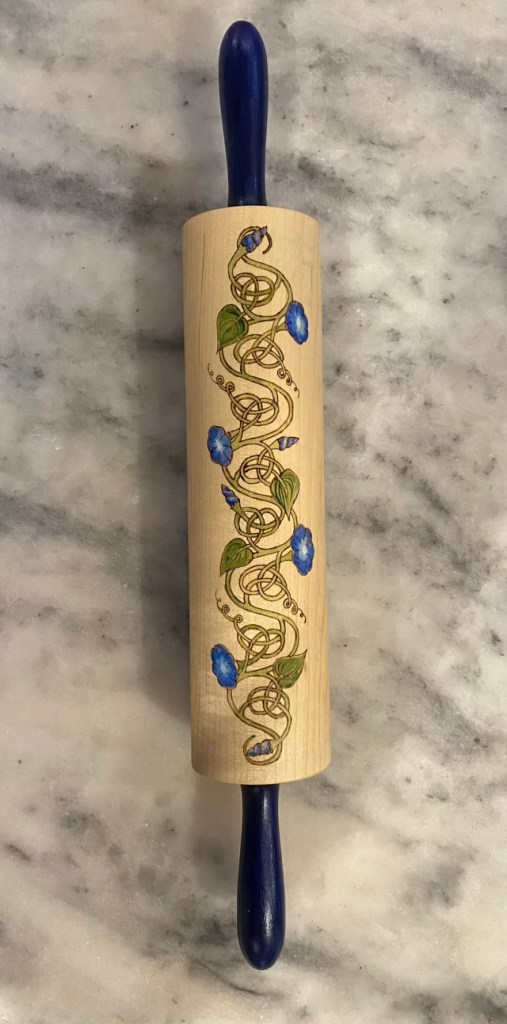
I have a new rolling pin! After several coats of tung oil, my rolling pin is done. I will probably wait about a week to use it to make sure the tung oil is solid, but I’m very excited to get back to making sourdough discard crackers, and maybe some pie crusts.

Finished repaired rolling pin

I hope you enjoyed this series. I did draw it out quite a bit, but decided to run it sequentially, which I don’t normally do, so the thread is easier to follow for those that stumble across it later.

(Part 8 of 8 in this blog series)

Adding color

I love, love my wood burned Celtic knot morning glories on my rolling pin, but I feel it could use some color. With the lines solidly established, I felt confident adding some diluted acrylic paint to make the design pop.

Adding acrylic paint to the wood burned design

I know from experience that acrylic paint does well under coats of tung oil, so I am not in fear of losing this design to mineral spirits. But I have a new problem. The old rolling pin handles are a different wood and thus a different shade than the new rolling pin center. Not pleasingly, either. Paint to the rescue. I sanded down the old finish on the handles to prep for paint.

One handle in the original color, one sanded down before painting.

I used the darkest blue acrylic paint that I used in the design to paint the handles. Next step, finishing!

(Part 7 of 8 in this blog series)

Wood burning

I was gifted a professional wood burner setup last December, and it has been waiting for me to clean up my craft space and find a project to burn. The wait has ended. I liked the pencil drawing on my wooden rolling pin so much I thought wood burning would be the best next step. I read through my instructions and flipped through a detailed book, then practiced on one of the rolling pin’s cut off ends.

Practicing with my new wood burner

I am in love. The wire writing tip for the wood burner is absolutely fantastic. There is a bit of learning curve with temperature settings and speed of burn, but I am loving the results.

Partially wood burned rolling pin

The writing tip burns the line I want without making deep marks that would transfer to dough. The burn is deep enough, though, to hold up to light sanding to remove stray pencil marks. But not so deep that I can’t use a blade to lightly scrape away mistakes.

Wood burn complete

So exciting! This opens up a whole new world for my wood work.

(Part 6 of 8 in this blog series)