Ukulele strap part 2

My ukulele did not come with strap buttons, so I found some elliptical ones from D’Addario and drilled pilot holes at the base (there is a block of wood inside to support the screw), and the back of the neck.
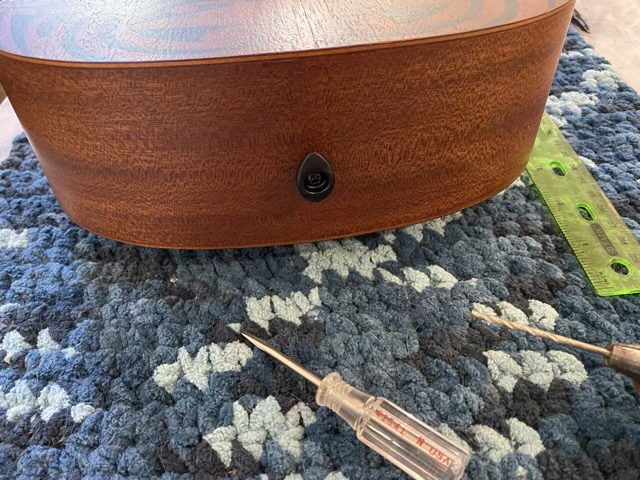
Photo description: Elliptical strap button installed on the bottom of a tenor ukulele
Photo description: Elliptical strap button installed on the base of the neck of a tenor ukulele

I trimmed the ends of my woven band (see yesterday’s post), and treated them with white glue to make them stable.

Photo description: Both ends of a tablet woven strap treated with white glue (shown on a post-it note) using a brush (shown).

I found two metal slide buckles at the craft store and used one as intended, sewing on end of the strap to the middle bar and threading the other end over it. The other buckle I modified by taking out the middle bar and using as a ring in the fold of the strap. In my leather stash I had an old black belt. The leather was thick but flexible, and great for making the end of my straps. I folded, cut and carved tear drop shaped holes in the belt for the ends of the strap. One end I sewed on using waxed thread. The other I riveted together.
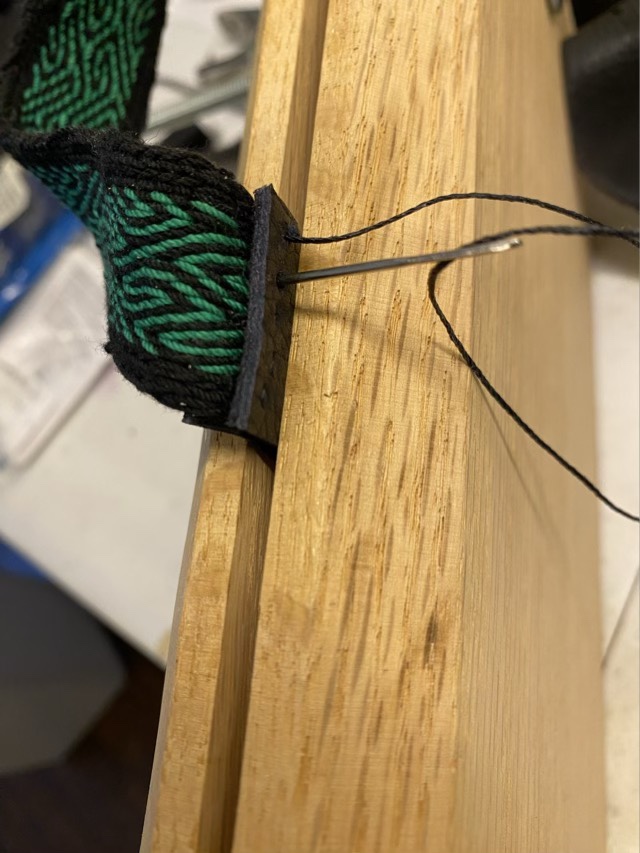
Photo description: Wood clamp holding the leather end and the woven end together so I could sew using the holes I punched into the leather.
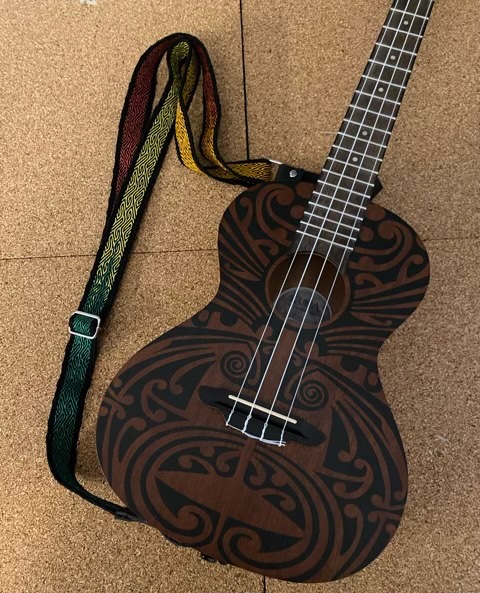
Photo description: Finished strap with leather ends and metal slides
Photo description: Strap installed on the tenor ukulele.

I’m rather excited about having my ukulele on a strap since it makes it easier to hold at a good position for both my hands. I’m off to practice!
Ukulele strap part 1

I decided my ukulele needed a strap. Maybe it was mostly an excuse to design a new card woven pattern, maybe it was to use up cotton crochet thread, most likely I decided to make it myself because I don’t have enough works in progress.

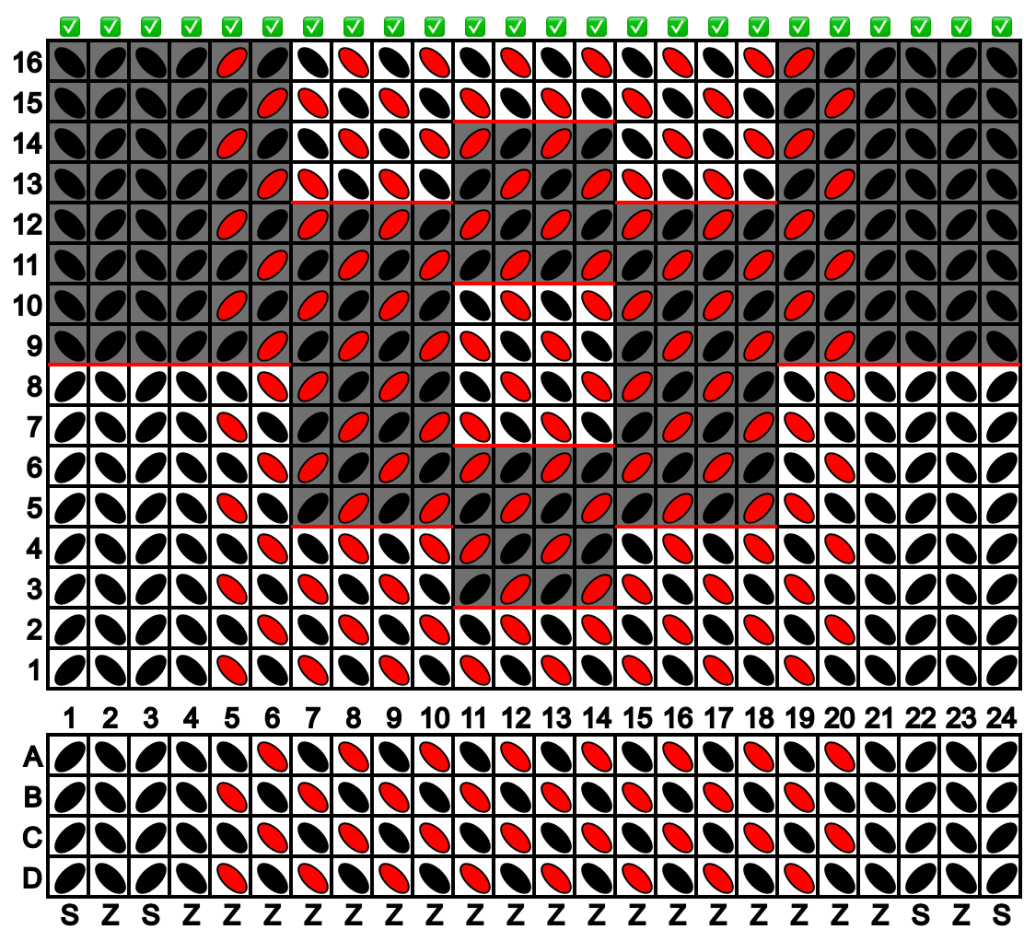
I used this tablet weaving designer, and came up with this pattern.

Photo description: Tablet weaving pattern diagram generated in Tablet Weaving Draft Designer v1.5.0. Diagram shows how to setup the cards in the tablet, and which way to turn each card for each pass of the weft thread.

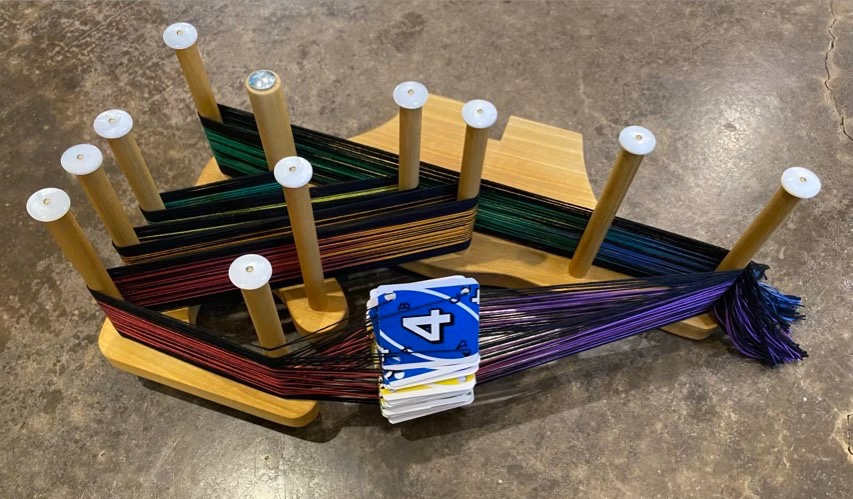
I warped my loom with #10 cotton crochet thread in black and rainbow. The rainbow warps I aligned by color. It was quite serendipitous that a color repeat in the thread was just a little longer than my warp length, so I could have all the colors, and very little waste.

Photo description: Handmade Inkle loom warped with black and rainbow thread with weaving cards made from an Uno deck.

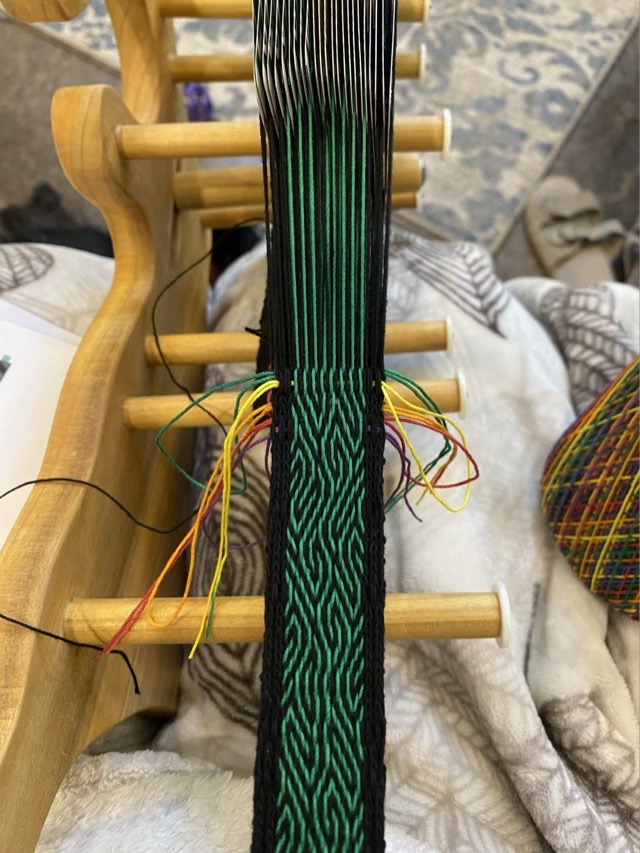
I used the black thread as the weft, and started with a few passes held straight with lengths of 18 gauge wire, then doubled the weft back on itself for several rows. To end, I used a loop method to draw the weft back on itself to help lock the weaving in place.

Photo description: Weaving in progress showing a wavy green and black pattern with solid black edges and rainbow colored loops along the weft pass to use to draw the weft backwards.

I love this pattern. It is balanced so the twist does not build up in the warp, except when I make a mistake. Even when I miss a turn or double a turn, it still looks cool, and it is double sided! Win! I love the middle, but the edges vex me because they are not even (an artifact of the balanced weave). I may try a plain woven edge next time around (my youngest has requested one for her uke.)

Photo description: Finished woven band with color changes along the spectrum in the same wavy pattern.

Now to make it useful in addition to decorative.

Corriedale page

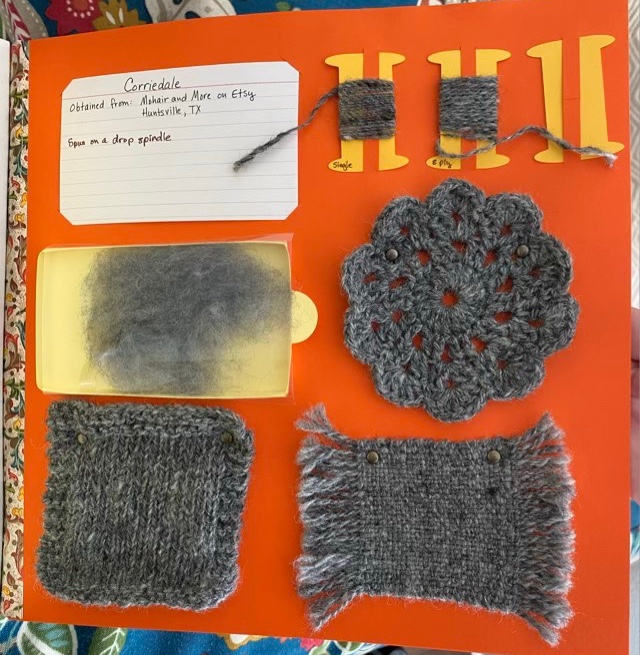
I did a fiber sample page for the Corriedale wool I’ve been using for teaching spinning. The woven sample is my best yet; I started the weaving with a pass of twined weft away from the edge of the loom. My weaving then stayed more even and consistent to the end, where I did another twined pass. The twining keeps the weaving in place better too, so I didn’t need to make knots. If I were making a piece that would see more action than laying in a book, I would secure the fringe better, either with more twined passes, or knotted or sewn fringe.

Photo description: clockwise from top left: 3×5 card with “Corriedale obtained from Mohair & More on Etsy, Huntsville, TX, spun on a drop spindle”; single ply on a paper bobbin; two ply on a paper bobbin; crocheted lace round; woven sample with two salvages; knitted sample with garter stitch edge; sample of un-spun fiber

Corriedale is very nice to spin, has a nice feel, but isn’t the softest. The blended dark and light fibers make it easier to see the twist, which is why I like it for learning.

Bamboo page

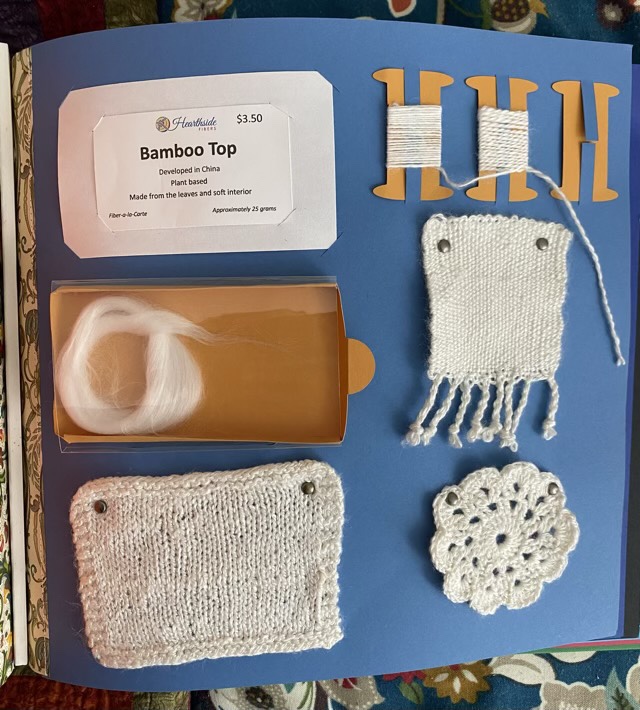
Photo description: Clockwise from top left: “Bamboo Top” card which reads “Developed in China, plant based, made from the leaves and interior”, single spun yarn on a paper bobbin, 2-ply yarn, swatch woven on a Clover mini loom with 3 selvages, crocheted lace round, knitted rectangle, unspun fiber in a paper box.

Spinning my bamboo sample was very enjoyable. The fiber is soft, and the staple is a nice length. I did have some static issues, but those that were resolved with a spritz of water. I spun the singles on a drop spindle, and I kept the fiber and spindle in my purse to spin during waiting times. I made the two ply yarn from a center-pull ball using the same spindle. The fiber has a beautiful luster.

Photo description: A hand holding a single spun bamboo yarn wrapped nostepinne style on a 3D printed spindle.

Expanding my fiber book

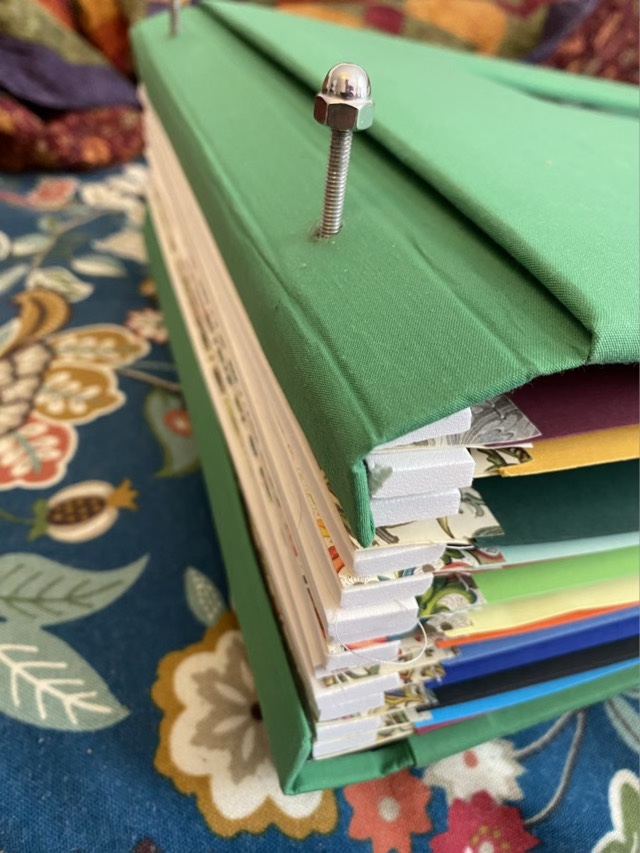
I’ve been quite frustrated with options for expanding my fiber book. The longest binding post screws I could find were not long enough, and the “extenders” had multiple reviews that that the threads didn’t fit, and I couldn’t find extenders that came with the caps. Bah. Time for a trip to the hardware store, specialty fasteners to the rescue. I found 5 inch threaded rods and some acorn nuts. They aren’t as fancy as a binding post, but they get the job done and I can probably fit another 10 pages in my book. I did have to adjust the cover to accommodate the acorn nuts, but it worked just fine to unfold the edge. A photo book this size would be very heavy and unwieldy, but my fiber pages are light and have thick spacers, so it works. I suppose I could separate up the pages into different books (shocking, right?), but right now I’d rather spend my money on fiber than book covers.

Photo description: Acorn nut on a threaded rod going through the edge of a photo book, sticking up about one inch over the cover, colored pages are spaced with white foam.

It is in my plan to eventually have an elegant external presentation, but I’m still cogitating on how I want that to look. This does the job for now.