I had an idea for a small pouch that didn’t require a string tie, or button, or zipper. Inspired by couch pillow covers, these have overlapping flaps in the back that do well to keep small rigid items protected.
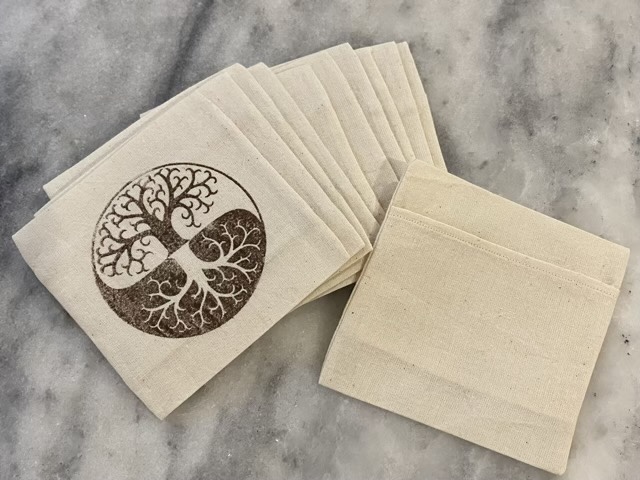
Stamping muslin
I wanted 4” square pouches, so tore an 11” strip of washed and ironed unbleached cotton muslin, marked 4.5” sections along the strip, and stamped my logo in the center of each section. To stamp, I squirted some fabric paint into a bowl, then loaded a sponge brush with paint to apply the paint to the stamp.
Making a 1/4” hem
I hemmed both long edges of the strip with a 1/4” hem foot on my sewing machine. (Hands down, this is my favorite foot.)
Sewing adjacent sides of the pouches
To form the pouches, I folded the long strip inside out, with about a 2” overlap, then sewed 1/4” on either side of my pencil lines. A cut between the seams, clips of the corners, turned inside out and pressed, and I was able to fairly quickly produce many small product bags!
My youngest wants to be Zelda from Breath of the Wild for Halloween, so we ordered her a costume. Well, while the dress is well made (especially for a mass-produced costume), it is a sleeveless dress. It did come with tiny clear straps that frankly don’t do much.
Costume base dress as shipped
So I ordered some gold chiffon and hand-sewed on straps/shoulder coverings not only to help the dress stay on, but to meet dress code requirements, should she decide to attend a school event. As long as I was at it, I also hemmed up the skirts since the dress was apparently made for someone 5’9”, which is unusual for a Hylian.
Dress with chiffon added at the shoulders and displayed with accessories
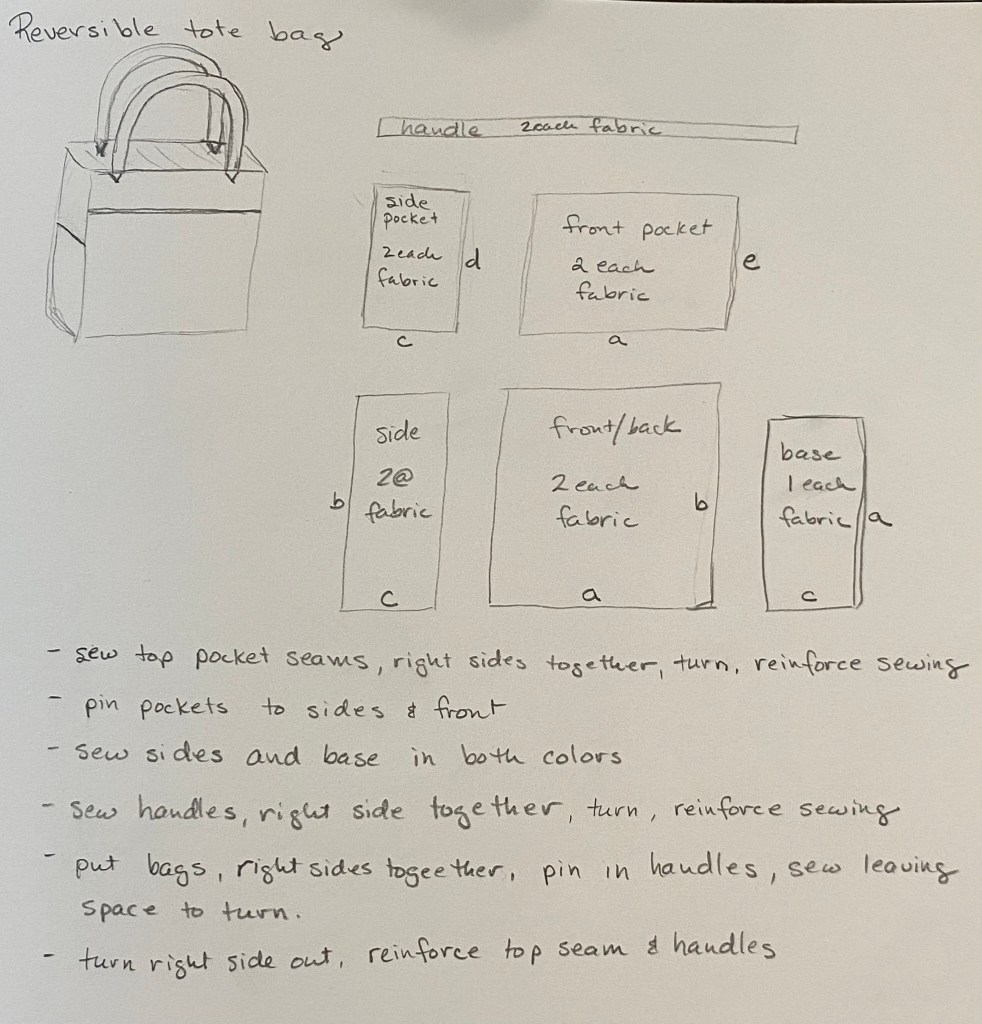
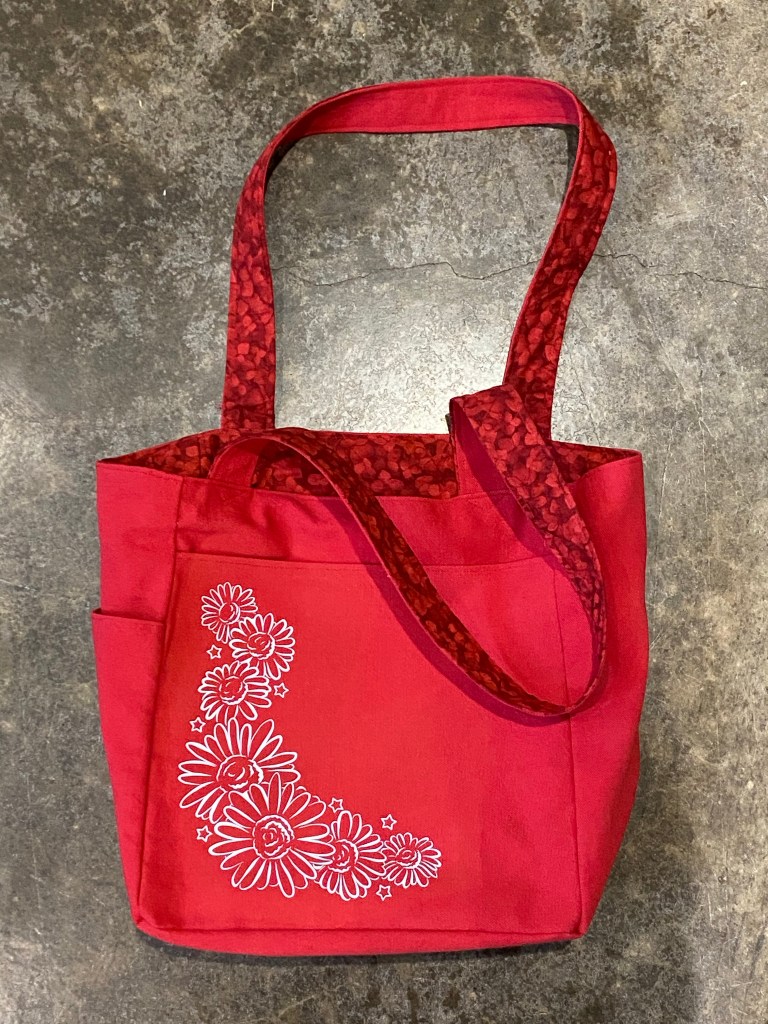
I’ve been wanting to make a pocketed bag for awhile. I decided to use some excess fabric thus reducing the stash as well as making something useful!
Sketch of bag plans
When approaching a sewing project, I usually collect my thoughts by doing a sketch and a rough outline of the steps. Then I use paper to make a pattern. This basic idea can be adapted to different sizes, but my primary goal was to make the side pocket fit a bottle of water (it is good to have priorities). Since this is size independent, I’ll give the outline of the steps below. Pictures of the finished project are at the end of the post.
1. Choose two coordinating fabrics. Iron fabric, then cut out pattern pieces.
2. Sew one piece of each color side pocket together at the top, right sides together. Turn right-side out and sew along the seam close to the edge. Repeat for all pockets.
3. Place the side pocket with right side out on the matching side panel. Place the side panel with pocket right-sides together with the matching bottom. Sew the seam, reinforce the area at the top of the pocket by going back and forth. Sew the plain side panel to the opposite side of the bottom.
4. Repeat step 3 with front panels.
5. Sew up all four sides, from corner to top. Clip the corners.
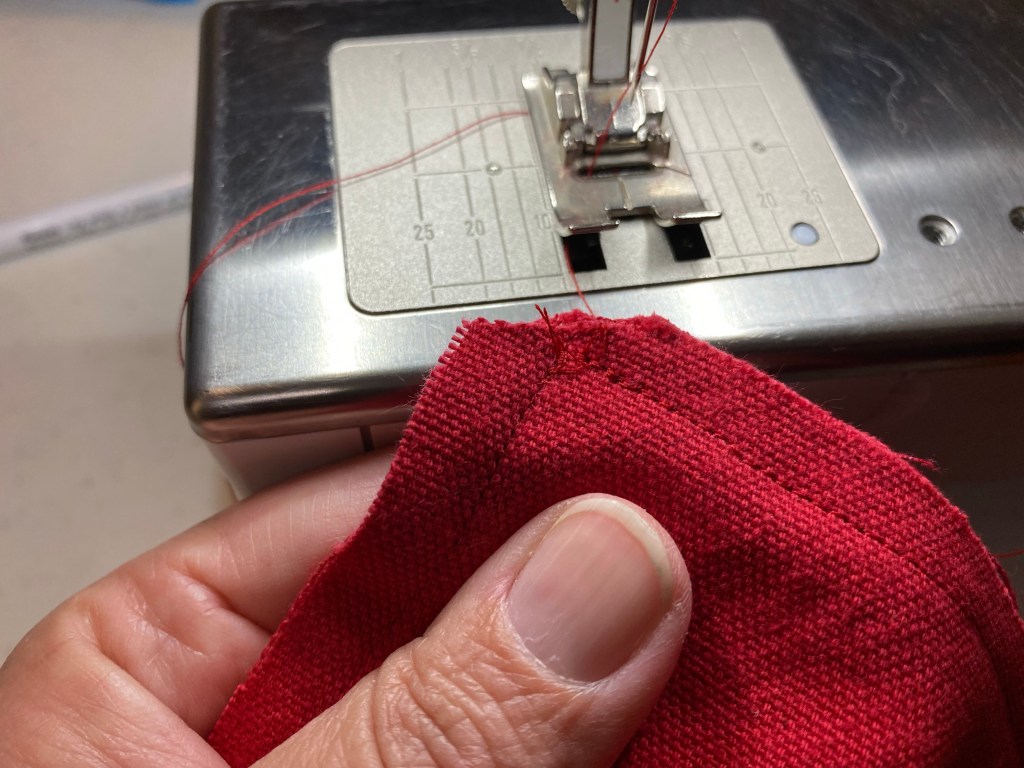
Be sure to clip corners to keep them neat
6. Repeat steps 2-5 for the other fabric color. I prefer to have one pocket per panel, so be careful of pocket position (yeah, I had to do some seam ripping).
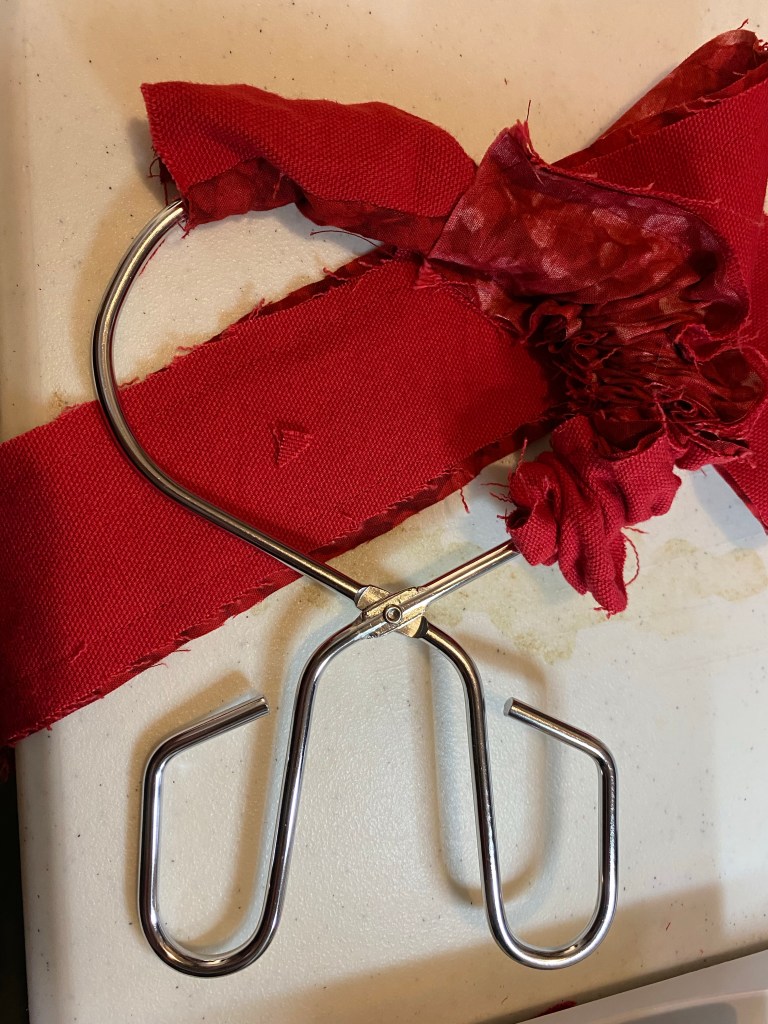
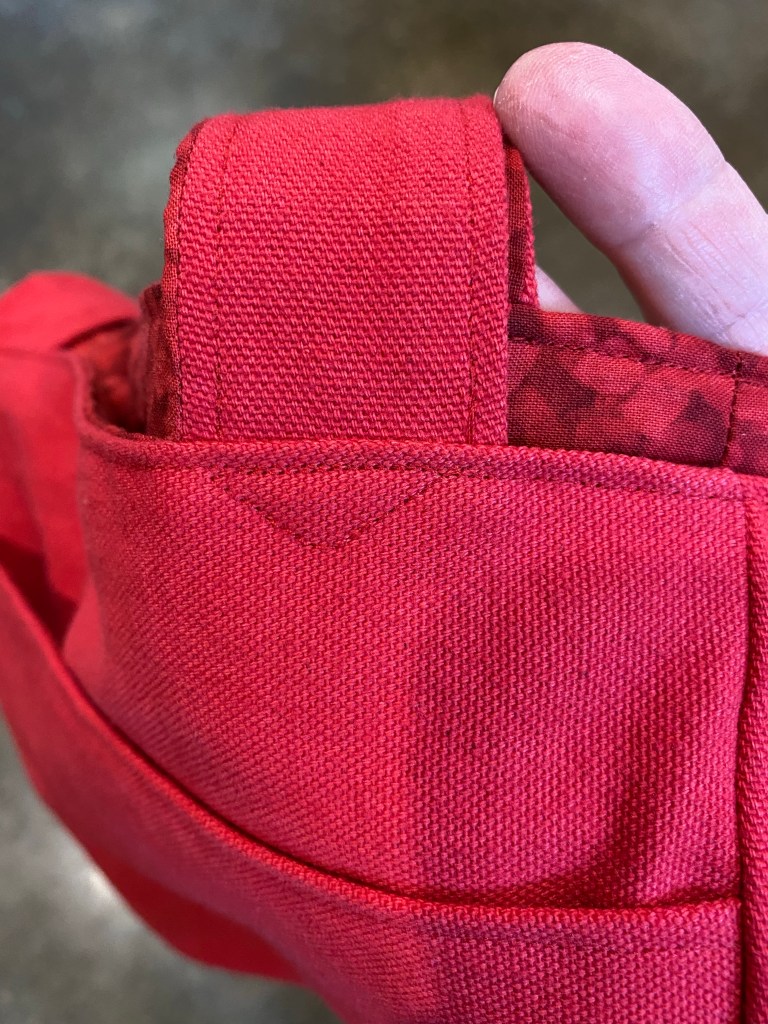
7. Sew handles right sides together, then turn right-side out. Press. Sew over seams, close to edges.
Tube turner devices are handy for turning handles
8. You should now have two one-sided bags and two handles. Place the bags right sides together and pin the handles right-sides together between the bags (loop tucked inside). Sew the top seam, but leave about 4-5” open for turning. Be sure to go over the stitches securing the handles a couple times.
9. Turn the bag right-sides out. Sew the top seam close to the edge, and add some more security stitches to the handles (I sewed triangles). Done!
Close-up of handle stitchingFinished bag (patterned side)Finished bag (plain side) with an iron-on decal I designed
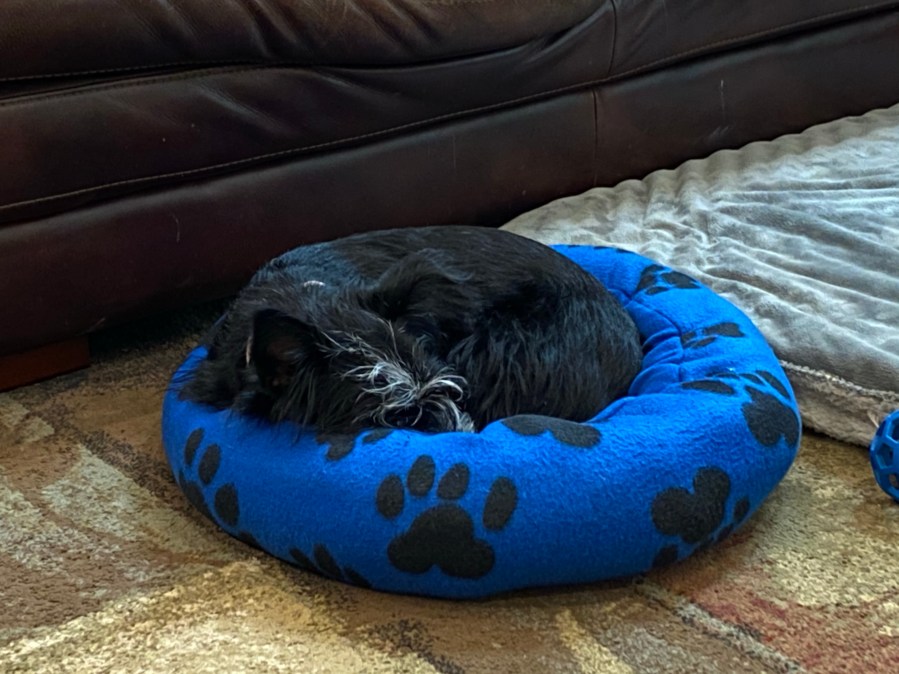
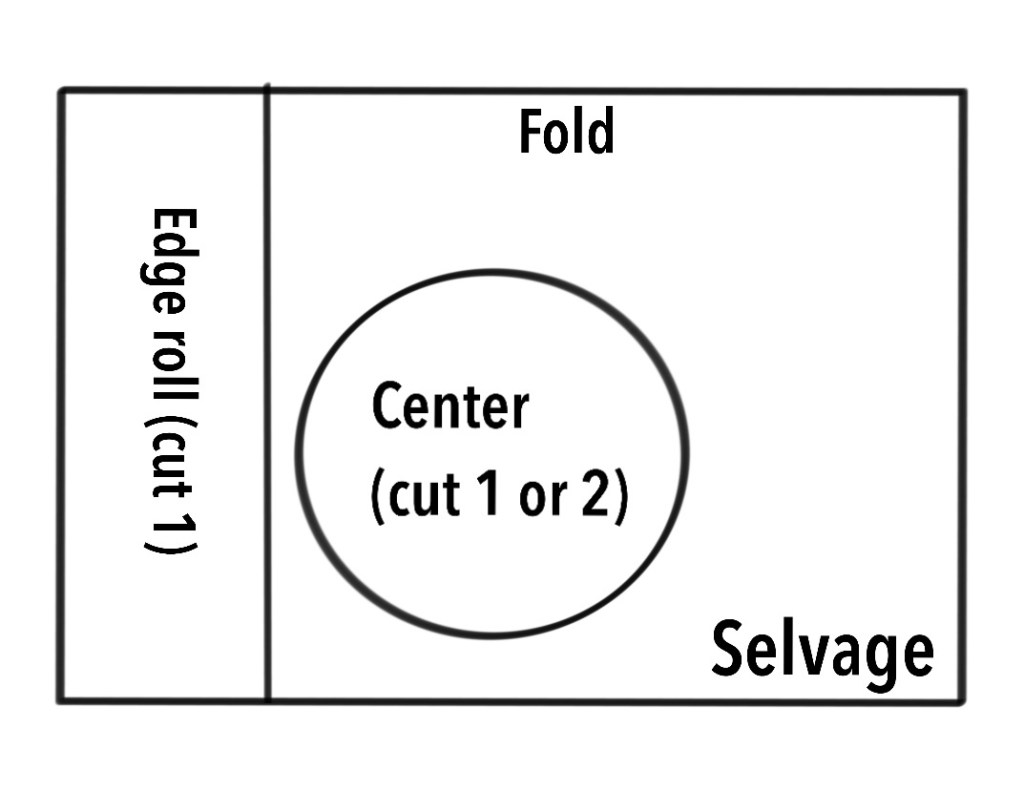
I read that some dogs find comfort in the donut style cuddle beds. I had some fleece and stuffing so decided to make one. I started by cutting off about 14” from one end of the fabric, from selvage to selvage. This will form the roll. Then I laid the strip loosely in a circle with ends overlapping a couple inches on the remaining fabric and cut a circle to the outside diameter. (If you want a stuffed base, cut two circles.)
Using the cut end to cut the center roundSketch of cuts for donut bed (not to scale)
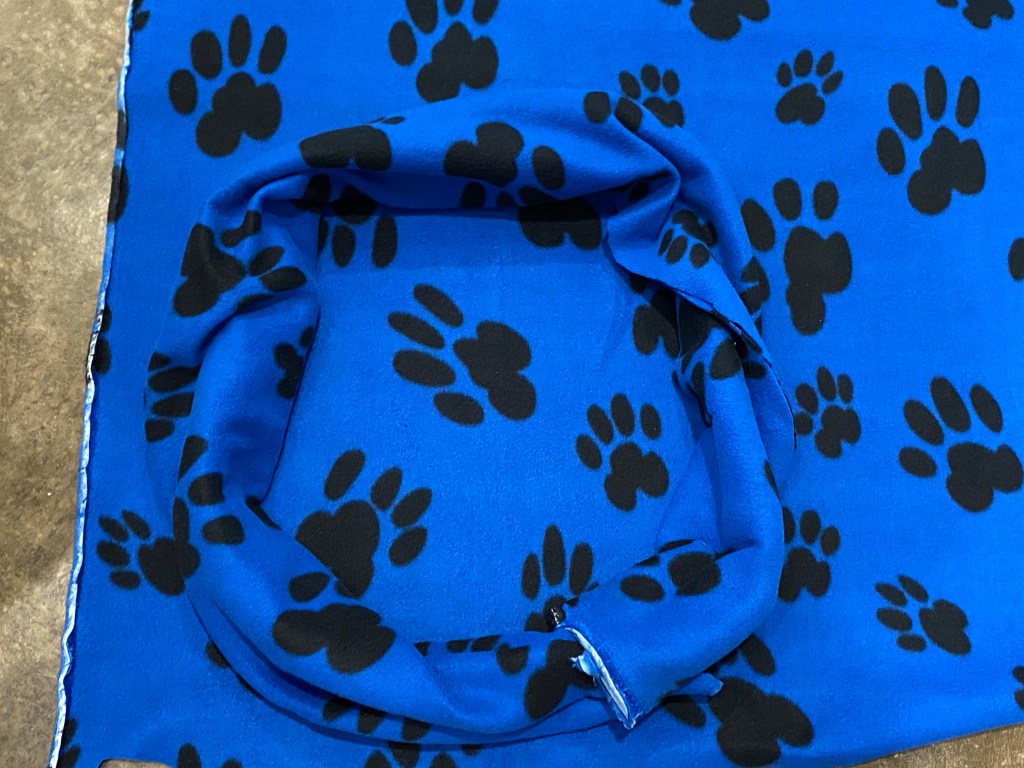
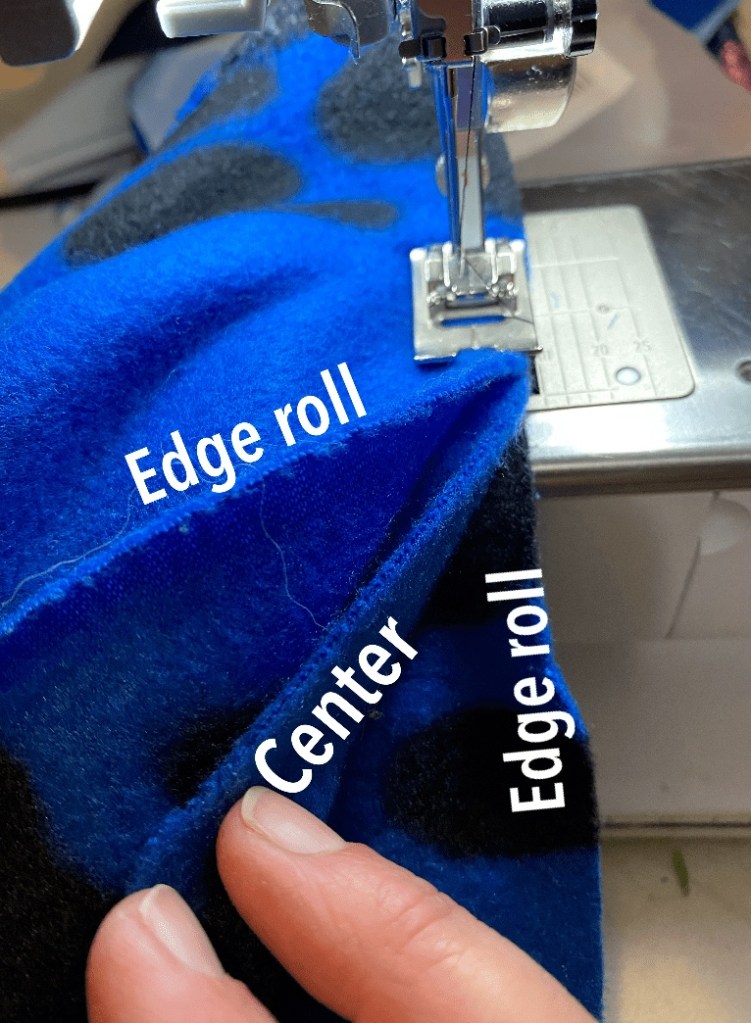
To sew, fold the edge roll in half length-wise, with the circle inside and one section of the circle edge lined up with the edge roll cut sides. I used a jersey stitch on my machine. Start an inch or two into the seam.
Showing how the cut edge of the circle lines up between the edges of the folded roll fabric
If you have ever sewn trim into a seam, this is a similar technique. The center is sewn inside the tube, so that when it is turned right side out it lays correctly. It is a little fiddly sewing the layers together without catching unwanted fabric, and the circle bunches up inside the roll, but it turned out easier than I feared! It wouldn’t be a problem to make two circles so the bottom could be stuffed. I sewed the entire circumference of the circle, but to stuff it, stop short a few inches. I used polyfil to stuff the edge roll, but shredded memory foam would work too. If you cut two inner circles, stuff those as well before hand sewing everything closed. I ended up with some extra fabric on the edge roll, which I just tucked in before sewing.
Finished cuddle bed, with seam rolled underMissy likes the cuddle bed
I know skinny t-shirts are a thing, but there are times when they are too skinny! My eldest has a favorite print shirt that fits this category, and drives her crazy when it rides up. We did look for a larger size, but it has been a few years since she received it as a gift. To fix it, I found a thin knit fabric that matched the weight of the shirt (and coordinated with the print), then picked out the side seams all the way up, including the sleeve seam. Using a different, well-fitted shirt as a guide, I cut 3” strips of the new fabric and sewed them in using the jersey stitch on my sewing machine.
Skinny shirt given some wiggle room by adding side panels (shown on a dress maker’s form)