I know skinny t-shirts are a thing, but there are times when they are too skinny! My eldest has a favorite print shirt that fits this category, and drives her crazy when it rides up. We did look for a larger size, but it has been a few years since she received it as a gift. To fix it, I found a thin knit fabric that matched the weight of the shirt (and coordinated with the print), then picked out the side seams all the way up, including the sleeve seam. Using a different, well-fitted shirt as a guide, I cut 3” strips of the new fabric and sewed them in using the jersey stitch on my sewing machine.
Skinny shirt given some wiggle room by adding side panels (shown on a dress maker’s form)
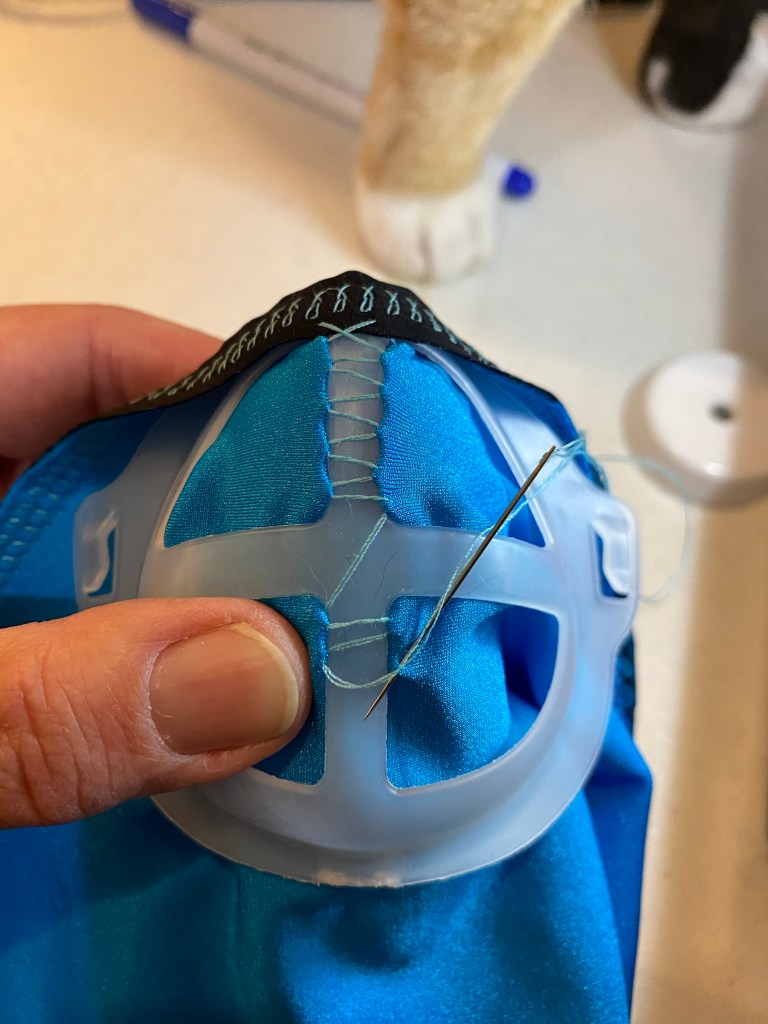
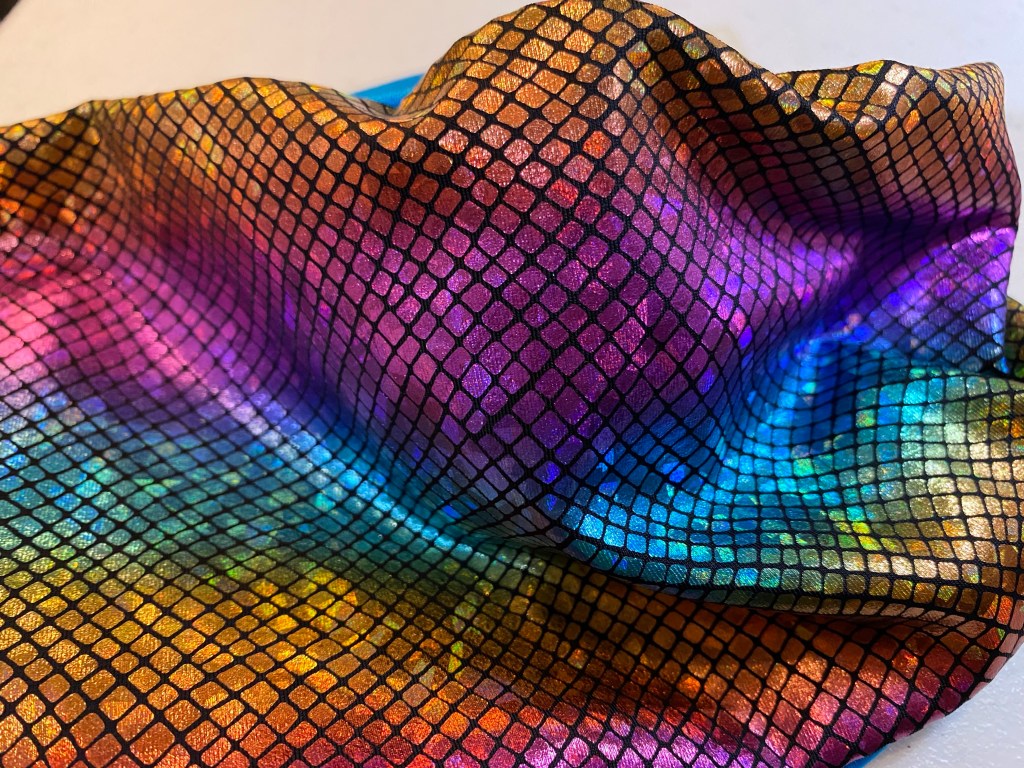
I have an ancient (probably vintage, possible antique, not ancient, but it has been handed down a few times) darning egg with a handle that sits in the bottom of my sewing box. I am making my youngest a new set of masks since she has grown and the old ones are getting a bit snug. She likes the gaiter style, but with a frame sewn in to make it easier to breathe. I use swim material because it dries quickly, and I double layer it. This time she requested material that was “pink and blue”, she is quite fond of the rainbow mermaid fabric I obtained! Because I didn’t want rainbow sparkles against her skin, I made the lining with plain blue fabric.
Sewing the frame to the lining fabric
Here is where the darning egg comes in. Sewing the frame to the fabric is a bit tricky, but the smooth wooden tool fits nicely under the fabric and frame and makes it much easier to stitch. First I use the sewing machine with a jersey stitch to secure the top edge, then I hand sew in in the frame before machine sewing the bottom edge. I turn the mask right side out and sew the back seam.
Darning egg with handleShiny rainbow mermaid fabric
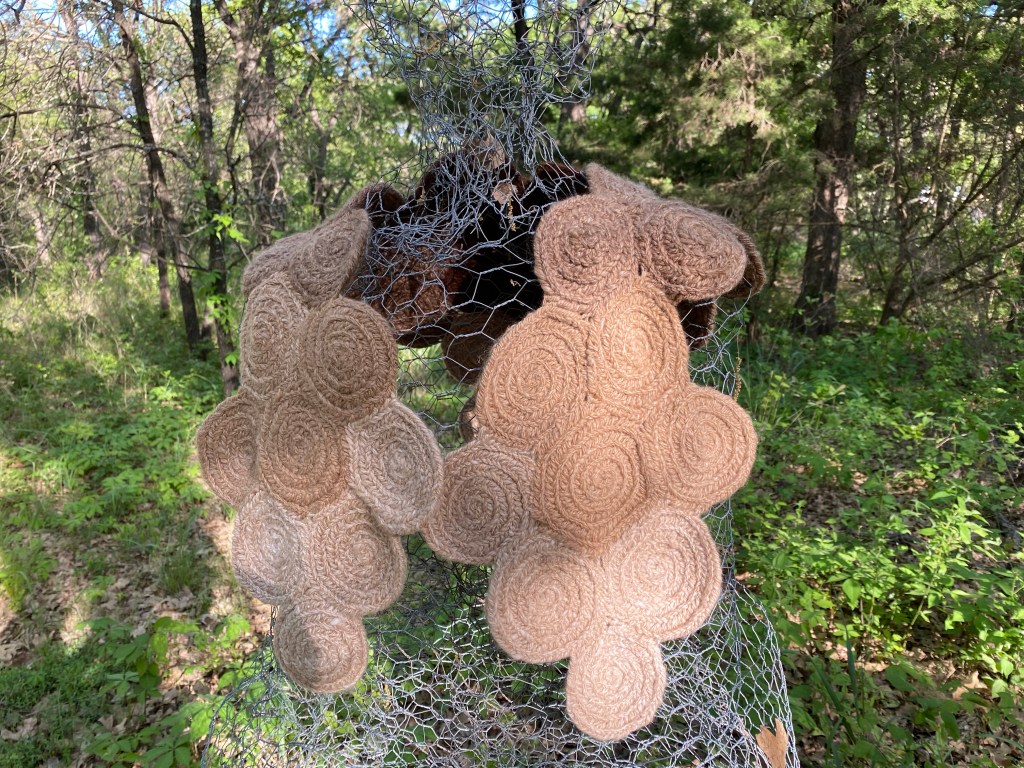
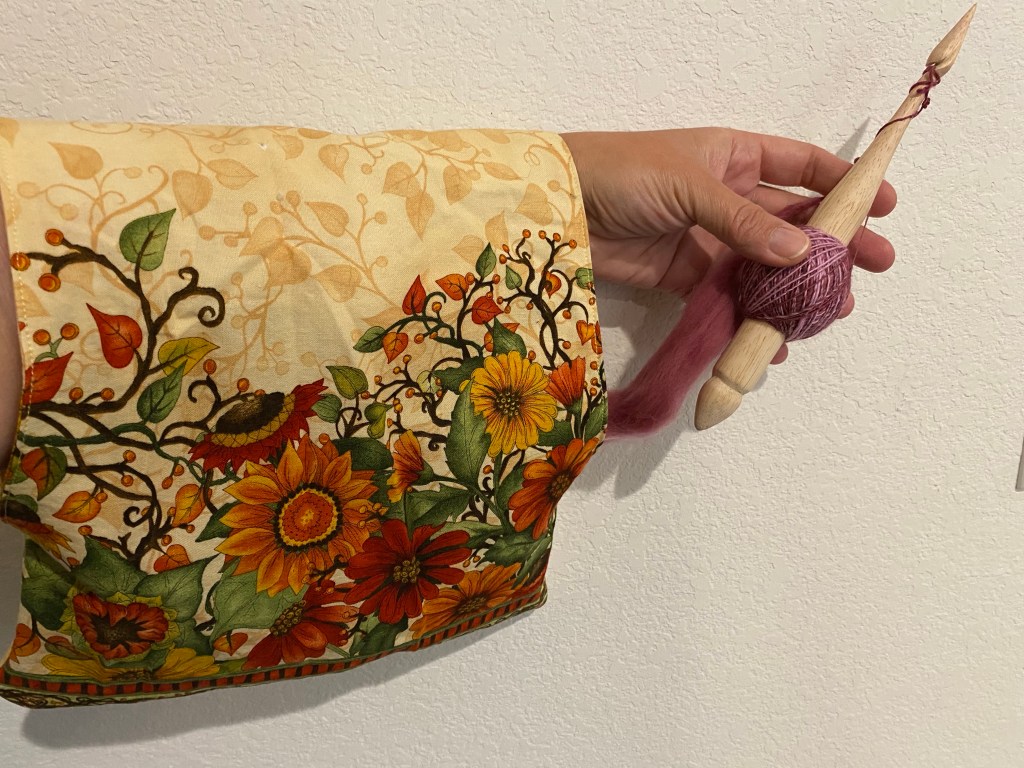
Even I am not immune to project fear, which leads to bundles of yarn in various states of assembly moldering in a corner because I’m not sure what to do. My forever alpaca project has been that way for months (I started it over a year ago) because I had an inkling that I didn’t have enough to make a vest. I was right.
Nålbound spirals laid out on my favorite vest
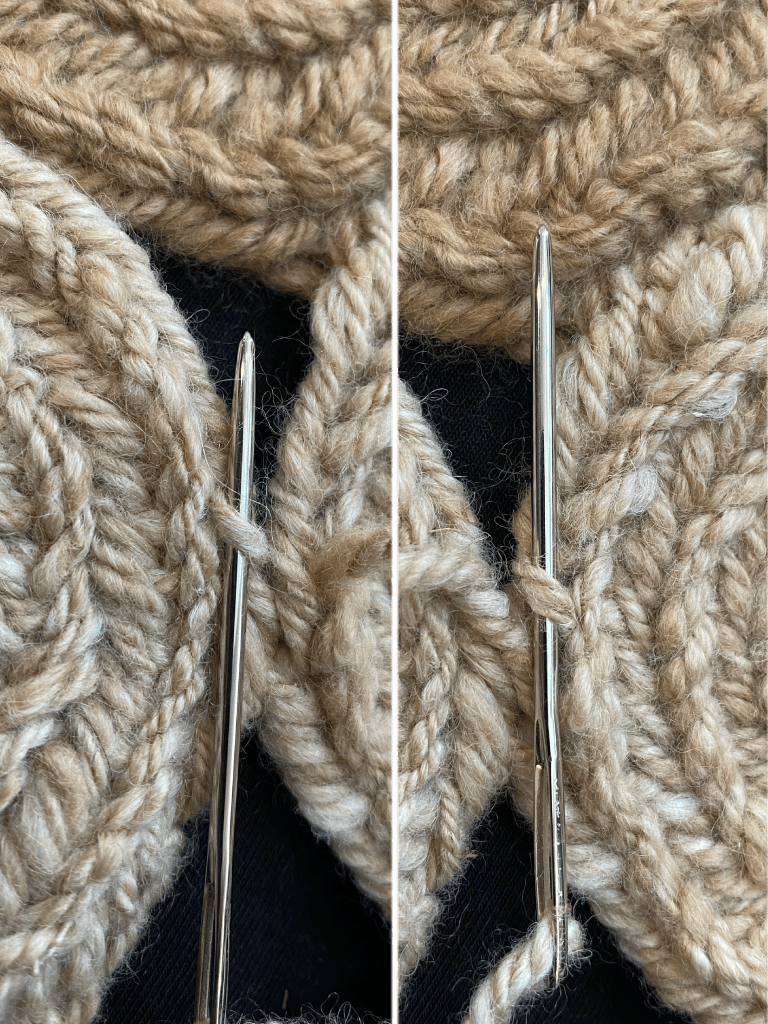
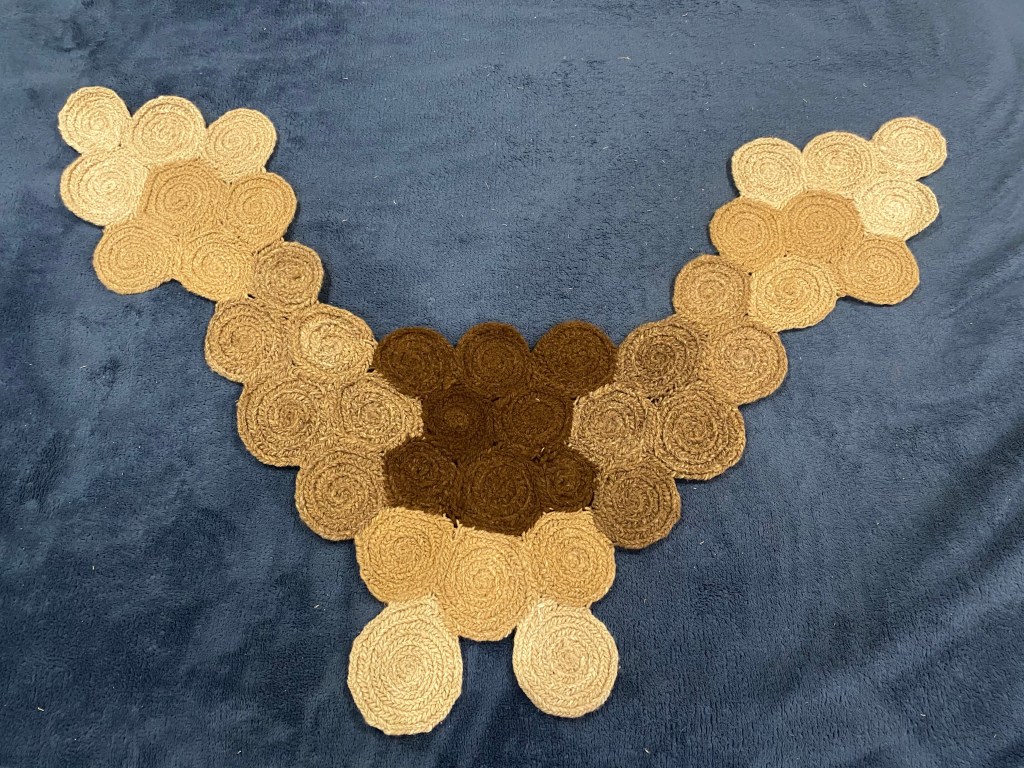
The idea was to lay out pieces on a vest that fit well, then sew the bits together to form a new vest. I’m not really wanting a bolo vest, and I spun all that fiber at one time, so I would be more consistent. I’m not sure I could spin it up the same now. So. Time for a new plan. I laid out the spirals in several different configurations, and when I had one I liked, took a picture and started sewing using the tails I left after nålbinding. To sew, I used a mattress type stitch, where the needle points the same direction for each stitch, just switching sides.
Two images showing stitching the circles together, picking up loops on the left and right respectively
I was planning on a scarf, but when I did a test fit (as you do), I realized I could shape it more like a shawl or large collar.
Nålbound circles connectedBack of shawlFront of shawl
I also realized that I may still be able to turn it into a vest by adding a body section. Hmm.
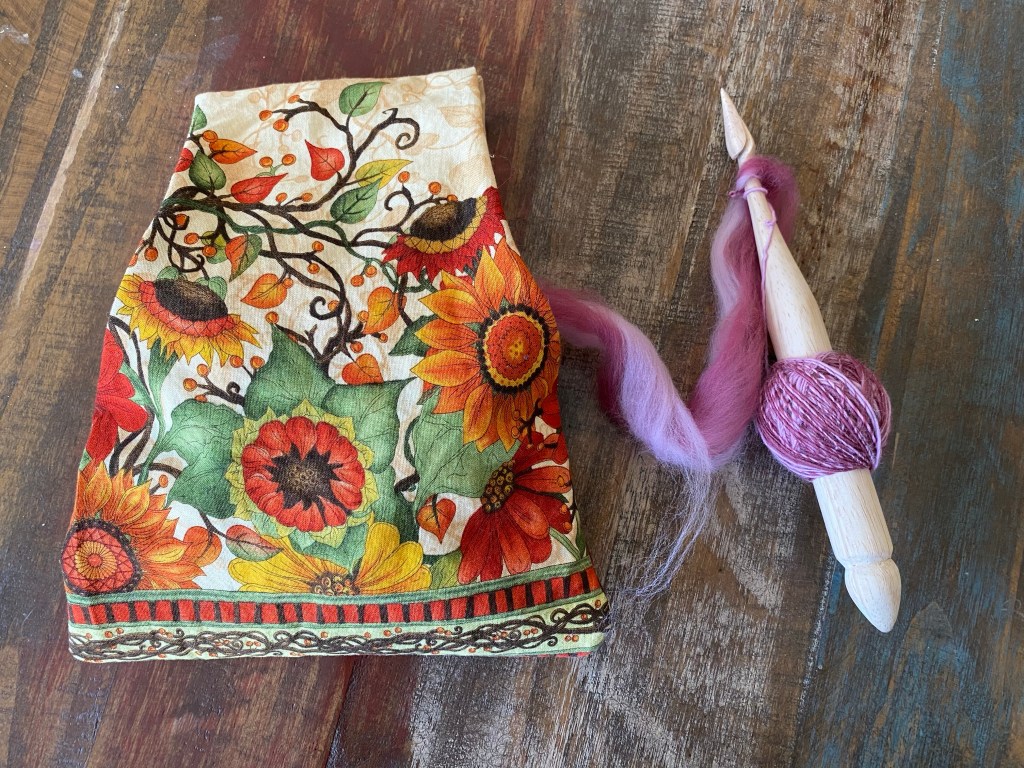
I have a small arm bag that I made to hold my crochet yarn while I work. It hangs on my arm, so my supplies are close and don’t get tangled. I thought I would try the bag for fiber management for spinning, but the bag is full of a current crochet project, so I made a new one! This is my favorite fabric. When I found it in the store years ago I bought the whole bolt. I have been slowly working through it for various projects, and each time I marvel at the colors and the composition. Since it has a thick border and the rest is a more subtle background vine, it works perfectly for a lined bag.
Small arm bag to hold fiber for drop spindle spinning
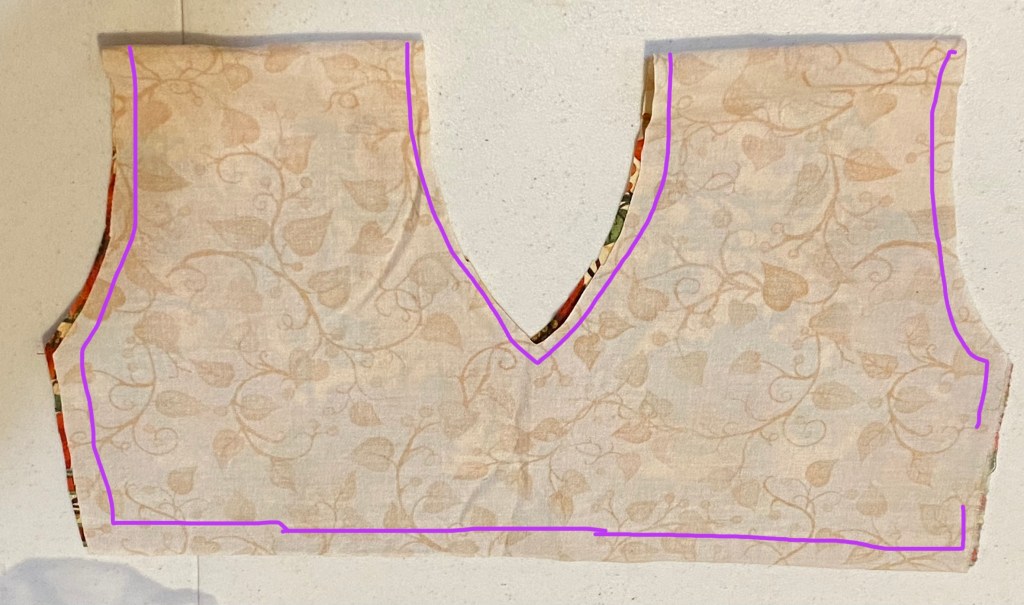
I started by folding my fabric to the height I wanted for the bag plus seam allowance (about 11”). With the folded fabric cut for height, I then cut the width double at 17” (to avoid one seam). I folded this piece in half and cut shallow arcs from about two thirds down, to the top, which makes a wide strap to hang on my forearm. I opened the side fold, then with right sides together sewed along the cut edges, leaving a space in one side to turn it right side out.
Purple lines indicate sewing path, with gap so the fabric can be turned right side out
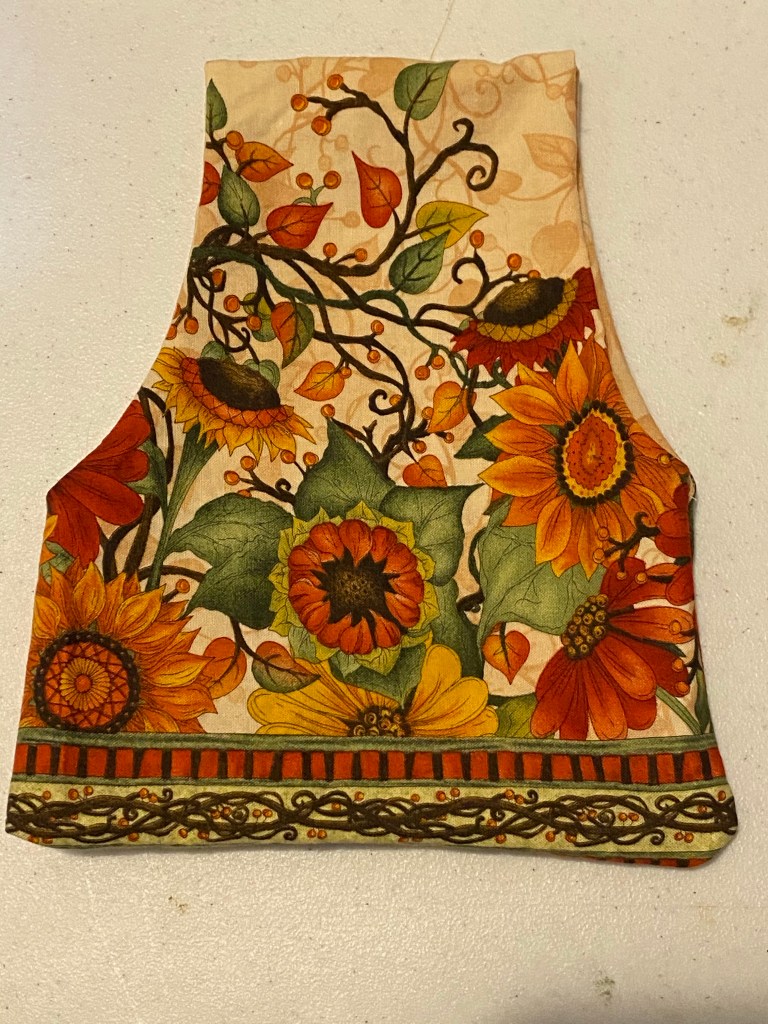
I clipped corners and turned the piece right side out, then with the patterned sides together, sewed the bottom three sides and the top, leaving the arcs open. Another inside out and the bag is serviceable! A nice touch is to over sew around the arcs to keep the seam neat.
Serviceable small arm bagA larger version of the arm bag to hold more fiber! Shown in use.
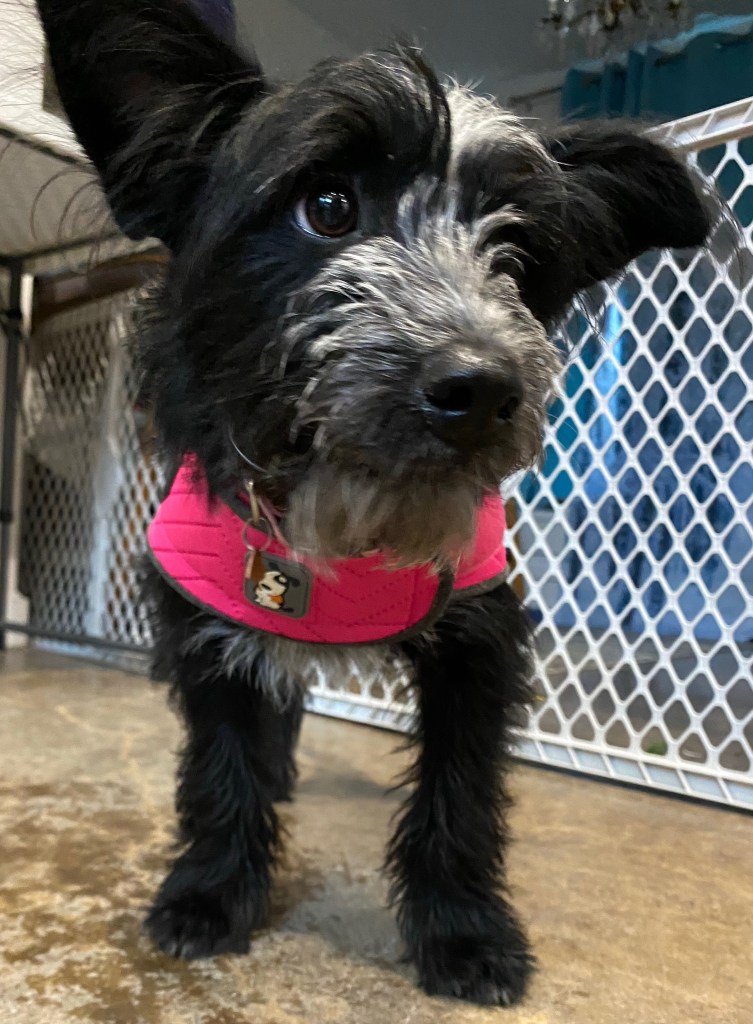
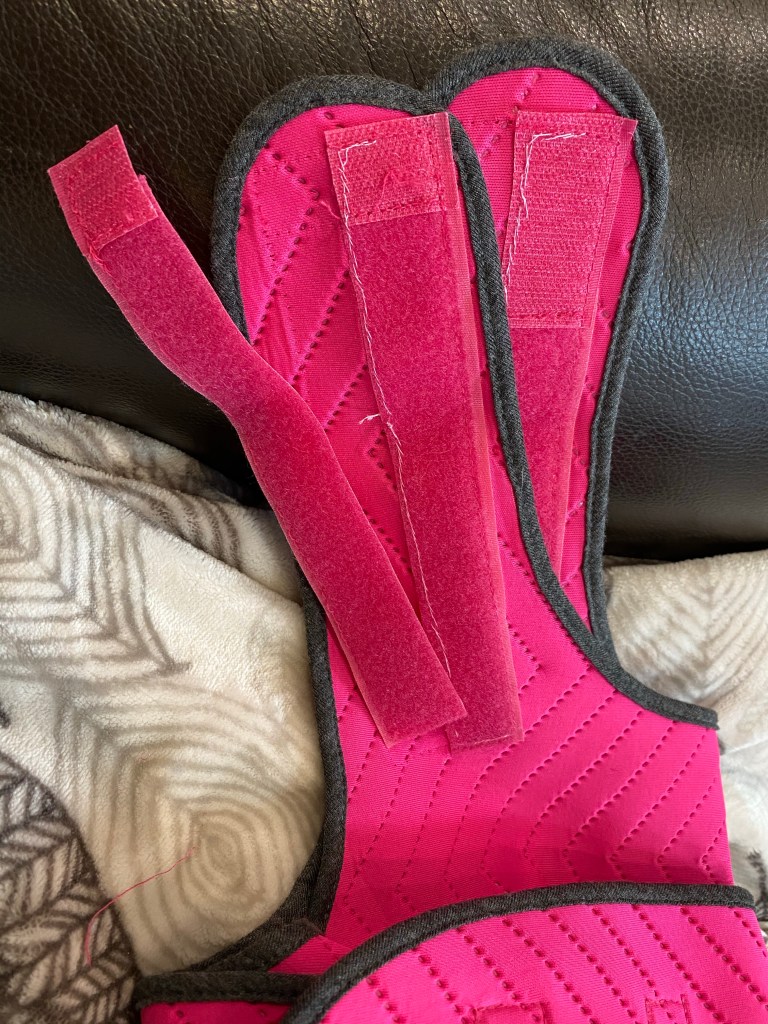
Little Missy’s isn’t quite comfortable in her Thunder shirt. The front strap has a very wide band of hook and loop that is quite stiff and when she is wearing it, she doesn’t like to lay down. So I unpicked half the stitches and cut the tape in half, then stitched it back together. I hand stitched it because it was a good excuse to sit and watch a show. First fitting after the sewing adjustment went well. We are going super slow on reintroducing car rides and other scary things. I’m taking an online course on dog reactivity, which has so much information that would have been good to know when we first had her, but at least I am learning now.
Missy in her Thunder shirt, pre-adjustment, showing how wide the chest strap is on herHook and loop tape reduced by half to increase comfort