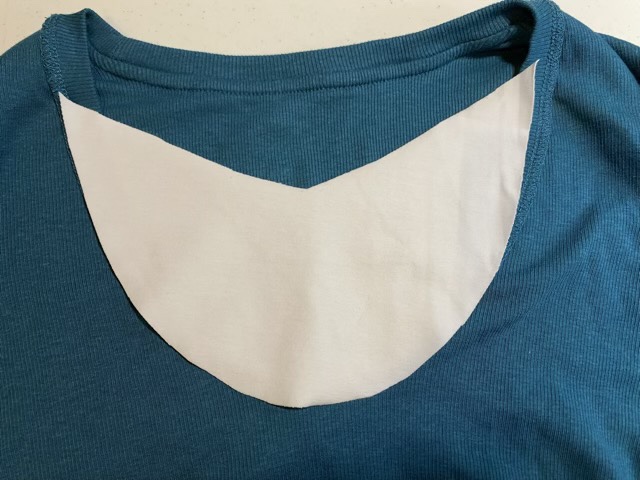
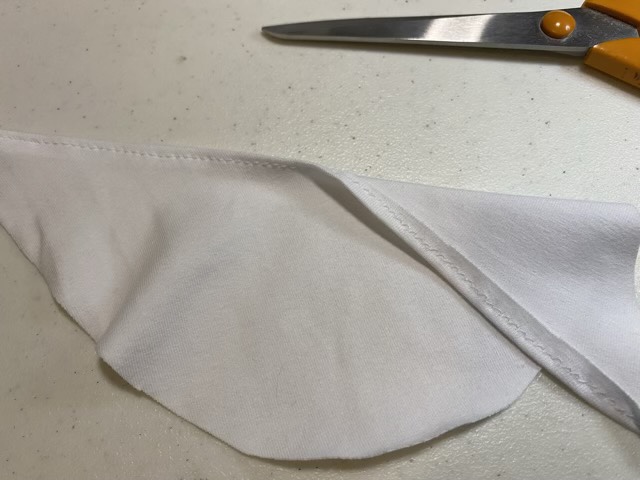
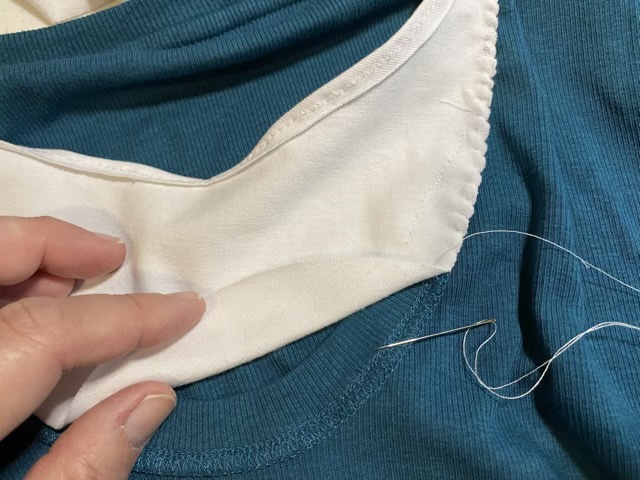
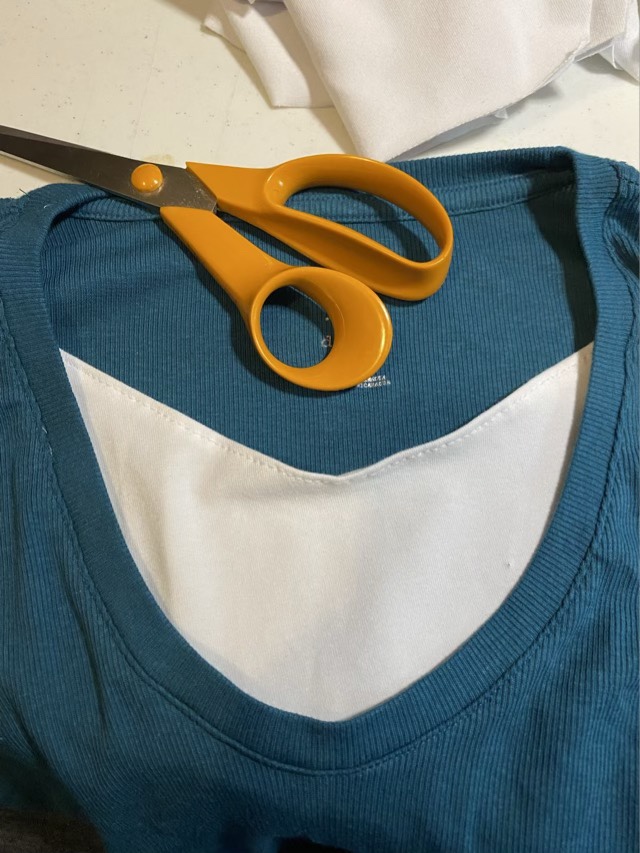
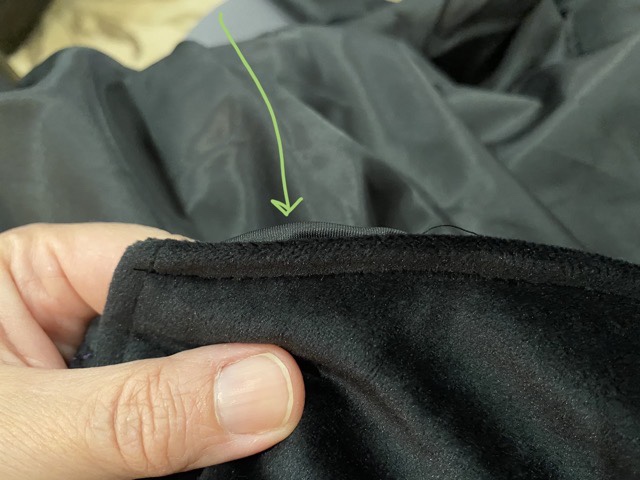
I picked up a shirt when shopping with the kids and the neckline turned out to be way too low. So I added a modesty panel using cotton knit material. I did attempt to do the whole alteration on my machine, but I had a terrible time feeding the thin knit material consistently under the sewing foot. Frustrated, I turned back to hand stitching; the inside of the neckline had a convenient seam that made making an invisible whip stitch easy. I think the next time around I will hand stitch a decorative edge on the top as well, leaving the machine work for woven cotton and inside seams. The finished product has the look of layers, without the bulk.
Crescent of material cut to cover the low neck line of a knit shirtMachine stitched top edgeHand stitching panel to inside of shirt with a whip stitchInstalled modesty panel
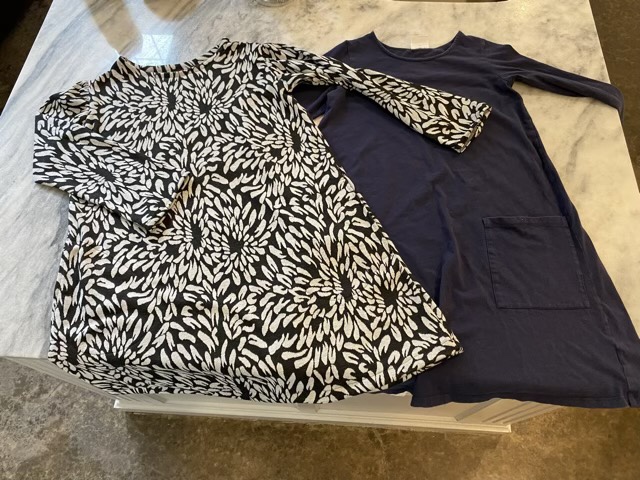
I wanted to try my hand at making a dress for my youngest. I took one of her dresses that she likes and fits well and used it as a pattern to cut the new fabric. I did not cut or alter the old dress, just laid it out on the fabric and gave a generous half-inch seam allowance when I cut the pieces.
Using an existing dress as a pattern
My youngest loves pockets, so the dress had to have pockets, but I didn’t think front patch pockets like the original dress fit the fabric of the new dress, so I did a single layer seam pocket. The pocket is sewn to the front of the dress, but because of the big bold pattern, they are almost undetectable.
Pattern pieces cut for the new dress, sleeves, pockets, front and back
Dusting off my clothing sewing memory, I sewed the pieces together, top of shoulders first, then I finished the neckline (while it was easy to access) with a strip of the matching fabric. I put gathering stitches across the top of the sleeve to ease it into place, and sewed the shoulder seam next. I pinned the side seam and placed the pockets. I then sewed the pocket seam in back, and turned over and sewed a half inch for the pocket opening in front. I sewed the side seam down to the pocket and then from the bottom of the pocket to the hem. At that point I pinned the pocket to the front and sewed it in place, reinforcing the stitching at the top and bottom. I hemmed the sleeves and (…ahem) hem, the gave the dress a quick wash and dry.
New dress (left) with old dress (right)
The dress came out better than I expected and fit my youngest well. She appreciated the pockets.
I did the pocket the way I remembered, by using my hand as a pattern, which makes a nice looking pocket perfect for hands. I think next time I will make one that has a curve on top, but drops down along the seam to make the pocket more functional for things in addition to hands. I would also dip the front of the neckline a little more than I did, next time. And there will be a next time. It is hard to find appropriate clothing in the stores that fits. Although I might change my tune after the first trip to the fabric store. (This dress was made from fabric from my stash.)
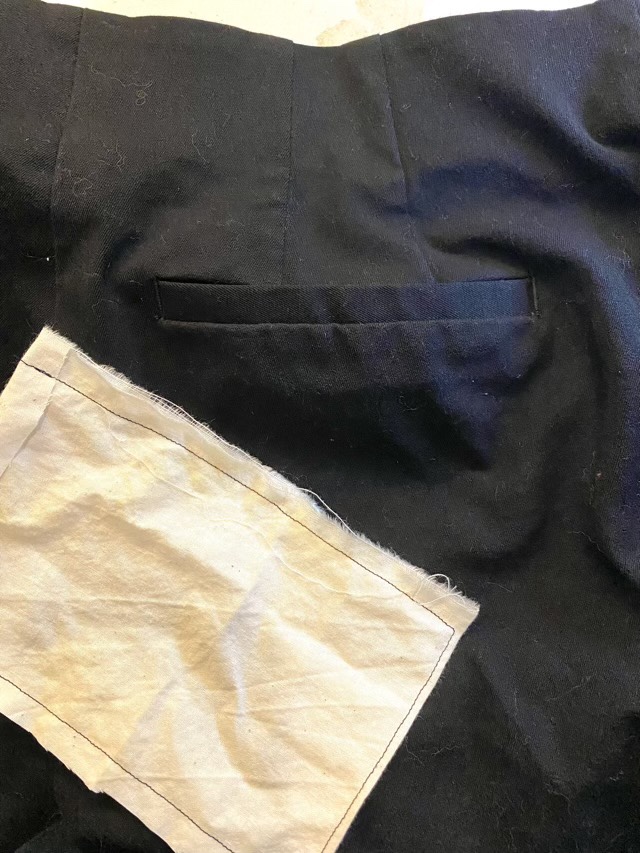
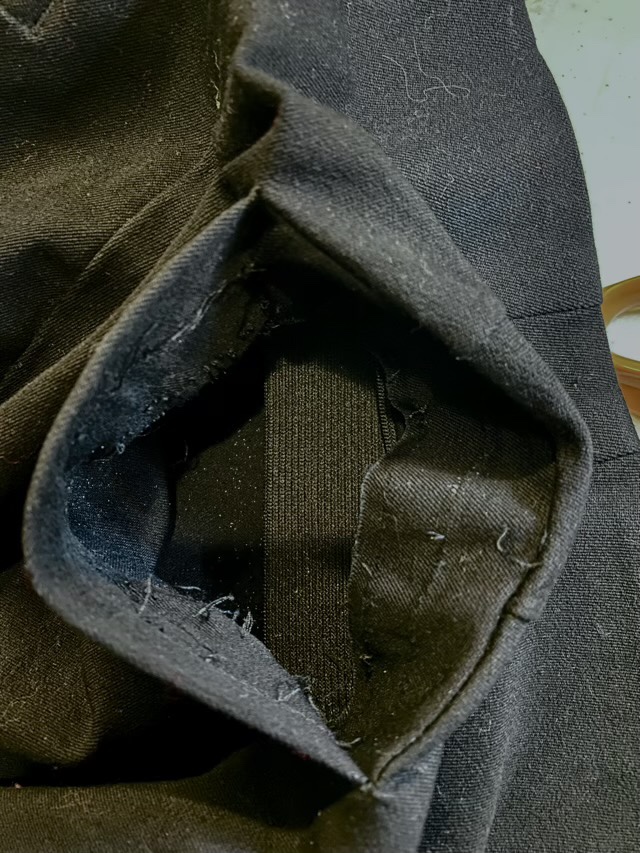
In the realm of clothing, there is nothing more abhorrent than a fake pocket. All the hard work has been done, with the fiddly finish and neat corners, why couldn’t the designer just add a real pocket? And not one of those shallow useless pockets, but proper pockets. I’ve heard the line “it changes the line of the garment,” well, then they are more concerned with themselves than with their customer. Ok, rant over. Let’s fix the issue.
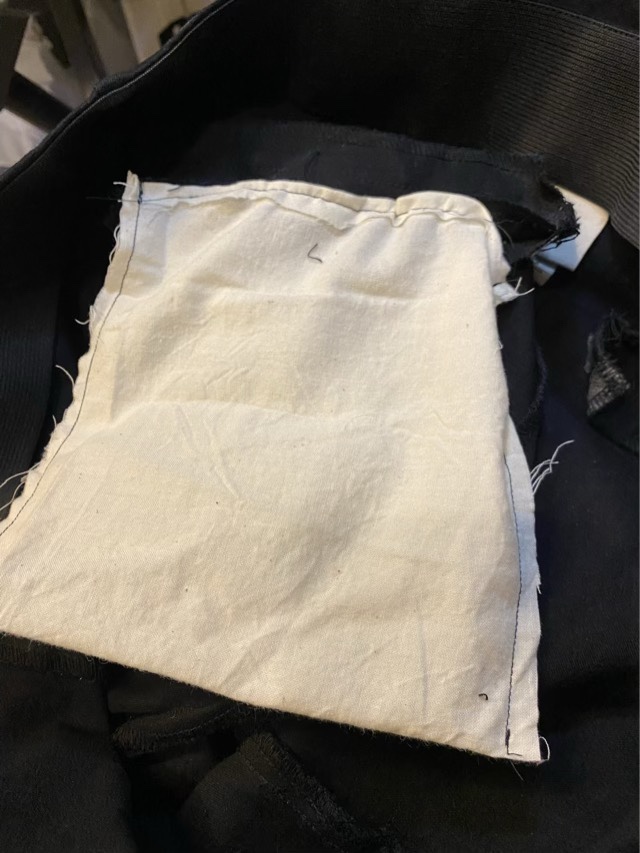
Fake pocket in women’s pants, with a simple cotton pocket ready to sew inClip the seam keeping the fake pocket closed, so it opensOn the wrong side, sew in the pocket over the pocket opening. You can fold in the raw pocket edges, and fold the pocket top out if you want to get fiddly. Sew along the front and back of the pocket opening, don’t worry if there are small gaps at the end of the seams, they will be at the top of the pocket.Pocket insert installed. Crises averted. Wrongs righted. Balance restored.
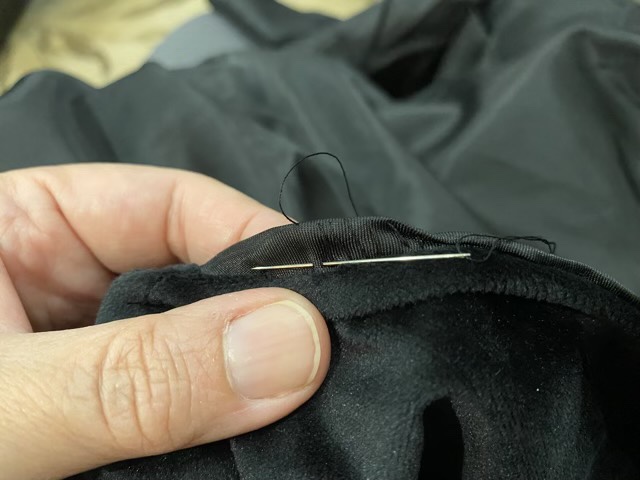
Inevitably when I sew a lining, a section of the lining slips and shows past the edge. I use pins and go slowly, but lining material tends to be slippery, especially when sewing satiny fabric to velvet.
Lining material showing past a edge
At this point there are several choices: hope no one notices (I know it is there!!), rip out the seam and try again (horror), or hand sew it. I have found a rather useful stitch to tuck in the offending blob of material.
Sewing a folding edge
To fold the lining in and keep it there, it works well to alternate small stitches near the original seam, then at the top of the original fold. Keep these stitches loose for four or five repeats, then gently pull the stitches tight. The fabric folds down and is secured!
Lining tucked and tackedNo lining showing on the edge of the velvet
This is part of an adjustment on a purchased velvet tail coat. It was faster and more economical to get a pre-made garment, then make alterations, than to make the jacket from purchased material and a pattern. Although I would have had the same issue either way; linings and velvet always gives me fits.
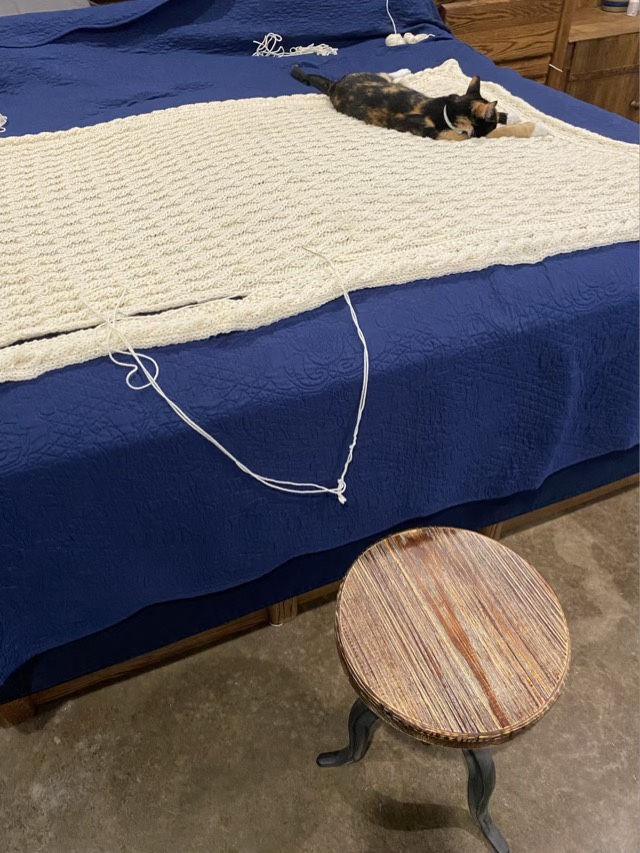
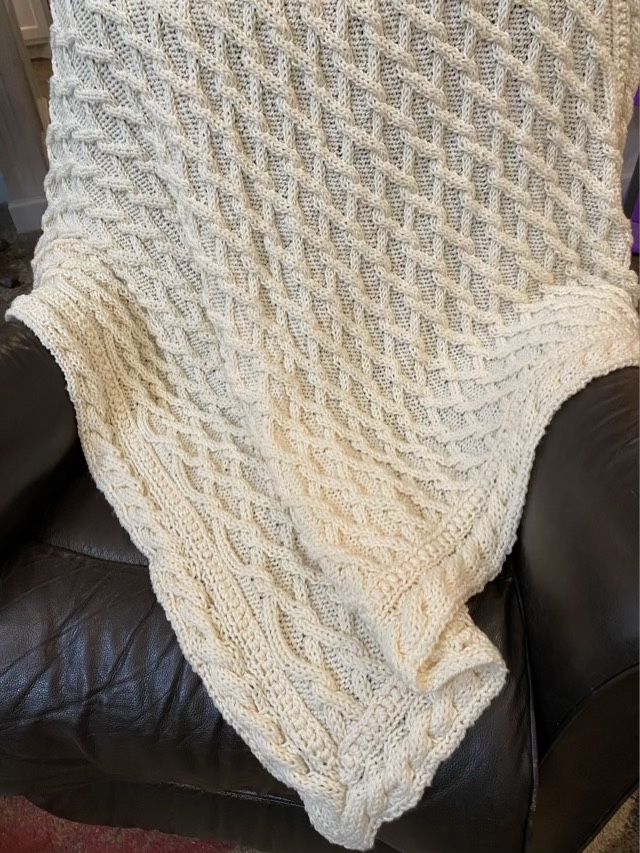
Time to sew the borders on Grandma’s blanket! I laid the center field and borders out on the king bed, and set up a stool so I could sit and sew. As an extra precaution, I used quilting pins to secure the borders to the middle at regular intervals.
Blanket laid out on the bed for sewing on borders
I used a mattress stitch, but with the border over lapping the center, by picking up stitches under the border edge and from the top of the center field. This hid the curled edge of the middle, but showed off the neat edge of the border.
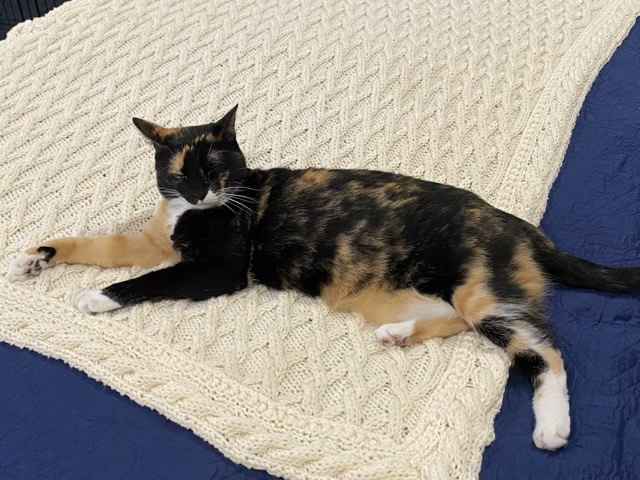
Izzy demanding attention
Izzy tried to get her tail into the stitching, but luckily I am adept at sewing around cats. She has been waiting for months to lay on this blanket. She made the most of it.
Borders sewn, Izzy content
I did wash the blanket and dried it in the dryer (deep breath, it is acrylic yarn, it can take it), to get most of the cat hair off.