Here is a trip in the Wayback machine to 1988. My Mom was into quilling and we were decorating eggs. My Dad recently sent me photos of one of the eggs we worked on together.
Photo description: white egg with yellow and orange shades of quilling paper and a double brass ring basePhoto description: back of the same egg with different quilling patterns
This is a 37-year-old paper, glue, and egg project that has lived in a cupboard and been moved around the country a few times. I don’t think the colors faded or pieces fell off. Quilling is great for developing fine motor control and patience. (The egg was blown out before it was decorated.)
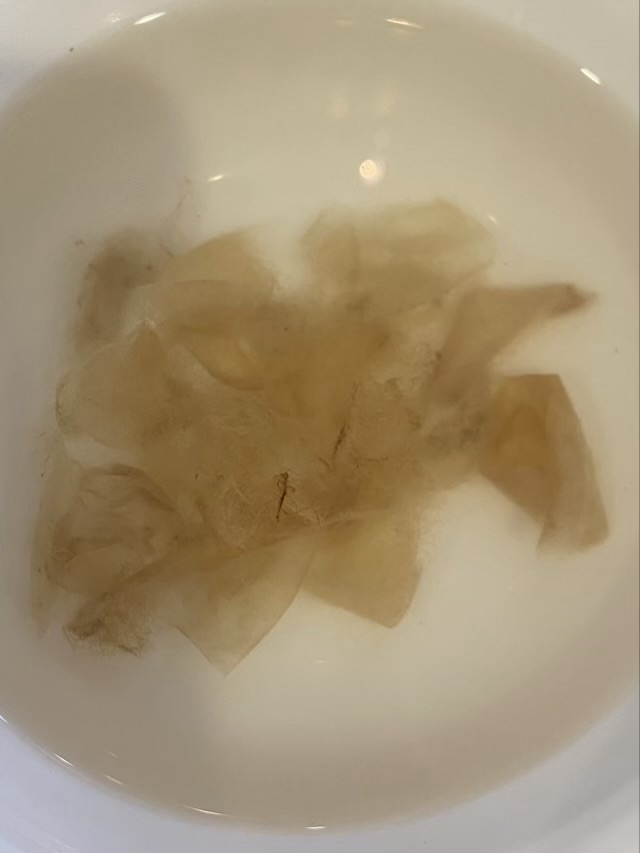
I found a Polyphemus Moth cocoon! These giant silk moths are native to Texas and form a beige colored oblong cocoon made of silk. It was on the ground outside my house, one end open where the adult moth escaped.
I decided to see what I could do with the cocoon. I started attempting to pull the silk fibers away from the cocoon, but it was difficult, so I soaked it in water. Then I realized the remains of the pupa was still inside the cocoon, so I cut the cocoon open to get it out. With the side split, I was able to tear sheets off the cocoon with some success. I left the cocoon to soak in water and over several days was able to pick more of the cocoon apart. I picked away the soiled bits, and gave it a wash with dishwasher soap.
Photo description: cocoon layers soaking in water
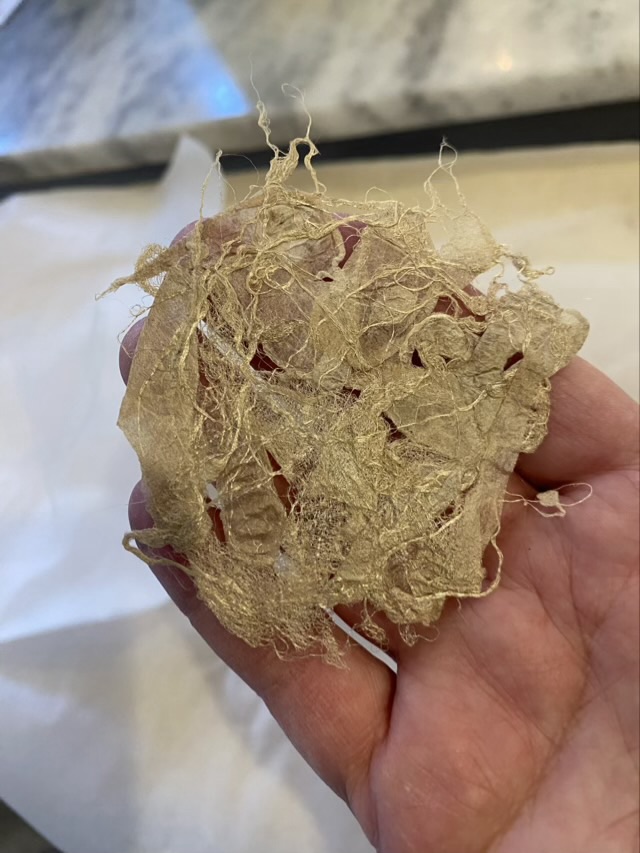
During the soaking, Camaj fibers released an instructional PDF on making silk paper. Hm. I ordered the PDF and read the whole thing, and using their method, made a single small piece of silk paper from the cocoon.
The pictures really don’t do the paper justice. It is soft to the touch and has a pretty luster. I have no idea what I’m going to do with it, but it was a satisfying project.
I designed a snowflake cutout to use with my laser cutter for my holiday cards. Laser cuts can be much more precise than electric cutters like Cricut because there is not a dragging knife blade, however, there is a potential for burn. What I found interesting is that colored card stock had less burn than white card stock at the same settings. Hm. A product of reflection, maybe? Something in the way the paper is made?
Photo description: delicate snowflakes cut from card stock, the white showing burnt edges
I accidentally stacked two white sheets in the cutter at one point, which was disastrous with the burn marks, especially on the bottom page.
Photo description: burned cutouts as a result of cutting two pieces of paper, same settings as the picture above
Now I can see an artful application of this smoke effect, but not on snowflakes.
To design the snowflakes, I did traditional paper cutouts, took photos, converted the photos to scalable vector graphics, them combined them in Adobe Illustrator.
The cards are printed and cut, but are still on the craft table and not in the mail. Why? I want to write on the back and that desire became a stumbling block. I had to choose to send them out before the New Year, or send them with writing, whenever I could find the words to write. I obviously chose to send late.
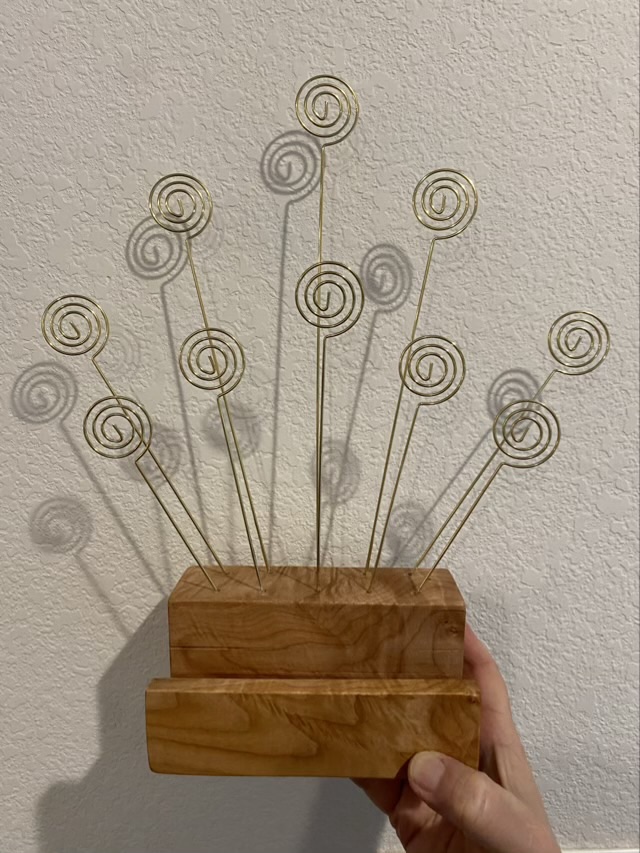
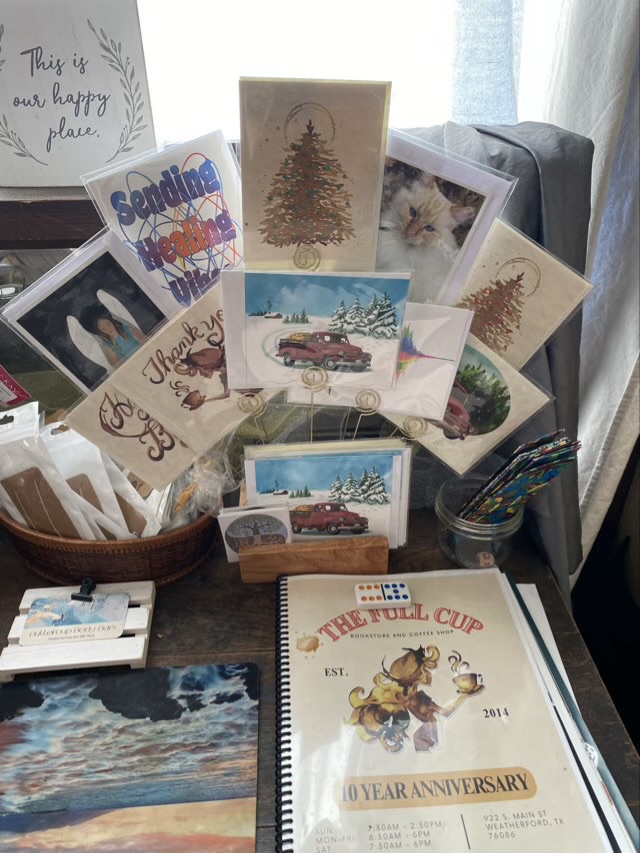
I have had it in my head for a while to make a new card display for the greeting cards I have for sale at my favorite coffee shop. I wanted something artsy that would show off the cards, but also have a spot for a stack of cards and business cards. I decided the take a block of flame maple from my stash and combine it with some spiral wire card holders.
Photo description: hand made card holder with flame maple base with storage slot carved in and embedded wire spirals for also holding cards
I used a two part epoxy to secure the wires in the holes drilled into the wood, then finished the block with Howard Feed-n-Wax. The feed and wax is my kind of product: it applies easily and dries within 24 hours or less, plus it smells nice.
Photo description: card holder with cards for sale at The Full Cup in Weatherford Texas
The bouquet style display brings the cards up off the table and creates an eye catching arrangement.
I saw another crafter post in my Wild Basketry group about making twined bracelets and wearing them as a durability test. Yes, please, and thank you Marijke!
Twining has become my go-to fidget when I’m waiting or wandering. The brown bracelet on my wrist is daylily leaf gathered from the ground where they were dead and dried, but still pliable. The green bracelet is dried and rehydrated leaf strips from corn that I gathered on a countryside road. The white bracelet was twined out of the paper packaging on restaurant straws while waiting for lunch.
Photo description: my wrist with three twined bracelets, daylily, corn leaf, and paper packaging
To connect the bracelet, I untwist the start, which is a loop, and slide it over the end knot. The twist in the twine keeps the loop locked behind the knot. I have been wearing the bracelets at all times, so unsurprisingly the paper bracelet did not survive the shower test. The paper soaked up the water and separated at the weakest point: the untwisted loop.
Photo description: twined paper bracelet broken at the connecting loop
The daylily leaves have shrunk some, leaving gaps in the twine. Since I gathered them when they weren’t completely dry, the separation is expected. When crafting with plant fiber, most crafters recommend letting the material dry completely, then rewet, but not soak, the material to make it pliable. This method reduces shrinkage in the finished product.
The corn leaf was completely dry, and I did gently rehydrate by wrapping it in a wet towel. The twine has held together without gaps.