Here is a throwback from February 2005. I carved a Celtic knot into a leather belt and dyed and finished the leather. I really enjoy leather carving, nearly as much as pyrography. The photo isn’t spectacular, but at least I moved away from the black velvet backdrop.
Photo description: black leather belt with a Celtic knot carved along the length, sitting on a sandy colored composite counter
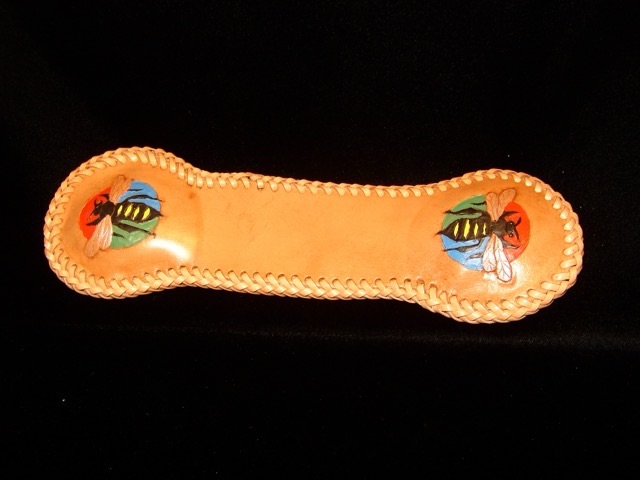
Today we are going back to December of 2004 and a leather book weight I made and decorated with painted bees. It seemed appropriate to share this in nod to my bee visitor this week.
Photo description: tooled and painted leather book weight with painted bees on red, blue, and green circles on each end, the sides have been sewn with leather lace with a braided edge. Black velvet background (which was totally a thing back then).
The ends of the book weight are filled with small bags of sand to give it enough heft to hold a book open. The back side is suede to be gentle on the pages and have a bit of grip. I’m still quite pleased with the stitches around the outside, I love a good decorative braid stitch. I do have to admit that I have to look up how to make the braid every time.
My current endeavors are not my first foray into knitting socks, as proven here in a picture from November of 2003. I was knitting with thicker wool, and sewed tooled leather to the soles to make a slipper. Tooling leather isn’t the ideal slipper sole, it is thick and stiff. Now I would use suede or a finished supple leather, something to reduce the chance of slipping while walking more than the simple tooling I tried here. I do like how neat my stitches are, though, and worsted weight yarn knits up much quicker than sock weight yarn!
Photo description: cream colored wool slipper socks with a lightly tooled leather sole whipped stitched with leather lacing.
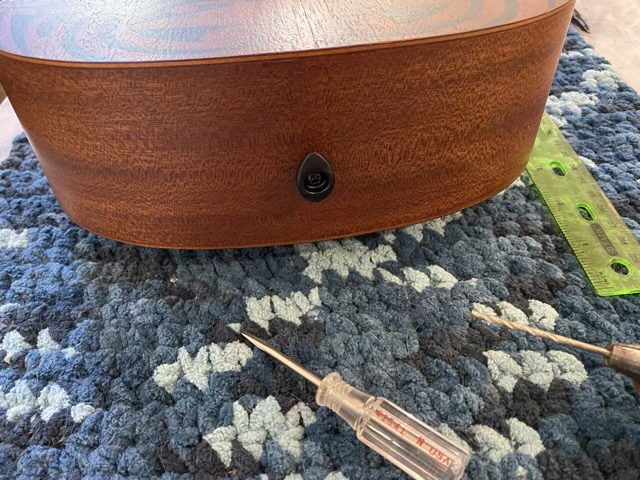
My ukulele did not come with strap buttons, so I found some elliptical ones from D’Addario and drilled pilot holes at the base (there is a block of wood inside to support the screw), and the back of the neck.
Photo description: Elliptical strap button installed on the bottom of a tenor ukulelePhoto description: Elliptical strap button installed on the base of the neck of a tenor ukulele
I trimmed the ends of my woven band (see yesterday’s post), and treated them with white glue to make them stable.
Photo description: Both ends of a tablet woven strap treated with white glue (shown on a post-it note) using a brush (shown).
I found two metal slide buckles at the craft store and used one as intended, sewing on end of the strap to the middle bar and threading the other end over it. The other buckle I modified by taking out the middle bar and using as a ring in the fold of the strap. In my leather stash I had an old black belt. The leather was thick but flexible, and great for making the end of my straps. I folded, cut and carved tear drop shaped holes in the belt for the ends of the strap. One end I sewed on using waxed thread. The other I riveted together.
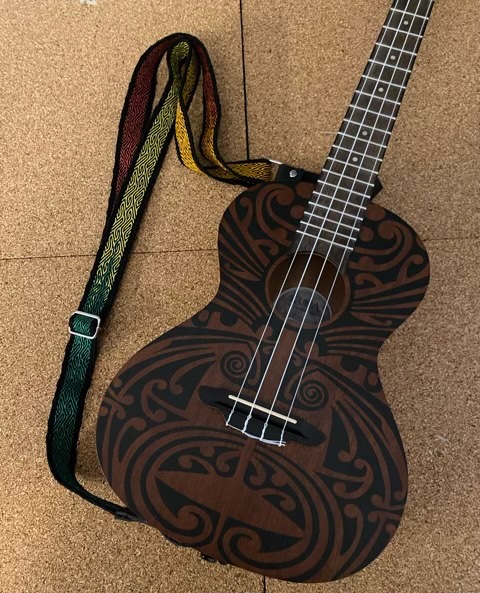
Photo description: Wood clamp holding the leather end and the woven end together so I could sew using the holes I punched into the leather.Photo description: Finished strap with leather ends and metal slidesPhoto description: Strap installed on the tenor ukulele.
I’m rather excited about having my ukulele on a strap since it makes it easier to hold at a good position for both my hands. I’m off to practice!
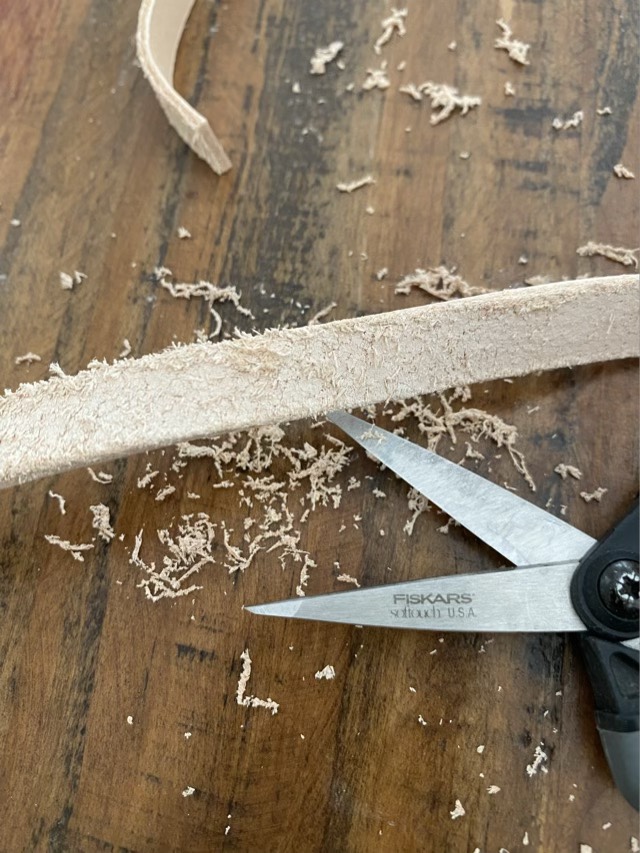
I recently finished a commissioned order for leather wrap bracelets with a saying. I used 1/2” strips of tooling leather, which were a little fuzzier on the back side than I’m used to, so I trimmed the “fuzz” as a first step.
Trimming off excess leather on the back of a tooling strip with scissors
Next I wet and smoothed the edges of each strip round with a slicker. I found a wooden slicker tool awhile back, but am not impressed with it in the raw state. I think I will give it a good sanding and glossy finish before using it again.
Wooden slicker tool and three wet strips of leather
I have multiple options on making the saying on the leather: I have stamps, leather tools, and my pyrography kit. I haven’t done pyrography on leather, so really wanted to see how it might work. I took a scrap piece of tooling leather and did some experiments.
Scrap leather with “Find” written with pyrography
I found that the heat of the pyrography pen, when at about 5 and a half, would burn into the leather and make a mark like stamping, but also darkened the leather. This was what I was hoping for! I could do the sentence free hand. I also found that it was better to dye the leather first, then burn it, then seal it.
Laying out the design on a paper strip “Find Joy and Meaning where you can, and file the rest appropriately.”Dyed and burned bracelets with buttons unassembled, the shorter one was my test case
Once the pyrography was done, I cut in the button hole and sealed the bracelets. When the sealant was dry, I punched holes for the button and used waxed linen to sew on the button. The leather had become stiff, so some bending and moving freed up the form some.
Finished bracelets sitting on the windowsil
I do really enjoy pyrography, so this was a fun project and discovery!