I found this wicked looking thorn laying in a parking lot. Most likely it stuck to a tire and fell off in route, and I’d like to say I picked it up so no one impaled their foot, but the was a secondary benefit. Really I wanted to see what I could make with it.
Photo description: approximately 4” thorn cluster with opposing spikes 1-2” long held lightly in my hand
I used my pocket knife to cut the side thorns off. The tips are wickedly sharp and hard, so I wanted to try to make a needle. I approached it as I would for carving solid wood. The center of the spikes are soft though, so the needle hole didn’t have enough support when I whittled both sides down.
Photo description: single thorn with the end carved into a needle eye, which broke, pocket knife on the side of the picture
If I were to make the attempt again, I would put the needle hole in the outer bark, and not reduce the integrity of the thorn by cutting the bark away.
Everything is covered in pollen in Texas in the Spring. A thick nose-watering blanket of yellow dust also covered my front bench, which used to be black. Something struggled through that pollen and left strange marks in the film.
Photo description: right side of a slated bench with moth or butterfly-like outlines in the accumulated pollenPhoto description: left side of a slated bench with possible claw marks in the accumulated pollen
My current hypothesis is that an insect from the Lepidoptera family landed on the right side of the bench, crawled, wings flapping through the pollen, and something mammalian with non-retractable claws caught and munched it on the left side of the bench. Reducing it to the simplest and most likely candidates based on population density in our area perhaps it was a large moth (polyphemus maybe?) eaten by an opossum.
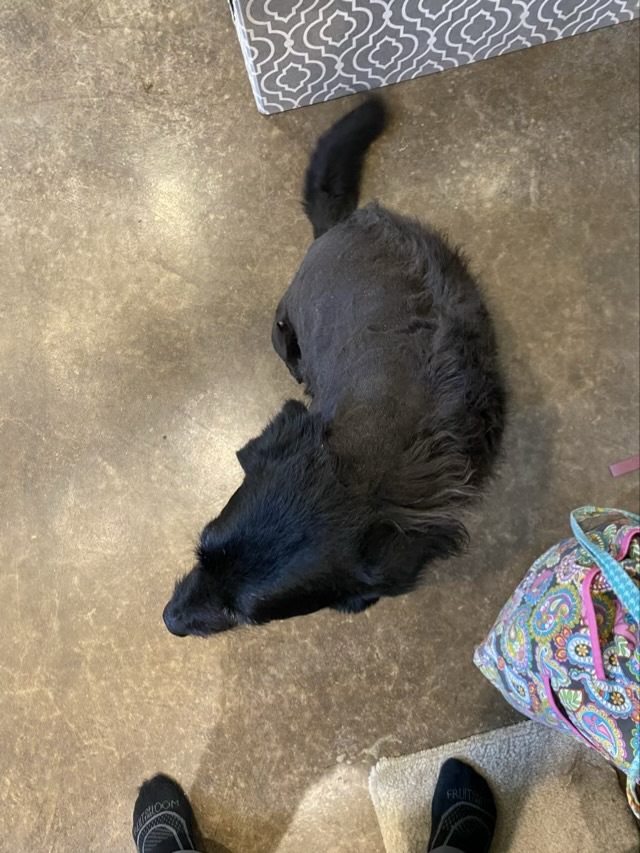
Texas is heating up and Griffin the dog is starting to pant in his winter coat. Time for a shave. I do it myself because he is not a show dog and the clippers pay for themselves after only a few trims. Since it is hot here I take his fur down quite short. He is usually very laid back, he knows how much better he’ll feel when the heavy layer of hair is gone. This time, though, halfway through, he had had enough.
Photo description: black dog half shaved as seen from above
I gave him a break, cleaned up three whole dust pan loads of fur, let the clippers cool, and later I coaxed him back and finished the job. I missed a few spots, and there are uneven areas, but he is a much happier dog.
No, I didn’t save the fur to spin. His hair is wiry, short, and stiff, which does not produce a nice yarn.
I don’t like the U shaped travel pillows. I’ve tried several, and the bulk pressing against the back of my neck (really anything around my neck) drives me nuts. So I made a different kind of pillow. It is ideal for reclining chairs because it has two side pillows so my neck doesn’t twist too far, and no stuffing behind my head. The best part is that I made it with one fat quarter, some thread, and poly fil stuffing.
Photo description: fat quarter (18”x21”) of quilting fabric with a pineapple motif
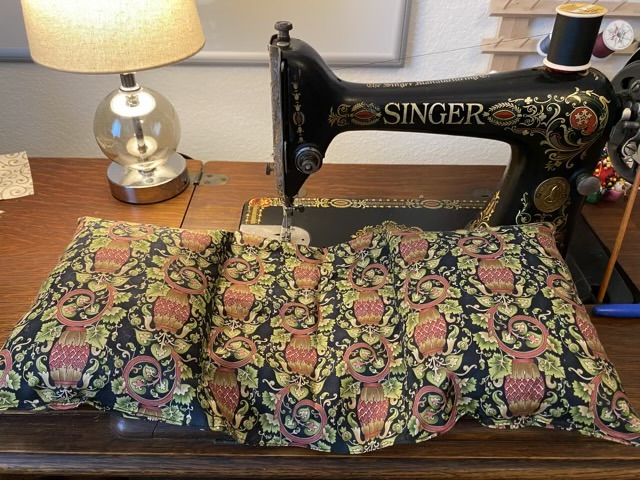
To make the pillow, fold a fat quarter in half lengthwise, right sides together (9” x 21”, doubled). Sew along the edges, leaving two 4” gaps on the outside thirds of the long edge (for stuffing later).
Photo description: fat quarter folded in half and sewn with two gaps on the far edge, on a model 66 treadle sewing machine
Clip the corners and turn the pillow right side out. Fold the case in thirds, mark the line, then sew seams along the lines. This divides the pillow into three parts.
Photo description: pillow case divided into thirds and being sewn using the fold as a guide
Fill the outside sections with stuffing, then sew the gaps closed. I usually do this by hand, but the foot on my model 66 has such a nice tiny toe, I thought I would try on the treadle sewing machine. It worked well.
Photo description: sewing the pillow gap closed using a treadle machine fitted with a standard footPhoto description: finished travel pillow laying on the work surface of a 1916 Singer treadle sewing machine
It amuses me that the fabric coordinates with the “red eye” decals on the sewing machine. I can report that the pillow works great, especially for naps.
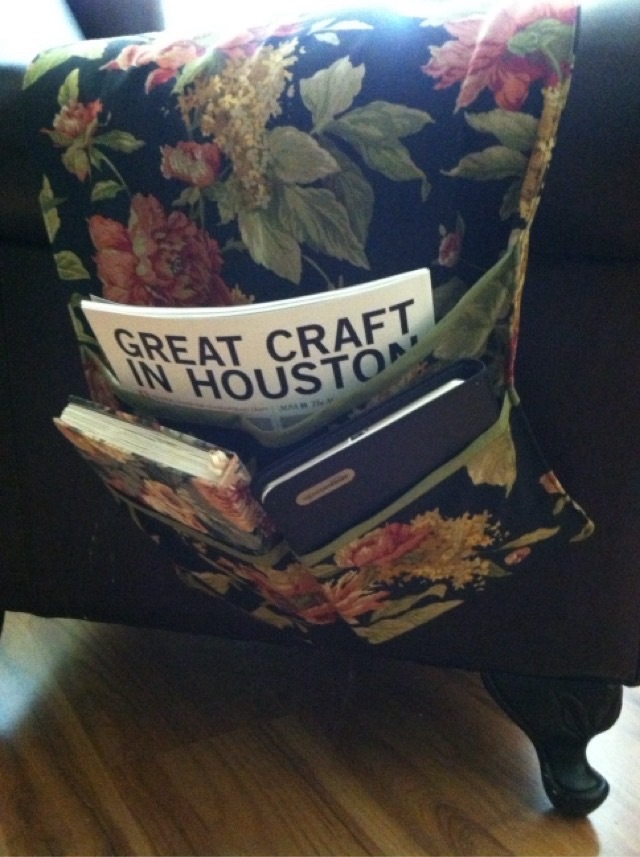
In May of 2013 I made this arm chair organizer that has pockets on the side for magazines and notebooks. I’m not sure why I didn’t sew on something to hold it down on the seat cushion, instead relying on butt power, but I am pleased how nicely I trimmed out the pockets using bias tape.
Photo description: floral fabric with a black background sewn with three overlapping pockets trimmed in green and filled with booksPhoto description: other side of the organizer with different sized pockets to hold different books, electronics, and magazinesPhoto description: over exposed photo of the chair from the front and the organizer stretched across the arms of the chair, no butt anchor
If I were to remake this project, I would add fabric to tuck down on the sides of the cushion, or maybe even go all the way around or under the cushion. Hm. Maybe I didn’t have enough fabric so had to rely on butt power. It would have made more sense to run the center section under the cushion.