Boot of shame

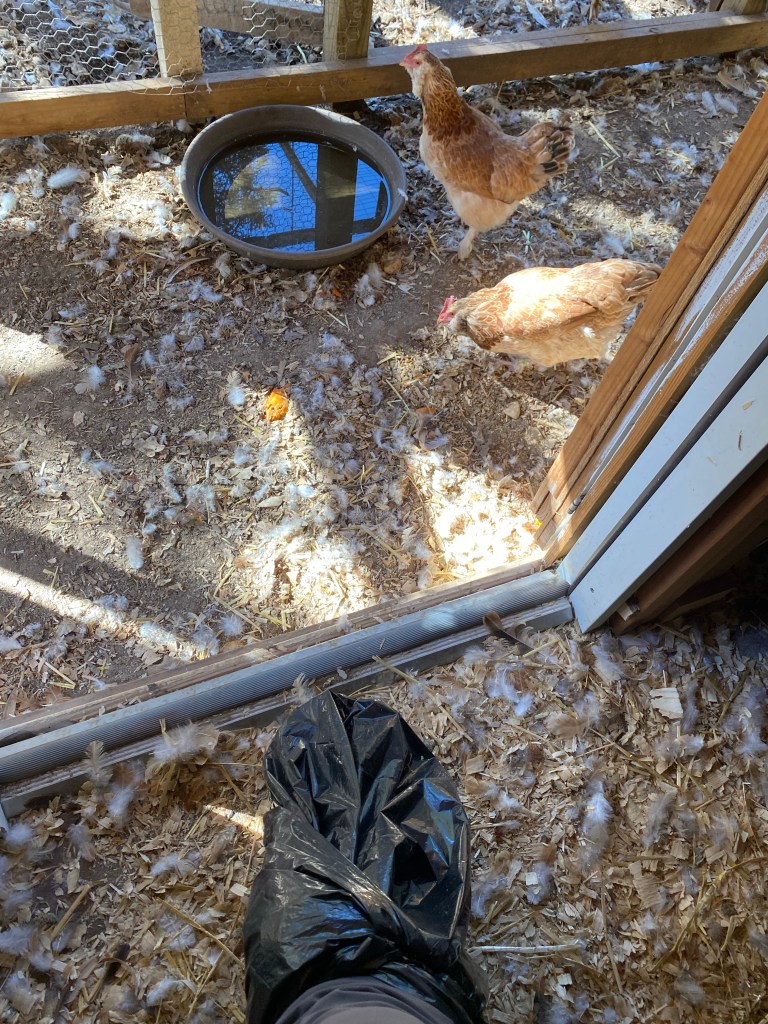
So I feel the “boot”, which is placed on humans to help healing for foot issues, is akin to the Elizabethan collar or “cone of shame” for dogs. Something done for our own good, but which is dreadfully embarrassing to wear. Yes, I have to wear a boot. I injured my Achilles tendon, but continued to walk on it for two months, so really it is just desserts. Doesn’t mean I have to like it. And there are things that still must be done. Like going out to tend chickens. For that, I wrapped the boot in a garbage bag to avoid getting muck on it. The hens were not impressed and are quite wary of my giant black limb.

Boot wrapped in a garbage bag, hens keeping clear

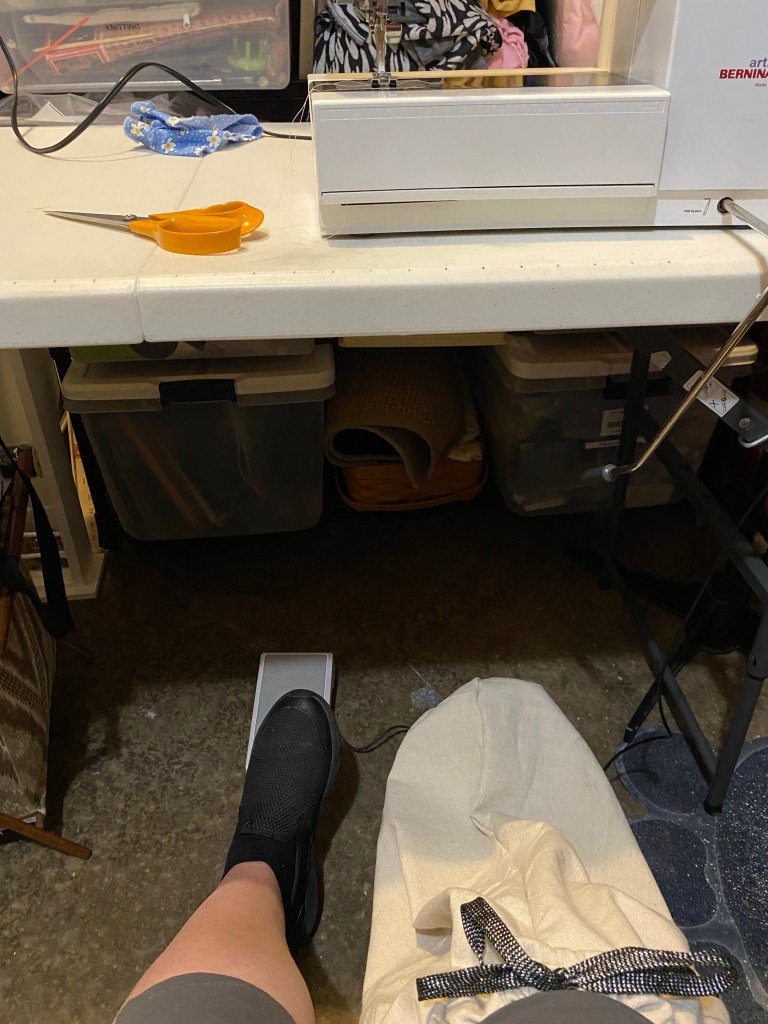
I also just started back into lathe work. A boot full of wood shavings is a terrible thing; the flakes stick to the neoprene fabric like Velcro and once inside are terribly itchy. So I sewed a large fabric bag out of an old drop cloth and added a pull string closure. Before making saw dust, I pull this over my boot to protect it. Running the sewing machine with my left foot was an interesting experience, by the way (I do take the boot off to drive, doc said it was OK, so that is something).

Newly sewn drop cloth boot cover

The worst bit is no walks. Which means I can’t spin yarn and walk. For a month. <twitch> Doc says I can bicycle or use an elliptical machine. OK. Now to figure out how to spin and do that. Hm.

Straps

My youngest wants to be Zelda from Breath of the Wild for Halloween, so we ordered her a costume. Well, while the dress is well made (especially for a mass-produced costume), it is a sleeveless dress. It did come with tiny clear straps that frankly don’t do much.

Costume base dress as shipped

So I ordered some gold chiffon and hand-sewed on straps/shoulder coverings not only to help the dress stay on, but to meet dress code requirements, should she decide to attend a school event. As long as I was at it, I also hemmed up the skirts since the dress was apparently made for someone 5’9”, which is unusual for a Hylian.

Dress with chiffon added at the shoulders and displayed with accessories

Frame to tea tray

Should you have need of a tea tray, and also have a nice thick wooden frame laying about, a couple drawer pulls, and some fancy paper, you can make your own.

Picture frame with drawer pulls mounted on the sides

I removed the glass, and used Modge Podge to apply the beautiful paper to the back of the frame insert. I drilled holes for the handles slightly larger than the screws for the drawer pulls. (Remember to measure twice, drill once.) I did need to purchase longer screws to get through the frame because my frame is thicker than a drawer front. When picking screws, use the thread checker at the hardware store to make certain you buy the right thread size. I picked up two lengths, but if you measure the width of the frame side before you go, you can save yourself the extra purchase. (Or dig around in your random screw and nut bin.)

Tea tray made from a picture frame

I put an additional coat of Modge Podge on the top of the paper and let it dry overnight before putting it back in the frame. This is a light duty tray and does fine for a little breakfast. I originally made it as a prop for a play, but it functions well and it pretty to boot.

Craft fair

You would think I haven’t been able to go to a craft fair in years… oh wait. The high school theater group put on a craft fair and I did my part to support the theater and the craftspeople that set up their booths (and also scouted out what I might set up for next year). My favorite find? A hand-painted bakery sign! Yup. Hand-painted. Not stenciled, not cut vinyl, not printed, not laser burned. Hand-painted by someone who has been pin-striping and lettering for over 20 years. I have the utmost respect for good pin-stripe artists! The artist gave me $2 off because the hook on the back fell off, which was a solid deal. When I got it home, rather than put another sawtooth hanger in the soft wood, I took my rotary tool and a small router bit and cut a channel in the bottom of the wood block. It works perfectly with the monkey hooks I like to use in dry wall.

Channel cut in the bottom of the wood block on the back of the sign to accommodate the monkey hook (yeah, there is an extra hole in the wall. Oops.)
Prized craft fair sign, hand-painted by a professional

Music hack

We needed another modification to my youngest’s coronet case. She was carrying around her lesson book because it wouldn’t fit in the case. So we used command strips to attach a plastic pouch to the outside. Now the music stays with the instrument, but if we need to remove the pouch, the command strips should allow it to come off cleanly.

Plastic pouch attached to a coronet case with command strips