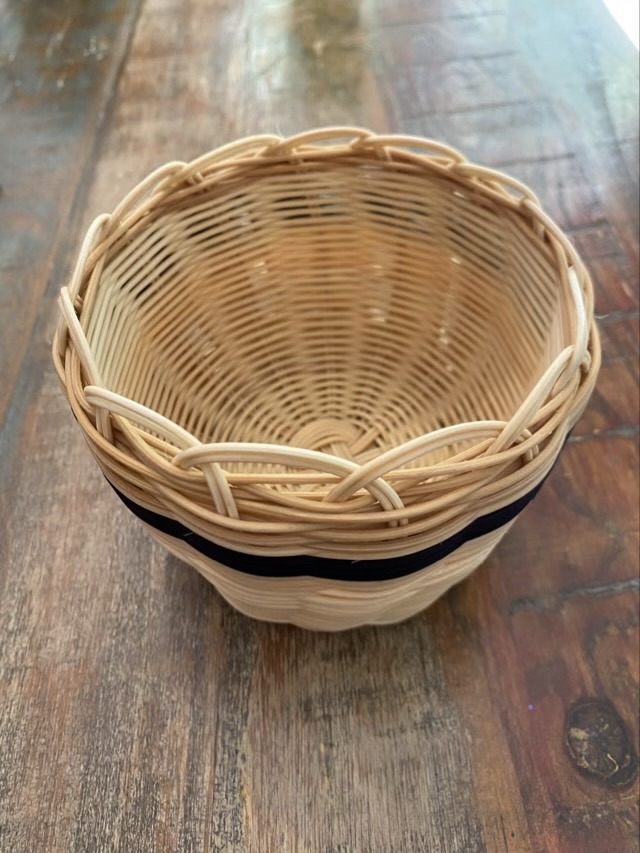
I attended a double-walled basket class taught by my wonderful weaving neighbor. I spent a morning winding #2 reed round and round, happily seeing how to turn at the top, and finish off the bottom. It is my first double walled basket, but I have ideas on how I would do different shaping. One of the other students had a beautiful curve to the sides of her basket!
Photo description: the side of a double walled basket with accent stripePhoto description: same basket viewed from a top anglePhoto description: same basket, bottom view, showing the two walls
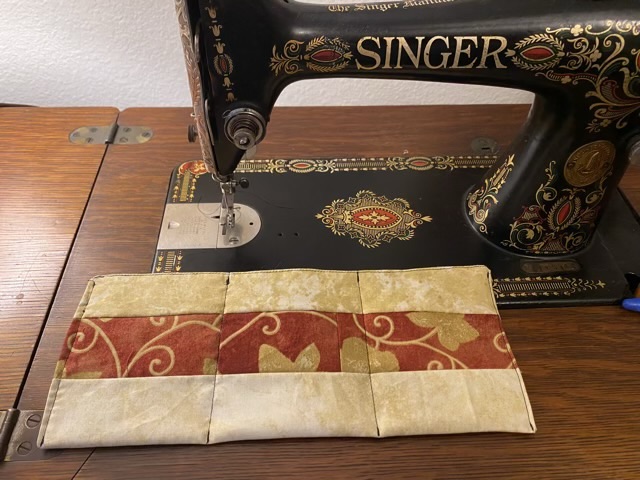
I tried a few different ways to organize my headphone and charging cords in my purse, but they all ended up in a tangled snarl. I thought what I might need is more pockets. (Pockets!) I exercise my antique Singer treadle machine by sewing together scraps of quilting fabric, making larger bits of scrap. I took two of those pieces and made a three pocket strip by sewing the right sides together, turning it right side out, folding it in half, and stitching the sides and pocket dividers.
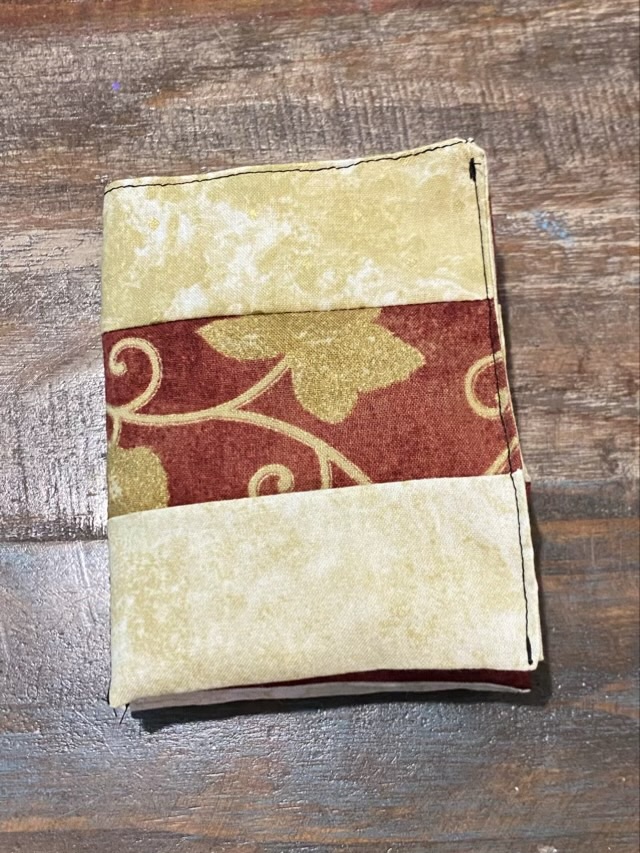
Photo description: three connected pockets sewn from scraps of quilting fabric on a model 66 Singer Sewing machinePhoto description: other side of the pockets shown with headphones, charging battery, and charging cords sticking out of the pockets.Photo description: view of the top of the filled and folded three pockets Photo description: view of the side of the three pockets when they are accordion folded into a wallet
I did not put a zipper or closure on the pockets, because folding the wallet does a good job of keeping the cords in place, and the wallet goes in my purse upright, so there is a low possibility of getting turned upside down. So far the wallet works well because I have not reached into my purse and encountered a tangled mess.
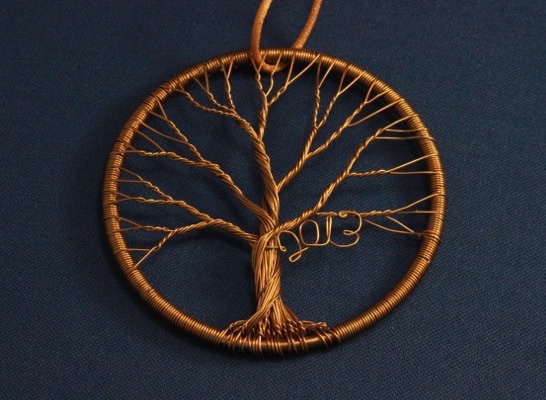
I love trees. I have made many wire trees, and I feel I have a flare for them. In December of 2013 I made an ornament with copper wire and a brass loop with “2013” done in wire along a branch of the tree.
Photo description: copper wire tree in a circle ornament with “2013” on a lower branch
I like this style of tree. Larger versions do well as wall hangings, which, for me, is preferable to sculptures that take up horizontal space. The market for wire trees fluctuates, for while every craft fair and mall had a wire tree booth. So anymore I mostly make these when I want one, rather than to sell.
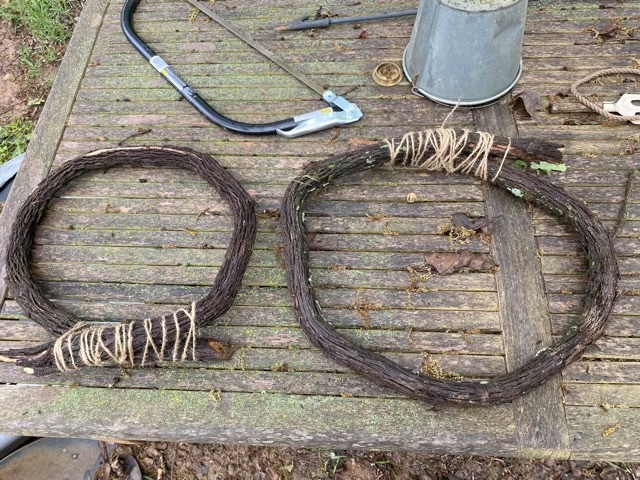
When we cut off the ends of the grape vine for our hand railing, my eldest and I curved the ends into a circle and lashed them. It definitely took two pairs of hands, but they bent without breaking. The idea is that when they dry, I will trim them and make loops for either wreaths or other craft projects.
Photo description: two thick grapevine circles wrapped with jute twine
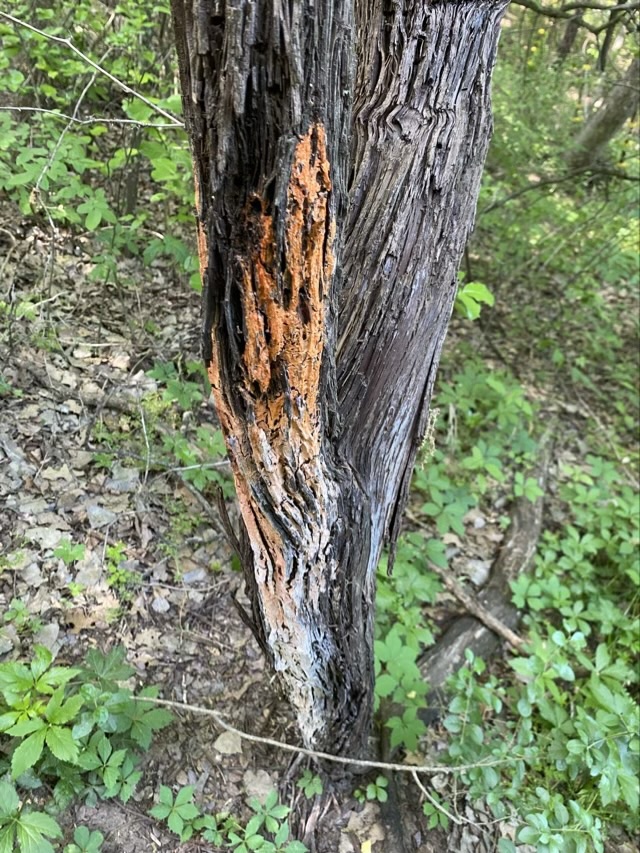
My husband built a beautiful rustic style curved stone staircase off our back porch. Our challenge has been getting a handrail to match the curve without throwing a lump of money at it. The first attempt involved cedar sapling trunks, but we didn’t have one long enough, and splicing two together was tricky. When I was wandering our woods looking for hand rail candidates, I saw a grape vine that I’ve been meaning to trim because fungus has started into the side of the bark.
Photo description: orange and white fungus on a large muscadine grape branch
I cut off the vine above the fungal damage, and since that vine was a nice diameter for a hand rail, freed it from the canopy. I then cut away the diseased tissue from the main vine and sealed it with pruning spray.
Photo description: sealed main vine, approximately 7-8 inches in diameterPhoto description: muscadine grape vine freed from the woods and dragged to the back yard
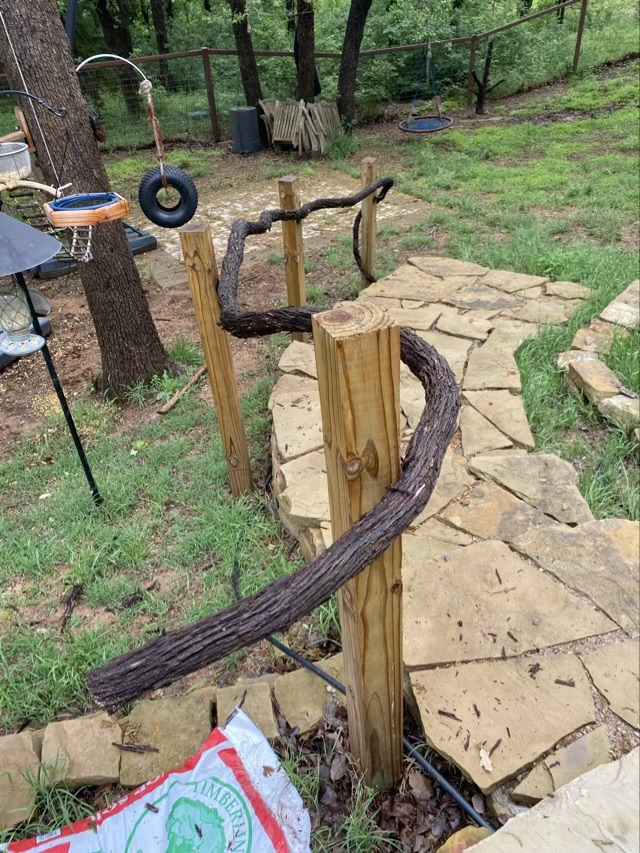
It took three of us to wrestle the vine into place as a hand rail, but because the vine is supple and we waited until the rain gave it a good soak, it was possible.
Photo description: grape vine installed as a hand rail on a curved stone staircase
We secured the vine with screws. The next step is to strip off the bark and seal the vine core so it lasts a little longer in the Texas weather.