I spun and plied angora rabbit hair back in March. I stuck the small ball of yarn in a project bag and promptly forgot about it. I found it again 8 months later and this time made the swatches from it that I intended to do in March.
Photo description: four ply angora rabbit yarn swatches. Top left: nälbound circle, top right: knit, bottom left: double crochet, bottom right: zoom loom weave
These swatches are made from unprocessed 100% angora rabbit fur. I took what was in the bag I bought from the breeder and spun it, no washing, carding, or combing. The yarn does shed a bit, but not significantly, and did fine especially with the abrasive nature of weaving and nälbinding.
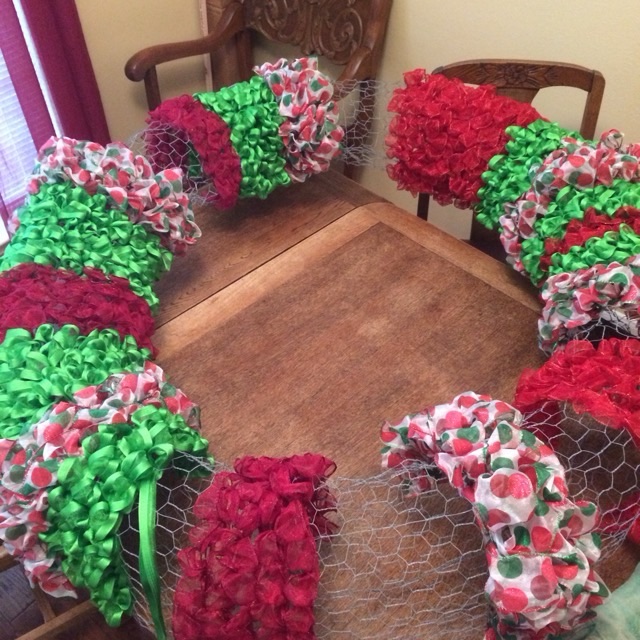
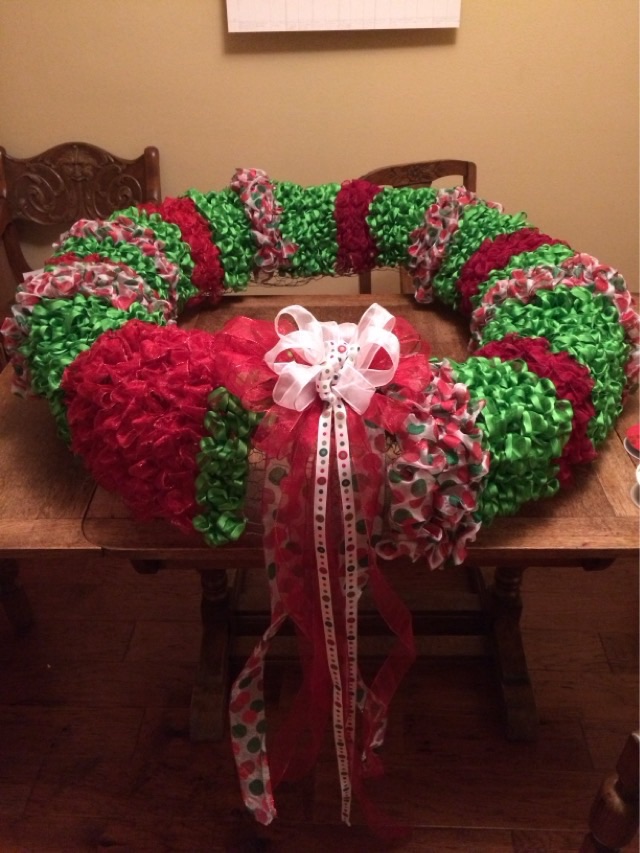
Sometimes things just don’t work out the way I hope. In December 2015 I made a large wreath from poultry wire and ribbon. It took me over a week to get all the loops of ribbon installed, and I had to buy more ribbon because I underestimated yardage. I should have made it smaller, but the thought of undoing it was worse than just pressing forward.
Photo description: hollow tube wreath frame made from poultry wirePhoto description: closeup of how I attached the wired ribbon to the poultry wire framePhoto description: in process picture with looped ribbon work in stripesPhoto description: finished wreath sitting on a table that is three feet deep, the wreath overhangs the tablePhoto description: wreath hung on an outside window because it was way too big for a door
The little bow I put at the bottom was woefully out of proportion to the huge wreath, but at that point I never wanted so see another loop of ribbon, possibly ever. I also didn’t care for the overall look when finished. I did learn from the process. I learned that looped projects take way more material than wrapped (logical). Storing such a large thing is difficult and the poultry wire frame didn’t hold up to rough handling. Ribbon is expensive, especially before the holiday sales.
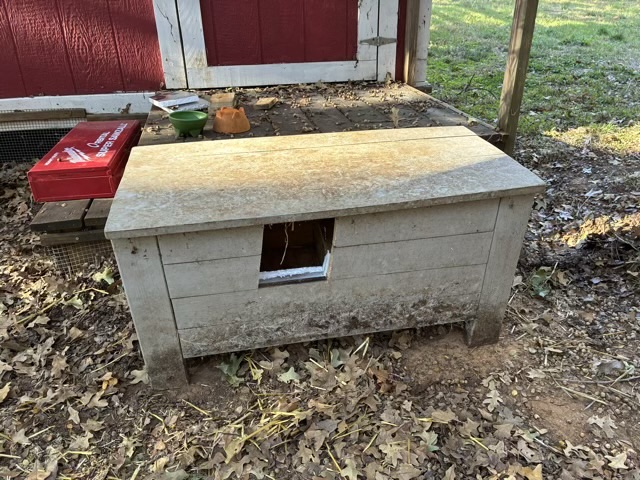
I built a cat house bench back in August 2018, before I started this blog. The outside cats never really used it. I cleaned out the old straw and evicted the insect residents.
Photo description: 7-year-old storage bench that is really an insulated cat house, entrance on the right side
I decided to cut an exit hole, so there was an escape route. I didn’t want it to be a wind tunnel, so I cut it into the side of the insulated box.
Photo description: same bench but now closed and a new exit cut into the side
I used a saws all to cut and rather lost control as my cuts are diagonal rather than straight. Serendipitously the two cuts are parallel, so that’s a bonus, even if they are crooked.
I put lavender inside to deter bugs, and put down some fresh straw, since I’ve read that when fabric scraps get wet they don’t insulate where straw insulates even when damp.
Photo description: inside of the bench showing new straw and both escape hatches
While I was at it I also caulked in the gaps on the top that were letting in the damp during heavy rains. We’ll see if the modification made any difference to the local colony. Winter is coming, but it is Texas, so it will flirt with fall for a while longer.
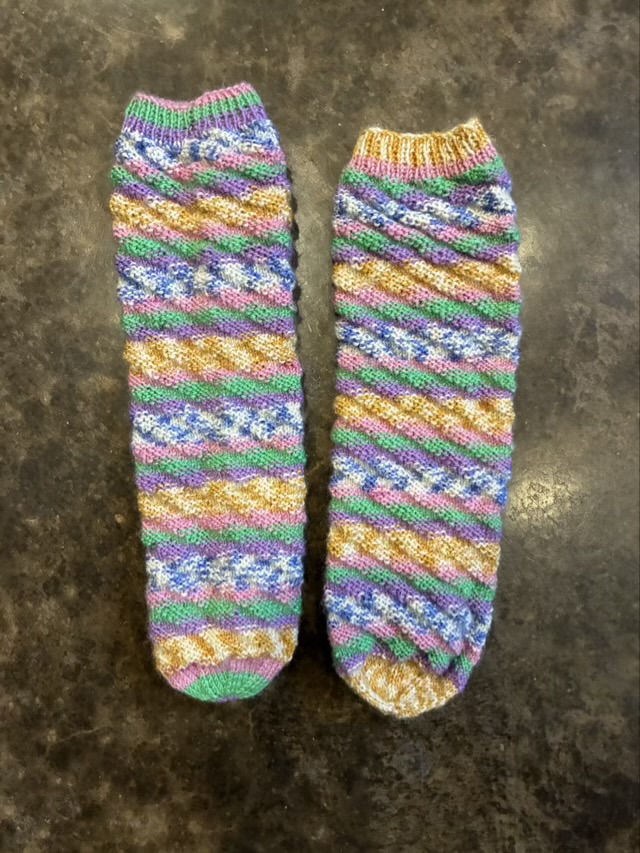
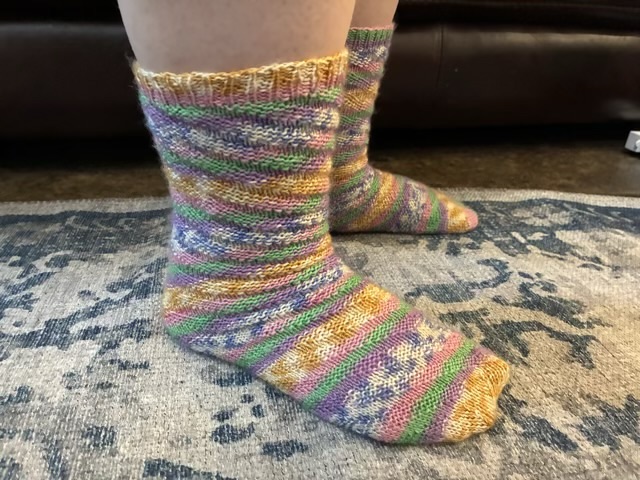
I finished the pair of spiral socks that I started in September. The special thing about spiral ribbed socks is that there is no heel, the rib expands to fit the heel without bunching at the ankle like tube socks.
Photo description: finished spiral knit socks made with Heritage Cascade printed fingering weight yarn and size 2.5 needles, 64 stitch cast on, 4×4 offset rib, knit cuff to toe
I was dubious on fit as I was making them, but after blocking they stretched out and they fit as advertised.
Photo description: spiral socks worn
My youngest struggles with sock heel placement, so these socks are much easier to get on. I will now always have a set of these socks on a pair of needles, to outfit her with friendly socks. I did check with a sock knitting machine company, with the idea to speed up production, but knitting machines can’t do the offset ribbing, so they have to be hand knit.
I wanted a pair of star earrings to wear to chorus events. I started looking at preassembled sets and was dismayed at materials and pricing, so I ordered parts from Fire Mountain Gems and assembled them myself. Since buying in bulk makes the individual item less expensive, I ordered enough for my whole chorus.
Photo description: antique silver plated open star charms on simple silver plated ear wires and threaded into a card with our chorus logo
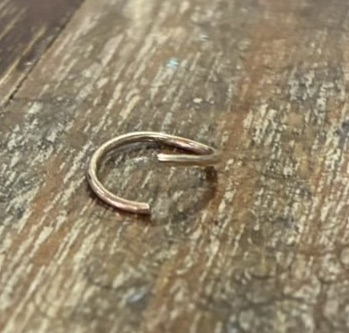
I picked a simple star charm and an open loop ear wire so assembly was a just matter of using needle nose pliers to open the wire loop, put in the charm, and close the loop again. Here is a tip for opening wire loops, either on ear wires or for jump rings: twist, don’t pull. Rather than pulling the ends of the loop apart and widening the loop, if you twist them, one side forward, one side back, they are much easier to twist back closed.
Photo description: close up of a wire loop that has been twisted open
The thing that took the longest time was getting the cards with earrings into the little 2×3” bag. The sets, with shipping, cost less than $1 per pair plus time. The components are silver-plated, which is fine for costume jewelry. The assembly is simple enough that if someone does have a nickel allergy, the charm can easily be transferred to a pair of titanium or niobium ear wires instead. (Those are just considerably more expensive.)