Can wind spinner

I found a tutorial for making wind spinners from two cans and I may have a problem. These are easy to make, I can make them while still being present for my kids and watching after them as they do their homework, each one doesn’t take much time, and I really like watching them spin. I’m currently experimenting with the best way to get them to spin easily. I have some set up as traditional pin wheels, and some set up on vertical spikes. I’ve been using old wire hangers as supports (seriously, I think these propagate in the dark, I always seem to have some even though I haven’t had dry cleaning done in months).

Aluminum can prep

I found that marking 3/4” around my cans gives me 11 even spokes. It is easiest for me to remove the top of the can with a craft knife, then cut the spokes with kitchen shears. My fingers work fine to bend the spokes out at the base.

Two cans ready to connect

Bent nose pliers make folding up the ends of the spokes easier, and to start, I just bend up about 1/4” to 90 degrees. Then when putting two spokes from different cans together, I finish crimping down the fold, and add a corner fold to secure the connection.

Connected spokes
My dog photobombing the spinner experiment

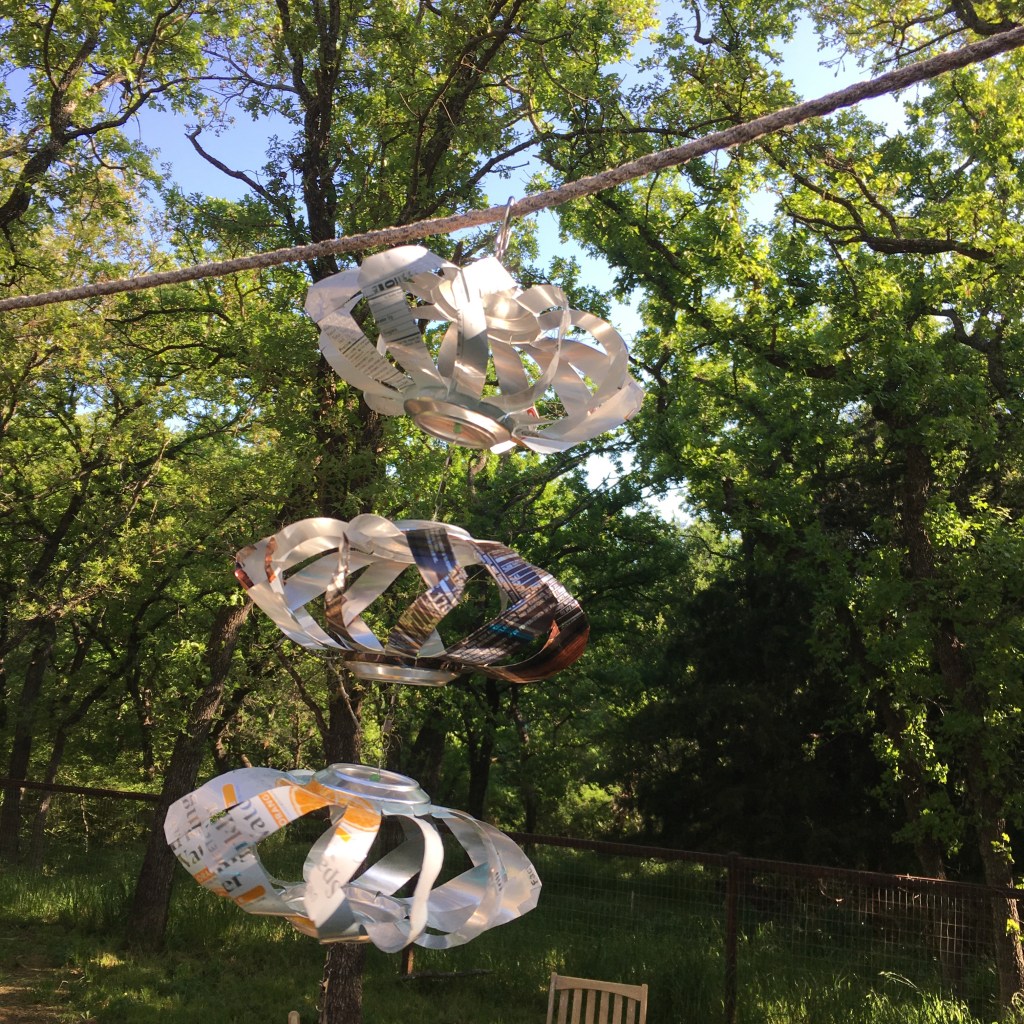
So the best way is stringing vertically and hanging, by far. The hanger wire mounts seem to have too much friction. I hung three with beading wire (nylon coated steel cable), with glass beads and separated with fishing swivels. Even the slightest breeze gets these spinning!!

Hanging aluminum can wind spinner

He liked it so much…

Our dog Griffin really likes his egg crate foam bed, so I made him another for his “place” (dog kennel). Since I am limiting my brick-and-mortar shopping, I bought a twin sized egg crate foam mattress topper online, cut it to size, and sewed a cover out of an old sheet.

The foam cuts easily with kitchen shears
I doubled up the foam
The good part of the fabric from a worn out set of sheets, with a zipper at one end to make it easy to wash
I think he likes it! The new foam mat is under his regular blankets

This is the first sewing project that I have made time to do in weeks. But now that the CDC is recommending cloth masks for grocery shopping (yes, I’m a little behind the news, it is healthier for my sanity), I will try to make some masks.

Laminated feather book marks

What to do with those feathers that the kids collect outside? Or in this case, the feathers that my eldest decided to keep because our inside cat managed to snag some off a bird from INSIDE her catio. Rather a badge of honor, that. How about laminating them and making a book mark? Any potential pathogens are sealed in, and frankly, we can never have too many book marks. I think this one came out nice; the small feathers arranged and cut out to be part of a larger feather shape. The natural caught in the unnatural. I placed the feathers between the two layers of plastic, gently fed it through the laminator, then cut out the shape. I have a hot laminator, but I think this method would work with cold lamination, or even clear sticky tape.

Laminated feather bookmark

We also did this with the feathers from our chicken’s first molt.

Laminated feather book mark

Going on a bear hunt

I’ve seen great posts about people putting out bears, so kids walking the neighborhood can go on a bear hunt while social distancing. What a neat idea! We have some scrap corrugated metal, so I thought I would try a cut out bear (that would stand up to the elements).

Bear shape cut from corrugated metal

First, this stuff is sharp. If you do try this, wear gloves. Thick ones. Preferably leather. I used metal shears to cut the shape and made the bear as big as possible to make cutting easier. After I cut, I hand sanded the edges and removed as many sharp bits as I could. This is definitely something better seen than touched! I painted the back with black spray paint, but I kind of liked the look of the shiny wavy metal, so left the other side as is.

Back of the bear(?)

Although my family all identified the shape as a bear, I feel it looks a little bear/hog cross. Maybe the kids in the neighborhood can go on a guess-the-creature hunt.

Next blend

Carded rolags made with Aimee and Donabella’s fleece (alpaca)

I’ve moved on to my next color blend: fawn mixed with dark brown. I loaded the fawn color on my carder first, then added the dark brown so the fawn wouldn’t be overwhelmed by the brown. This worked much better. When all the rolags were prepared (I used a large box to hold them this time), I sorted them by shade in three groups. The idea is that if I spin each group, then ply them together, I will still get a gradual color fade in the final yarn. We’ll see.

Folding the sorted rolags in dish towels

To keep my colors sorted, I gently folded each group in a dish towel so they stay neat and in order. There is still a fair amount of vegetative matter (VM) in the fiber, even after carding, but I have found that when I spin it is easy to remove most of it by plucking the yarn before I wrap it on the spindle. Some stubborn bits needs to be pulled out, but it is easy to feel and see where they are in the twist.

You would think that with the pandemic I would have more time to spin, but the opposite has been true. The time is being well spent: I’m baking with the kids, we are painting rocks and doing art, playing games, learning states and capitals, reading, and are starting into home schooling. All good things, just different from pre-pandemic. I think being flexible and able to roll with changes is important and I hope I‘m instilling that in my children. “Make hay while the sun shines.”