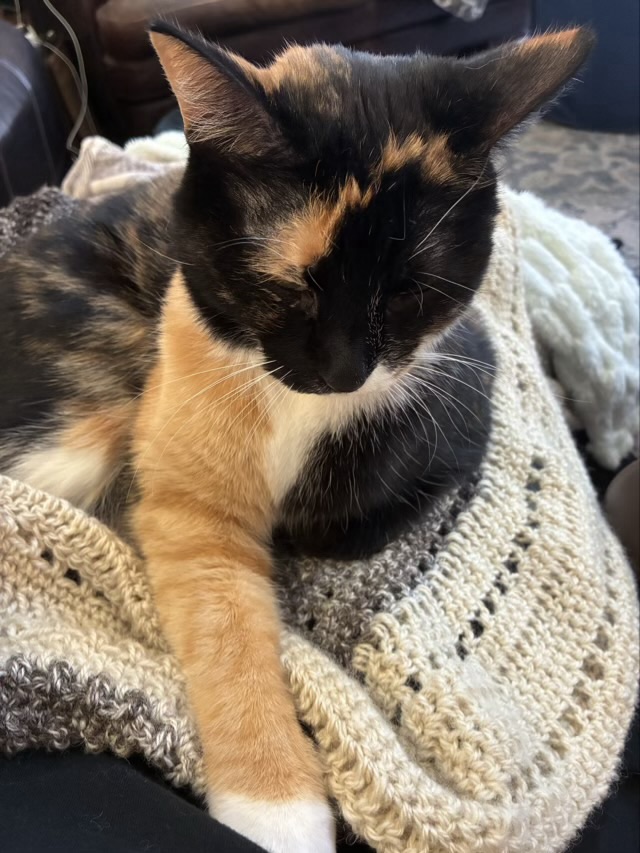
Izzy the calico cat has been trying to lay on the wool vest I am crocheting for weeks. She finally found me distracted and cuddled in. I did continue to work on the piece and just rotated her as I went. She still stayed put. Purring.

Izzy the calico cat has been trying to lay on the wool vest I am crocheting for weeks. She finally found me distracted and cuddled in. I did continue to work on the piece and just rotated her as I went. She still stayed put. Purring.
Back in October of 2016, my kids were taking horseback riding lessons. My youngest had trouble keeping her hands forward, and her instructor had the idea of having a stuffed toy sit in front of her on the saddle and she had to keep her hands in front of the toy. She chose one of her baby dolls, and of course baby had to have a helmet if she was riding horseback, so I crocheted a helmet with black yarn.
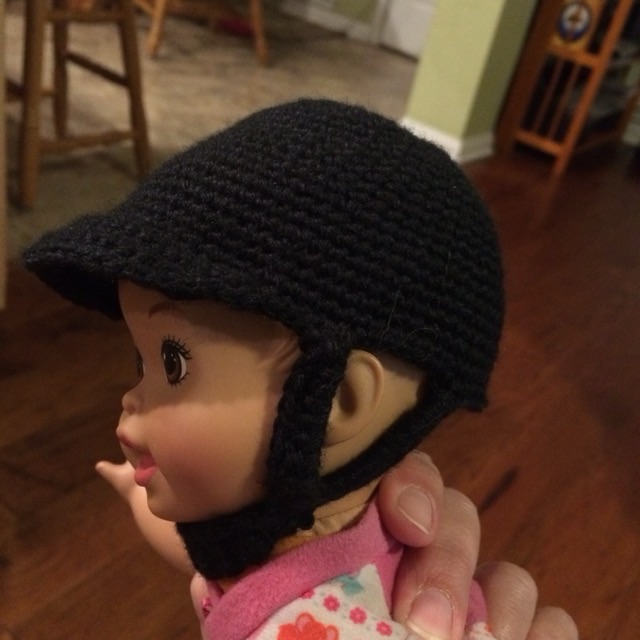
I don’t have any pictures of my youngest riding with the doll, but her hands are forward with the reins in all the pictures after, so something clicked.
I played my mandolin for a little while, until my fingers started to hurt. The top strings are thin and feel sharp. To deal with it I need some calluses.
“Calluses develop from repeated friction, rubbing or irritation and pressure on your skin.” (Cleveland Clinic)
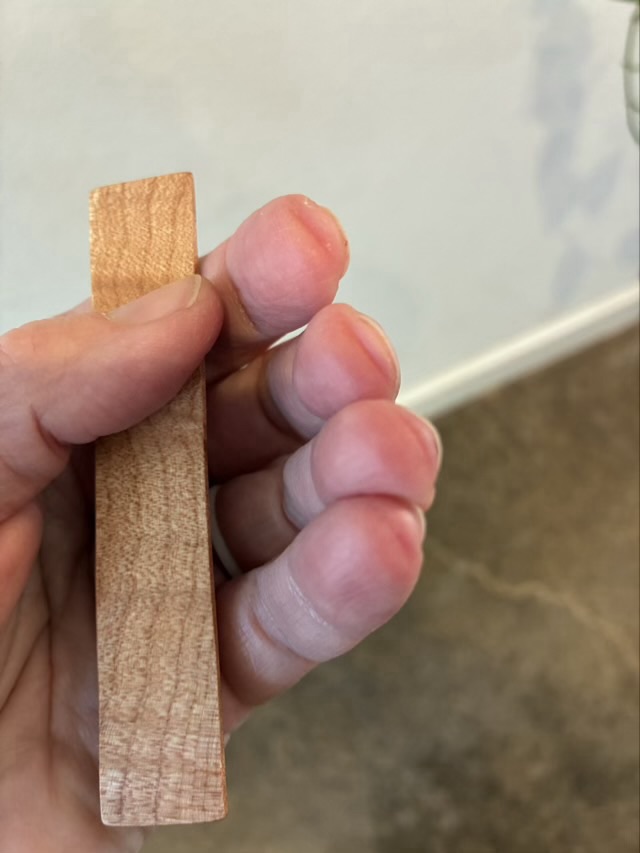
Traditionally string players develop calluses from playing their instruments; one recommendation is to play for 10 minutes multiple times per day, rather than one long session. I would love to this, but my schedule doesn’t always allow for that, and I am easily distracted. I started to look for other ways to apply sharp pressure to my finger tips. I tried several home grown things, a block of wood wrapped with old guitar strings, a hand strengthener wrapped with wire, but they did not fit easily in my pocket and so would not be readily available throughout the day. I ended up making a triangular stick.
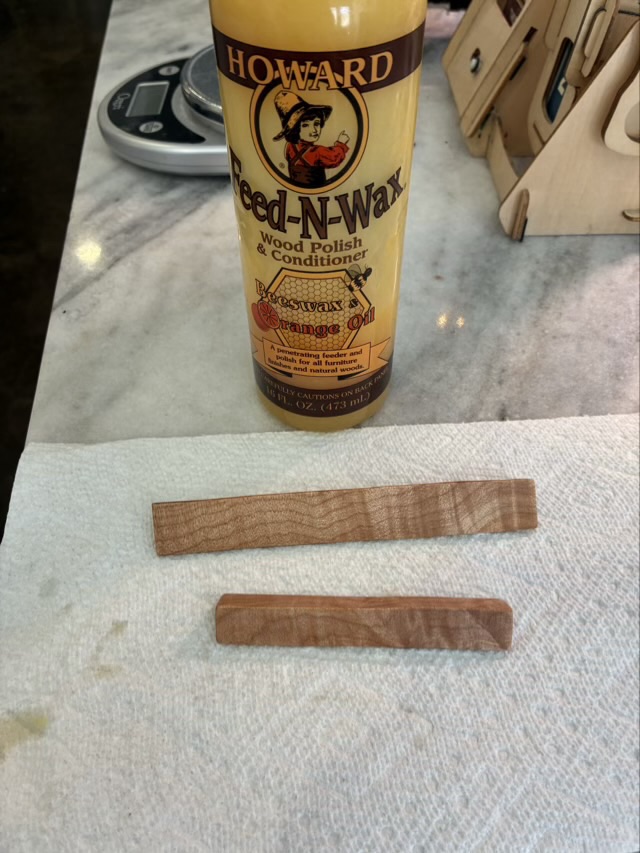
I squared up a small piece of flame maple to 3/4”, then cut it down the middle to make two triangular shaped sticks. I sanded them to 320 grit and sealed the wood with feed-n-wax. I made two lengths, one to sit by my chair, and the shorter one to go in my pocket.
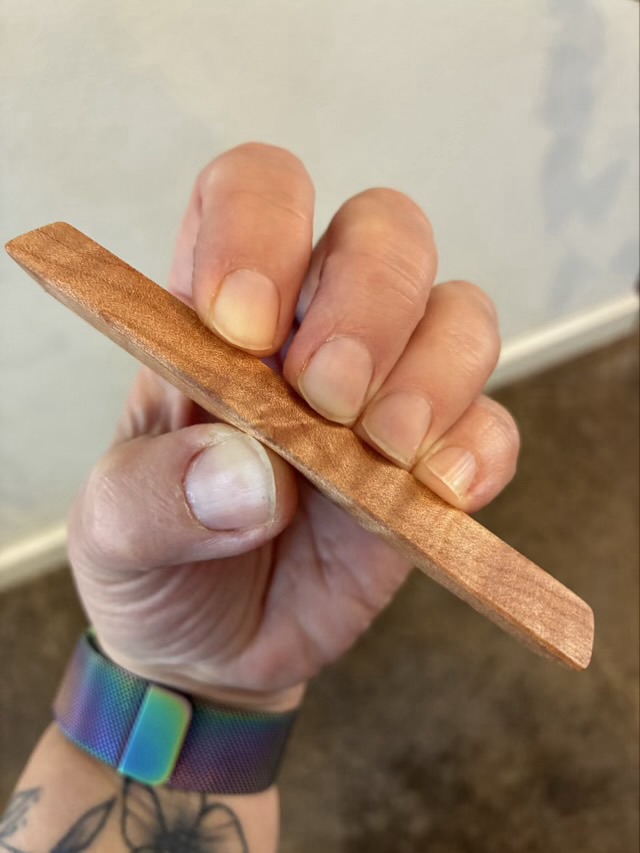
To get the edge of the triangle to bite into my fingers, I place my thumb at the wide base and my fingers on the apex.
It takes a month to develop proper calluses, so I will update y’all later on the efficacy of this method. I can say that in the past few days I do pull out the stick (I need a better name) and use it several times a day. Even if calluses don’t develop, it makes a useful fidget.
In October of 2016, I painted ping pong balls with irises and pupils and glued them on a wreath frame decorated with short lengths of dark red glittery ribbon and mounds of black netting to make a Halloween decoration.
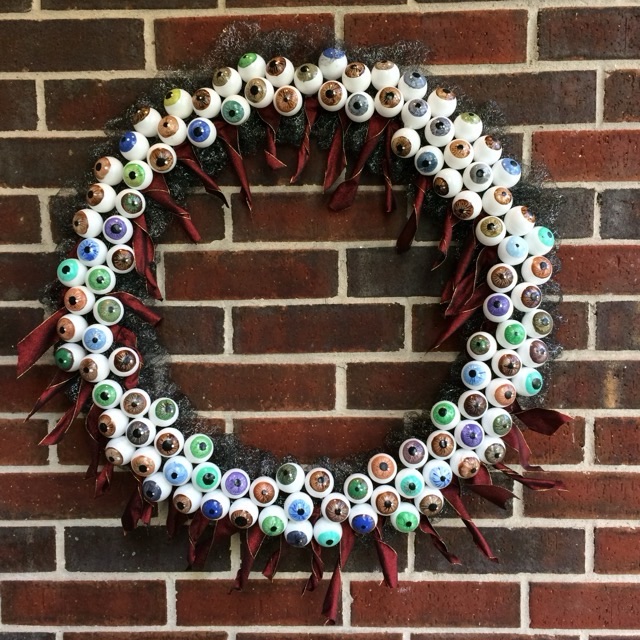
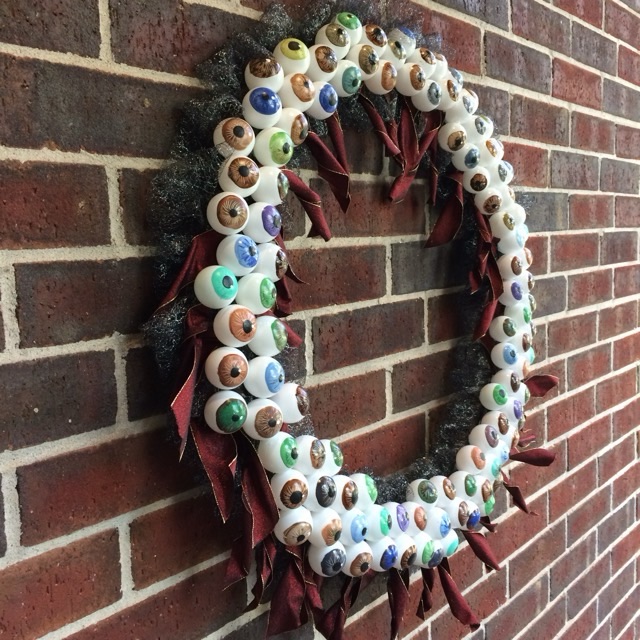
This was a short-lived wreath. In storage the acrylic paints rubbed off the ping pong balls, and the hot glue released its hold. And while it was interesting to play with different iris colors, it didn’t take long for painting that many ping pong balls to get tedious. If I were to do it again, I would look into making the eyes more realistic, maybe with some clear epoxy, since the true impact of this piece is achieved on closer inspection. There would be fewer eye balls as well!
I find knitting and crochet patterns for clothing items very frustrating. There is the whole sizing issue – just making more rows or making the pattern “bigger” does not mean it will fit right when you’re done. Putting hours and hours into a project and then have it not be a useful item is defeating. I’m working on a circle vest, because I like vests, and they are generally easier to fit than items with sleeves. Up until this point I have followed the pattern by LazyTCrochet, checking fit as I went. I used the largest version XL, and added the “Plus size” extensions, which are a joke.
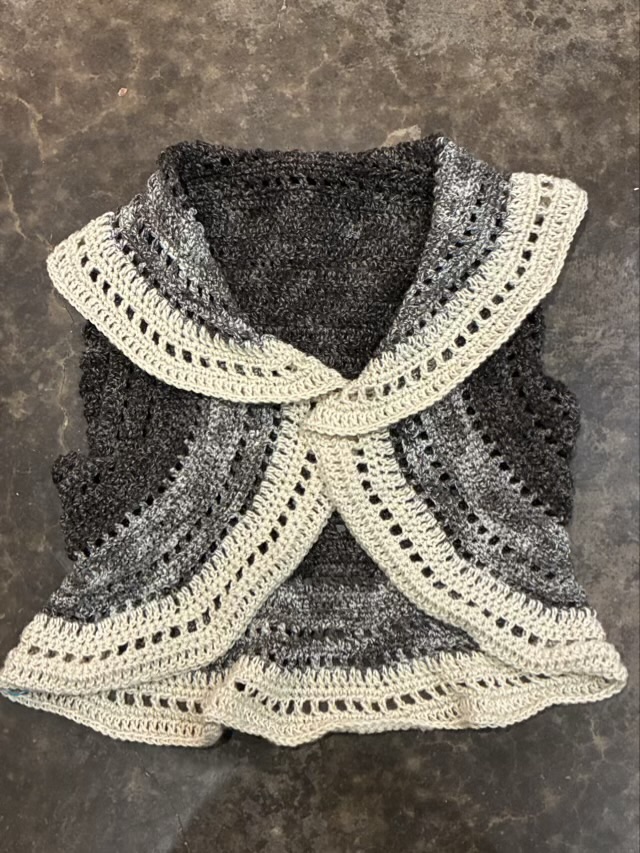
Fitting for multiple body sizes is hard. Most designers add rows and call it “good.” Frankly, there are more body types than XS-5XL (this particular pattern went from S-XL). Arm circumference, bust size, height, arm length, waist size, shoulder to hip, are all so individual. I could flail and complain about pattern designers, but I think it is the crafter’s duty to know their body and learn how to make adjustments to fit. For me, patterns are starting places, they just have to be. For this vest, I’m going to add more rows in the same style as the rest of the vest, not only to balance colors, but to get more coverage. I did purchase this pattern, but it wasn’t expensive (warning sign), but I won’t be purchasing from the designer again.
