I keep working on the Bucilla felt kit to make a cat themed wreath. So many tiny stitches. I laid it down to take a progress picture and Izzy the cat decided to investigate.
Photo description: in-progress felt wreath with calico cat standing next to it
The stuffed candy cane the cat is holding is the smallest stuffed object I have ever done, so far. The project has many, many tiny stuffed details.
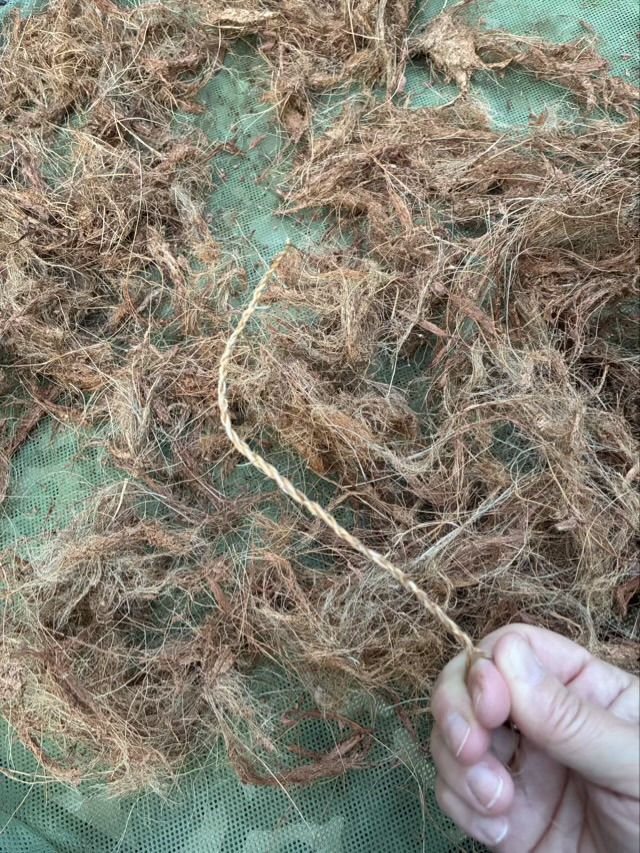
I took my dried coconut husk back outside after soaking it, pulling it apart, rinsing it, and then air drying it on a drying rack inside. The mass of husk was copiously shedding bits whenever the drying rack was disturbed, so outside was the best choice for further processing. I decided to twine the coconut coir, the long, strong fibers from the coconut husk.
Photo description: twined coconut coir in front of a pile of separated coconut husk
Even with the soak and rinsing, there was still a large amount of spongy brown pith on the fibers, which I scraped off with my nails. I separated out the longest fibers, leaving the pith and the short, fine, breakable fibers, which were more difficult to twine.
Photo description: paper bag of cleaned coconut coir fibersPhoto description: bucket of coconut coir pith, I promise there is a bucket under there
I was a little disappointed in how few long fibers I was able to rescue, and I’m not sure that the soaking and rinsing really made my work any easier. I have four more white coconuts (unripe), which I will try getting the fibers straight from the husk as a comparison. The coir pith I put in my compost heap, it has excellent moisture retention so will do well in the mix for future plants.
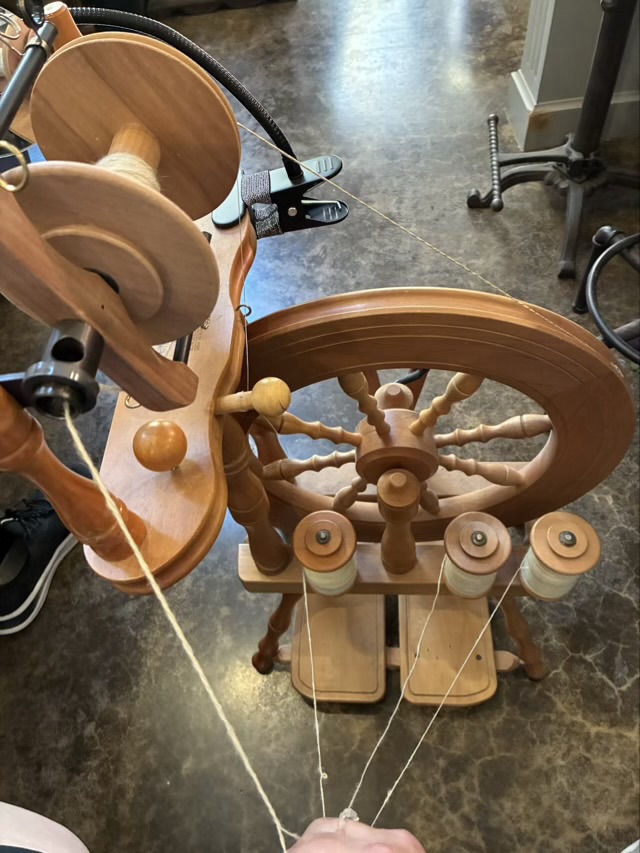
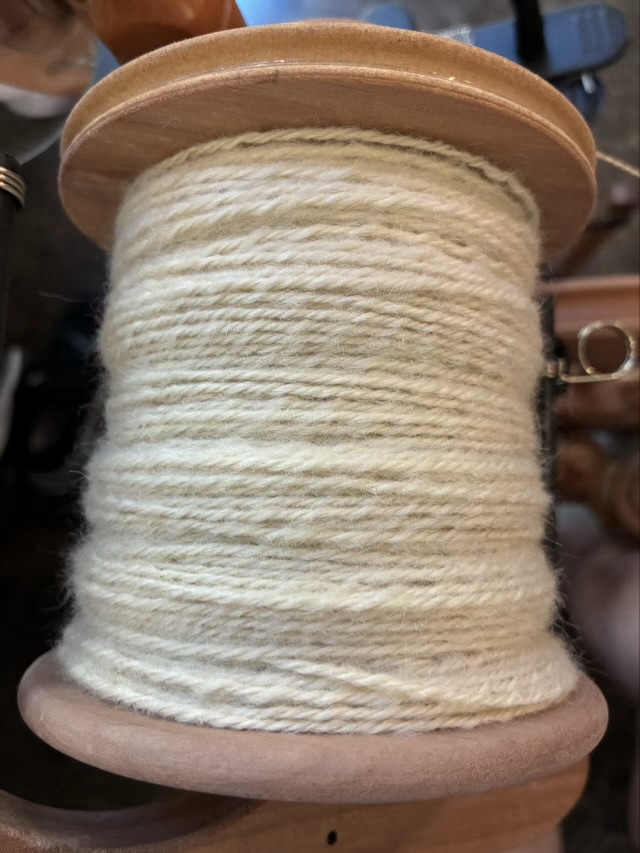
I’ve spun up three bobbins of my Teeswater wool, so it is time to ply. I use the built-in bobbin holders on my Ashford Traveller spinning wheel and have two points of control. My right hand holds the three strands apart by putting each strand between different fingers, and my left hand slowly lets in the twist, then feeds it onto the jumbo bobbin. I’ve found that with slow and steady progress I don’t need to put a brake on the bobbins because they don’t spin out of control.
Photo description: looking down at my three bobbins of single spun Teeswater woolPhoto description: three ply Teeswater wool yarn on a jumbo bobbin
I have more Teeswater roving, so I’ll go back to spinning singles. I also have another jumbo bobbin, so I can leave the three ply on this bobbin to rest.
Missy the dog tries to lay right behind my feet when I’m spinning, which makes it hard to treadle. So I put her bed to the side, which was an acceptable offering.
Photo description: Ashford Traveller spinning wheel, Svaha Genetic plants dress, small black dog on a blue round bed
I’m currently spinning Teeswater wool on my Ashford Traveller spinning wheel. Teeswater is listed as a critical in the Livestock Conservancy’s list of Heritage Sheep Breeds. I purchased roving from a rancher in Michigan, and I am enjoying spinning the fiber.
I spun and plied angora rabbit hair back in March. I stuck the small ball of yarn in a project bag and promptly forgot about it. I found it again 8 months later and this time made the swatches from it that I intended to do in March.
Photo description: four ply angora rabbit yarn swatches. Top left: nälbound circle, top right: knit, bottom left: double crochet, bottom right: zoom loom weave
These swatches are made from unprocessed 100% angora rabbit fur. I took what was in the bag I bought from the breeder and spun it, no washing, carding, or combing. The yarn does shed a bit, but not significantly, and did fine especially with the abrasive nature of weaving and nälbinding.