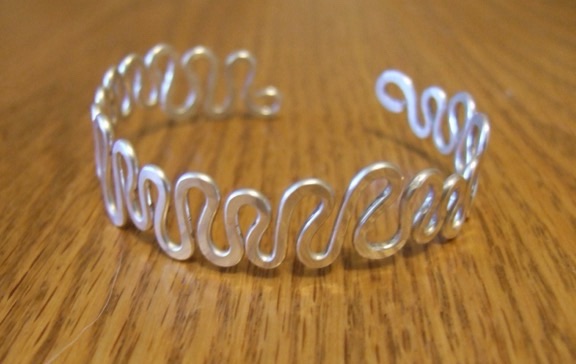
Today we are looking back to February of 2009 at a fun cuff style wire bracelet I made from thick gauge sterling silver wire. I bent the wire like ribbon candy, then hammered it flat (and kept having to readjust the bends because when you hammer them they want to open up). When I had the waves where I wanted them, I hammered it into a cuff shape around a bracelet mandrel.
Photo description: sterling silver wire bracelet in a squiggle pattern about 1/2” wide
The ends are curled into loops to protect the wearer from the cut ends. This is a fun little project and makes a pretty wrist adornment.
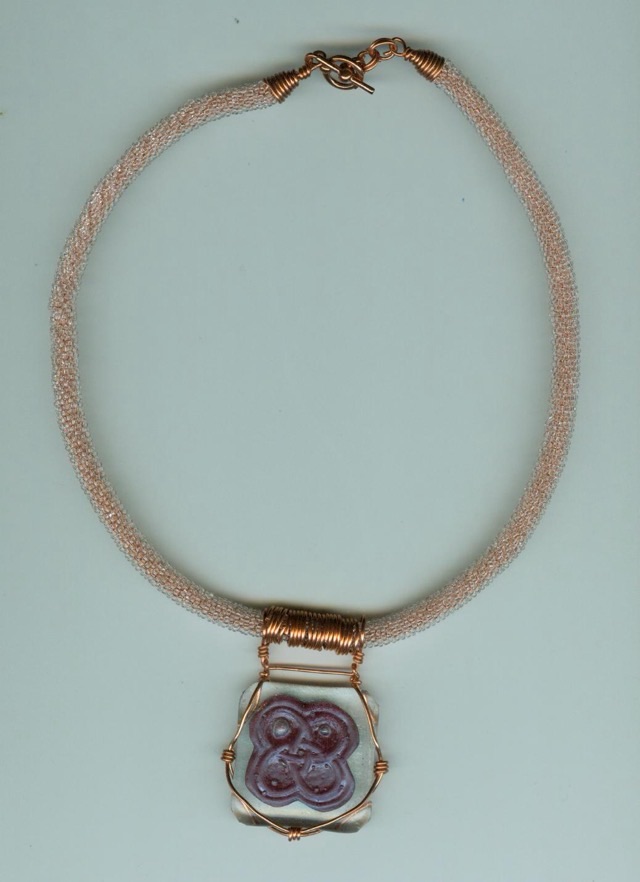
Here is something from July 2008 that reflects most of the crafts I was involved with at the time: crochet, wire work, and glass fusing.
Photo description: copper and glass necklace from 2008
The rope was crocheted with copper lined seed beads (I think, I may have crocheted copper wire with clear seed beads, but the rope looks too even with a nice drape, which tells me I probably used silk cord, rather than wire, and the the copper color may come from a lined seed bead). I finished the rope with hand made wire cones and a purchased copper toggle clasp. The pendant is fused glass with a hand made chased copper inclusion in the shape of a four loop Celtic knot. I was experimenting with fused glass using a small kiln because I could set it up, let it run its program overnight, and check on it in the morning in my own time, very important when dealing with a young child and another on the way.
I attached the glass pendant using copper wire, and added five independent coils of copper around the rope. I must have done this for flexibility reasons, it would have looked better with a single longer coil, but that would have changed the drape.
These seed bead crocheted ropes do make me nostalgic for the times I could wear necklaces. They have a comforting feel in the hand.
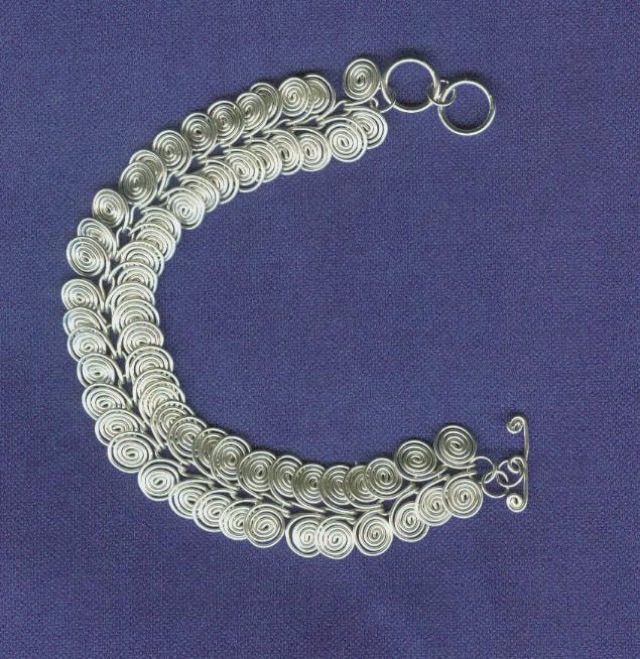
Here is a throwback to May 2008 of a work in wire that looks more complicated than it is.
Photo description: Egyptian coil bracelet made from 22 gauge silver wire with handmade toggle clasp
I enjoy items that are made my connecting identical elements to form something new. The Egyptian coil bracelet is made up of lengths of wire spiraled in opposite directions from the ends and folded in the middle. Each link connects through the center fold loop; the spacing between links depends on the length of the loop.
Although I like the look of the bracelet, the darn thing catches on everything. The thin gauge wire is easier to coil into a tight spiral, but when it catches on a thread or pocket, the wire pulls open. It is a good linkage study, though I recommend using 20 gauge wire or thicker.
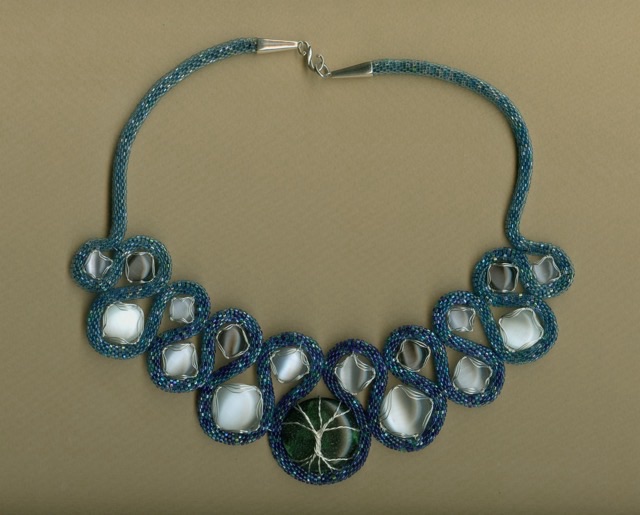
In May of 2008 I took a picture of a finished necklace for which I really should have tracked my hours. The main element is a beaded crochet tube that winds around wire wrapped cats-eye cabochons. I would work on the tube while my eldest was in preschool or napping, and I believe I could obtain an inch an hour at my fastest. It is very tiny work done with a very small crochet hook using silk thread and Delica seed beads, which are high quality and more uniform and also very small.
Photo description: Statement necklace with variegated blue beaded crochet rope wound around 17 glass cats-eye cabochons wire wrapped with the center cabochon featuring a wire tree
I still marvel at the amount of work that went into to that beaded rope. I strung the beads on the silk thread, then crocheted the rope, waxing the thread as I went. The finished strand feels very nice, has a nice weight and a pleasant feel, but it is truly a work of passion.
When my kids were young I turned to making more jewelry. The projects were usually quick (under a couple hours), easily stashed out of reach, and didn’t involve things like knives or torches. Wire is one of my favorite crafting media, and I still like this wire wrapped stone with braided wire necklace I made in July 2007. I feel the photography on this piece also shows skill improvement.
Photo description: triangular polished stone wrapped with twisted wire “roots”, combined at the top, then split and braided to form the sides of the necklace, finished with a magnetic clasp
Ironically, when my kids were babies, I stopped wearing necklaces and earrings so they wouldn’t be targets for little hands. Over that time I developed a neck sensitivity and can now only wear a very light necklace for an hour tops before it bugs me and has to come off. Heavier necklaces like this one don’t last 30 seconds.
Happy Fourth of July, may your neighbors celebrate quietly and early, and may your animals be calm.
P.S. My apologies for email subscribers on a partial post yesterday. I started writing tomorrow’s post, stuck my phone in my pocket, and the post published itself, incomplete. The full post should go out tomorrow, barring more technology hiccups.