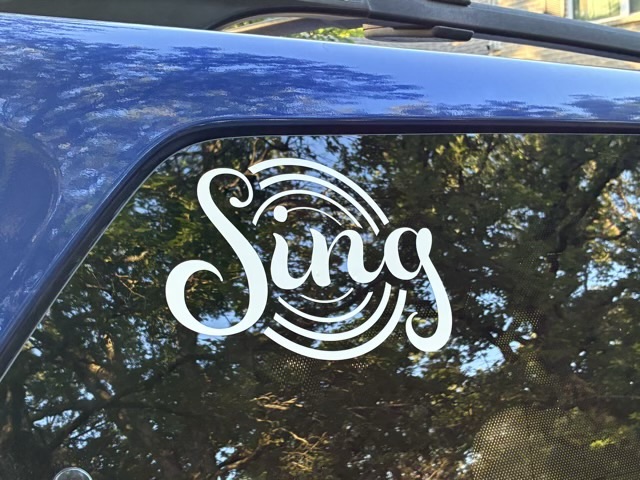
I needed a new design for the other side of the van in the upper corner of the back window because it makes the vehicle easier to spot in parking lots. So I designed one.
Photo Description: white vinyl decal on a car window with the word “Sing” in script letters and four concentric circles of varying thickness
The concentric circles represent the Barbershop cone of sound, just looking down from the top, where the largest sound should be from the basses, then baritones (when their note is below the leads), then leads (who have the melody in Barbershop), and then tenors. Fun fact, in Barbershop the voice parts are not related to gender, but to the role the part plays in the harmony balance. So we use bass, baritone, lead, and tenor for low voice, mixed voice, and high voice choruses and quartets.
I designed the graphic in Adobe Illustrator and cut it out with a CRICUT electric cutter.
I had my first encounter with textured metallic vinyl for my electric cutter. My youngest wanted new bookmark/ornaments for teacher appreciation week and I thought using the gold vinyl would look great for lettering and stars. I did look up what settings other crafters used to cut the vinyl so cut cleanly on the first pass (on my CRICUT air: Vinyl + setting and a deep cut blade. (Note: cutting cleanly on a first attempt with a new material is almost unheard of, it was a deceptive introduction.))
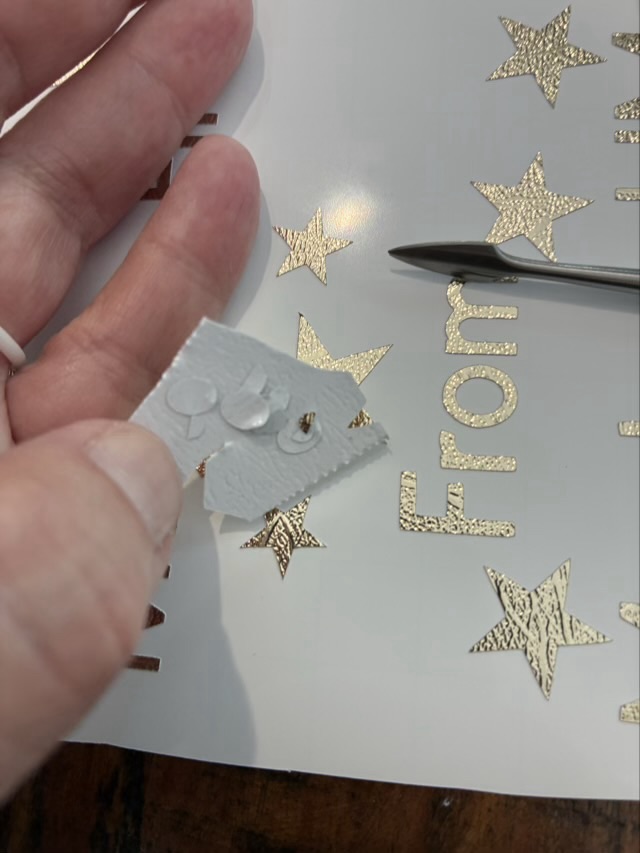
I find it easiest to weed the cuts (take out the bits you don’t want) using a metal pick, and then use a larger waste part as a sticky holder for the smaller fiddly waste parts.
Photo description: weeding gold-colored textured metallic vinyl with a pointed metal tool and a section of waste vinyl to hold the tiny pieces from the inside of letters
Weeding was a little fiddly, but not terrible. The terrible part came when I placed the transfer sheet on the cuts. The purpose of the transfer sheet is the hold the cut vinyl from the front so the nice layout is preserved and you can then move the cut vinyl to the final project location. Transfer sheets are usually clear sticky film with grid lines. The textured metallic vinyl doesn’t like to stick to the transfer sheet. It would much rather stick to my fingers or the pick or really anything other than the transfer paper.
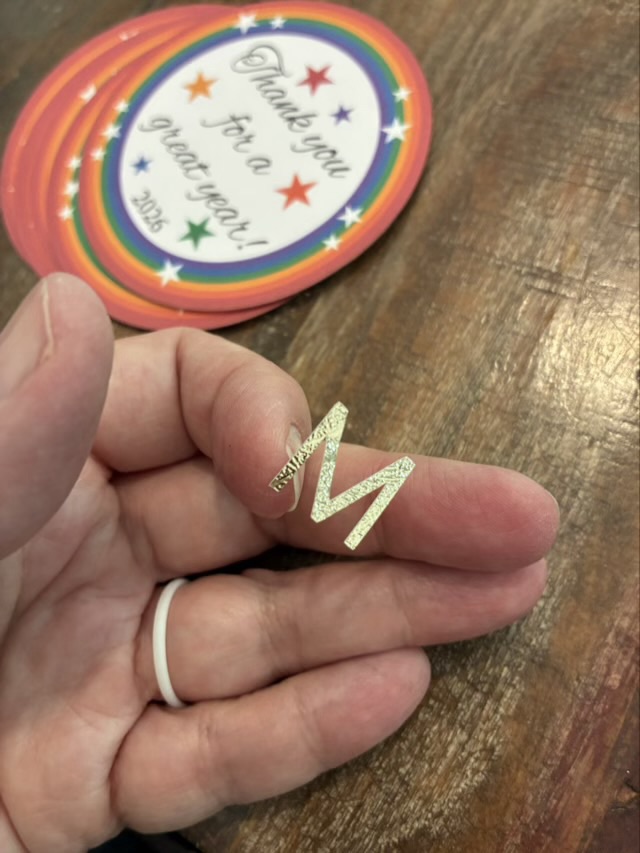
Photo description: Textured metallic vinyl letter “M” stuck to my finger, Teacher gift project in the background
The first transfer was a complete disaster and I ended up with most of the letters stuck to my fingers and had to place each individual component onto the back of the printed circles by eye. It was readable, but not neat. I then took more time peeling off the backing paper, bending it sharply back, and using the metal tool to detach the letters.
Photo description: bending the backing paper sharply back and rolling it off the cut vinyl
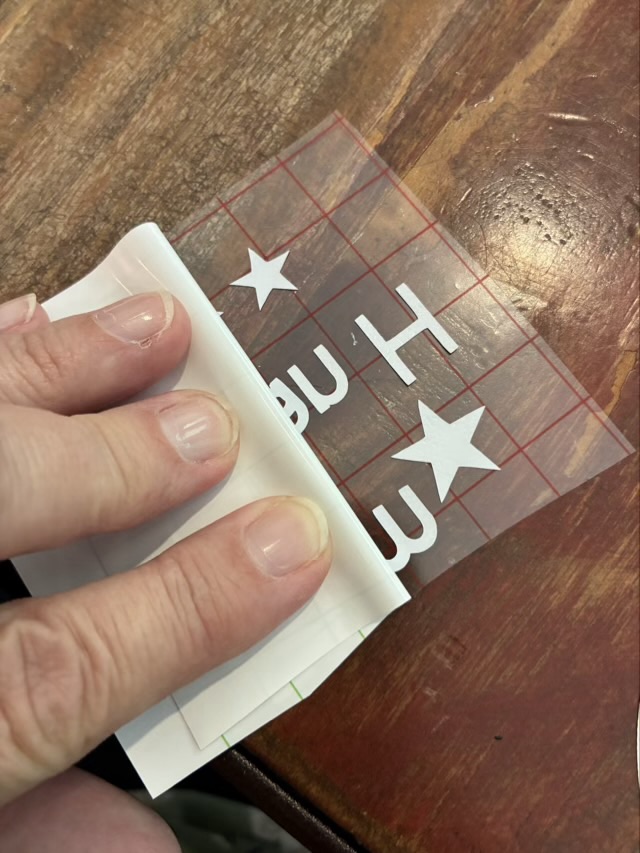
The transfer sheet and vinyl didn’t stick well, but the transfer sheet loved the card stock and if I used any pressure at all, the top layer of the cardstock would come away with the transfer sheet. Ugh. I finished the rest of the lettering by very lightly touching the transfer sheet with its precious cut vinyl cargo to the cardstock to place the letters. It is one of the fiddliest craft things I have done. If I use textured metallic vinyl again, it will be large cutouts, rather than small letters.
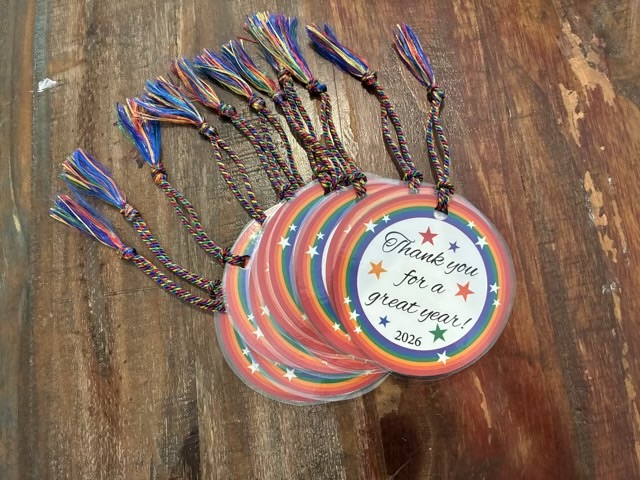
The teacher gifts came out well. I designed the graphic to my youngest’s specifications in adobe Illustrator, printed on recycled card stock, cut the circles with a blue diode laser cutter, put the “from” information on the back with vinyl (this was the time suck), laminated the circles, punched a hole, and added a rainbow tassel.
Photo description: bookmark ornaments with rainbow circle and stars and the words “Thank you for a great year! 2026” created as teacher gifts (cut vinyl personalization on the back of the circles)
I needed to upgrade my phone, which I hate doing and always wait until the end of updates looms. I do all the protective things for the new phone, and this time I purchased a clear case, and found a PopSocket with green, a cat, and dragonflies. Finding a design that had cats, dragonflies, trees, music, and fiber arts was a big ask, so I designed my own and cut shapes from removable vinyl with my Cricut cutter and stuck them to the inside of the clear case.
Photo description: back of my black phone, with a clear case and vinyl cutouts of my business logo showing tree branches and roots, the words “Sing Harmony”, a drop spindle, a treadle spinning wheel, and the Zelda triforce symbol
Now I feel that there is no mistaking the phone for anyone’s but mine.
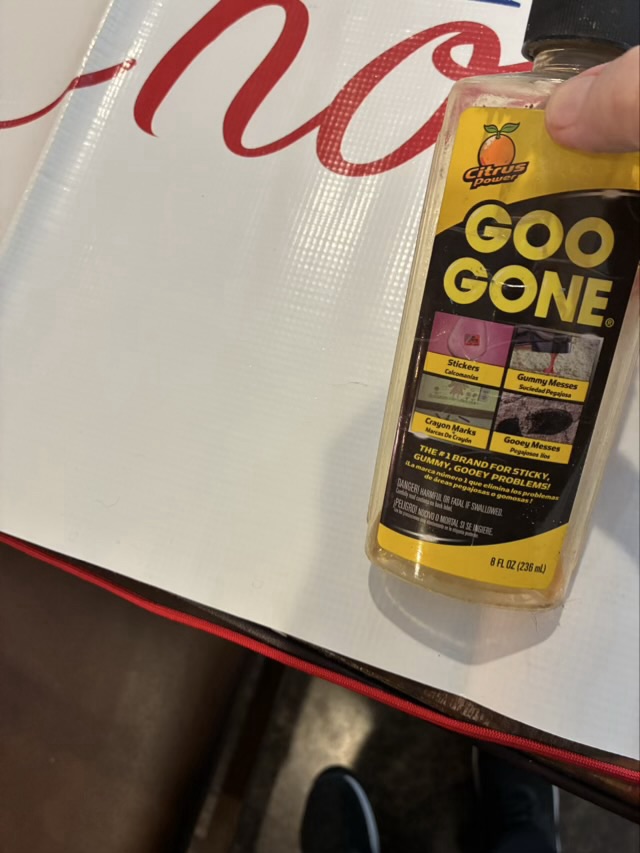
My chorus had a couple old signs in storage that had old versions of logos and were in need of some TLC. The flexible vinyl sign had been stored folded and had some tape residue.
Photo description: tape residue on a vinyl signPhoto description: sticky residue removed with Goo Gone
Goo gone removed the glue spots and some time with a hot hair dryer smoothed out some of the creases. We are now going to store it rolled up, rather than folded.
Photo description: masking tape outlining a star shape inside the existing star
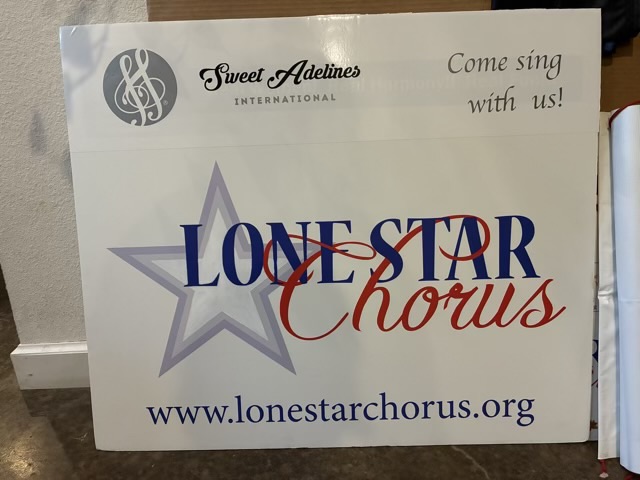
We updated our main logo recently to add a white star inside the two gray stars, which gives it a nice pop. My Cricut cutter can’t cut quite big enough to make a white sticker star, so I masked off the star and painted it with four layers of white acrylic paint. My cutter could do the new Sweet Adelines International logo and our website address.
Photo description: vinyl sign updated with web site address, SAI logo, and white center star
We also had a rigid plastic sign that had an old SAI logo and slogan. I used white adhesive vinyl to go over the whole top of the sign, and used my Cricut cutter to cut out the new version of the logo.
Photo description: old plastic corrugated board sign Photo description: large plastic corrugated board sign with updated SAI logo and white center star