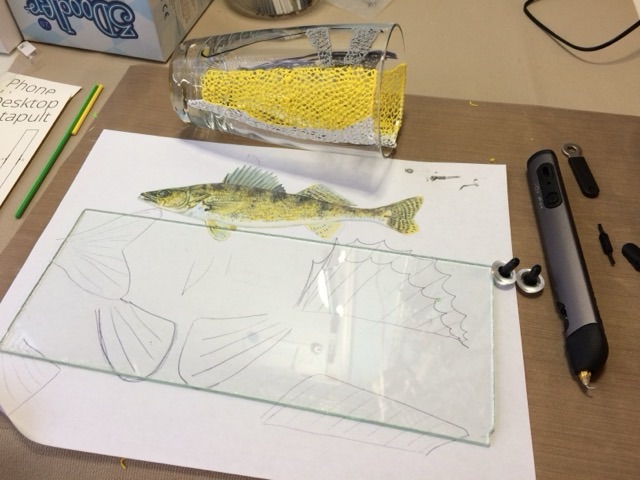
In June of 2016 I was experimenting with the 3Doodler, a pen shaped device that extrudes hot plastic, like a 3D printer, but hand driven rather than computer driven. I decided to make a walleye fish, for my Dad, to experiment with construction.
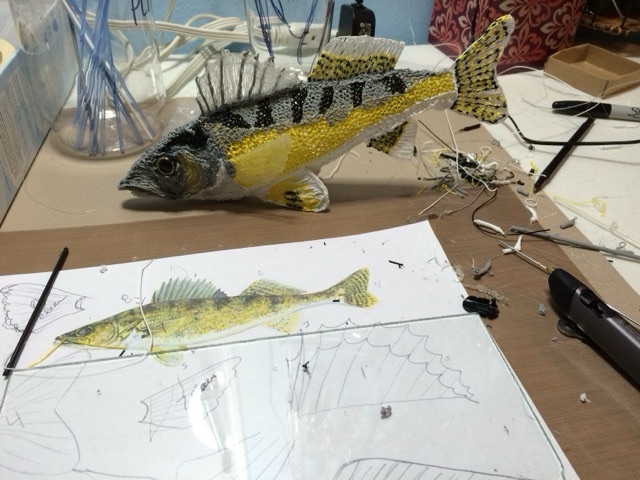
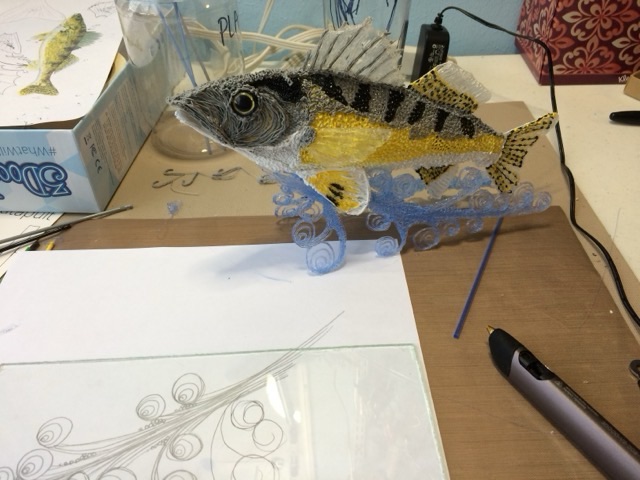
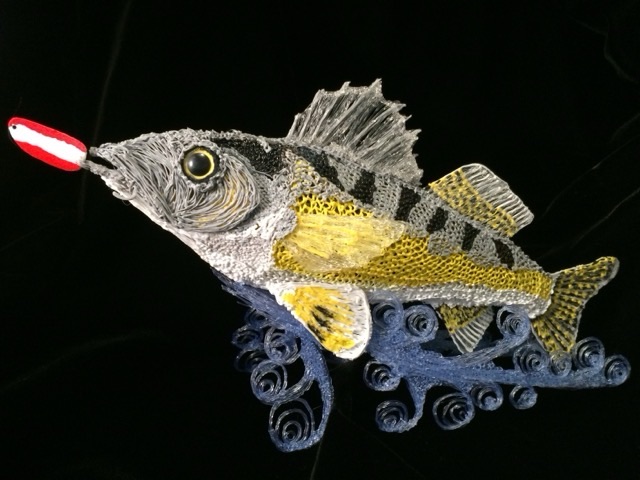
Photo description: getting started, with the 3Doodler pen on the right, doll eyes, sheet of glass for flat components, and a glass drinking glass for curved components, along with a reference illustrationPhoto description: body constructed and onto the fins, it worked best for me to make the component, then attach it to the base rather than build up from the base, especially for the finsPhoto description: fish complete, but I wanted a better position than it resting on its pectoral finsPhoto description: translucent blue “waves” doodled flat then added as a base for the fishPhoto description: finished piece titled “Hooked” made from extruded plastic with a 3D doodler pen, red and white lure also doodled with plastic, then melted smooth, and plastic doll eyes
The biggest frustration with the project was the tool. The version of 3D doodler I was using needed more breaks than I did, and I would have to walk away and let it rest, which is not ideal in the middle of a creative storm.
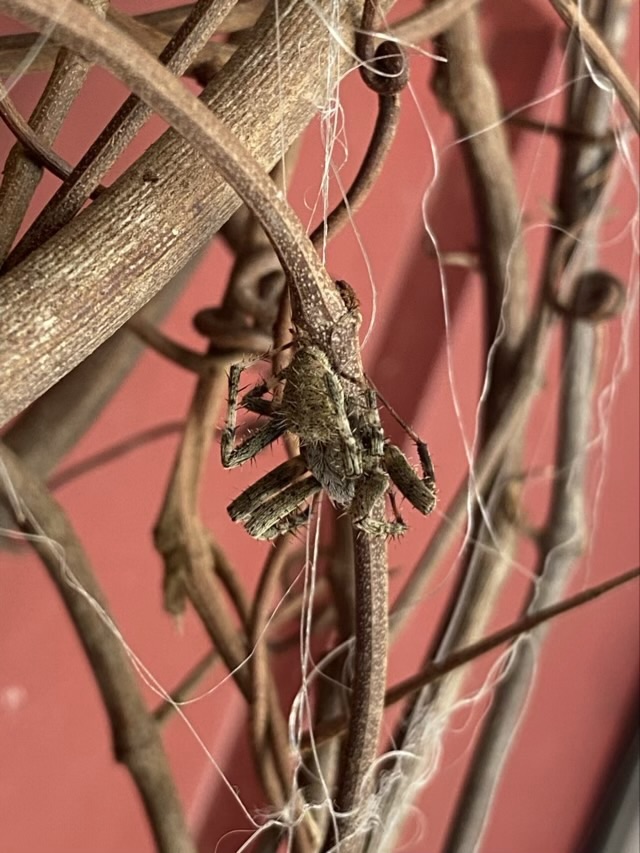
My front door grape vine experiment with hot glued glass pebbles and thin draping strands of hot glue caught a spider.
Photo description: Spotted Orb Weaver spider caught on strands of hot glue
I saw the spider as I was leaving the house and thought it odd that it was sitting there exposed. I pulled on some of the glue threads and it moved, so I gently pulled the threads away. It turns out the spider was tangled in the thin strands of plastic. When I pulled away enough of the elastic string, the spider mobilized and moved to a more protected area. I finished taking all the hot glue strands off the sculpture. I had no idea they were capable of entrapment.
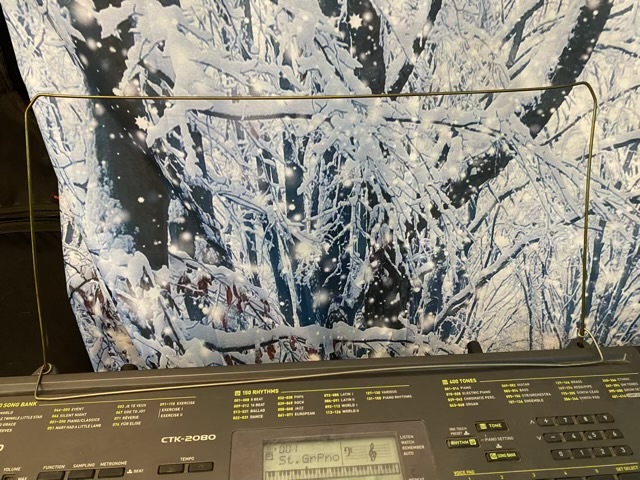
I received a synthesizer from a neighbor who was cleaning out. It has a “learn” function, something my 1928 upright grand doesn’t. What it doesn’t have is a music stand. (My upright grand has an awesome music stand that can hold many piano books.) I looked up the manual online and saw that the issued music stand was just a thick wire fitted into two holes. Hm. I took an old wire hanger, snipped off the hook, and bent the rest into the right shape. I took a second hanger and made a page stop at the bottom, which does not stop the sheet music from bending and sliding out the open wire frame. Hm.
Photo description: music stand on a synthesizer made from wire hangers
To fix the open frame, I used a grocery bag to make a sheath over the wire. It works, and was a zero cost solution. A little washi tape on the channel works better than the wire to keep pages from sliding.
Photo description: wire and grocery bag music stand on a synthesizer
Sheet music is my crutch. I’m struggling with the teaching method on the synthesizer, since it only shows the note on the staff when it is played, not before.
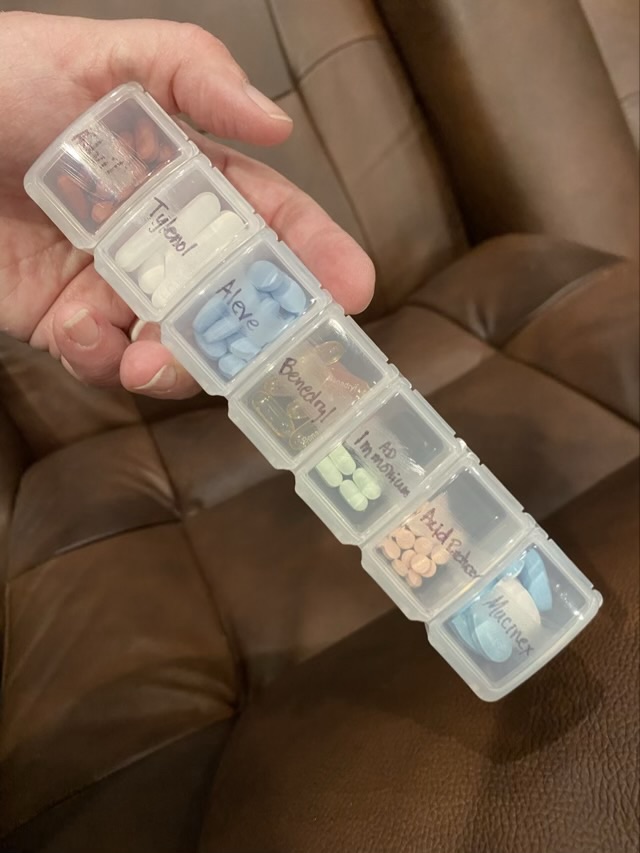
To keep my emergency meds on hand and organized, I bought a pill case, sanded off the day-of-the-week letters with an emery board, and wrote on the medicine names.
Photo description: weekly pill organizer converted to a mini medicine cabinet
This is not my idea, I saw it first from a friend who was very well organized. It certainly beats my previous method of a small plastic bag with random pills.
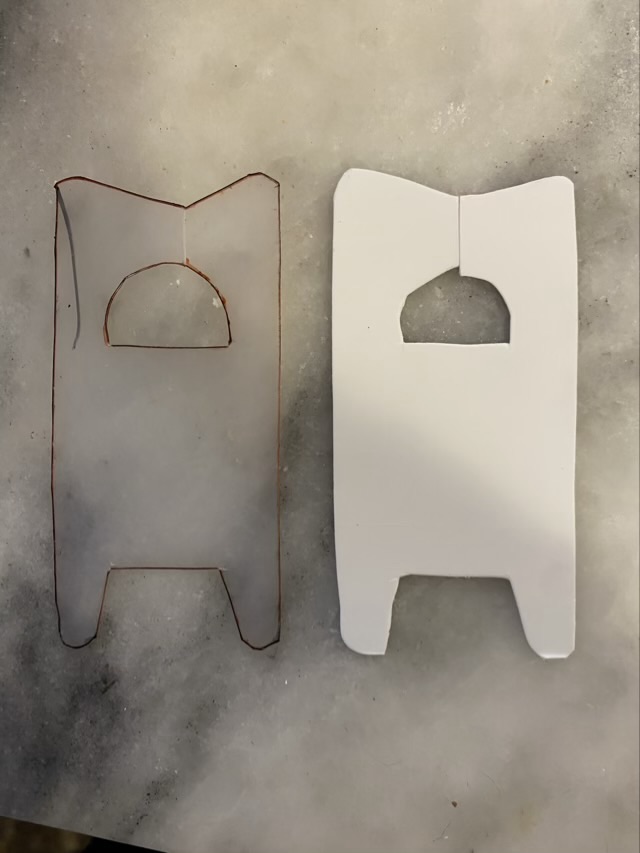
I’ve been cutting yarn bobbins out of waste plastic, as my grandmother did.
Photo description: hand cut plastic yarn bobbins made from waste plastic
I’m not as precise as my grandma, or I don’t take as much time, but I wondered if my new laser cutter could do a precise job for me. I read that the kind of plastic matters. PVC, for example, lets off chorine when heated, which can degrade the laser.
I designed an SVG file of the outline and hole, but left the slit to be cut by hand. The slit needs to be tight to hold the yarn back. I did my first try on a Tide pod container, which is PET (polyethylene terephthalate).
Photo description: three attempted laser cuts in the cut out side of a Tide pod container, with diode laser settings written on the plastic
The plastic melted and cooled, resealing the cut, but not releasing the piece from the base material. The cut the nearly made it through showed bad burn marks on the back where the label was adhered. I attempted to remove the label, but it was firmly attached.
Photo description: back of the cut sample showing the label burned by the laser
The labels on the Tide container have a shiny component, and I wonder if this is why it failed. Hm. Experiments will continue.