I made a new digital card design for our holiday cards. I started in Adobe Fresco on an iPad with an Apple Pencil, moved to the computer and used Adobe Illustrator, then to print, used Adobe inDesign to do the layout. I like black and gray word art, but to give it a little pop I printed on pearlescent paper.
Photo description: “Dashing through the Snow” in different fonts, with pine needle bunches, holly sprigs, two swooshes, and assorted gray snowflake designs. The shimmer of the pearlescent paper is evident in the upper left corner.
My plan is to put the design in Redbubble and cross post to my CarynsCreations.com site after the design is available.
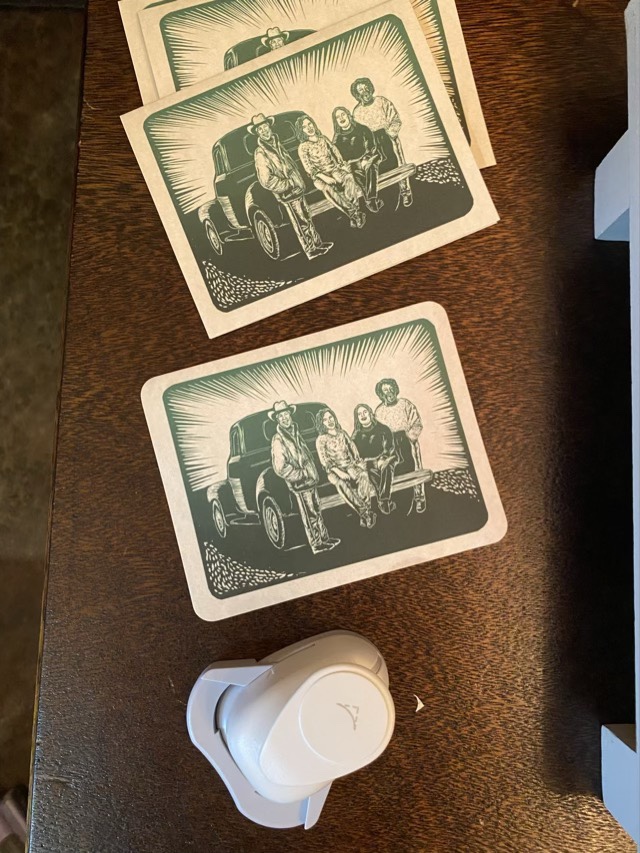
I had fun making a new holiday card design. My intention was to imitate a linocut technique, but in Adobe Illustrator, so instead of building shapes, I erased bits from the shapes. Then I applied a gradient color to the left over parts to imitate hand painting a stamp, and printed on recycled card stock. To finish off the cards, I used a rounded corner punch, and hand-stamped the greeting inside.
Photo description: Linocut-like design showing a quartet casually dressed singing around the tailgate of an old truck, corner punch shown in foreground.Photo description: Two cards, one showing the front, the other open to show “Happy Holidays“ stamped inside, stamp and ink pad on the right.
I finished another fiber page (really I did three together, but I’m going to spread it out in this blog). This page is about hemp. The hemp top, combed hemp fibers, came in a collection of plant fibers as a gift from my sister. I spun the singles on a drop spindle, then made a two-ply yarn using a different drop spindle. The fiber was nice to spin, but the resulting yarn was stiff and scratchy, even after setting the twist by boiling. Hemp is usually used to make rope and strong fabrics, certainly not anything you would want next to your skin. I made a knitted swatch with size 4 needles, a crocheted round with size C hook, and a woven sample with four salvages using a Clover mini-loom and doubling the warp threads. Even though I wouldn’t make clothing with this yarn, I think it is the neatest page I’ve done so far.
Photo description: Clockwise from top left, card from Hearthside fibers, three bobbins with single, 2-ply, and set 2-ply yarn, crocheted lace round, woven not-quite rectangle (still working on my weaving tension), knitted rectangle, and a card stock drawer with hemp fiber.
I finally finished my flax page. This is internet-sourced combed top flax, which is an unusual preparation. It is the short fibers left over from processing the long fibers, combed together. This particular sample was also dyed, probably with nettle dye. There was very little information from the seller (buyer beware). I did manage to spin it in on a drop spindle, using a sponge to wet my fingers. Linen yarn needs to be boiled to set the twist and soften the fibers. When I boiled mine, I used tap water, which has traces of iron. The soft green color turned to a soft orange. The picture below shows the color change especially across the paper bobbins.
Photo description: 12×12 page with floral paper binding; the original fiber label top left; paper bobbins holding the yarn as a single, a two ply unset (green), and two ply set (orange) top right; unspun fiber in a paper drawer middle left; plain weave sample middle right; knitted sample bottom left; weft-faced weave bottom right.
I did a knit swatch on size 4 needles. It isn’t precise, probably due to the variations in yarn thickness, and has a bias, probably due to over twist of either the single or the ply. Still, it isn’t as rough as I thought it would be and has some nice drape.
I obtained a Clover brand mini-loom to make the woven samples. The first weaving (bottom right) I followed directions on warping the loom and ended up with a weft-faced weave. Interesting, but not what I wanted. The second time (middle right) I wrapped the warp completely around the loom and doubled the number of warp threads. This brought the epi (ends per inch) up and let me do a plain weave that showed both the warp and the weft.
I swear I did a crochet swatch too, but I must have stashed it somewhere safe. I do still want to spin traditionally prepared flax, but I’m not likely to buy combed top flax again.
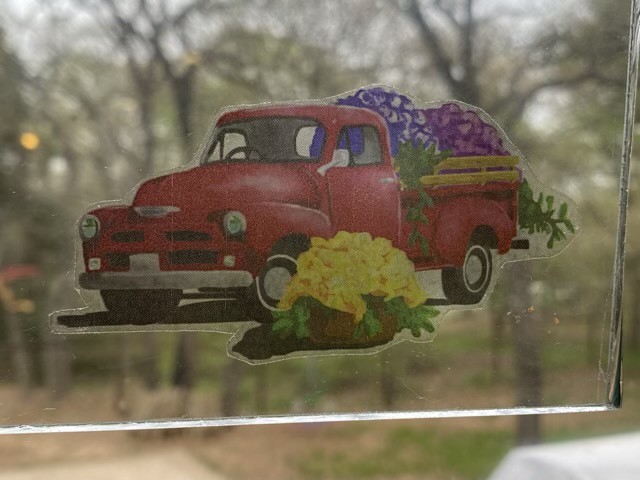
I bought some temporary tattoo paper actually designed for inkjet printers (see my fail post here). I still had to leave the prints out to dry overnight (the instructions said an hour, but I didn’t find that adequate), but the ink stayed where it was put. These temporary tattoos come with an adhesive sheet, which had a small learning curve, but not too bad. I tried one on my arm and … meh. Even though it is thin, it isn’t thin enough to mimic a real tattoo; it is more like a plastic bandage, wrinkles and all. Hm. I tried applying one to a glass sheet out of curiosity and tada! We have contact.
Temporary “tattoo” applied to glass
This is an intriguing use of material. The current limitation is that the surface needs to be water resistent. In order to remove the backing, it has to be dampened with water, which could potentially wreck havoc on paper items. Experiments continue.
Decal applied to glass and held up in front of a window