I had never heard of a cyanometer and was curious when I saw it scrolling my feed. It was invented in 1789 by Horace-Bénédict de Saussure and is used to classify the color of the sky. Gavin Gough has a good quality free printable here. My youngest is all about blue skies, so I printed her one and laminated it.
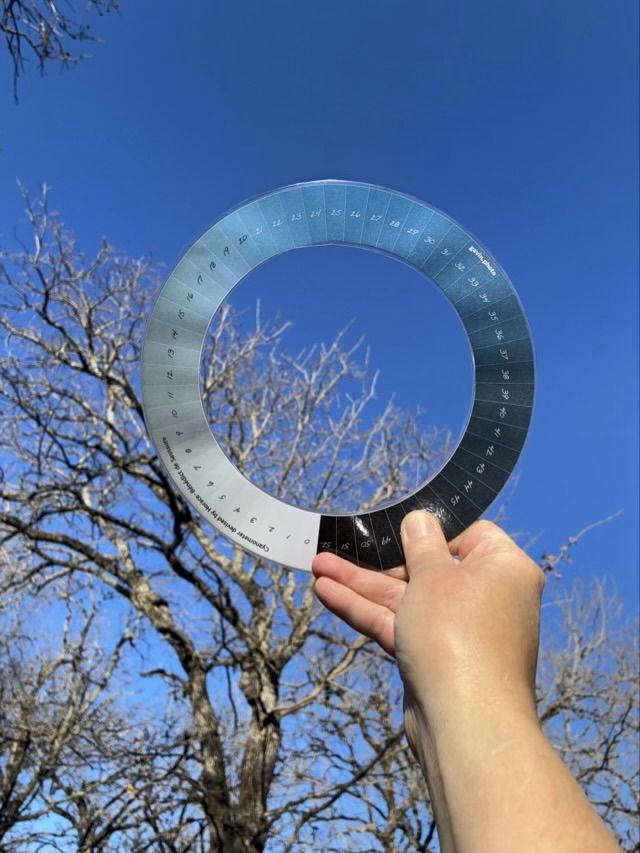
What my readings did not tell me, and what I had to discover in practice, was that you need a good light source on the cyanometer. Standing facing the sun, or in the shade, makes the colors too dark. I found using it with the sun at my back shining on the disc worked best.
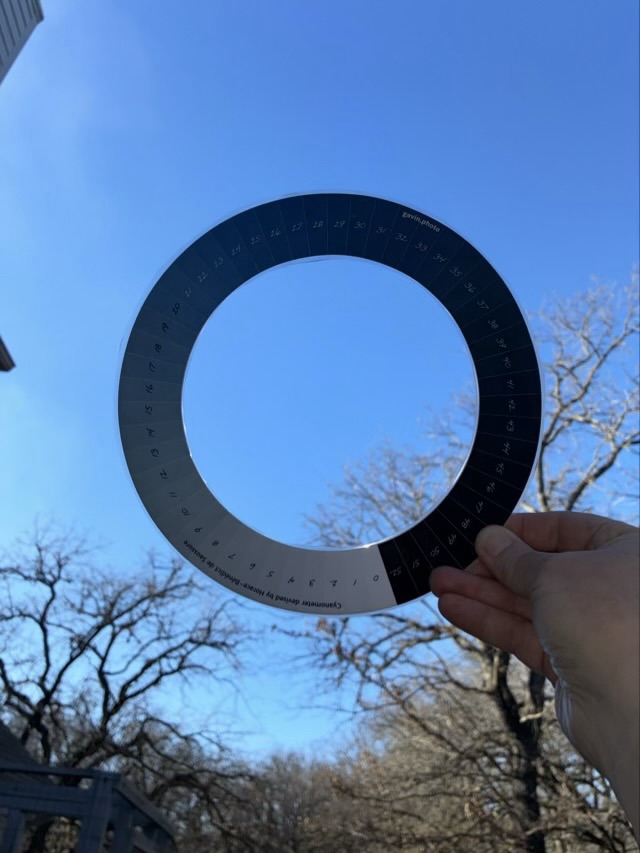
Of course there are many other factors to collect when taking your reading: time of day, geographical location, angle in the sky, cloud cover. Painters and photographers use it as a reference. Overall an interesting little disc.