After removing the rotting wood top and wire brushing the rust and wasp nests from the Singer Treadle machine base, it was time to refinish the cast iron.
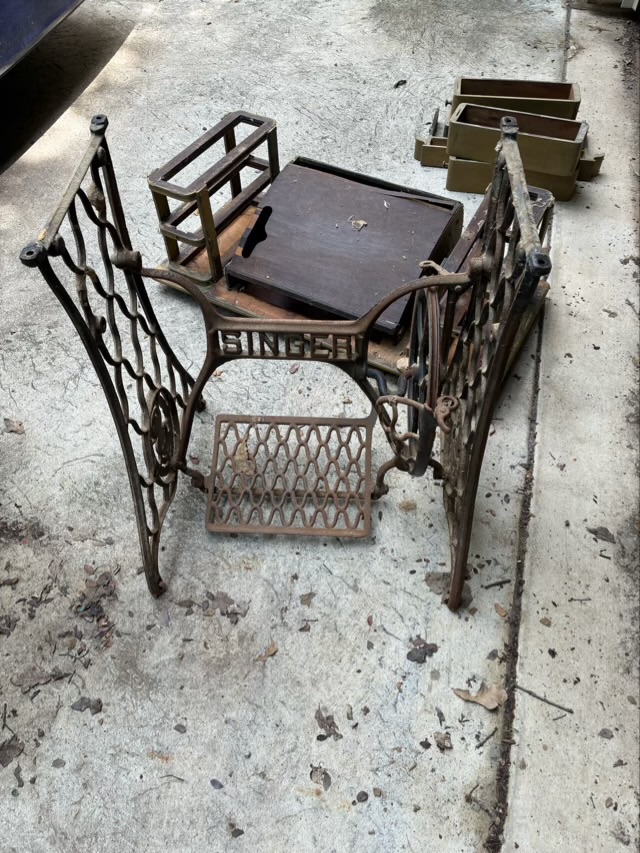
Photo description: Singer Treadle machine base from 1907 before polish
I chose to treat the cast iron with black stove polish to keep the rust away and keep it close to the original color.
Photo description: using a soft bristle brush to apply the black stove polish into the intricate cast emblem on the side of the treadlePhoto description: completed application of black stove polish
I used squares of cotton and a small brush to get the polish in the cracks and crevices. It was satisfying to see the paste melt into the iron.
The wheels all rolled well, so I cleaned them with a brass wire brush on my rotary tool and treated them with sewing machine oil.
Photo description: steel wheel before picturePhoto description: steel wheel after picture with the dust and dirt removed
The plan is to put on a table top, but keep the treadle functional by putting holes in the top so the drive band can come up through and run a device on the surface. I may experiment with some scrap wood first.
The Singer 27 treadle sewing machine that I purchased for $50 and pulled put of barn where it had lived for years is going back to the original purposes for which I bought it. I just wanted the cast iron base.
After reading about treadle machines I had changed my plan and attempted a restoration, but there is just too much rust. So. Much. Rust. Cleaning and polishing teeny tiny parts is not my happy place, so the project sat for three years. I need the workspace back, so I’m going back to my original plan of restoring just the cast iron base to be a power source for different tools.
Photo description: cast iron Singer sewing machine base separated from the wood top that was rotting and painted a strange yellow
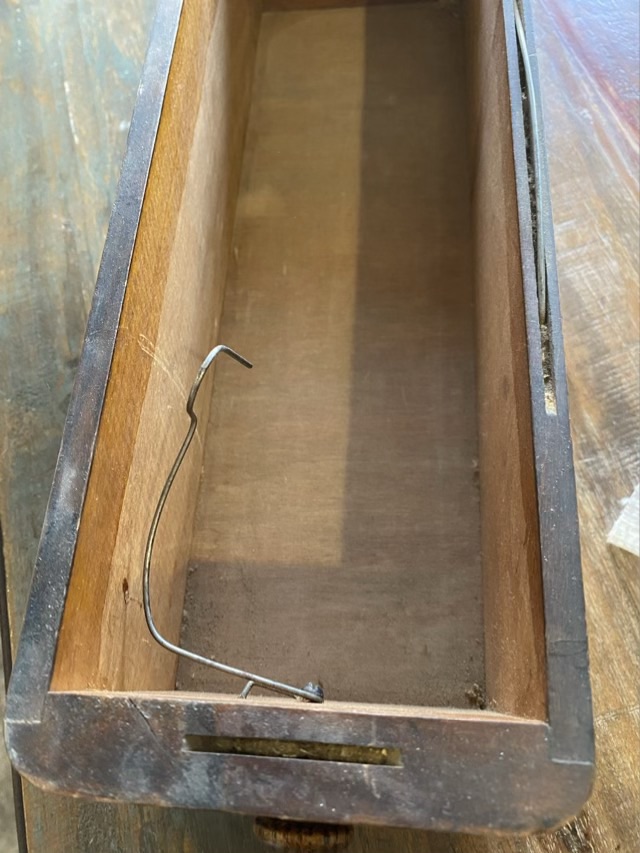
In one of the drawers of the Singer model 66 cabinet, there was a metal wire hook. Very strange.
Photo description: Inside of a wood drawer from a Singer treadle cabinet, with a wire hook attached to the screw for the wood knob.
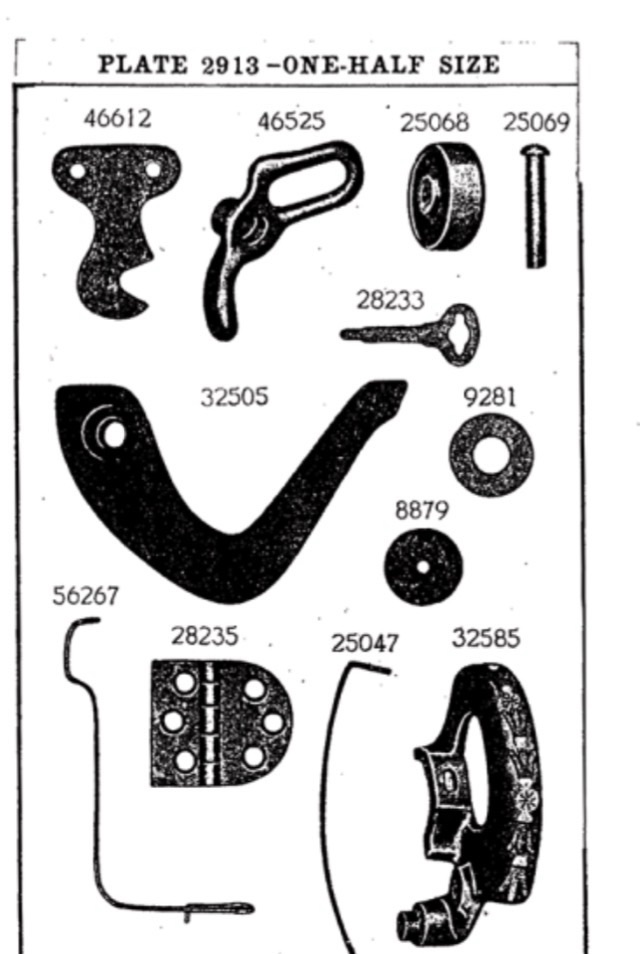
I asked on a couple FaceBook groups what the purpose of this hook was, and had many guesses, but no firm knowledge. I also signed up for the email list for TreadleOn.net, which talks exclusively about people powered sewing machines. It took a few days, but then a couple people chimed in with their informed guesses. From what I can piece together, this was intended to hold bobbins, and was an original Singer part 56267, as pictured in an illustrated plate (shown below) from MillardSewing.com.
Photo description: Illustrated plate of Singer sewing machine parts.
From what we could gather, this part was only produced for a short time. Users found it annoying and often removed it. Many people answered my question with better solutions for bobbin storage.
My hypothesis, as a long time crafter and person who sews, is that the hook was intended for bobbins, but not for storage. It is mentioned in the Singer manuals, frequently and with urgency, that bobbins should not be wound with additional thread. The old thread should be removed before winding on a new color. I have personally seen evidence that the sewing machine users blithely ignored this advice, because ALL (yes, all) of the bobbins from my model 27 and model 66 had multiple colors of thread. I believe the Singer engineers fashioned this hook to make unwinding the bobbin easier. I tested with this in mind, and it works beautifully for that purpose. A single bobbin can be threaded on to the hook, it holds the bobbin securely while letting it spin, and while unwinding the thread, the bobbin does not jump across the room and hide under the dresser, as happens every time I have unwound a bobbin previously. Maybe users found the need to not waste thread more urgent than the smooth operation of the machine. I don’t know. The modern solution is to have a plethora of bobbins, minimizing the need to unwind. I will be keeping the wire as is, and will use it for unwinding. I do appreciate good engineering.
I continue to periodically spray PB Blaster on the 1907 Singer 27 sewing machine I want to rebuild. I recently had a major breakthrough and was able to remove the rod for the pressure foot and the needle bar! These rods, on a clean machine, just slide out. I needed to pick away the crust around the holders, rotate them, pick away more build-up, then I was able to get them to slide upward! Very exciting day.
Photo description: Pressure foot rod covered with dried oil, the Singer 27 in the background.
I have one more internal part with a rusted screw that I want to free up so I can clean it. The main drive through the machine looks OK, so I don’t plan on removing that. Then all the parts that have been soaking in PB Blaster get cleaned. I have decided that the decals are too far gone, and it would be better to not have flaking paint, so I need to decide how to proceed with refinishing the body of the machine as well.
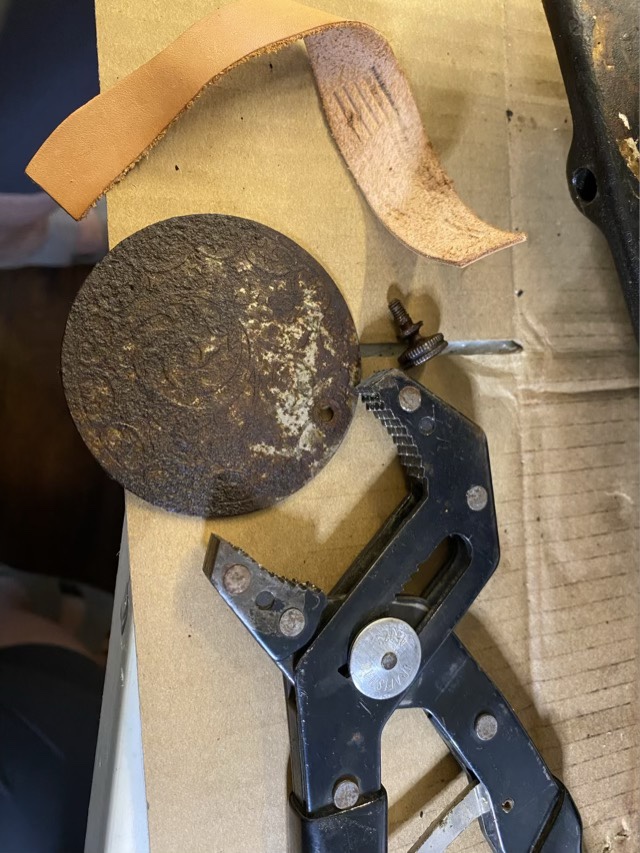
I’m still regularly oiling the Singer 27 treadle machine and attempting to remove more parts for cleaning. My husband has been helping, and he was able to free several bolts! I did take a tool to a thumb screw for the back plate; I figured if it was going to break, better that I’m the one that breaks it. I wrapped the knob in leather, then used an adjustable wrench, and slowly turned the screw. Success!
Photo description: Large adjustable wrench on the bottom, next to a very rusty back plate, next to a small knurled knob that held the plate in place on the machine, and at the top, a 1/2” strip of tooling leather
I photograph all the removed parts and put them in a labeled ziplock bag with a spray of PB blaster. When I get all the parts free, I’ll clean everything before putting it back together (fingers crossed).