Reclaimation

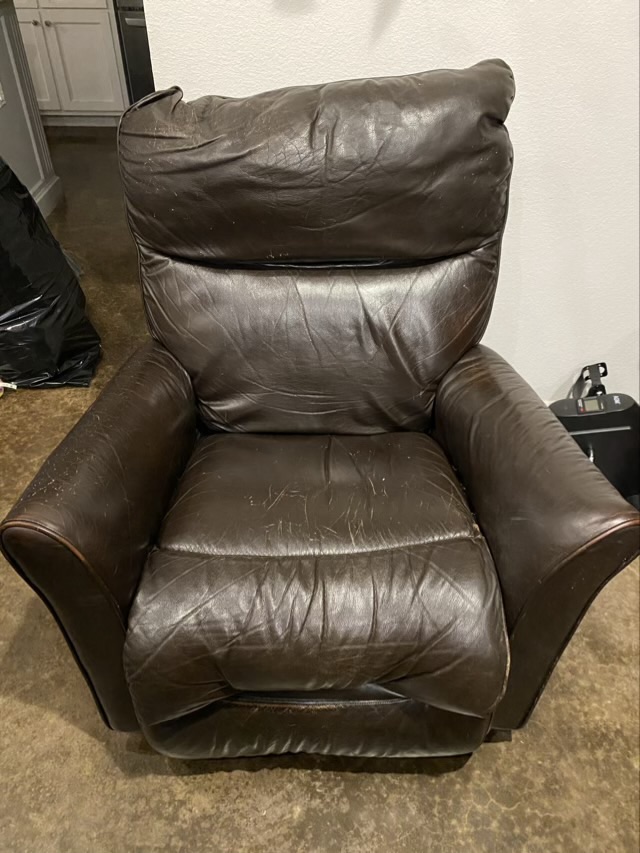
I replaced my recliner. The padding in the old one was breaking down, especially on the arms, causing pain and numbness in my own arm. I tried reworking the existing padding, and then replacing the padding, with no improvement. The recliner mechanism was also staring to go, again. (I did replace that a few years ago by ordering a new ratchet strip, but I even wore that out.) Time for a new seat, but what to do with the old one? It was not all leather, but did have some, could I reclaim it?

Photo description: old leather recliner

I took a pair of kitchen shears and went after the fabric of the chair.

Photo description: inside the recliner showing the leather (tan) and the faux leather (white)

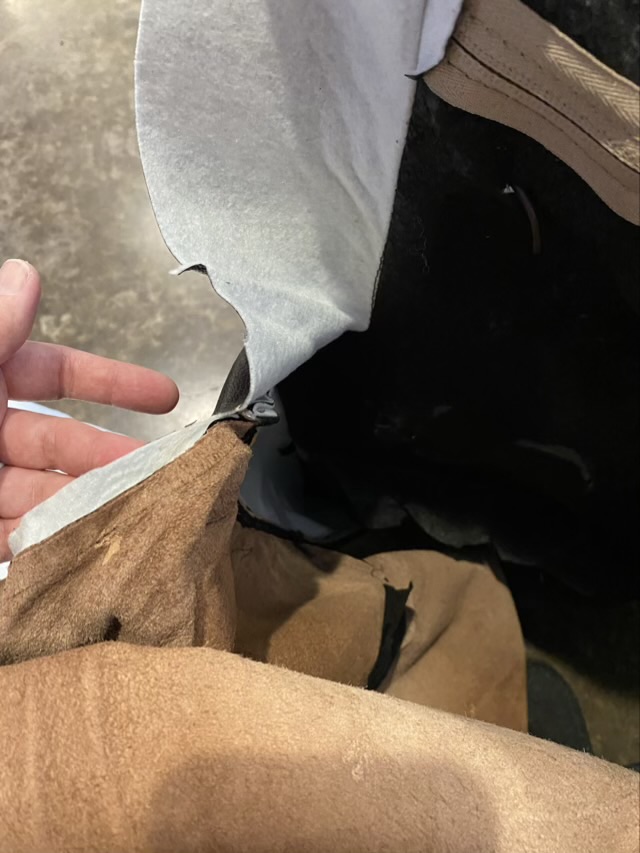
Deconstructing was not terribly hard. Most of the screws were two sizes of Torx head, and I had the right size screwdrivers. I was appalled at the amount of cardboard inside the recliner, it was a thin sheet of that over the sharp edge of wood that was causing the pressure point in the arm of the chair; the curved slope was an illusion. The hardest thing to remove was the handle for the recliner action.

Photo description: handle removed after applying a wrench to the screwdriver to get enough torque

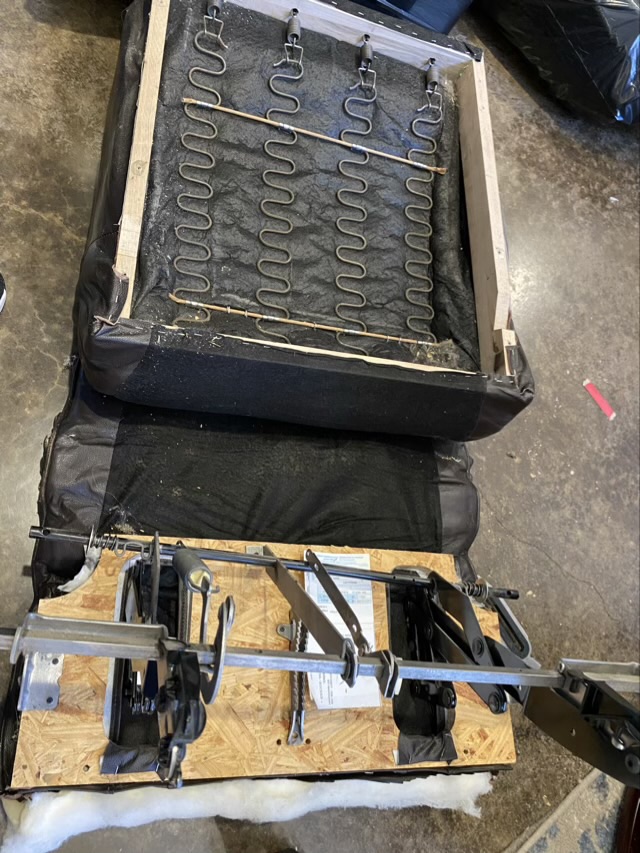
I’m thought about reclaiming some of the steel and springs, but I didn’t have a purpose in mind, and I don’t have the storage space for that much “maybe”. I used leather often, so I knew that was a valuable resource.

Photo description: steel mechanisms and springs inside the recliner

In the end, I reclaimed 2 pounds 9 ounces of leather and reduced the recliner to fit in four black bags, which could be put out with the other trash and not require a special pick up.

Photo description: four large black garbage bags ready for take out

Leather pan handle

Dad put another leather handle for cast iron pans on his wish list, so I delivered. I used some unfinished tooling leather, cut it to shape, wet it, and formed it to the handle of my Lodge cast iron pan. The design is wrap around, with only the end sewn, so that it can slip on and off. I sewed the ends together with waxed thread using a baseball stitch.

Photo description: dried leather is pan handle, side view
Photo description: sewn end of the pan handle

I wanted to add some decoration to this so turned to my pyrography setup.

Photo description: starting the decoration with spirals done with a pen tipped pyrography tool
Photo description: completed pyrography in Zentangle style, with spirals going to stacked tear drops to clustered bubbles finished with parallel lines

I finished the leather with Resolene, a leather conditioner that will protect against food splatters.

Throwback Thursday: leather belt

Here is a throwback from February 2005. I carved a Celtic knot into a leather belt and dyed and finished the leather. I really enjoy leather carving, nearly as much as pyrography. The photo isn’t spectacular, but at least I moved away from the black velvet backdrop.

Photo description: black leather belt with a Celtic knot carved along the length, sitting on a sandy colored composite counter

Throwback Thursday: book weight

Today we are going back to December of 2004 and a leather book weight I made and decorated with painted bees. It seemed appropriate to share this in nod to my bee visitor this week.

Photo description: tooled and painted leather book weight with painted bees on red, blue, and green circles on each end, the sides have been sewn with leather lace with a braided edge. Black velvet background (which was totally a thing back then).

The ends of the book weight are filled with small bags of sand to give it enough heft to hold a book open. The back side is suede to be gentle on the pages and have a bit of grip. I’m still quite pleased with the stitches around the outside, I love a good decorative braid stitch. I do have to admit that I have to look up how to make the braid every time.

Throwback Thursday: Socks

My current endeavors are not my first foray into knitting socks, as proven here in a picture from November of 2003. I was knitting with thicker wool, and sewed tooled leather to the soles to make a slipper. Tooling leather isn’t the ideal slipper sole, it is thick and stiff. Now I would use suede or a finished supple leather, something to reduce the chance of slipping while walking more than the simple tooling I tried here. I do like how neat my stitches are, though, and worsted weight yarn knits up much quicker than sock weight yarn!

Photo description: cream colored wool slipper socks with a lightly tooled leather sole whipped stitched with leather lacing.

This was over 20 years ago. Hm.