In January of 2015 I was examining the construction techniques of Irish crochet, a type of free form lace that has a rich texture.
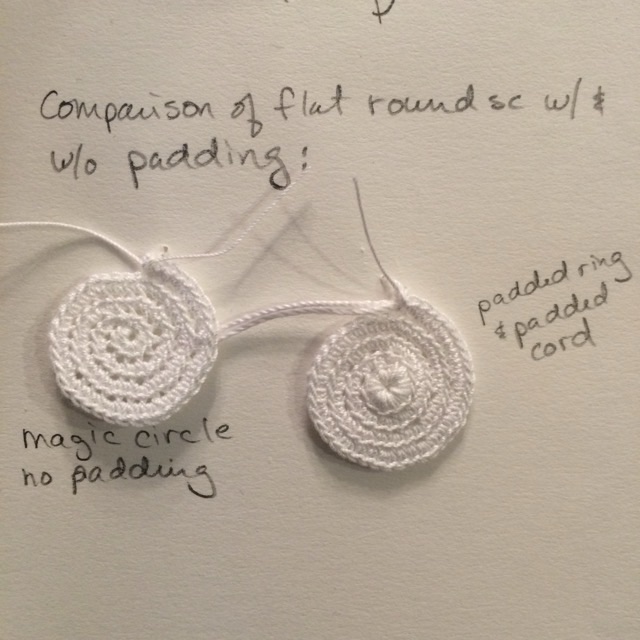
Photo description: two crocheted circles, one without padding (left), one with padding (right)
Padding in crochet is carrying a thicker cord, or multiple cords, along inside the crocheted stitches. The padding cord also gives more control of the shape of the crochet because it can be pulled tighter and lock in curves.
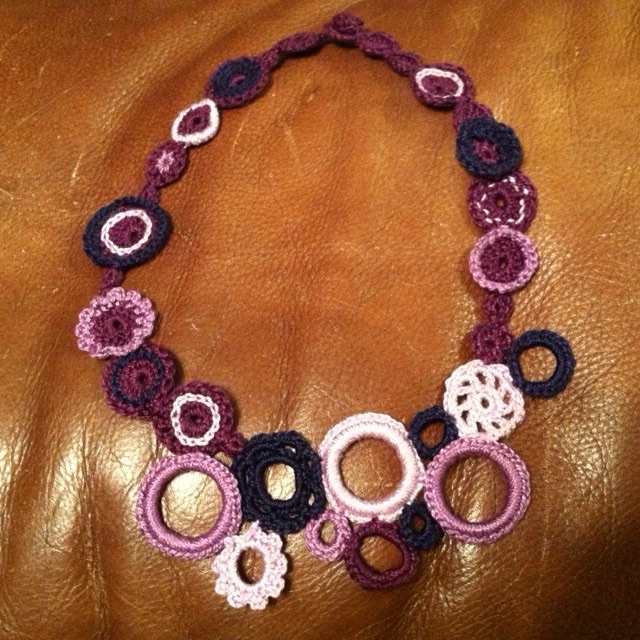
Back in December of 2014 I decided to combine crochet and jewelry making to create a light weight but bold necklace with pearlized cotton in shades of purple.
Photo description: crocheted circle necklace with hand made button clasp using four shades of purple pearlized cotton on a leather couch cushion
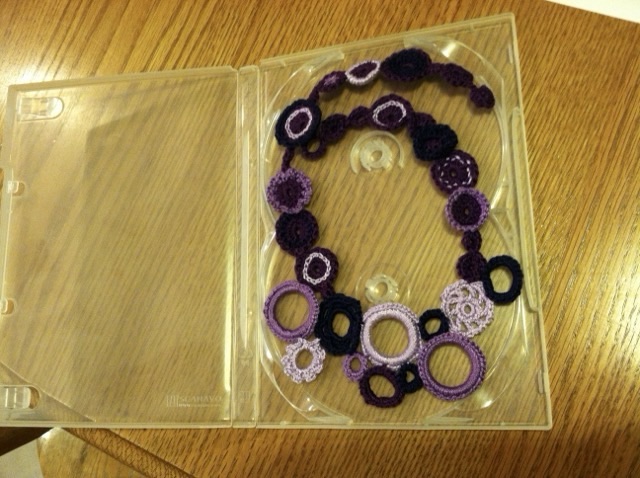
In 2014 I really had started to embrace taking pictures of my creations. I even took a picture of the CD case I repurposed into a guess-thwarting jewelry box.
Photo description: same purple crocheted necklace in a clear double CD case to keep it flat and give the recipient a moment of “hm?” before opening
I’m pretty sure since this is purple it went to my Mom. I’ve done more crocheted jewelry since. It is much lighter than traditional bold jewelry pieces, but does have to be laundered, starched, and laid flat to dry on occasion. I can personally tolerate a crocheted necklace for a little longer, if it isn’t too tight.
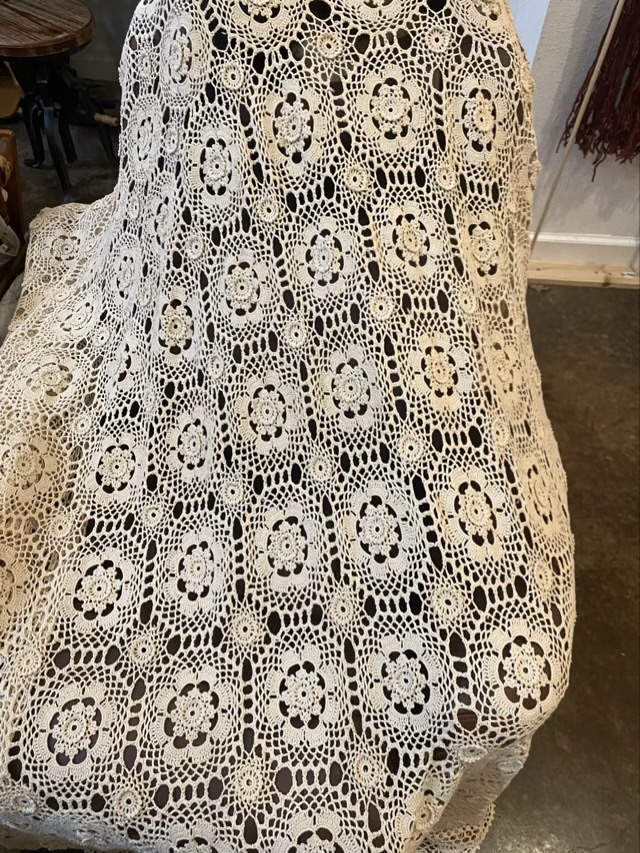
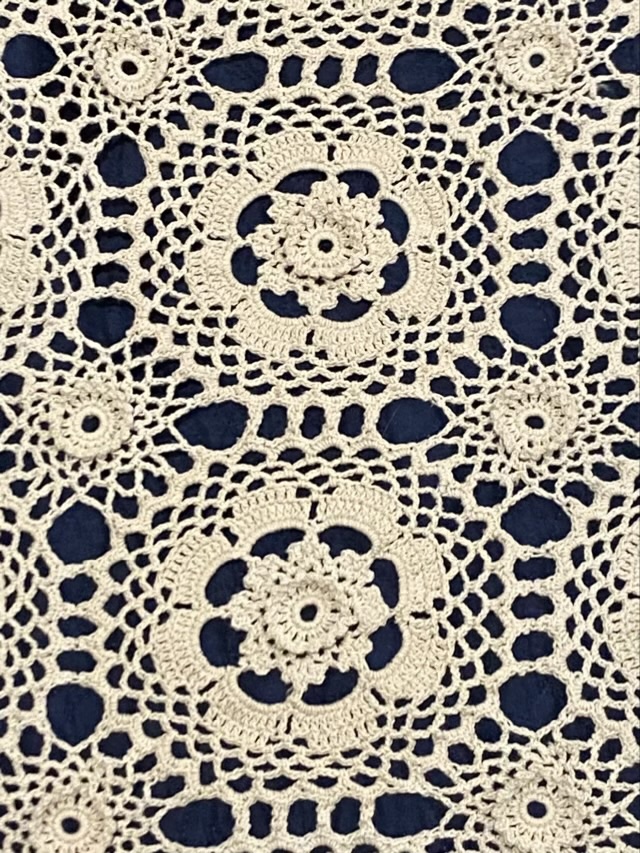
I have a side hobby of spotting fake crafts. Either AI generated photos or machine made items pretending to be hand crocheted. Hand knit is harder to tell apart from machine made, since knitted fabric can be produced rapidly by a series of hooks and knitting machines have been around for a long time. I have heard of crochet machines that do make single loops with a single thread, but they are used to edge blankets and not make intricate lace. I was surprised then, when I was crawling a garage sale, to find a large crocheted throw.
Photo description: king-sized cotton crocheted lace coverletPhoto description; closeup of two motifs of the cotton coverlet, showing the stitches, all of which I can identify and recreate.
I asked the sellers for historical detail, but it was a multi-person sale and the person who owned it wasn’t there. I bought it for $8. It smelled like moth balls and time in a closet.
When I got it home, I found a tag: made in China. Oh. So this was not an heirloom blanket sold at a garage sale. This was an item bought commercially and not used. I suspect the “flat dry” was the problem. Not many people have room to flat dry a king-sized blanket.
Photo description: tag found on the blanket that reads: 100% cotton, machine wash, cold water, gentle cycle, no bleach, flat dry, made in China RN 59757
The only way to produce this large and intricate work cheaply is by using many poorly paid people. I know the original owner didn’t pay $8, but to sell it for that tells me that they didn’t pay much.
That it is in pristine condition tells me that it was barely used, if used at all. There are no stains and no tears. But it is definitely hand crocheted. I can identify each stitch and see the progression of the work. Each motif was worked with a crochet hook then connected and I can see the connection stitches. I can tell how the border was worked and what stitches were used. I washed it and dried it both by machine on the delicate and gentle cycles, and it came out fine.
That the skill to make the coverlet is so casually discarded and undervalued is a sad state.
I went to rinse and block my small twined cotton bag and was a little shocked when it held water. It wasn’t completely water tight, there was a slow drip, but it didn’t absorb water like I expect cotton to do. My hypothesis is that because I hadn’t washed it at all to this point, there may be some natural water resistance on cotton bolls. Not enough to keep the harvest safe from rain (as this cotton farmer describes), but some. Or the twining is tight enough and thick enough to resist the water for a short time.
Photo description: small twined cotton bag holding water over a sink
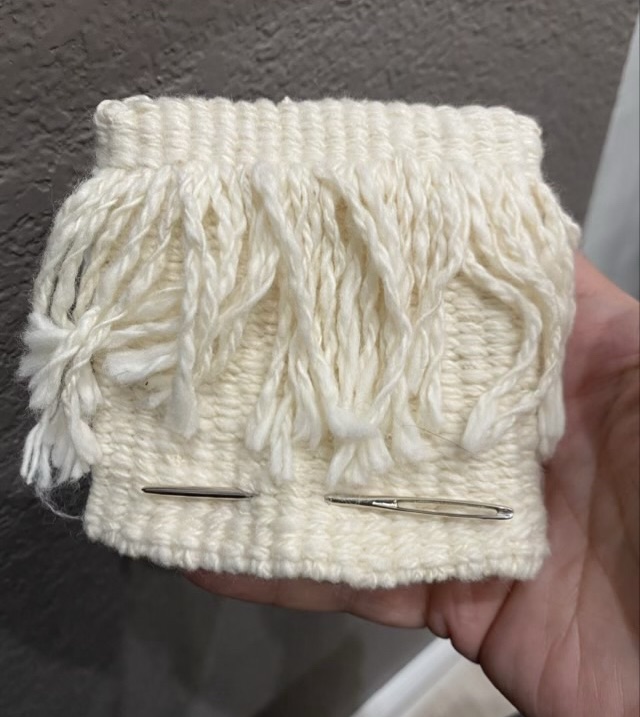
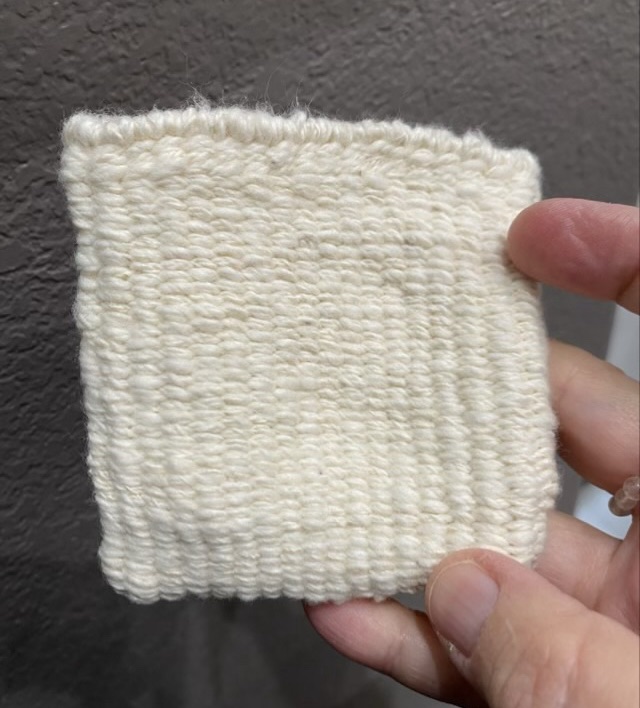
For my North Carolina grown cotton fiber page I had enough hand spun crepe yarn to twine a small pouch. I used a square of sanded eighth inch plywood as my form and twined until I was about square. To finish the bottom, I ran the warp threads up the opposite side of the bag.
Photo description: half the warp threads woven back through about seven rows of twined weaving with the bag wrong side outPhoto description: all the warp threads woven in and the needle used shownPhoto description: pouch right side out after trimming the warp threads
After I wove in all the warp threads, I realized a probably should have knotted them, then wove them in. Since this bag will only be on display in a book, it won’t see heavy use, but it is something I need to remember for next time I twine a bag. The picture of the pouch looks skewed because there is a bias twist in the fabric. I noticed when I started twining that I was actually untwisting the ply, so I switched my twine direction, which reinforced the ply, but gave it extra twist energy. It should even out after blocking.