I decided my ukulele needed a strap. Maybe it was mostly an excuse to design a new card woven pattern, maybe it was to use up cotton crochet thread, most likely I decided to make it myself because I don’t have enough works in progress.
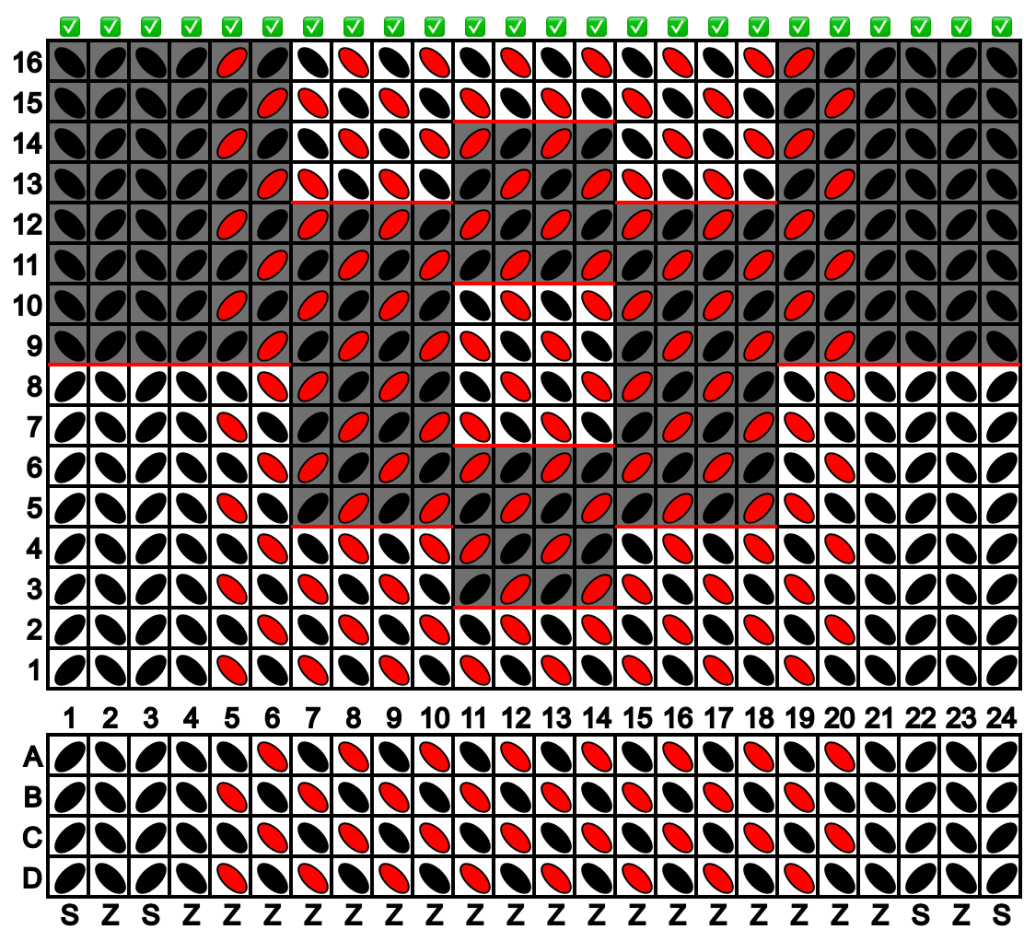
I used this tablet weaving designer, and came up with this pattern.
Photo description: Tablet weaving pattern diagram generated in Tablet Weaving Draft Designer v1.5.0. Diagram shows how to setup the cards in the tablet, and which way to turn each card for each pass of the weft thread.
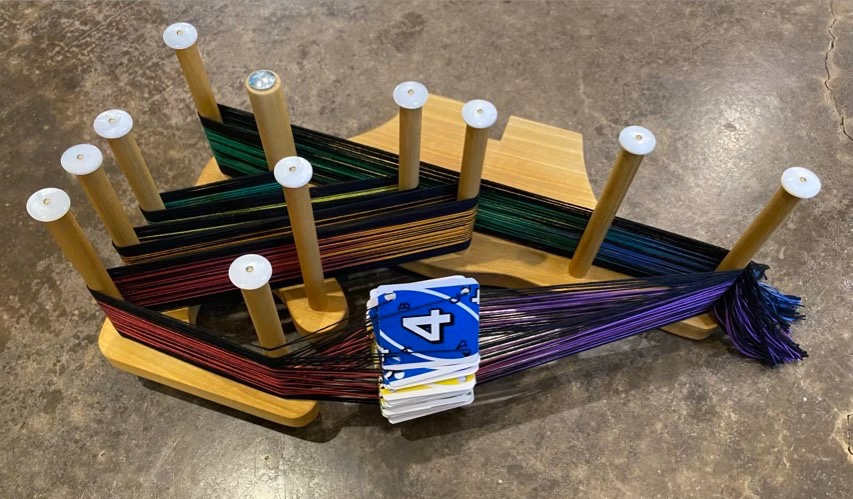
I warped my loom with #10 cotton crochet thread in black and rainbow. The rainbow warps I aligned by color. It was quite serendipitous that a color repeat in the thread was just a little longer than my warp length, so I could have all the colors, and very little waste.
Photo description: Handmade Inkle loom warped with black and rainbow thread with weaving cards made from an Uno deck.
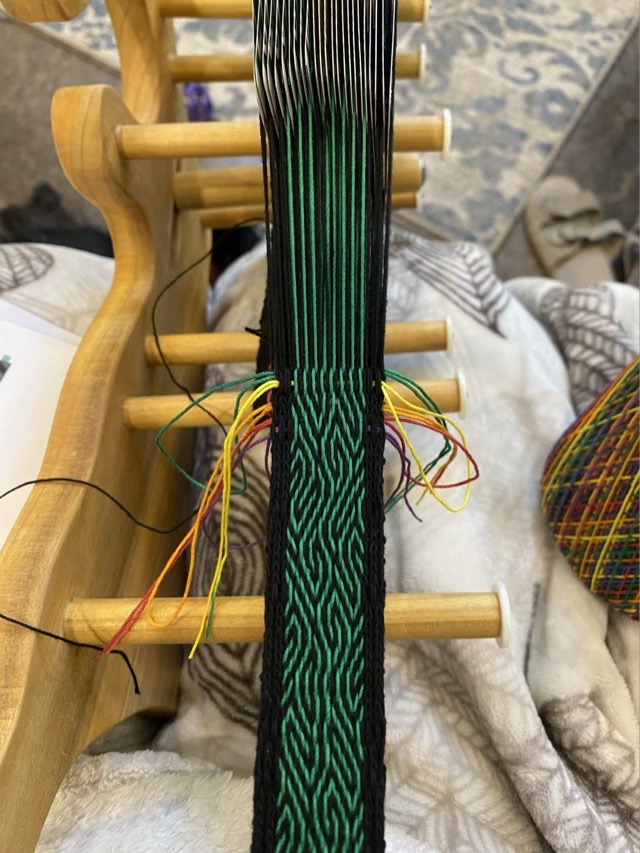
I used the black thread as the weft, and started with a few passes held straight with lengths of 18 gauge wire, then doubled the weft back on itself for several rows. To end, I used a loop method to draw the weft back on itself to help lock the weaving in place.
Photo description: Weaving in progress showing a wavy green and black pattern with solid black edges and rainbow colored loops along the weft pass to use to draw the weft backwards.
I love this pattern. It is balanced so the twist does not build up in the warp, except when I make a mistake. Even when I miss a turn or double a turn, it still looks cool, and it is double sided! Win! I love the middle, but the edges vex me because they are not even (an artifact of the balanced weave). I may try a plain woven edge next time around (my youngest has requested one for her uke.)
Photo description: Finished woven band with color changes along the spectrum in the same wavy pattern.
I modified another t-shirt. I don’t care for crew neck t-shirts (sensory thing with fabric touching my neck), so I cut off the binding, and used black crochet thread to make a blanket stitch all around the neckline, then added a simple chain 3, double crochet repeat pattern row. I like 3/4 sleeves, so I used the same 3 chain, double crochet pattern to lengthen the short sleeves, and added a scalloped edging by making five chain 1, 1 double crochet in every other junction.
Photo description: Black Smashing Pumpkins t-shirt with black crocheted lace at the neck and sleeve.
I am not historically a lace person, but the practicality of it in our Texas heat is appealing. The idea of practical lace also amuses me.
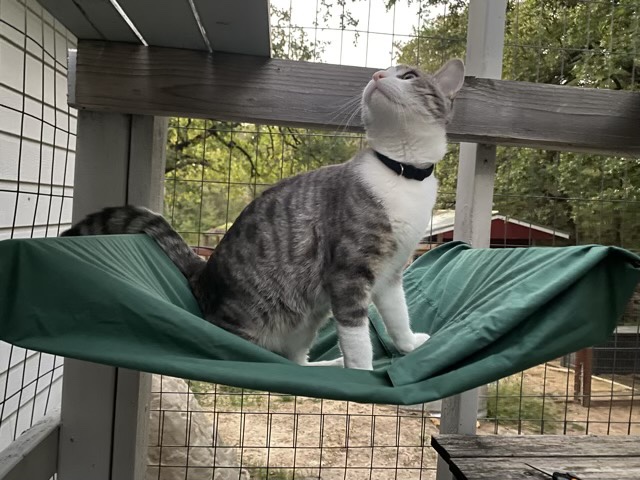
One of the sling beds in the catio gave up under the weight of the kitten and popped its grommet. I removed the rest, it has lasted awhile, and puzzled over a replacement. The two sections of 1 x4” wood that I screwed to the catio supports seemed about the size of a pillow case. It turned out it was a little wider, but with a quick seam and a couple of snipped holes, I converted an old pillow case into a cat sling bed that slides over two parallel boards.
Photo description: Gray tabby sitting in the hammock made with a repurposed green cotton pillowcase suspended by two boards
Cotton does degrade in the sun, but this might be a better design idea than grommets in the corners screwed to the board. I’ll see of the cats use this setup, and if they do, replace the cotton with outdoor resistant fabric.
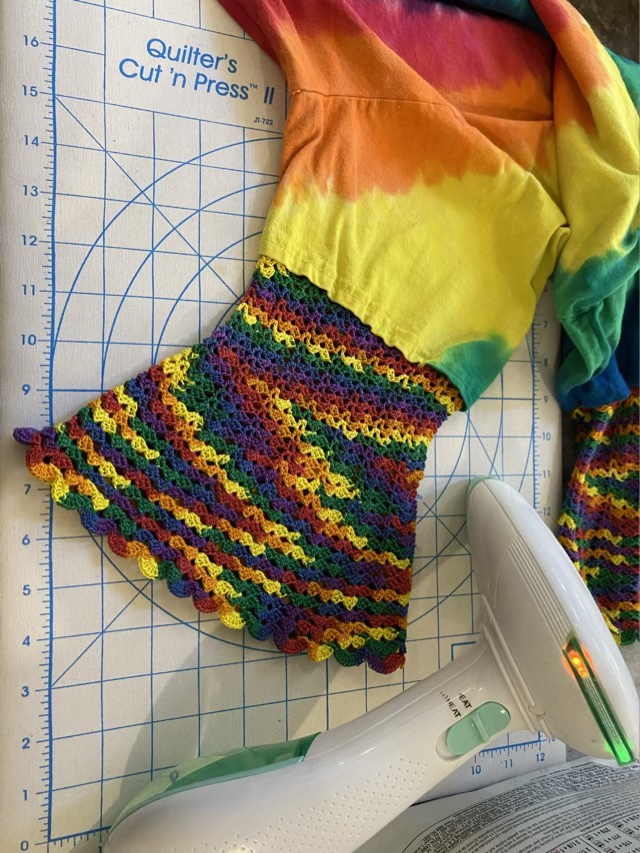
I really wanted bell sleeves on my tie-dyed t-shirt. My first attempt did not please me, so I ripped it out and tried again. I tried some crocheted lace with worsted yarn, but it was too thick and stiff. So I fell back on a crochet standard: number 10 cotton. This cotton is in every craft store, and nearly always comes in at least white, black, and rainbow. It is great for crocheting lace. I sewed a chain stitch to the inside of the sleeve hem, then crocheted in the round a simple alternating shell pattern.
Photo description: Rainbow colored fabric, with a rainbow colored cotton thread sewn as a chain stitch, showing the needle mid-stitch.Photo description: Rainbow colored crocheted lace bell sleeves on an ironing board with steamer at the ready.
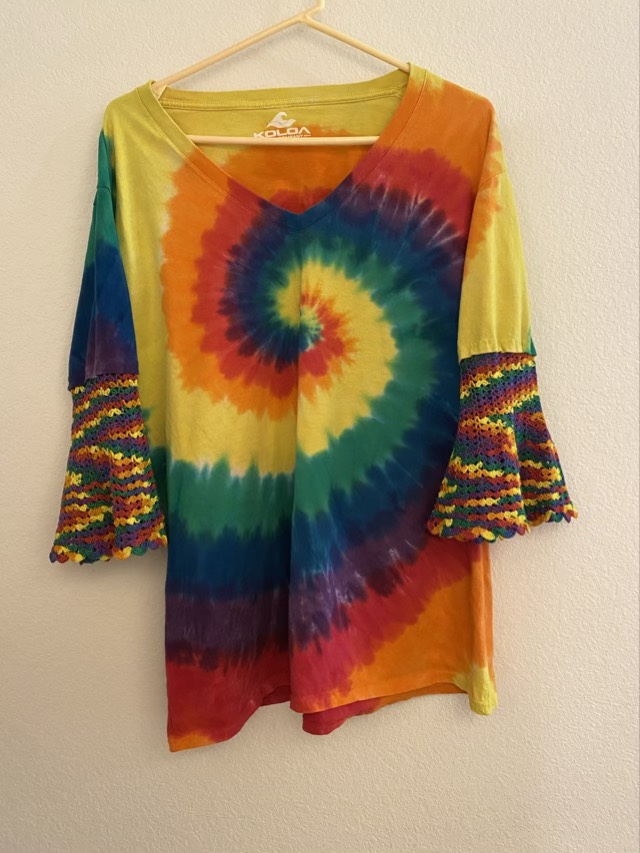
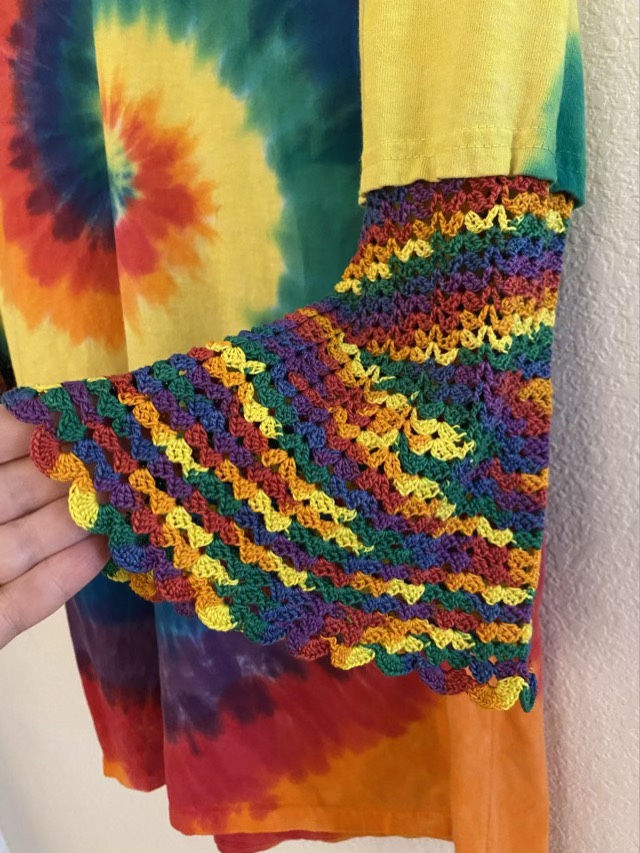
When the sleeves were done, I steamed them, which worked brilliantly to even out the stitches. The rainbow thread made serendipitous color pooling as the stitch pattern changed, which goes along with the tie-dye nicely.
Photo description: Rainbow tie-dyed spiral t-shirt with crocheted lace bell sleeves.Photo description: Close-up of bell sleeve being held open.
So here comes the crochet pattern and math, for those that are interested.
With needle and crochet thread, make an embroidered chain stitch around the inside hem of the sleeve. The size of the stitches should be slightly larger than a crocheted chain done with a size 0 hook.
Row A: With a size 0 crochet hook (2mm), join the thread to the first chain, chain (ch 3), double crochet (dc) into the same chain, ch 2, 2 dc in same chain. Skip 2 chains, (dc, ch 1, dc) in same chain. *Skip 2 chains, (2dc, ch2, 2dc), skip two chains, (dc, ch1, dc). Repeat from * around. At this point you can tell if the work is bunching up the fabric, or ruffling out, depending on how long the embroidered stitches were. If it is not to your liking, rip out and use a different number of skipped chains. This is the only place it will matter, just note how many shell sequences you make, so you can match it on the second sleeve. For instance, if you have 72 chains and 12 shell sets, each shell set will span 6 chains, so you’ll skip two chains between shells. A shell set consists of a shell stitch and a v-stitch.
Row B: Slip stitch (sl st) into the center of the first shell, (ch3, dc, ch2, 2dc) into same shell, (dc, ch1, dc) in next V-stitch, *(2dc, ch2, 2dc) in next shell, (dc, ch1, dc) in next v-stitch. Repeat from * around.
Repeat row B, 8 more times, or until the straight part of the sleeve is the length you want. Now we will start the bell.
Row C: Sl st into the center of the first shell, (ch3, 2dc, ch2, 3dc) into same shell, (dc, ch1, dc) in next V-stitch, *(3dc, ch2, 3dc) in next shell, (dc, ch1, dc) in next v-stitch. Repeat from * around.
Repeat row C, 4 more times.
Row D: Sl st into the center of the first shell, (ch3, 2dc, ch2, 3dc) into same shell, (2dc, ch2, 2dc) in next V-stitch, *(3dc, ch2, 3dc) in next shell, (2dc, ch2, 2dc) in next v-stitch. Repeat from * around.
Repeat row D, 4 more times.
Row E: Sl st into the center of the first shell, (ch3, 2dc, ch2, 3dc) into same shell, (3dc, ch2, 3dc) in each shell all the way around.
Repeat row E, 4 more times.
Row F: Sl st into the center of the first shell, (ch3, 3dc, ch3, 4dc) into same shell, (4dc, ch3, 4dc) in each shell all the way around.
Row G: Sl st into the center of the first shell, (ch3, 12dc) into same shell, (13dc) in each shell all the way around.
Join first shell, weave in ends, steam.
It writes up much more complicated than it works up.
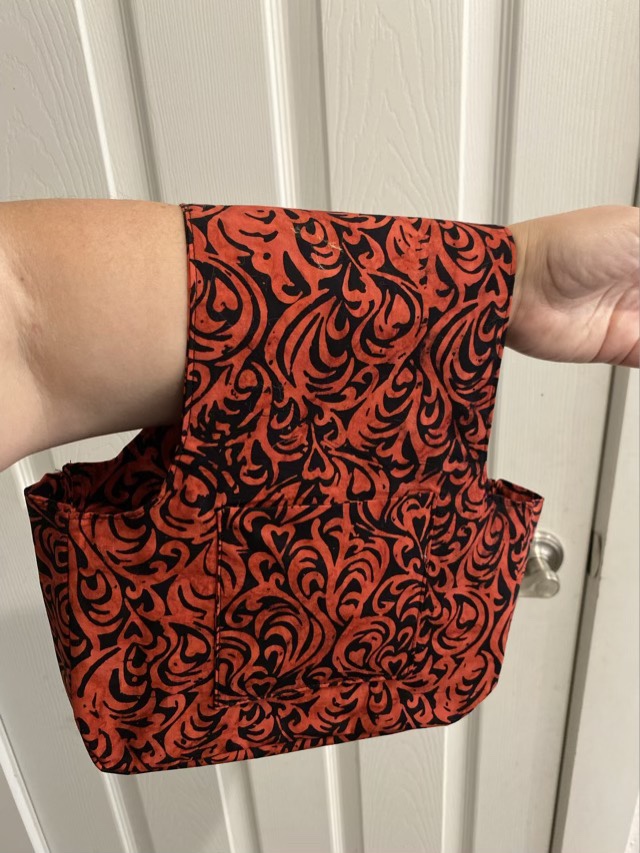
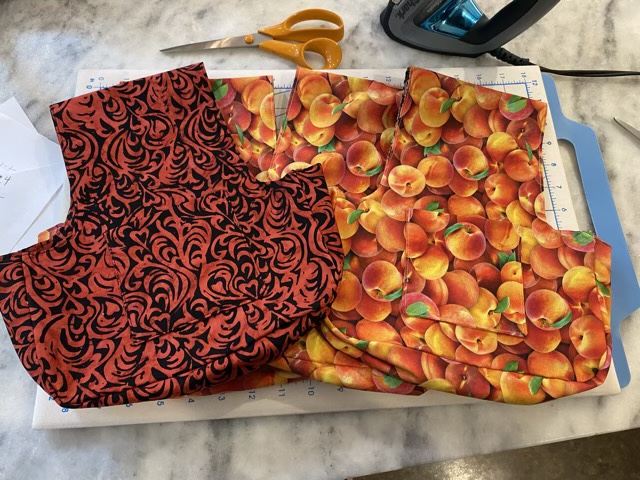
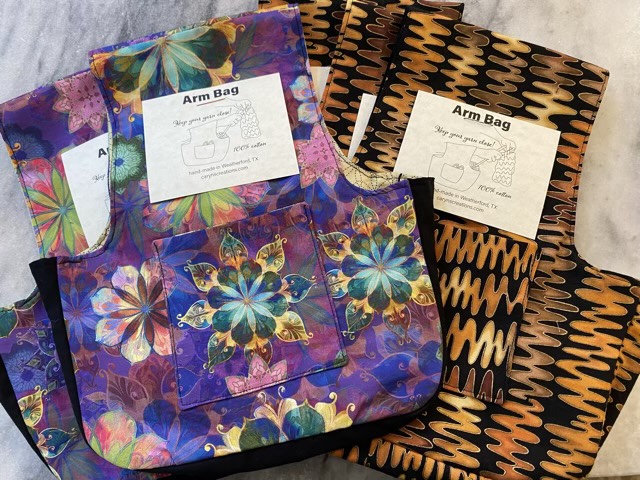
I made up a few arm bags to sell at our local craft store. I love these bags. I love having my yarn up close, and not having to draw it from a container on a table or the floor. They make it possible to stand or walk and craft as well. The wide handle lays comfortably on my forearm, there is enough room to reach into the bag while it is on my arm, and there are two pockets! Pockets are important. I make them with 100% cotton quilting quality fabric.
Arm bag on my armSome more fabric patternsA few more fabric colors
I commissioned my eldest for the drawing on the tags, as I was busy sewing. I think it came out well. These are currently sold exclusively at NerdCraft in Weatherford, TX.