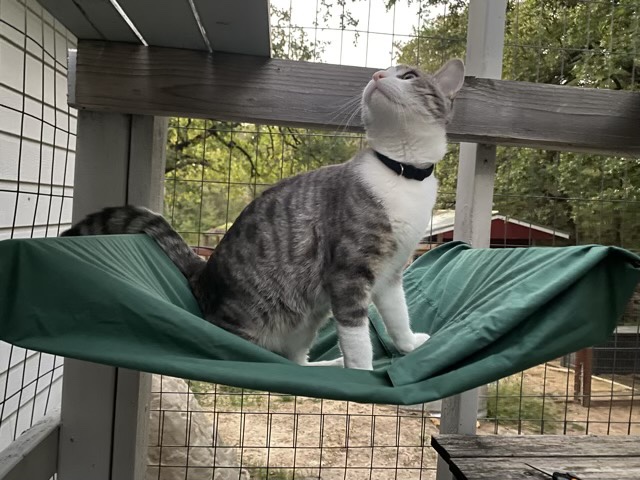
One of the sling beds in the catio gave up under the weight of the kitten and popped its grommet. I removed the rest, it has lasted awhile, and puzzled over a replacement. The two sections of 1 x4” wood that I screwed to the catio supports seemed about the size of a pillow case. It turned out it was a little wider, but with a quick seam and a couple of snipped holes, I converted an old pillow case into a cat sling bed that slides over two parallel boards.
Photo description: Gray tabby sitting in the hammock made with a repurposed green cotton pillowcase suspended by two boards
Cotton does degrade in the sun, but this might be a better design idea than grommets in the corners screwed to the board. I’ll see of the cats use this setup, and if they do, replace the cotton with outdoor resistant fabric.
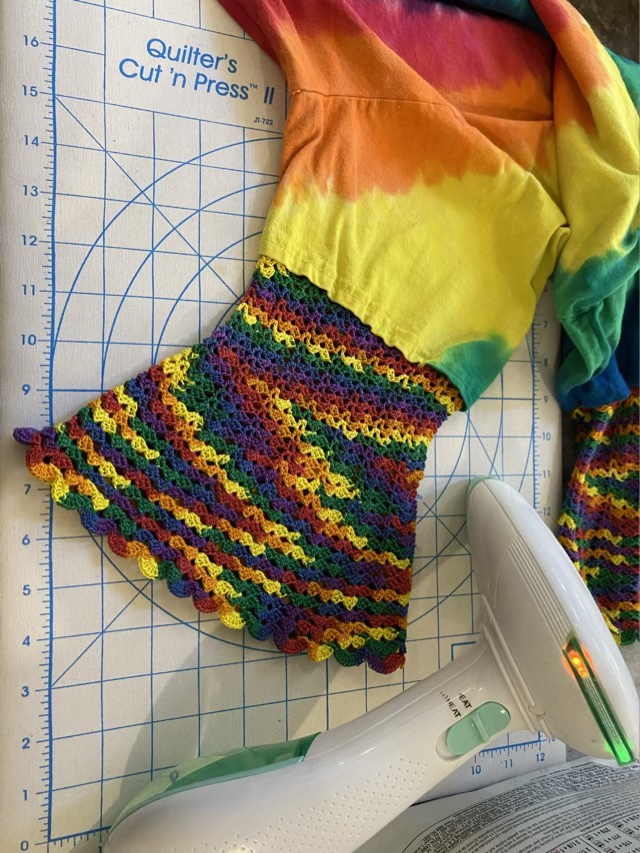
I really wanted bell sleeves on my tie-dyed t-shirt. My first attempt did not please me, so I ripped it out and tried again. I tried some crocheted lace with worsted yarn, but it was too thick and stiff. So I fell back on a crochet standard: number 10 cotton. This cotton is in every craft store, and nearly always comes in at least white, black, and rainbow. It is great for crocheting lace. I sewed a chain stitch to the inside of the sleeve hem, then crocheted in the round a simple alternating shell pattern.
Photo description: Rainbow colored fabric, with a rainbow colored cotton thread sewn as a chain stitch, showing the needle mid-stitch.Photo description: Rainbow colored crocheted lace bell sleeves on an ironing board with steamer at the ready.
When the sleeves were done, I steamed them, which worked brilliantly to even out the stitches. The rainbow thread made serendipitous color pooling as the stitch pattern changed, which goes along with the tie-dye nicely.
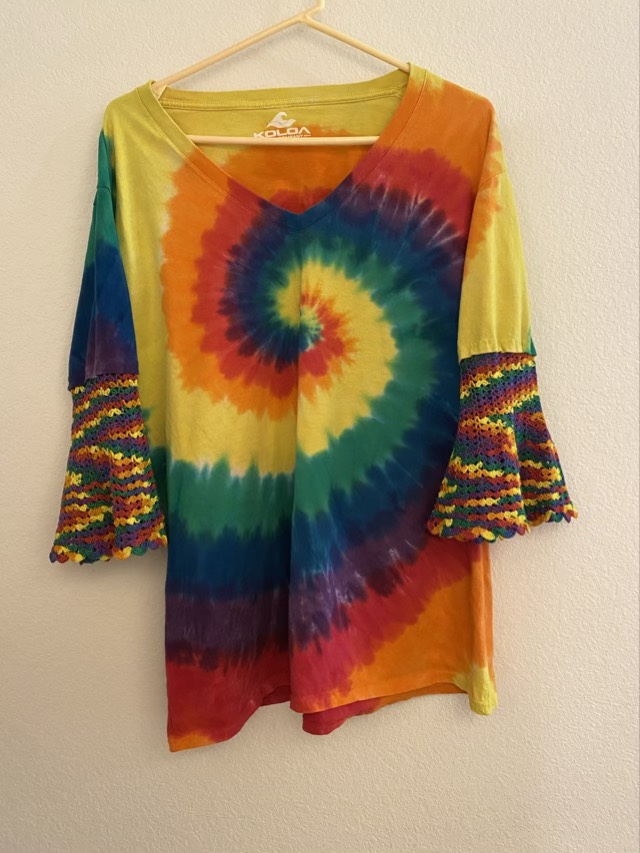
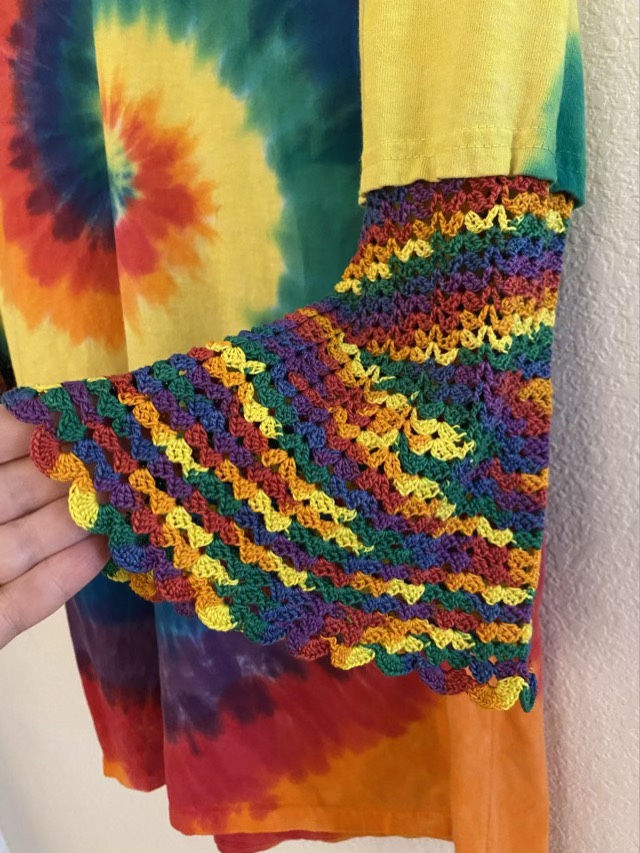
Photo description: Rainbow tie-dyed spiral t-shirt with crocheted lace bell sleeves.Photo description: Close-up of bell sleeve being held open.
So here comes the crochet pattern and math, for those that are interested.
With needle and crochet thread, make an embroidered chain stitch around the inside hem of the sleeve. The size of the stitches should be slightly larger than a crocheted chain done with a size 0 hook.
Row A: With a size 0 crochet hook (2mm), join the thread to the first chain, chain (ch 3), double crochet (dc) into the same chain, ch 2, 2 dc in same chain. Skip 2 chains, (dc, ch 1, dc) in same chain. *Skip 2 chains, (2dc, ch2, 2dc), skip two chains, (dc, ch1, dc). Repeat from * around. At this point you can tell if the work is bunching up the fabric, or ruffling out, depending on how long the embroidered stitches were. If it is not to your liking, rip out and use a different number of skipped chains. This is the only place it will matter, just note how many shell sequences you make, so you can match it on the second sleeve. For instance, if you have 72 chains and 12 shell sets, each shell set will span 6 chains, so you’ll skip two chains between shells. A shell set consists of a shell stitch and a v-stitch.
Row B: Slip stitch (sl st) into the center of the first shell, (ch3, dc, ch2, 2dc) into same shell, (dc, ch1, dc) in next V-stitch, *(2dc, ch2, 2dc) in next shell, (dc, ch1, dc) in next v-stitch. Repeat from * around.
Repeat row B, 8 more times, or until the straight part of the sleeve is the length you want. Now we will start the bell.
Row C: Sl st into the center of the first shell, (ch3, 2dc, ch2, 3dc) into same shell, (dc, ch1, dc) in next V-stitch, *(3dc, ch2, 3dc) in next shell, (dc, ch1, dc) in next v-stitch. Repeat from * around.
Repeat row C, 4 more times.
Row D: Sl st into the center of the first shell, (ch3, 2dc, ch2, 3dc) into same shell, (2dc, ch2, 2dc) in next V-stitch, *(3dc, ch2, 3dc) in next shell, (2dc, ch2, 2dc) in next v-stitch. Repeat from * around.
Repeat row D, 4 more times.
Row E: Sl st into the center of the first shell, (ch3, 2dc, ch2, 3dc) into same shell, (3dc, ch2, 3dc) in each shell all the way around.
Repeat row E, 4 more times.
Row F: Sl st into the center of the first shell, (ch3, 3dc, ch3, 4dc) into same shell, (4dc, ch3, 4dc) in each shell all the way around.
Row G: Sl st into the center of the first shell, (ch3, 12dc) into same shell, (13dc) in each shell all the way around.
Join first shell, weave in ends, steam.
It writes up much more complicated than it works up.
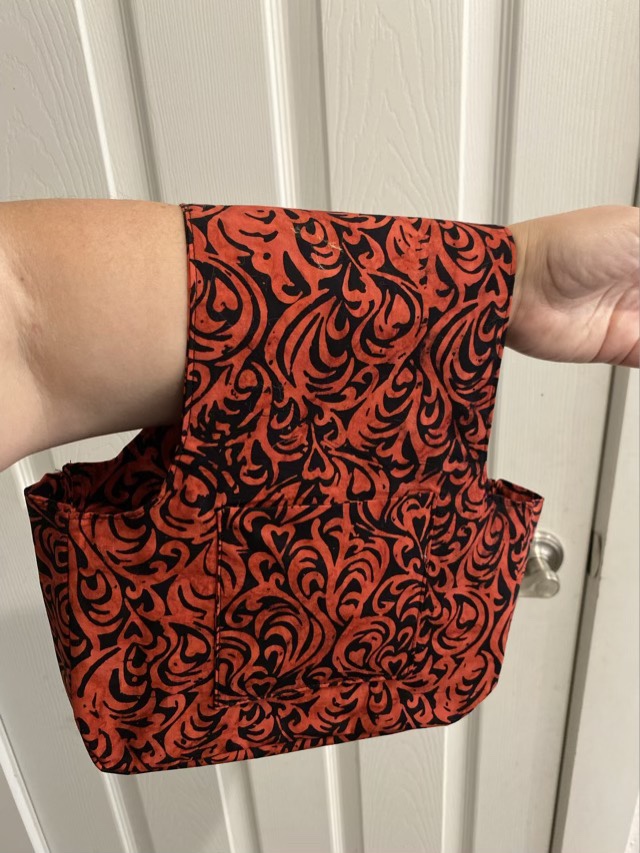
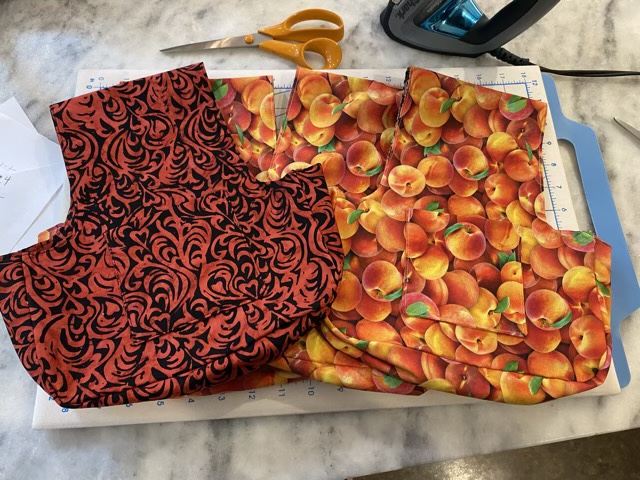
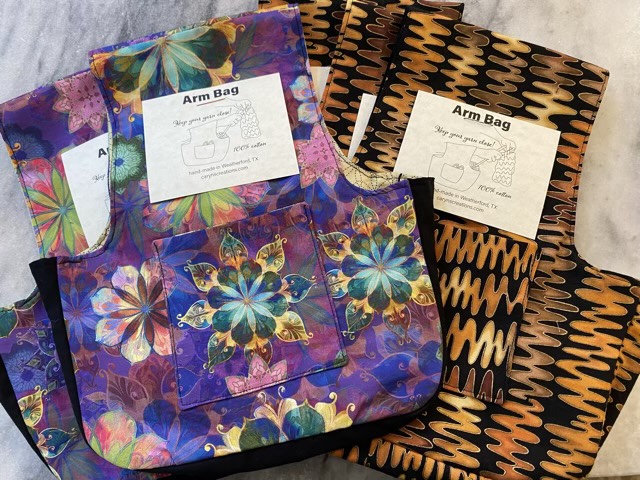
I made up a few arm bags to sell at our local craft store. I love these bags. I love having my yarn up close, and not having to draw it from a container on a table or the floor. They make it possible to stand or walk and craft as well. The wide handle lays comfortably on my forearm, there is enough room to reach into the bag while it is on my arm, and there are two pockets! Pockets are important. I make them with 100% cotton quilting quality fabric.
Arm bag on my armSome more fabric patternsA few more fabric colors
I commissioned my eldest for the drawing on the tags, as I was busy sewing. I think it came out well. These are currently sold exclusively at NerdCraft in Weatherford, TX.
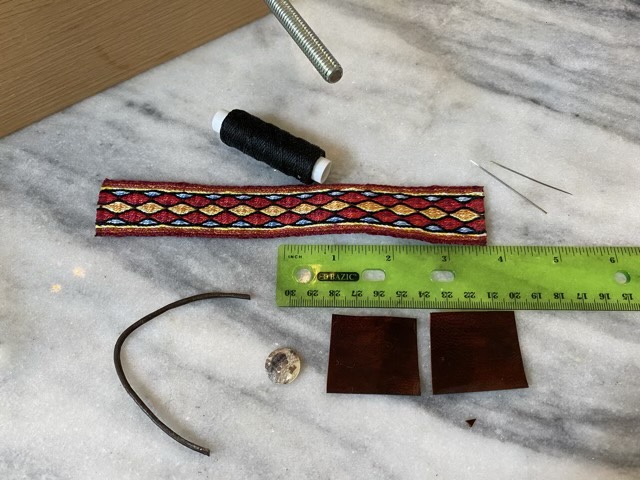
I found another thing to do with my woven bands: bracelets! I chose to sew leather ends on to reduce bulk, and I had the materials.
Materials to make the bracelet
I cut a strip of goat leather and stained it dark brown, then sealed it with an acrylic clear coat. I cut two smaller rectangles from the finished leather, cut a length of leather cord, sealed the ends of the woven strip with clear glue, selected a shell button, and sewed using waxed nylon cord.
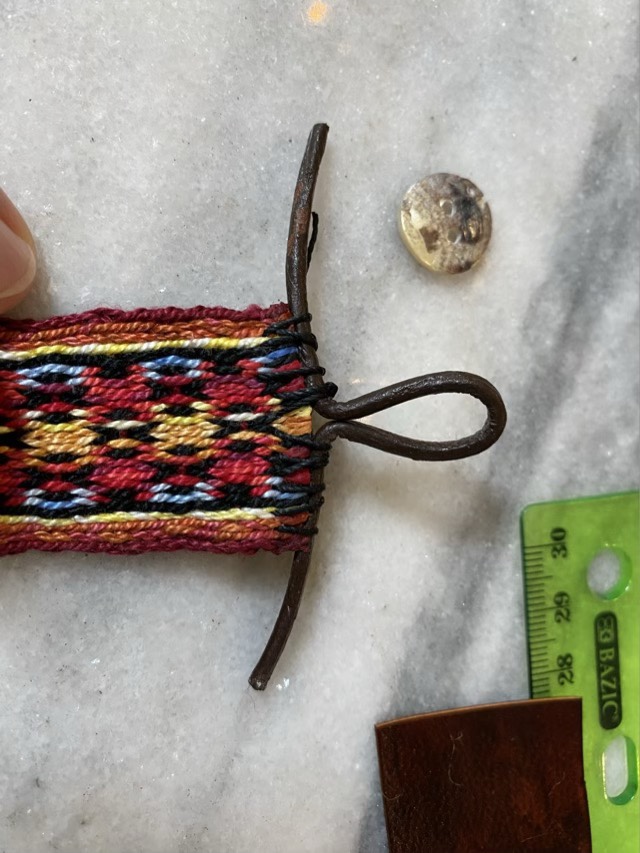
Attaching the eyelet
To form the eyelet for the button hole, I folded the leather cord in half, then bent the ends outward at a 90 degree angle. I secured it to the end of the woven band with waxed cord, then cut off the excess. To cover the end, I cut a slit in one leather rectangle to slide over the eyelet, then sewed the leather to the band. The nylon thread was thicker than I wanted visible, so I separated the three strands and just sewed with one.
Sewing the leather using a clamp
My wooden book clamp serves well as a leather stitching aid. I used wax paper to keep the newly finished leather from sticking to the wood. (I recommend waiting 24 hours before sewing, but I was impatient.)
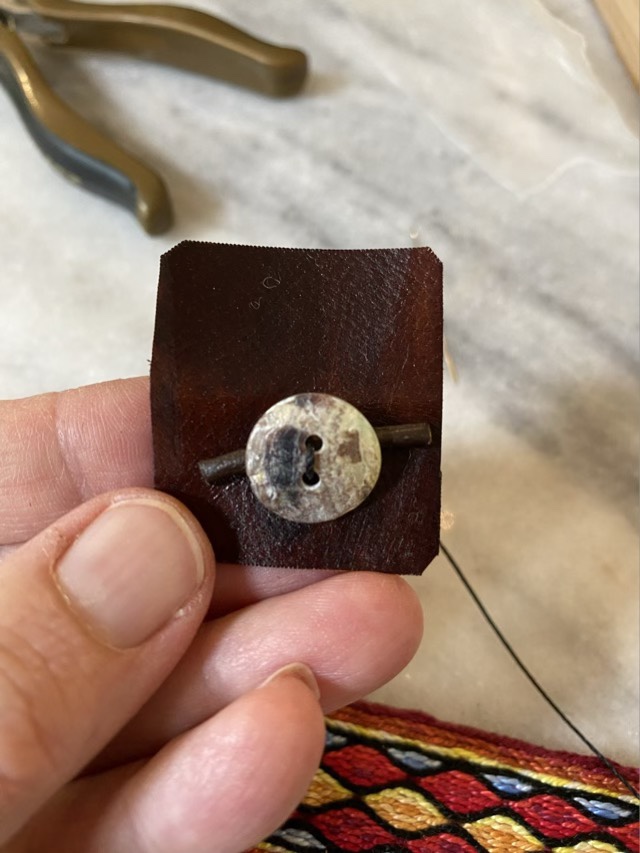
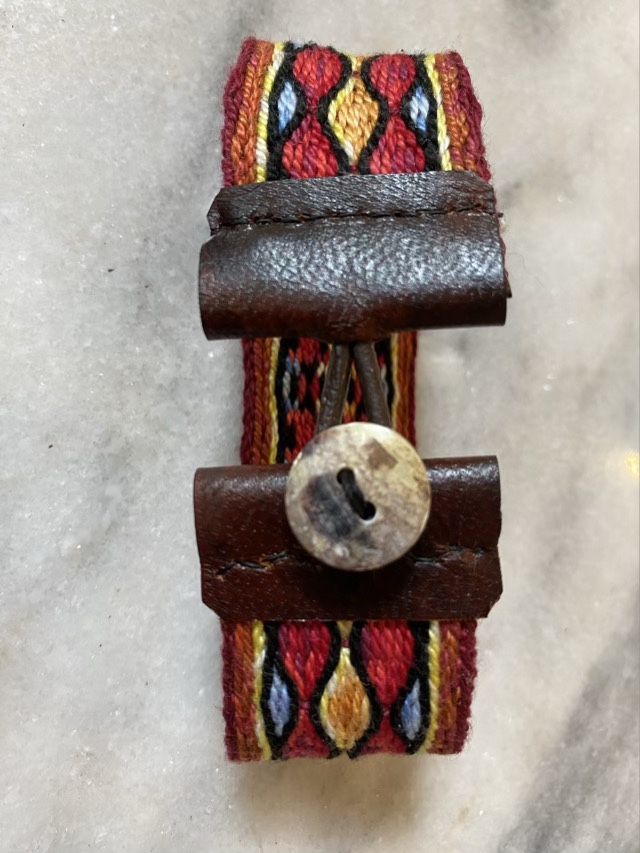
Finished button hole end
For the button end, I sewed the button offset on the other leather rectangle, using cord scraps to space the button off the leather. If the button is sewn tight to the surface, there isn’t enough room for the eyelet.
Button sewn using a cord for a spacerButton end sewn using a wooden clampFinished hand sewn leather button clasp
I’m pleased with the finished bracelet. Although I would have preferred the leather ends to butt together, the gap actually makes the bracelet more comfortable to wear by giving more flex. The bracelet is easy to button one handed, and is light.
I still haven’t found my weaving shuttle. Hm. So I made one. I’d seen some trapezoidal shuttles on Pinterest, so grabbed a small thin wood sheet and cut a shape using a coping saw. The shape isn’t sellable perfect, but it works quite well, once I sanded it down.
Handmade yarn shuttle
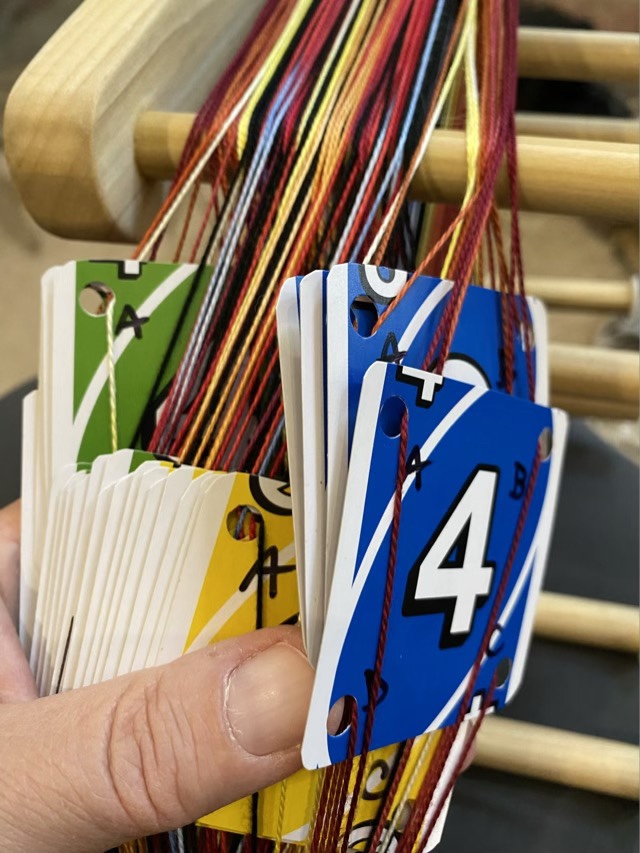
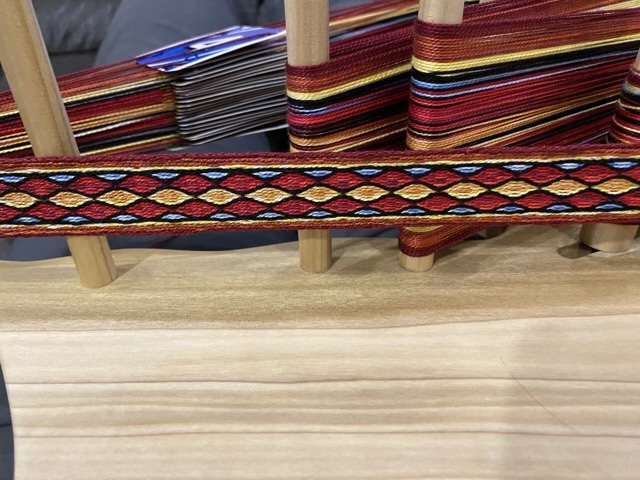
I was then able to weave my new band pattern. It was quite cool to see the muddy mess of warp threads focus into a distinct pattern as I wove. The main experiment in this round was to see if staggering the turnarounds on the edges made the transitions smoother. They do, but it still isn’t as nice as having the edges a consistent direction, but I didn’t have to deal with warp twist. I did discover that I could tell where I was in my pattern by when the “A”s lined up. Every fourth turn, the cards line up, and since the pattern is based in 4, it meant I only had to move my pattern marker every fourth line. I need multiple cues to remember where I am in a pattern; sometimes I forget to move my marker.
“A”s lined up at the end of a set of turns (note there is also no twist in the warp)Pattern emerging from the warp threadsFinished bandCorrected pattern
I did discover my original pattern had errors, which I fixed as I wove. I went back to the pattern editor and updated it as shown above. I also really like weaving with variegated yarn, it gives added depth to the pattern.