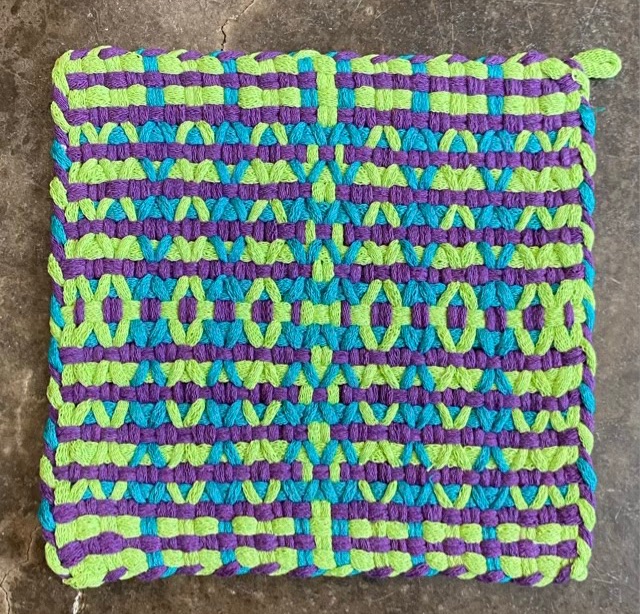
When I bought the potholder loom kits for my kids, I bought one regular size and one Pro. The Pro box still had intact seals. I fixed that, and thought I might make a small bag because the Pro potholders are larger and there were only enough loops for two projects. The loom also has an odd number of pins, rather than the even number for the regular loom. It opens up different design possibilities. I wanted to experiment more with twisting with my first project with a Pro loom. I counted all my loops and divided them in half, then came up with a design based on the number I had of each color.
Photo description: first pass, the center horizontal loop going through twisted adjacent strandsPhoto description: second pass on either side of the center horizontal loop, hook tool showing how the strands are picked up in pairsPhoto description: closeup of the third pass in process, showing how the horizontal loop returns the twisted strands to the original positionPhoto description: potholder loom with the center pass with two passes below the center, returning the loops to the original position, and four passes above the center, showing the twisted loops
The overall pattern when weaving is three fold: twisted path, plain weave, plain weave.
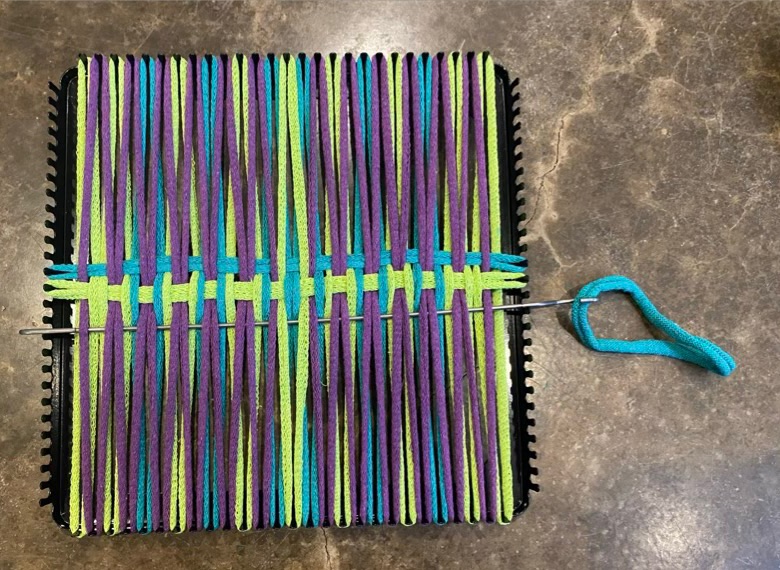
Photo description: weaving finished with the last four passes in plain weave on the top and bottomPhoto description: finished potholder with chained edge and corner loopPhoto description: opposite side of the same potholder
I was going to make a coordinating but opposite twist design, but it turns out when the strands are twisted the opposite way, the pattern is just being worked upside down, it doesn’t look different. Hm. I don’t want twins, so I’ll try something completely different for the next potholder.
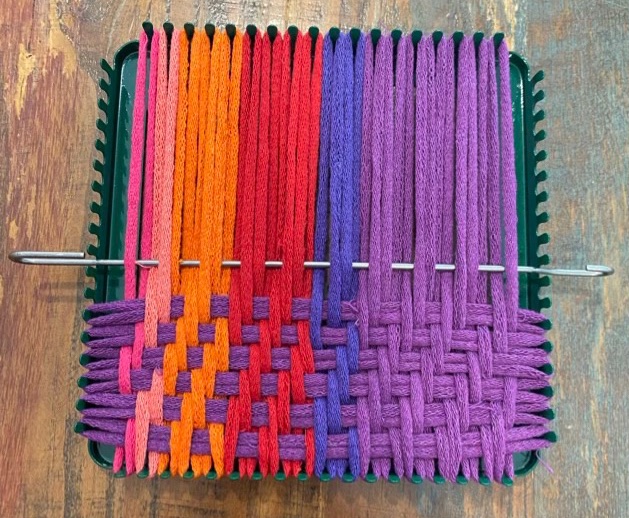
I’m running out of cotton loops for my regular sized potholder loom. I have enough for one more, and the colors are not what I would pick given infinite variety (which is why they are last). To maximize potential, I counted the loops and divided each color in half. I put them on the pin loom in blocks of color, so I didn’t come up short one color in a more complicated pattern. I did want to try a twill pattern, and chose a 2/2 twill, which means over 2, under 2. The start point of twill moves over one strand with each pass, which makes the diagonal lines.
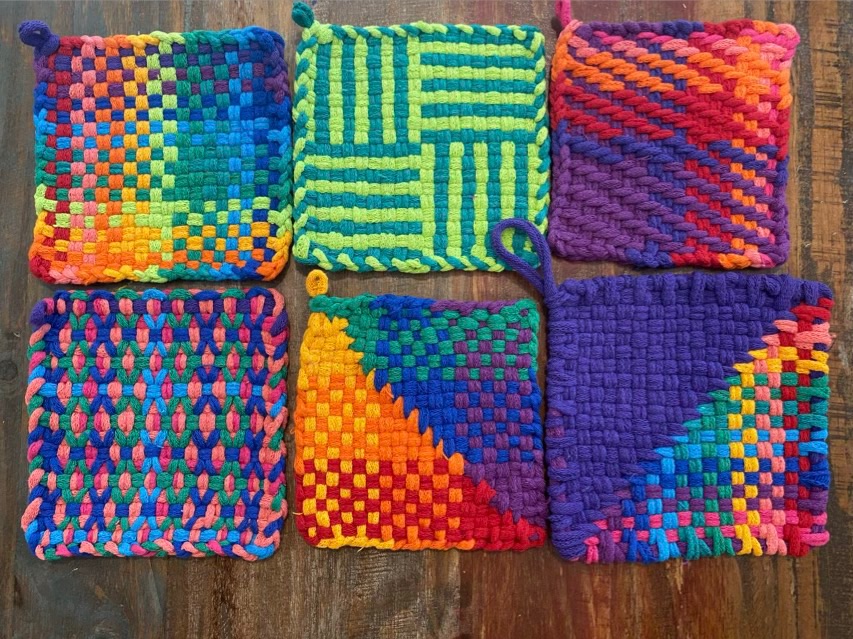
Photo description: purple, red, orange, and pink loops on a potholder loom with a third of the twill weaving pattern started and the weaving hook inserted for the next passPhoto description: twill potholder finished with a chain stitchPhoto description: six potholders made from one Harrisville Designs kit. From top left to right: plain weave with rainbow order chain finished, light green and dark green plain weave with alternating colors chain finished, twill pattern chain finished, twisted warm and cool colors three sides chain finished, warm colors vs cool colors with 90 degree wraps chain finished, and purple vs rainbow 90 degree wraps loop threaded finish.
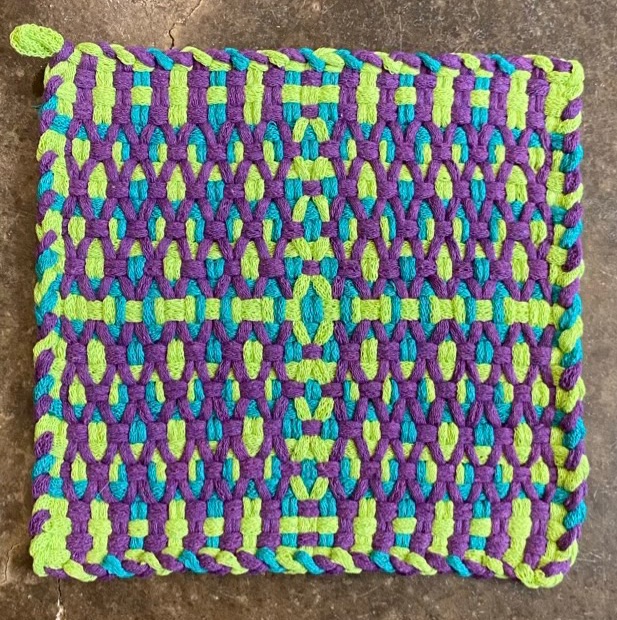
So now that I’ve pinned a couple potholder pictures on Pinterest, my feed is flooded with pin looms covered in cotton loops. I saw a partially woven potholder that had adjacent loops twisted over each other. There were no instructions or guidance, so it took me a bit of experimentation, and I didn’t make an exact replica, but I did enjoy working on a new technique.
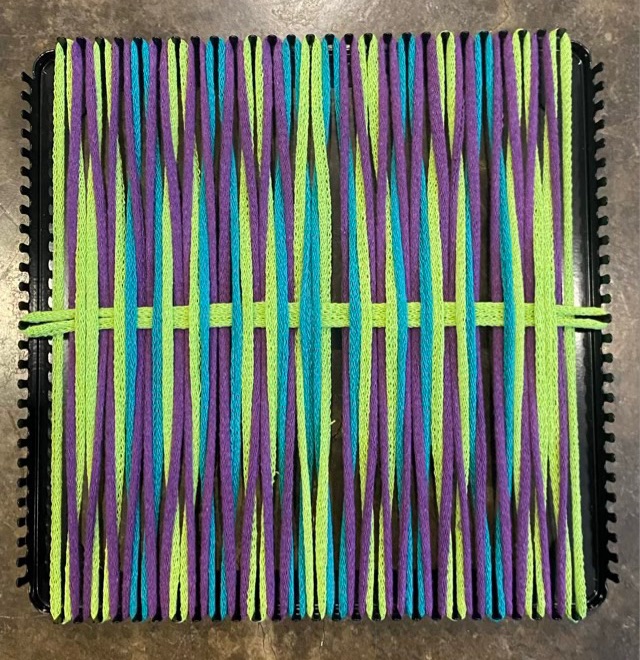
Photo description: potholder loom with loops hooked vertically across alternating warm (red and orange) and cool (dark blue, light blue, and green) colors. One green loop woven horizontally in the middle, skipping the first strand, the next two strands are twisted so the warm color is up, then strands 4 and 5 are twisted the opposite way so the warm color is up. The horizontal loop goes under the warm colors and over the cool colors twisted together across, with twist direction alternating.Photo description: two more horizontal strands added on either side of the center strand with no twisting, the warm color went under the cool colors on the first set of loops, and the cool horizontal color went under the warm colors, this set of loops are woven in the original pairs as with classic potholder loop weaving.
I found it easiest to work this pattern from the center. I twisted one strand from each adjacent loop together then ran the weaving loop through the center of the twist. I then twisted the next two strands in the opposite way. It took some mistakes and undoing to get the pattern right. I found if the warm colors were up I probably had the twist right. The next two loops are woven normally for potholders, where the horizontal loop goes over or under both strands of the same vertical loop. After the second pass, the vertical loops are in the original position and I could make another twisted pass. So even though it was challenging to puzzle out, the actual weave technique boils down to three rows: one twisted, two plain.
Photo description: weaving finished, shown still on the pin loom, mistake in bottom right
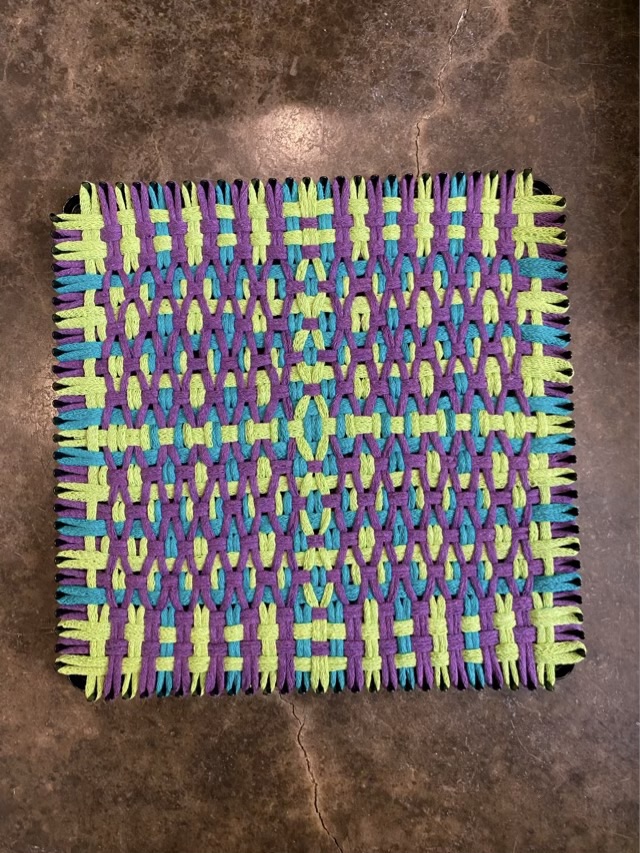
In the finished weave, the strands aren’t twisted, but rather curve back and forth vertically, which makes an interesting X pattern. As I write this post, I noticed a weaving mistake. Ah well. It is a potholder. I do find that if I leave a pattern for a bit and come back, I’m more likely to spot such errors. I was too eager to cast this one off.
Photo description: same potholder finished with a chain edge, except on the top where the twisted path made for a stable edge.Photo description: back side of the same potholder, showing horizontal stripes of warm and cool colors
Many of the pictures of woven loop potholders are taken when the work is still on the loom. This makes it easy to see the order of the colored loops by looking at the colors on the pegs. For plain weave potholders, this is all the info needed to recreate the pattern.
Photo description: potholder on the loom in light green and dark green, the vertical loops have 9 alternating colors, which then repeat, giving two light green loops in the center and light green on the outside. The horizontal loops switch this, with the dark green doubled in the center and on the outside.
Since the loom was out, and there were still loops left, I had to give this neat directional pattern a go.
It bothered me that the cast off for my last potholder was so tight, so I did up another diagonal line weave and tried something different. I used the same method of weaving, working from one corner and hooking pairs of loops together at a ninety degree angles.
Photo description: potholder loom with purple loops on one side and the start of a rainbow on the other, showing how the loops wrap around each other in order to achieve a sharp return to the edge peg
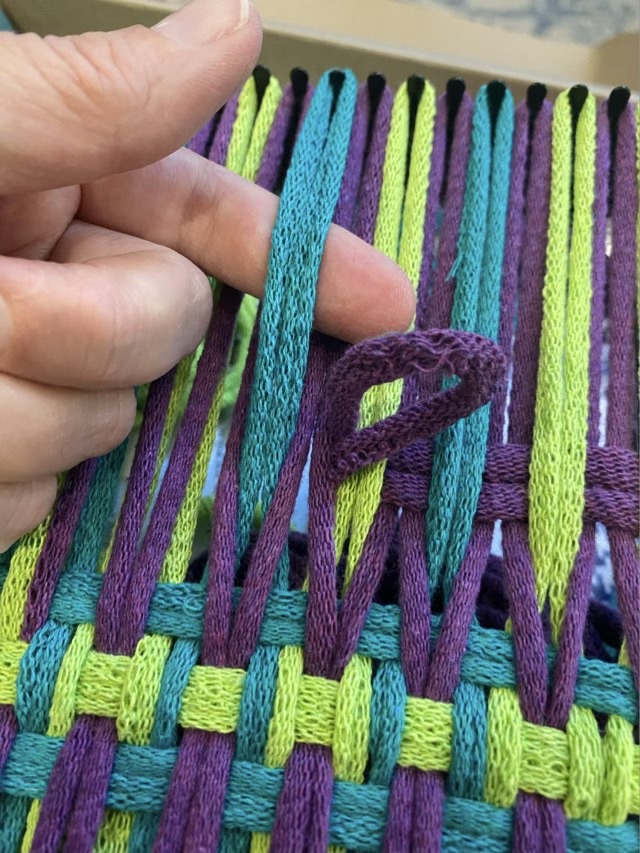
To finish, I tied a new loop to a corner loop, by chaining them together, then threaded this longer strand through the loops on the side of the loom.
Photo description: finishing a potholder by running loops tied together through the loops on the pegs of the loom
This method of finishing does produce a softer edge, but it doesn’t have the neat, crisp look of a crocheted edge. It also makes the potholder one “row” bigger as it is essentially weaving an additional row on each side.
Photo description: two loop woven potholders using a diagonal method, left square finished off with traditional crochet chain, right square finished by threading tied loops through the edge
I did get my center twists all going the same way in my second attempt. Yay.