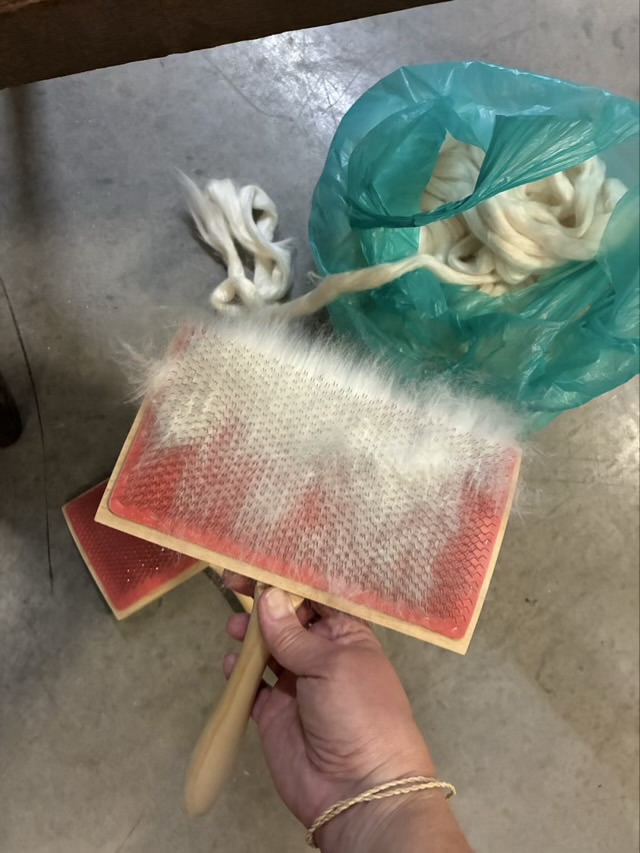
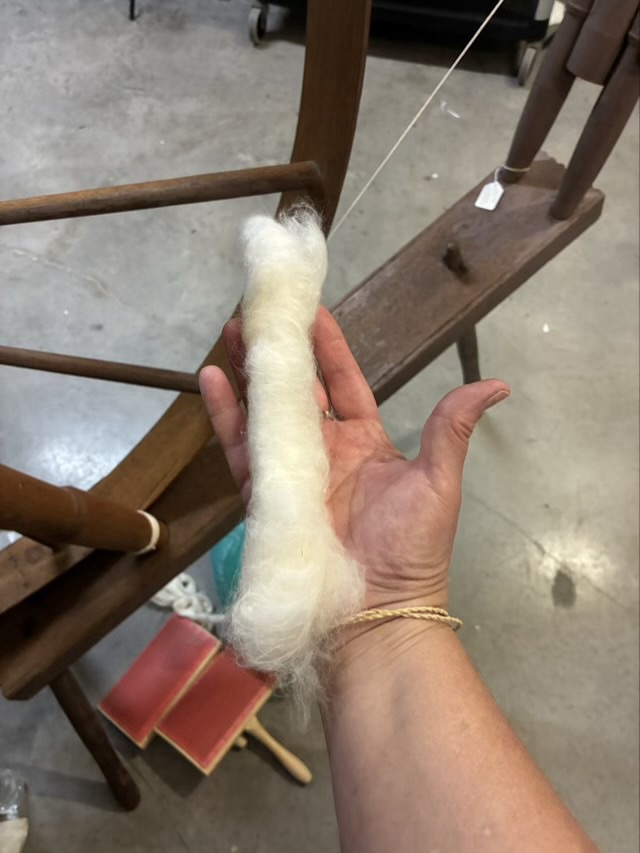
I have been using Texas grown cotton sliver, a combed preparation, to spin on a Great Wheel at the Doss Heritage center. The sliver is very smooth and all the fibers are aligned, but it has been fighting me when I spin. So I took it back a step and carded it. This mixes the alignment of the fibers, especially when I roll it up into a rolag.
Photo description: fine carder loaded with cotton, bag of sliver in the backgroundPhoto description: cotton rolag held in my hand, after taking it off the card
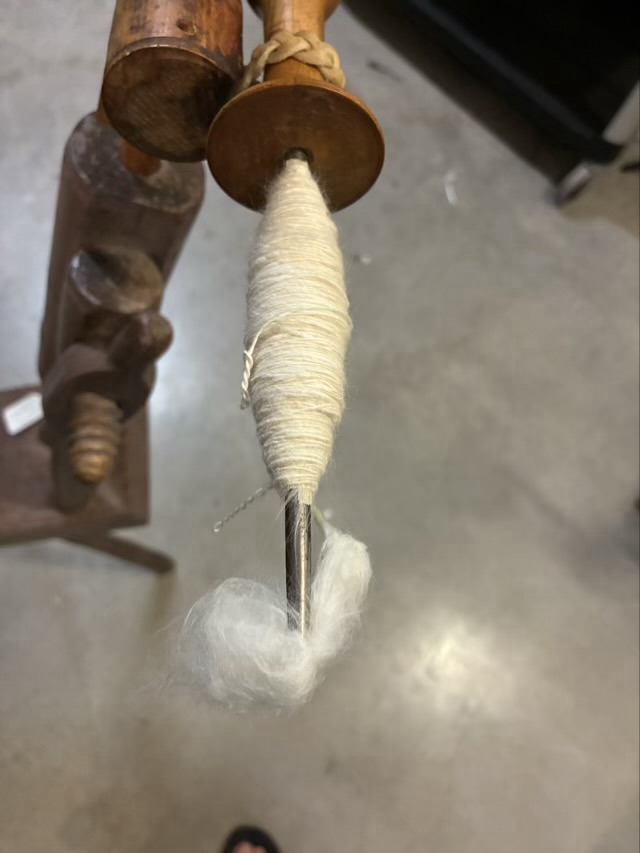
This woolen preparation (fibers not aligned is “woolen”, fibers aligned is “worsted”) actually spins much easier with fewer clumps and bumps. The draft zone flows better and the wheel and I happily spun for an hour (three rolags) with very few issues. The wheel did pick up a squeak, which I remedied with spinning wheel oil.
Photo description: cop of single spun cotton yarn on a Great Wheel spindle
I will be demonstrating at the Pioneer Festival at the Doss Heritage Center in Weatherford, Texas on October 3rd, 2026!
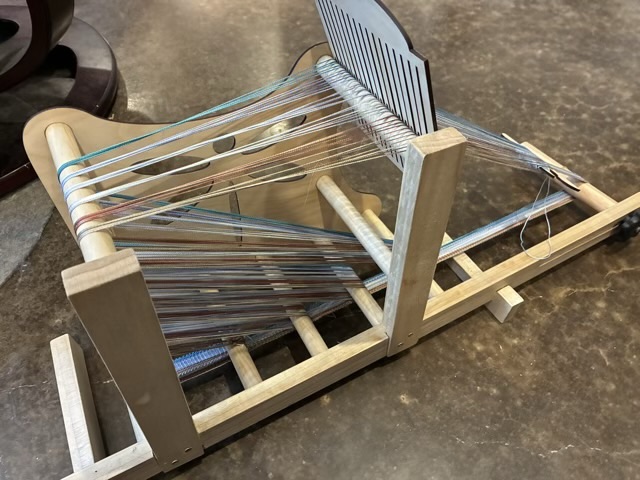
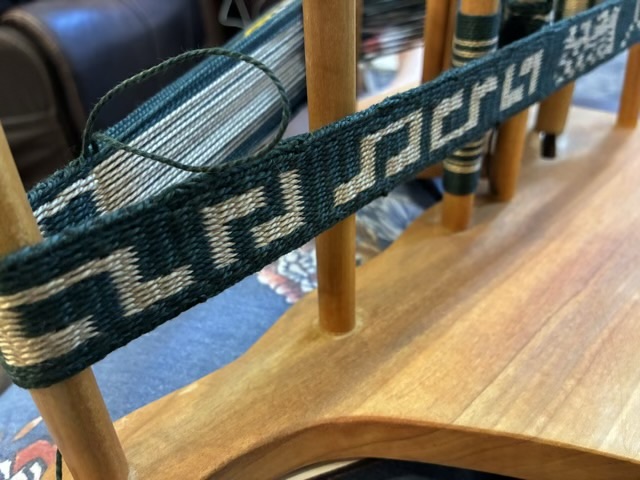
I was able to wait for the finish to dry before warping up my new inkle loom, but I didn’t take pictures until I had woven for a while.
Photo description: inkle loom warped with size 5 pearlized cotton in variegated colors of brown, blue, and teal, set up with a rigid heddle
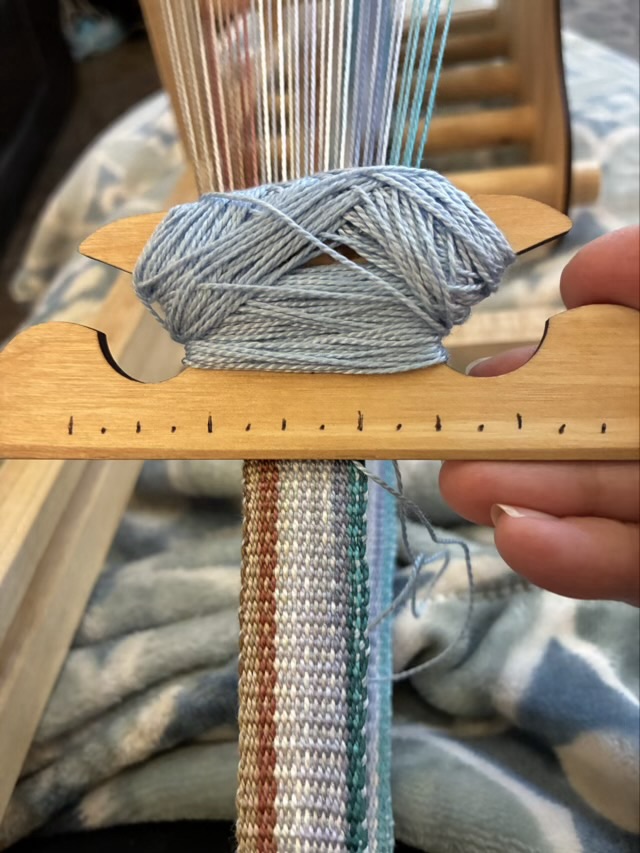
I made my rigid heddle a little taller than it needed to be, but it fits nicely between the upright supports and the removable side. It spreads the threads out quite a bit, and I’m struggling with keeping the band a consistent width, so I marked my shuttle with quarter inch ticks. On the next shuttle design I’ll engrave a ruler. I’ll also make adjustments to the size; I don’t like how the thread builds up on this design.
Photo description: shuttle wrapped with pearlized cotton and with ruler marks
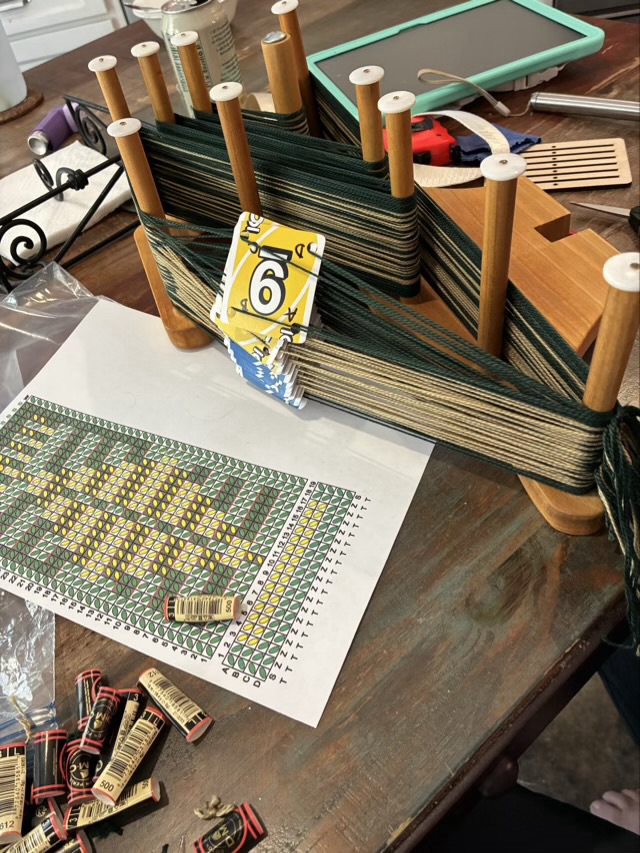
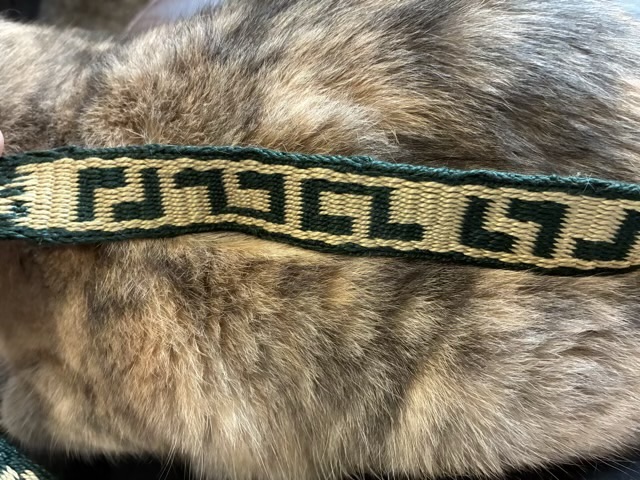
It has been awhile since I pulled out my inkle loom and did some tablet weaving. I wanted to try a double-sided design and use some size 3 pearlized cotton from my stash.
Photo description: inkle loom warped with tan and green pearlized cotton with 19 4-hole tablet cards
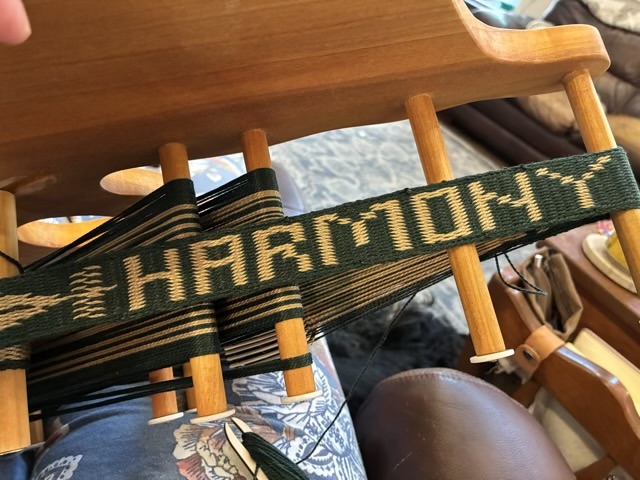
I used the online pattern maker Tablet Weaver Designer App and made several designs as I went. The band ended up being more of a sampler piece as I experimented with letters and music notes.
Photo description: “HARMONY” woven on an inkle loom with 4-hole tablet cards using size 3 pearlized cotton
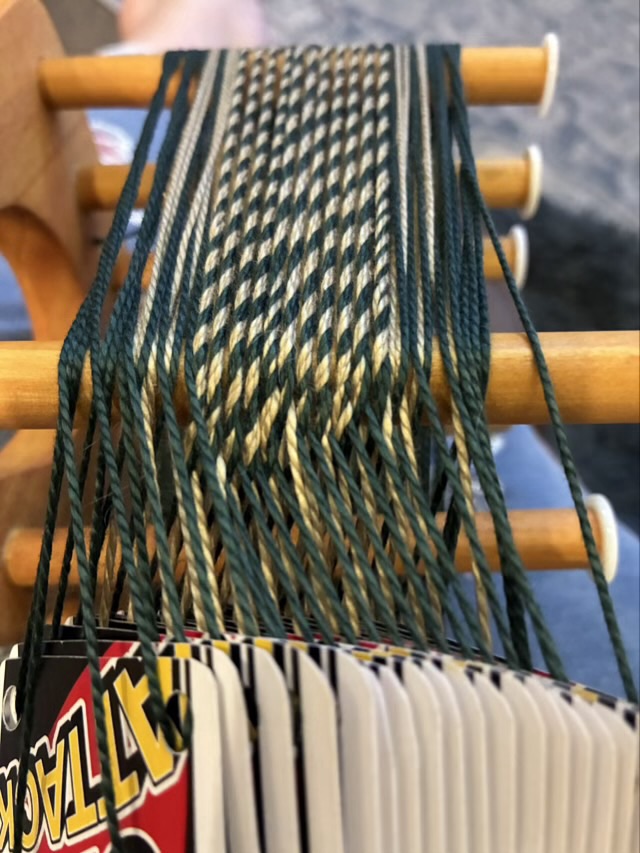
The designer app now also shows if the pattern is balanced— that each card has the same number of forward and backward turns across the pattern. As weaving progresses for tablet weaving, twist builds up in the warp.
Photo description: twist in the warp across the top posts of an inkle loom
There are a number of ways to deal with warp twist, I find making a balanced pattern the easiest. Using the design app I discovered that adding an extra row between two of the same motifs reverses all the forward and backward turns, balancing the pattern in double sided weaving.
Photo description: music notes tablet woven on an inkle loom
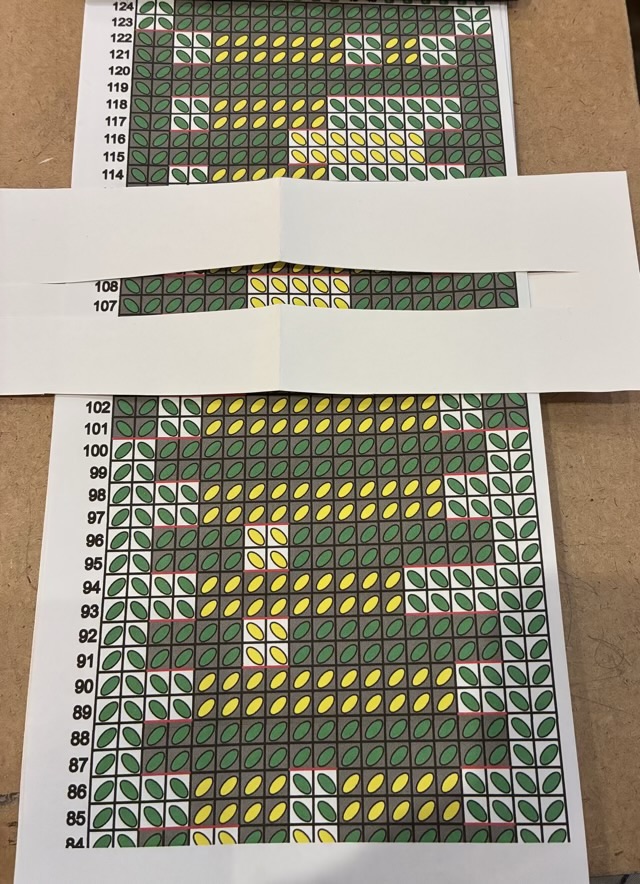
To keep track of rows, I cut two slits in a piece of cardstock and slid it over my printed pattern.
Photo description: paper row tracker
I did keep track of time for this project. It took me 1.5 hours to warp the loom, and I wove for 6 hours and 10 minutes. I used a timer in a knitting app to track the time.
Photo description: band removed from the loom, showing the reverse side of the music notes
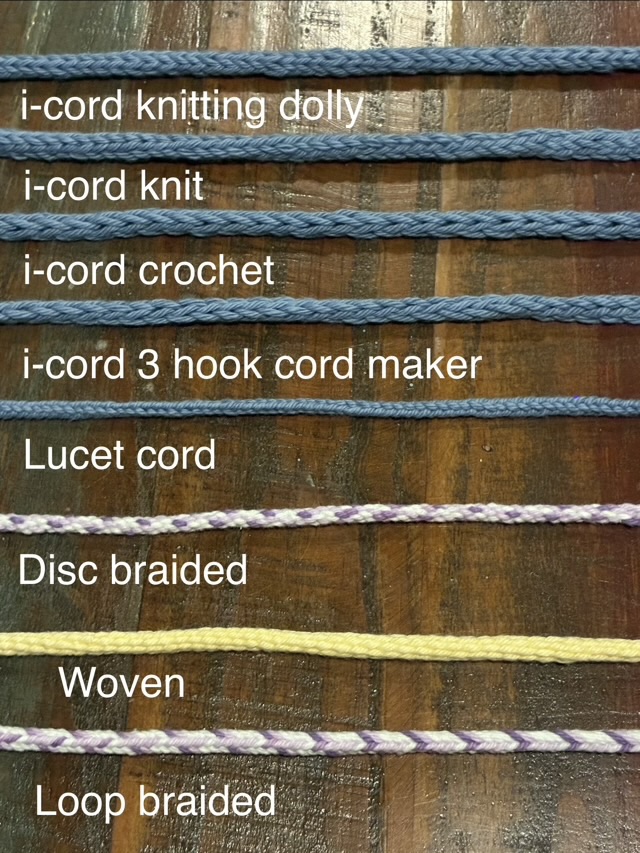
Here are all the kinds cords I made laid side by side:
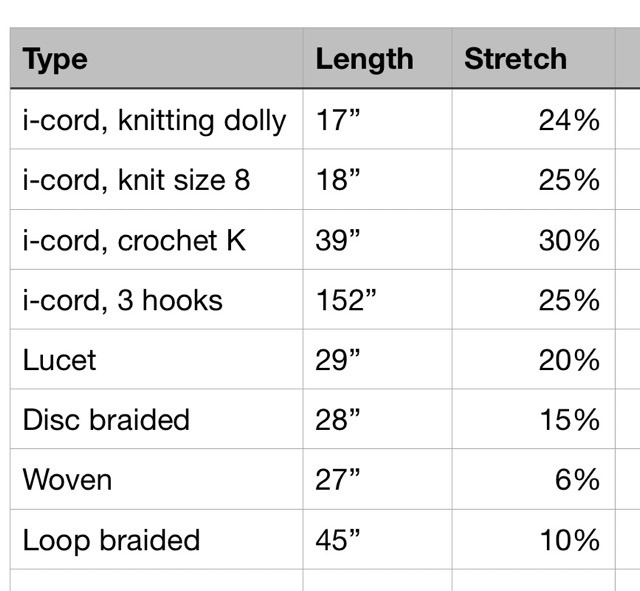
Photo description: eight cords made with different methods laid horizontally: 4 kinds of i-cord, lucet, disc braided, woven, and loop braided, all made from worsted weight cotton yarnPhoto description: chart for each type of cord, the length I made in 30 minutes, and how much each cord stretched
Apparently I can’t make charts in the app I use to write this blog, disappointing.
For i-cord, I found the knitting dolly gave the most even output, but if I needed long lengths quickly and didn’t care as much for the look or feel, I’d use a latch hook cord maker. If I needed a strong cord that wouldn’t stretch, I would weave it, but if I needed it long, I’d use a Lucet. If I wanted a spectacular demonstration of partner cord making, I’d do finger loop braiding. If I wanted something short but beautiful, I’d use a disc braider.
So each type of cord has its uses. My least favorite was crocheting an i-cord, but if crochet is what you are most comfortable with, it will work. In my tiny crochet days, I would slip stitch beaded rope, which in 30 minutes I would maybe make an inch!
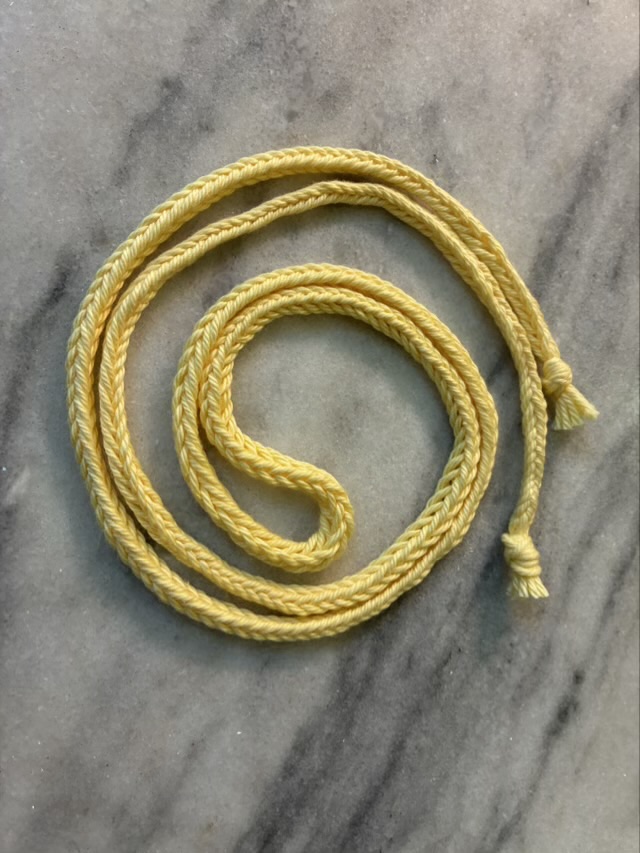
The traditional way to make longer lengths of loop braiding is to work in pairs. One person holds the loops on their fingers and makes the move, the other person is at the opposite end of the yarn bundle and tightens the braid after each move. The method of tightening, by pushing with the blade of the hand, or pulling the strands out at right angles, makes a difference in braid density, and it takes some practice to get an even cord. It is handy as well to have another person helping for when the braider drops a loop. There are hiccups in the braid where I dropped a loop and accidentally added an extra twist.
I recruited my eldest to help me during a visit and we made 45 inches of braid in 30 minutes, which is more than I can make with a lucet in the same time.
Photo description: partnered loop braided cord made from yellow worsted weight cotton yarn
At this point, I would choose the lucet method of cord making if I needed a long, strong, dense cord and I was working on my own. However, if I needed a known length, as for a belt or trim, and had access to help, the loop braiding is considerably faster and can make thicker cord.