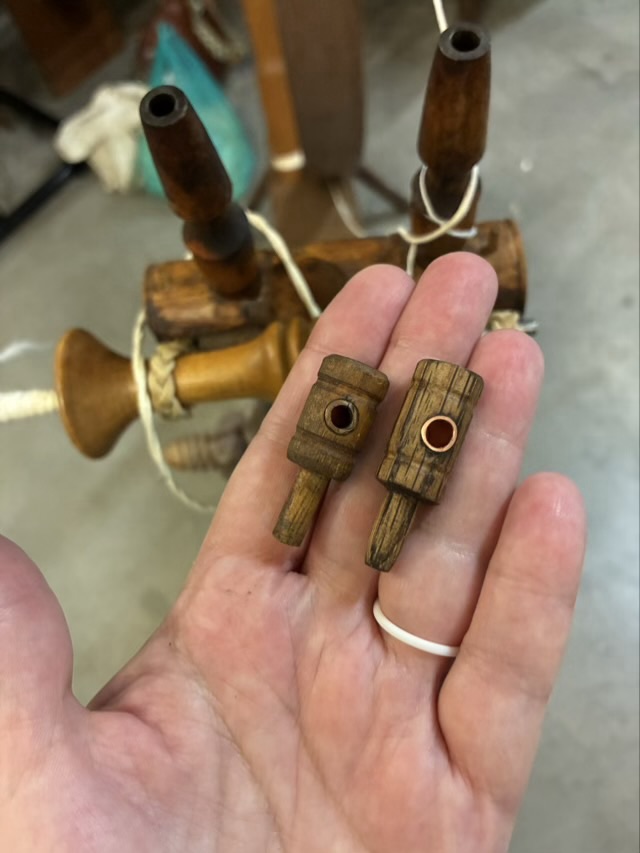
The new bearing that I made for an antique great wheel works! It is slightly longer than the original, but since the maidens adjust separately, the fraction of an inch difference doesn’t affect functionality.
Photo description: my hand holding the original bearing on the left and the new one on the right
The shaft of the bearing ended up being a little thick. It was a tight fit, but needed to be able to rotate to hold the accelerator wheel as the maiden post was twisted up or down. I used my pocket knife to shave off some of the wood so the bearing could rotate.
Photo description: bearing with the shaft narrowed held in my hand next to the maiden post, spindle visible belowPhoto description: fully assembled accelerator head on a great wheel with new bearing on the left side of the picture and the original bearing on the right
I spun for about an hour, working on my yarn width consistency and testing out my new part. It worked just fine! And rotated in the socket when it came time to stop and release the tension on the drive bands. I always lighten the tension between spinning sessions so the bands don’t stretch. I don’t loosen them enough to come off when stationary, which is standard practice for spinners. I can see though, how someone coming along and turning the wheel might be startled by the drive bands coming off or the parts not moving. The bands just need to be tightened before use.
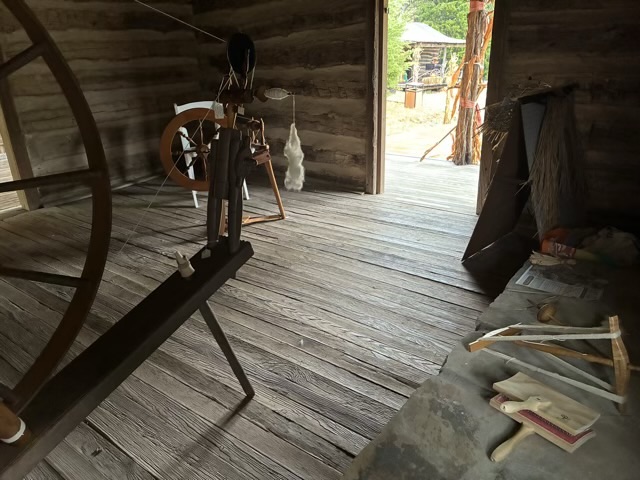
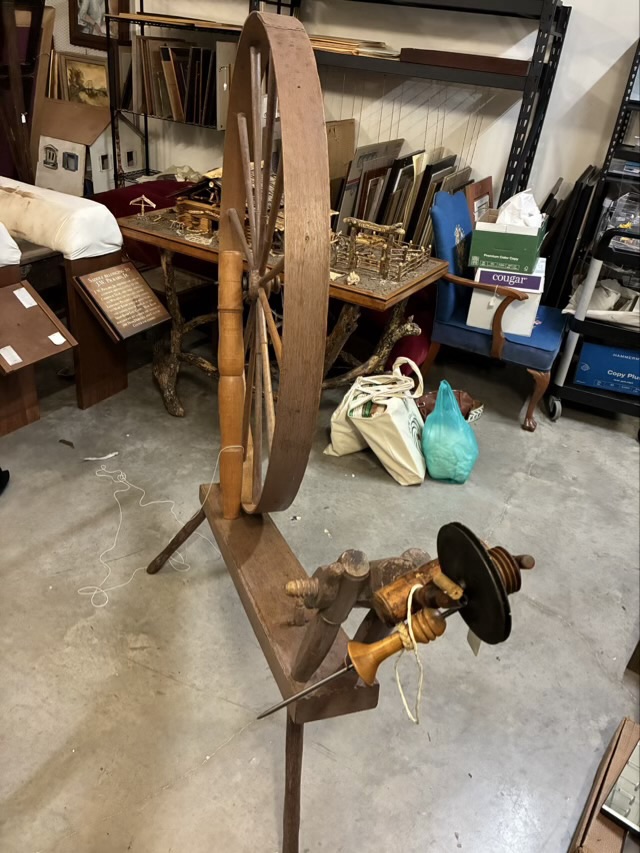
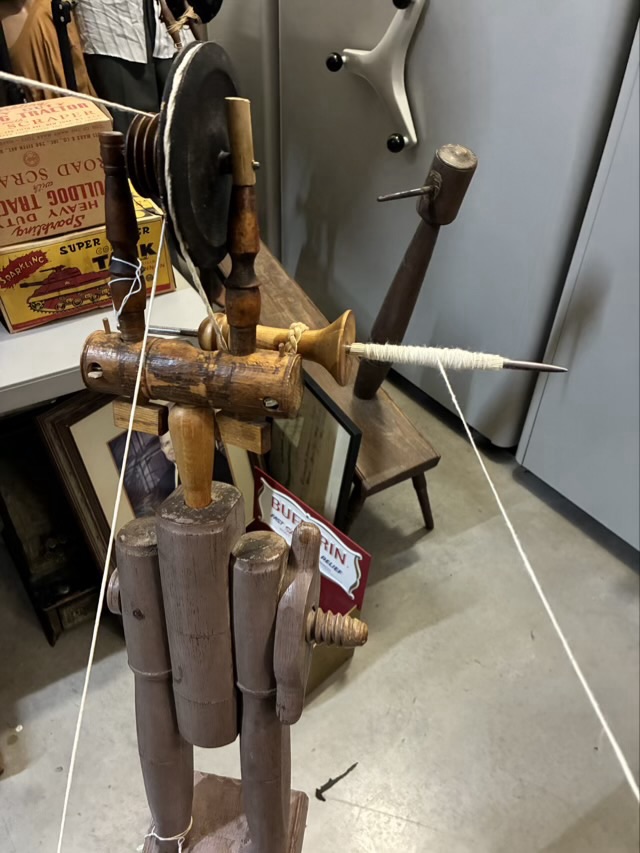
I had the opportunity to make friends with another walking wheel! I went to the Doss Heritage and Culture Center in Weatherford, Texas and met with the lovely people working there with the collections and events. They let me go down to the basement where there were two antique walking wheels, one with all the parts, albeit with some field-expedient repairs, and another missing the spindle and accelerator wheel.
Photo description: great wheel before I startedPhoto description: mother-of-all with spindle and accelerator head
I took off the mother-of-all, which holds the maidens, accelerator head, and spindle, to get a good look at the condition. I’m fairly certain that this mother-of-all is not the original one that went with the wheel, or the wheel was painted at some point, but the colors don’t match. The top of one of the maidens has also been lost to time, replaced with a dowel and metal spike, which certainly does the job.
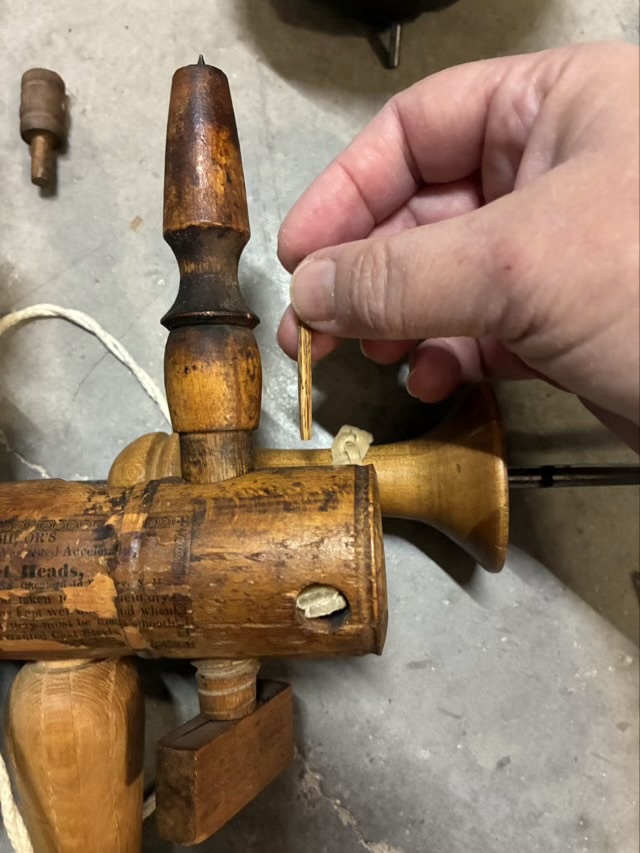
Photo description: small wood stake that goes into the mother-of-all to hold the braided rawhide straps in place
Where the last great wheel I worked with had waxed linen that held the spindle, this wheel had rawhide magic braids that were nearly as hard as the surrounding wood. I was surprised that the pegs holding the rawhide in place could still be pulled out.
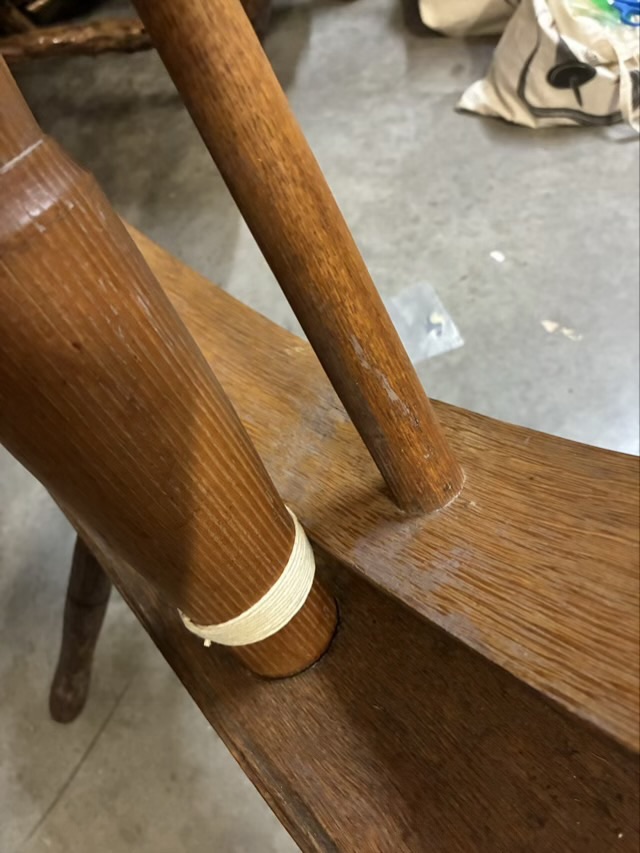
After looking over the mother-of-all, I put it back on the wheel, upside down. Oops. It took me about an hour of tinkering and fussing before I figured it out. In that time, though, I gave her a new cotton drive band waxed with beeswax, waxed the accelerator band, aligned the wheel with the base, and adjusted the wheel spacing against the post. The wheel rubs against the post, so I wrapped the post with waxed cotton cord to protect it from abrasion.
Photo description: waxed cotton cord lashed around the base of the post where the wheel rubs against itPhoto description: great wheel mother-of-all and tension system set up and spinning, there is another great wheel base in the background, which has a wheel, but the hub hole has worn away and it needs refitting
I love the tensioning system on this wheel. The wood nut on the right in the picture loosens to allow the center post to rotate forward and backward, decreasing or increasing tension. I think I actually like this set up better than the double nut Great Wheel, although both are more reliable over time than a greenwood tension system that relies on the bend-ability of fresh wood.
I did put a corn husk quill over the spindle to make it easier to remove the cop of yarn. For a leader I pulled three strands from my cotton twine, and did a larks-head knot over the corn husk quill. I spun Texas grown cotton sliver for a while before time called me away.
When I’m going to spin on a new-to-me wheel, I like to have a field kit of things I might need to adjust the wheel.
Photo description: clockwise from the right, tanned leather, cotton string, bamboo skewers, light machine oil, pure beeswax (not pictured, scissors)
Cotton string is useful if the drive band is missing or needs to be replaced. It can also be used to tie up loose parts, or slow the spin on a bobbin (for a Lazy Kate). It is always a good idea to have some string.
The leather scrap is there for making parts. Most often I need a washer to improve the fit, especially on older wheels whose wooden parts have sagged. A heavy pair of scissors and a scrap of leather can make many, many things.
Beeswax is used on the drive band to give it some grip. The most important thing to do with an unfamiliar wheel is to check the alignment of the wheel with the whorl. Then check the tension. A little bit of wax along the string can then give more advantage. Beeswax is good for wood, so will cause no damage.
Oil is for the bearings and places friction occurs, like the connections of the flyer, or bobbin, or spindle. I used it sparingly, usually just one drop is enough.
The bamboo skewers or toothpicks can replace a missing post pin, or be used as a wedge. They were an unexpected bonus to have when I was working with a Great Wheel. I think I will add tissue paper to my next kit, as a bit of tissue paper around a post end can tighten up the fit.
A scrap of cloth for wiping away dust and old oil would be a good idea too.
As I was demonstrating spinning on 165-year-old Great Wheel, I spent an equal amount of time spinning, talking about the wheel, and adjusting the wheel alignment.
This Double Nut New England wheel has a flat wheel surface made by bending two long thin wood boards into a circle, tapering the ends, and securing with iron rivets. The flat surface does not hold onto the cotton drive band like a concave surface would, and alignment with the spindle post is key in keeping the band on the wheel.
Photo description: view of the Great Wheel from the back, one cotton band on the wheel is the drive band, the other was an attempt to keep the drive band from slipping off. It didn’t work, the drive band merrily skipped right over it.
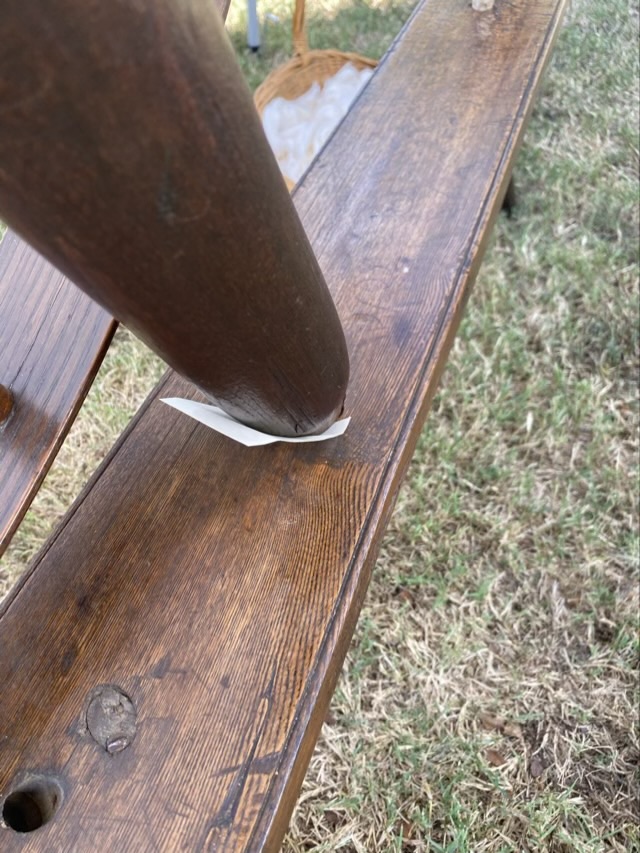
I found that the wheel post was not glued or nailed into the table, and had some play forward and backward as well as side to side. I attempted to wedge the wheel post in using a business card, with limited success.
Photo description: base of the wheel post with a scrap of card board wedged in
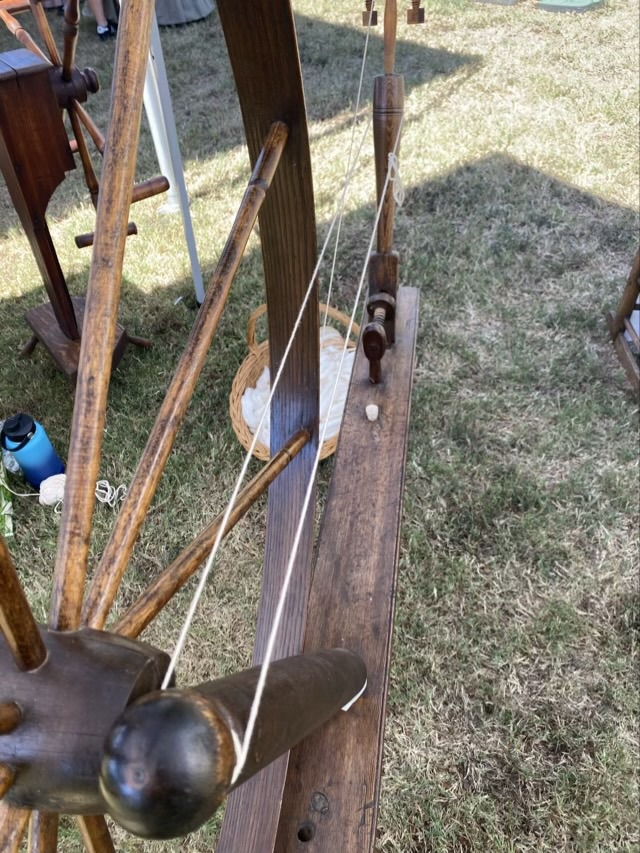
I did have some luck when I ran some cotton string from the wheel post to the spindle post. Mainly the line of cotton rubbed up against the drive band, keeping it on the wheel. Not an ideal situation, but a decent stop-gap measure.
Photo description: cotton string going around the wheel post and spindle post
I also tightened the drive band by cutting it and redoing the knot. I used a double sliding knot that is near impossible to undo once it is slid together. Once the ends are trimmed the knot also has a low profile, making it easier to pass through the grooves on the accelerator whorl. I ran some pure beeswax along the drive band as well, to give it some grip.
Photo description: tying the cotton drive band together with a sliding knot
The biggest factor in keeping the drive band on was to make sure the wheel was aligned with the accelerator whorl. The whorl has several grooves so the drive band can go in the one that aligns best to the center of the wheel. There was play in both the spindle post and wheel post, so keeping them in alignment was a game of concentration. When the area was quiet, I could get quite a long spin going, but when I started talking, my concentration would drift and the drive band would pop off.
I think I will add some tissue to my kit. Wrapping the base of a post with paper tissue can often increase the security of the connection, without causing permanent damage. I’ll talk about my spinning wheel field kit in another post!
This post is part of a series about my experience demonstrating spinning on a 1860s Great Wheel in Mansfield Texas.
“She’ll prick her finger on a spinning wheel’s spindle and die.” -Maleficent
A Great Wheel, or Walking Wheel, does not have a flyer assembly like treadle spinning wheels. The wheel has a drive band that turns a spindle, often made of iron, that is long and thin.
Photo description: iron spindle on a 1860s double nut New England Great Wheel, basket of prepared cotton fiber on the grass below
This iron spike, I’ve read, could be quite sharp, although the one on this wheel was not. Out of caution, the museum keeps a cork on the tip of the spindle to avoid the pricking of fingers or impaling of body parts.
The spindle is held to the Mother-of-all assembly with spindle bearings. On this particular wheel the bearings appear to be either carved wood or wrapped thread so old and hardened as to be a solid unit. I have seen pictures of other Great Wheels where the spindle bearings are made from fresh braided fiber and tightened through holes in the Mother-of-all.
I read that spinners would often use a “quill” with this type of spindle, wrapped around the spindle so that the cop of yarn could be easily removed. Historically the quill was a section of corn husk, so I bought dried corn husks from the produce section of my grocery store, and cut rectangles. To keep the husks pliable, I stored a few in a plastic bag with a damp paper towel overnight. Before I started spinning, I wrapped the husk around the spindle with the smooth side in. Corn husks have prominent ribbing on one side, and when the ribs are on the outside of the quill, they help hold the spun yarn in place.
Photo description: corn husk quill wrapped around the spindle and secured with wool yarn
I used a wool yarn leader to start my spinning, because that is what I made when I did my test spin a month before. It was an easy transition to go from the wool to cotton. I built up the cop of cotton yarn by spiraling the yarn back and forth across the quill as I rolled it up. This keeps the yarn from bunching and sliding as the pressure of the wound yarn builds up.
Photo description: building the cop of yarn onto the quill
This particular spindle does have a disc and I could have run the yarn right up to the disc without risking tangling the yarn in the spindle bearings, but since I wanted to be able to quickly remove the yarn, the quill worked well.
Photo description: cop of single spun cotton yarn onto a corn husks quill removed from the Great Wheel spindle
My first cop of yarn went too close to the ends of the quill. For the second I was able to control the yarn better and keep it centered on the quill.
Photo description: another cop of yarn with the corn husks quill showing at each end
I left a cop of yarn on the spindle when I was done for the day so it could be part of the display when they put the Great Wheel back in the Man House at the museum.
This post is part of a series about my experience demonstrating spinning on a 1860s Great Wheel in Mansfield Texas.