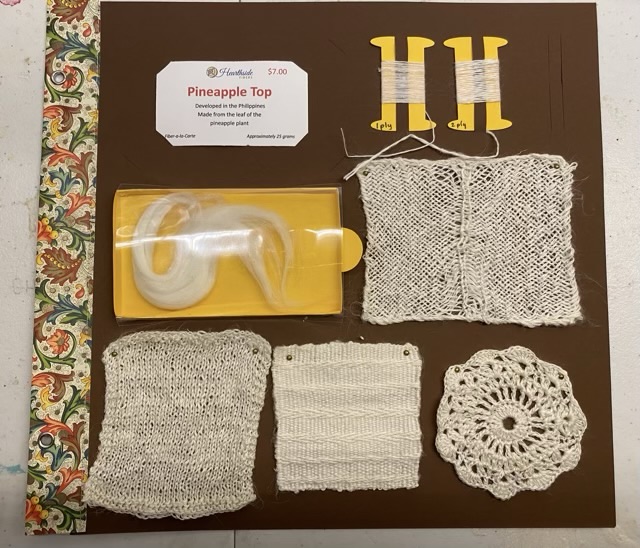
My fiber study page for my pineapple fiber sample is done!
Photo description: clockwise from top left: card from Hearthside fibers that says “Pineapple Top, Developed in the Philippines, Made from the leaf of the pineapple plant”, paper bobbins with single spun and 2-ply hand spun yarn, sprang swatch, crochet swatch, woven swatch, knit swatch, unspun fiber
The crochet round gave me fits with this fiber. I spun it so fine I was having trouble getting the right gauge for my regular coaster pattern. I think I ripped it apart three times. I ended up winging it, filling the space with stitches and numbers that fit.
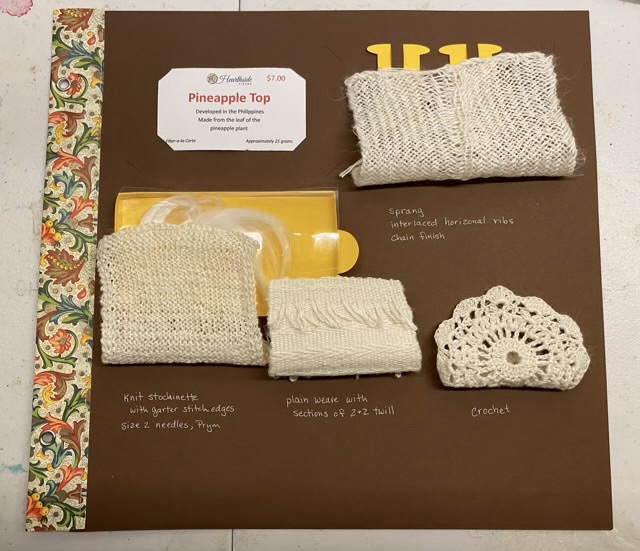
Photo description: same page with the swatches flipped up to show hand written descriptions: “Sprang interlaced horizontal ribs chain finished”, “crochet”, “plain weave with sections of 2×2 twill”, “knit stockinette with garter stitch edges size 2 needles, Prym”
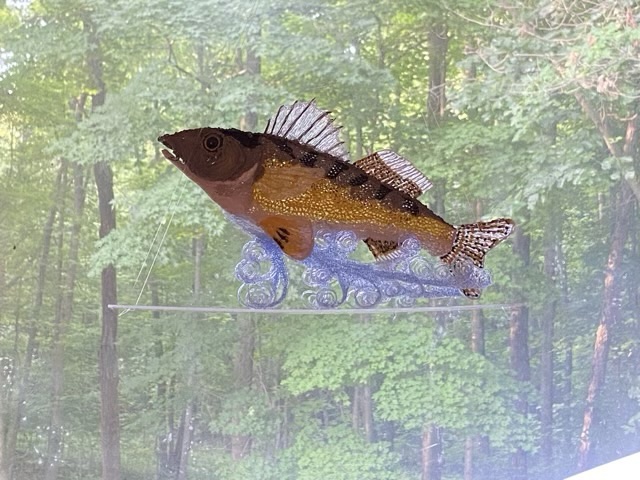
Here is a throwback to April 2017 when I used a 3Doodler 2.0 tool to sculpt a fish.
Photo description: “Hooked” fish sculpture created for my Dad for Father’s Day using the 3Doodler 2.0, about 50 sticks of PLA, two plastic safety eyes, and about 12 hours working time.
Dad displayed the fish on a clear acrylic shelf in an upper window. Here is a picture from 2024.
Photo description: same doodled fish seven years later on a hanging shelf with the woods behind the window glass. His lure went A.W.OL. probably cat related.
As much as I loved the idea of the 3Doodler, the entry level extruder pens could not keep up with my desired work flow. I burned out a couple pens experimenting, and they often needed frequent breaks in production, more than I did.
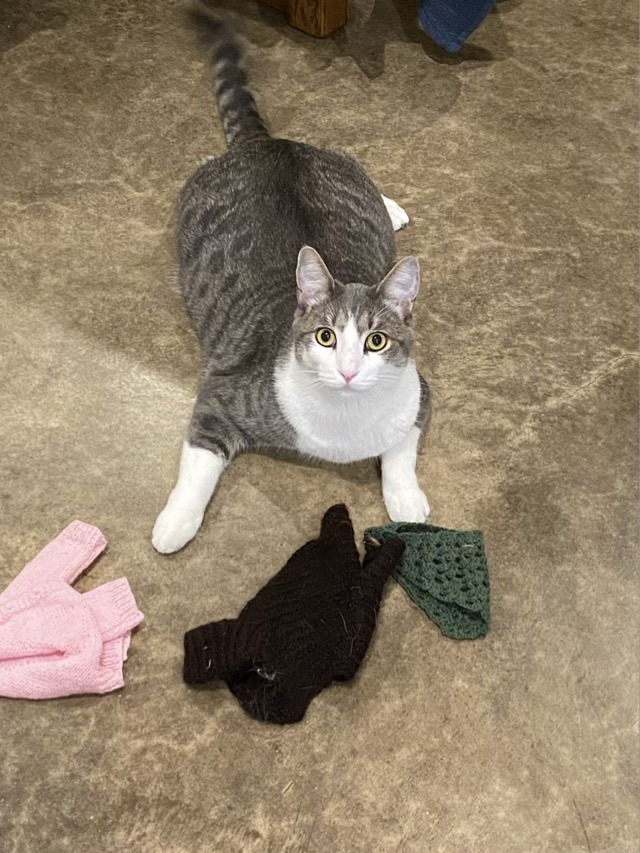
Photo description: Thor the cat with three articles of doll clothes in front of him, all made from wool
Thor the cat really likes wool. Awhile back we moved the gate keeping dogs out of the cat area and inadvertently removed the gap on the side that Thor used as a pass through. The gate was no problem for our two leaping female cats, but Thor is not a leaper. He can jump up, but for some reason doesn’t get that he can jump over. So he was blocked from the upstairs and our youngest’s room, which is full of wooly goodness. My eldest fixed his access by putting a stool on one side and a box on the other, giving him treats to entice him over. He learned, using supports, to get over and regained access to the treasure trove of doll clothes. He goes up, selects a wool item (always wool, never acrylic) and brings it downstairs. In the picture, the brown doll jacket in the middle was his latest prize, I threw the green doll shawl and pink doll sweater that he had previously brought down next to him for the picture. I could probably use him as a wool finder for fabric with unknown animal hair content.
P.S. he looks like a chonk, but the vet says Thor the cat’s weight is in the normal range.
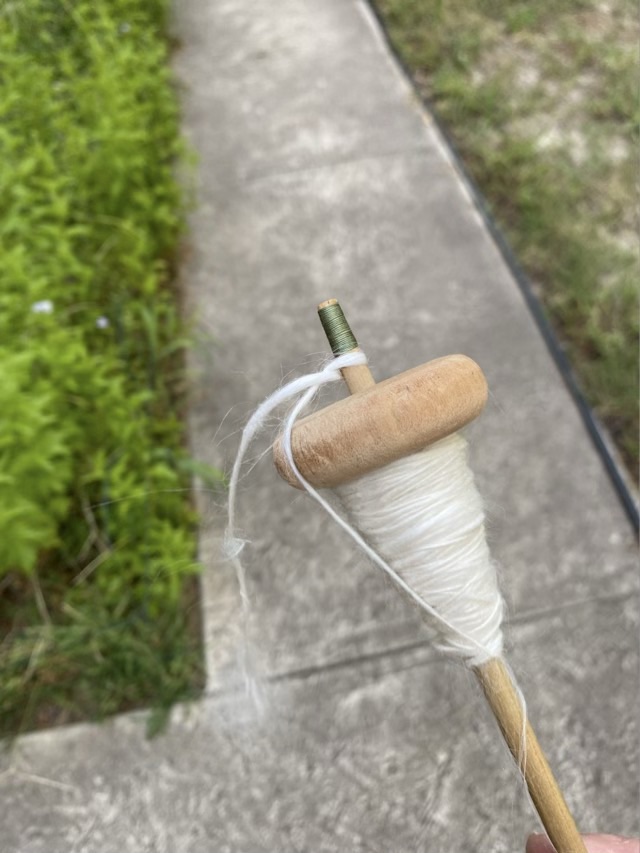
For my next spinning adventure I selected banana fiber (made from banana leaves) from my stash. It was already in my mind to consciously spin thicker singles, because my default spin size has been getting quite fine. It was a double challenge with the banana fiber which has about an 8 inch staple length (the length of individual fibers). Spinning fine would not be a challenge, spinning thicker was! To add to my challenge my fingers decided to spin the singles counterclockwise, opposite to how I usually spin. (Probably because I ply counterclockwise when I’ve spun clockwise, so my hands were already in ply mode.) The counterclockwise twist did not make the hook on my spindle happy, and it unscrewed in the middle of the walk and flew off into the grass. Hm. Undeterred, I switched to making a half hitch to secured the spun yarn.
Photo description: white banana fiber on a top whorl spindle secured with a half hitch below the silk cord lashing
I was pleased that the silk lashing I do on the top of my spindle shaft also serves as a security measure for the half hitch. Not only did I finish the walk still spinning, I continued to use the half hitch method for the rest of the spin over the next few walks.
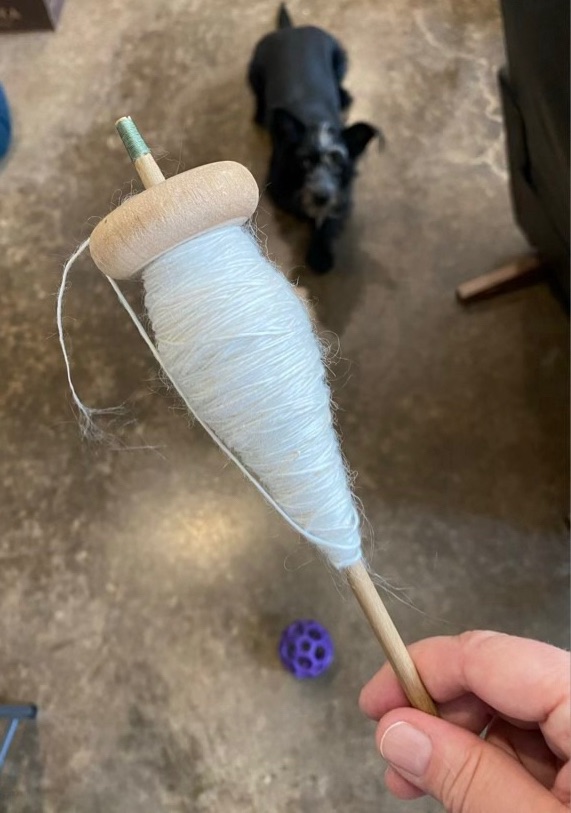
Photo description: all the banana fiber from my sample spun up on the spindle still missing the hook, Missy the dog and her ball in the background because it is hot in Texas and my last leg of the walk was around the kitchen counter inside
I managed to spin slightly thicker, we’ll see how it plies up. The banana fiber has a stiffness to it, more like flax, and doesn’t need much twist to make viable yarn. It had a cottony feel to it, despite the long staple length. It was easy to spin, but I think if I spin it again I will load the fiber on a distaff rather than pull off sections of combed top roving.
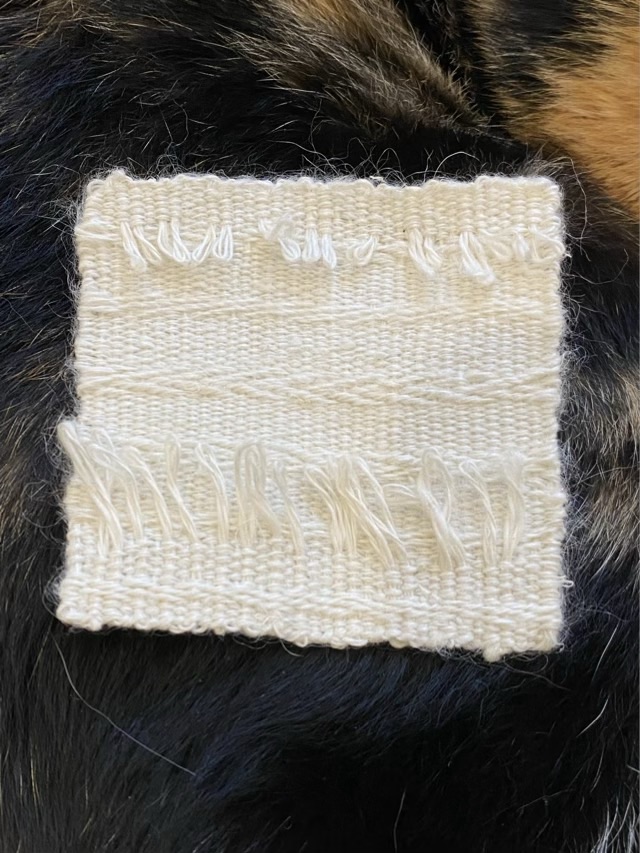
On my pineapple fiber weaving swatch I wanted to try a different method of finishing the warp ends, so wove the loops back into the fabric after taking it off the loom.
Photo description: needle inserted vertically through the top five passes of the weft, with the warp loop through the needle eye
My warp loops were quite small, so I had to insert the needle through the fabric first, then put the warp yarn through the eye of the needle, so I could pull the yarn through.
Photo description: back of the woven swatch showing all the warp threads woven through the fabric and left untrimmed
This is now my favorite way to finish my small woven swatches. The resulting edge has a nice ripple and a clean finish. I left the loops on the back to remind me what I did.