Here is a quick project for found butterfly wings. We often find deceased butterflies in the yard, and in December 2011, we had some amazingly intact wings. Jewelry sections of hobby stores often have premade pendant frames that are two pieces of thin glass or plastic held together with a metal frame. I found these square frames, opened them, and carefully cut the butterfly wings to fit the glass.
Photo description: four square framed pendants with monarch butterfly wings sandwiched between glass
I am amazed at the durability of these pendants. I decided they looked better on our tree, so rather than necklaces, I made them into ornaments by adding a hook. They are some of my favorite ornaments and are still gracing our tree 13 years later.
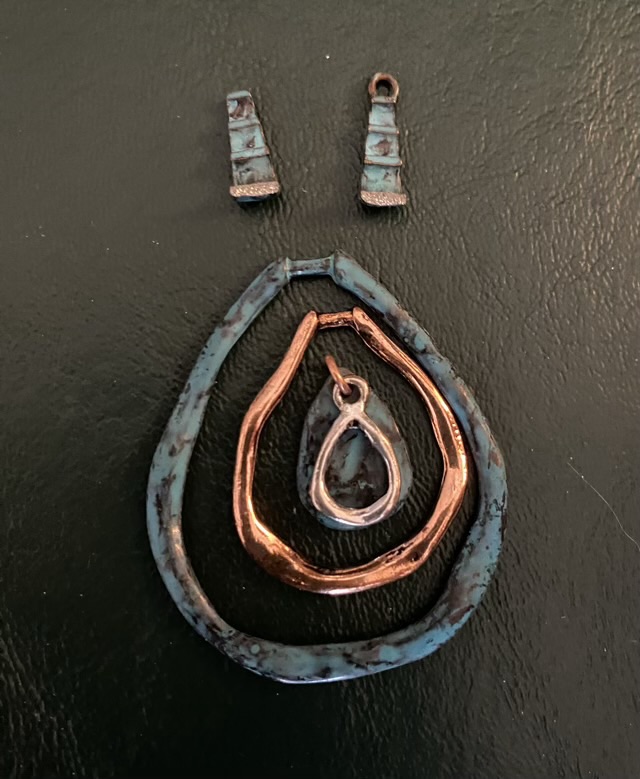
Here is another requested repair from my mother-in-law. This is a pretty nested tear drop design made from several colored loops. Here, the component holding all the loops broke in half.
Photo description: four layer teardrop pendant with broken connecting link (upside down)
Rather than glue the link back together, which surely would have broken again, I crafted a new linkage from twisted square sterling silver wire. I liked the rustic look of the twisted wire, and how it coordinated with the existing loops.
Photo description: looped twisted square sterling silver wire holding the tear drop loops
I did accidentally break the silver colored tear drop, but a little sanding removed the burr and I was able to still use it in the repaired pendant.
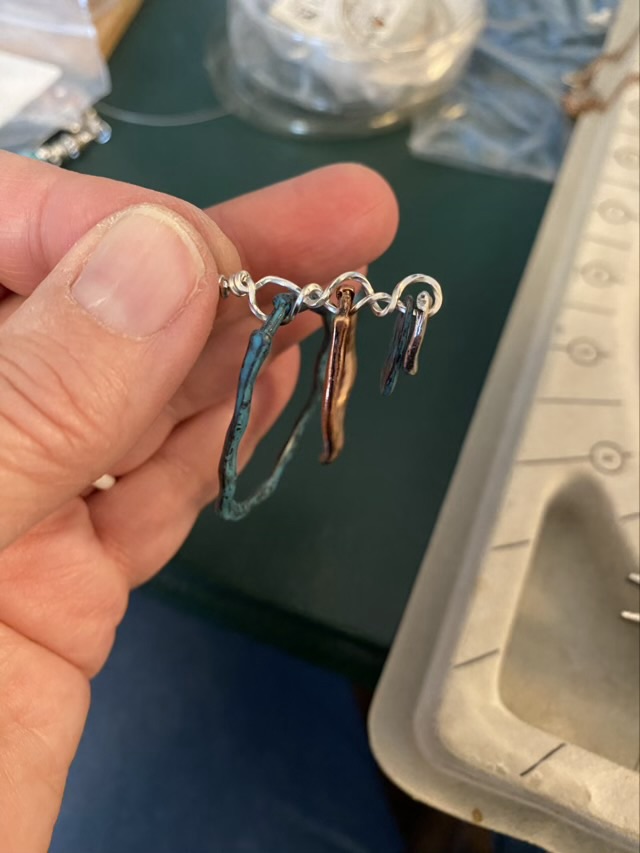
Photo description: repaired pendant as it would hang on the chain
Did I remember to take a photo of the pendant on the chain? Sigh, no.
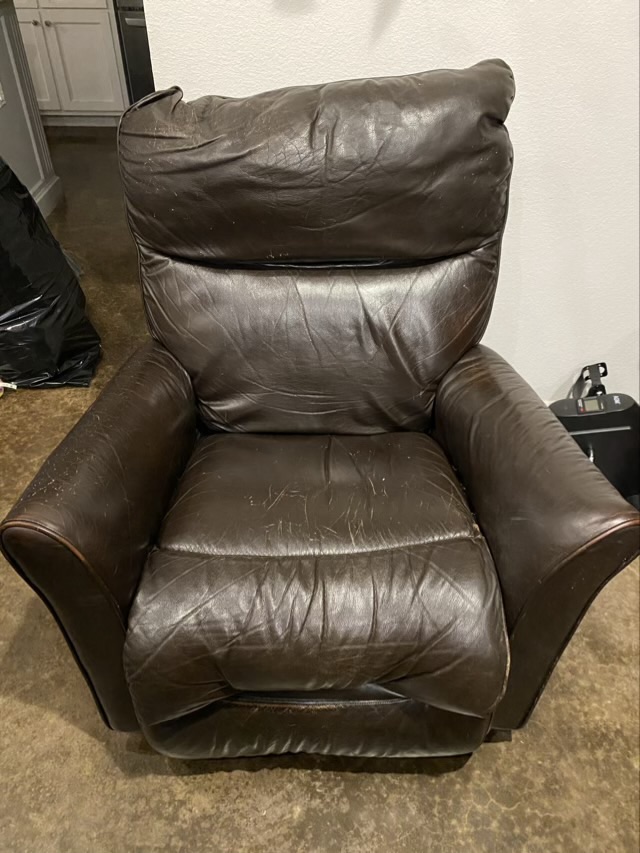
I replaced my recliner. The padding in the old one was breaking down, especially on the arms, causing pain and numbness in my own arm. I tried reworking the existing padding, and then replacing the padding, with no improvement. The recliner mechanism was also staring to go, again. (I did replace that a few years ago by ordering a new ratchet strip, but I even wore that out.) Time for a new seat, but what to do with the old one? It was not all leather, but did have some, could I reclaim it?
Photo description: old leather recliner
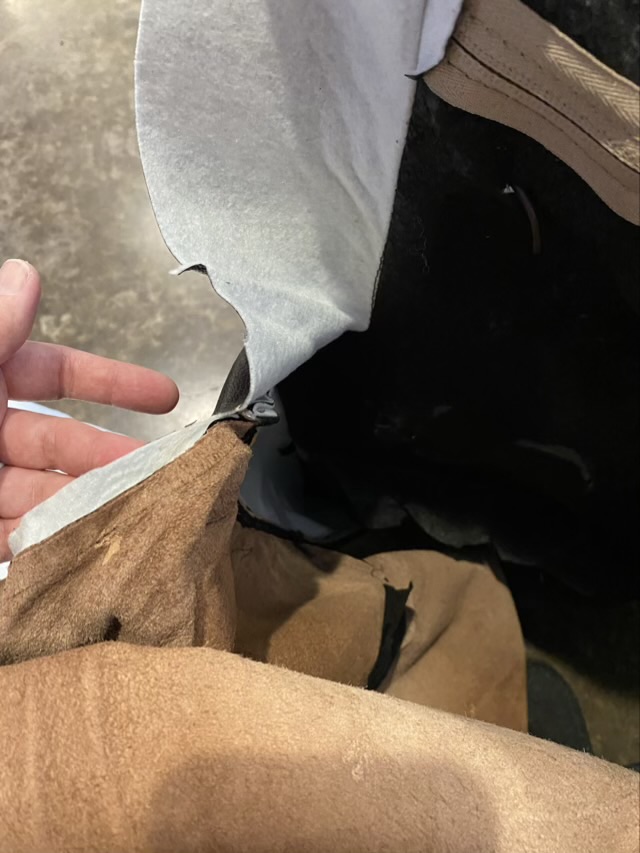
I took a pair of kitchen shears and went after the fabric of the chair.
Photo description: inside the recliner showing the leather (tan) and the faux leather (white)
Deconstructing was not terribly hard. Most of the screws were two sizes of Torx head, and I had the right size screwdrivers. I was appalled at the amount of cardboard inside the recliner, it was a thin sheet of that over the sharp edge of wood that was causing the pressure point in the arm of the chair; the curved slope was an illusion. The hardest thing to remove was the handle for the recliner action.
Photo description: handle removed after applying a wrench to the screwdriver to get enough torque
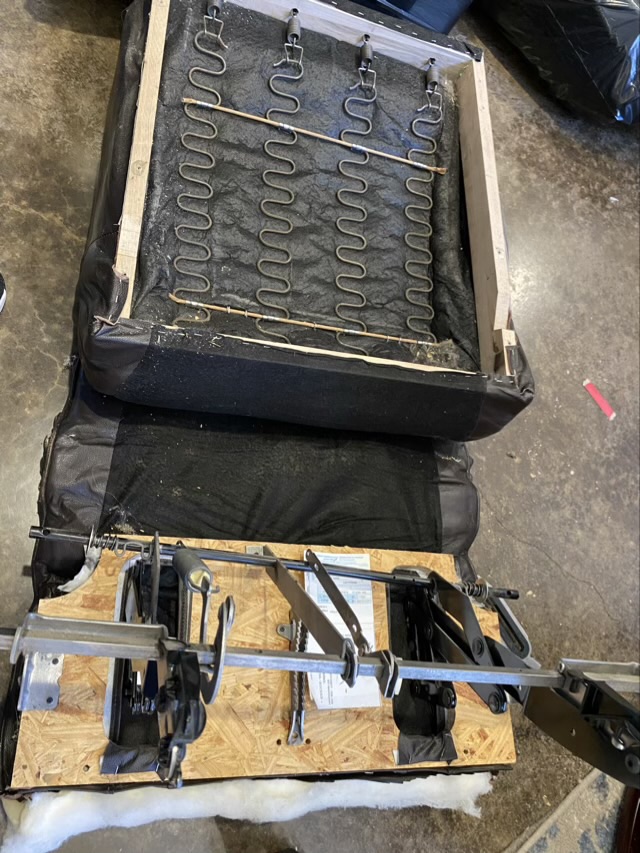
I’m thought about reclaiming some of the steel and springs, but I didn’t have a purpose in mind, and I don’t have the storage space for that much “maybe”. I used leather often, so I knew that was a valuable resource.
Photo description: steel mechanisms and springs inside the recliner
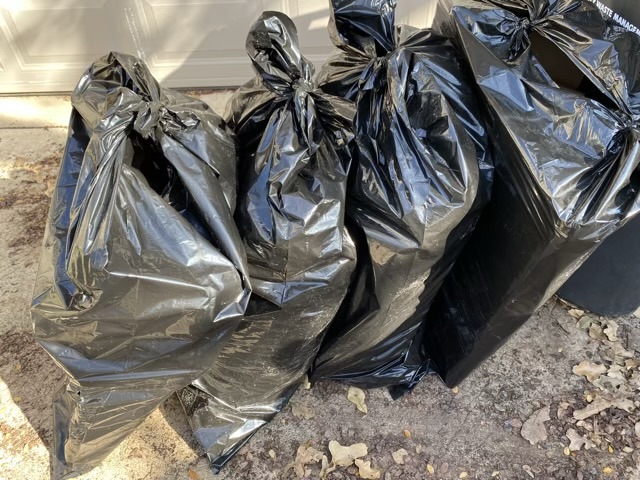
In the end, I reclaimed 2 pounds 9 ounces of leather and reduced the recliner to fit in four black bags, which could be put out with the other trash and not require a special pick up.
Photo description: four large black garbage bags ready for take out
I designed a snowflake cutout to use with my laser cutter for my holiday cards. Laser cuts can be much more precise than electric cutters like Cricut because there is not a dragging knife blade, however, there is a potential for burn. What I found interesting is that colored card stock had less burn than white card stock at the same settings. Hm. A product of reflection, maybe? Something in the way the paper is made?
Photo description: delicate snowflakes cut from card stock, the white showing burnt edges
I accidentally stacked two white sheets in the cutter at one point, which was disastrous with the burn marks, especially on the bottom page.
Photo description: burned cutouts as a result of cutting two pieces of paper, same settings as the picture above
Now I can see an artful application of this smoke effect, but not on snowflakes.
To design the snowflakes, I did traditional paper cutouts, took photos, converted the photos to scalable vector graphics, them combined them in Adobe Illustrator.
The cards are printed and cut, but are still on the craft table and not in the mail. Why? I want to write on the back and that desire became a stumbling block. I had to choose to send them out before the New Year, or send them with writing, whenever I could find the words to write. I obviously chose to send late.
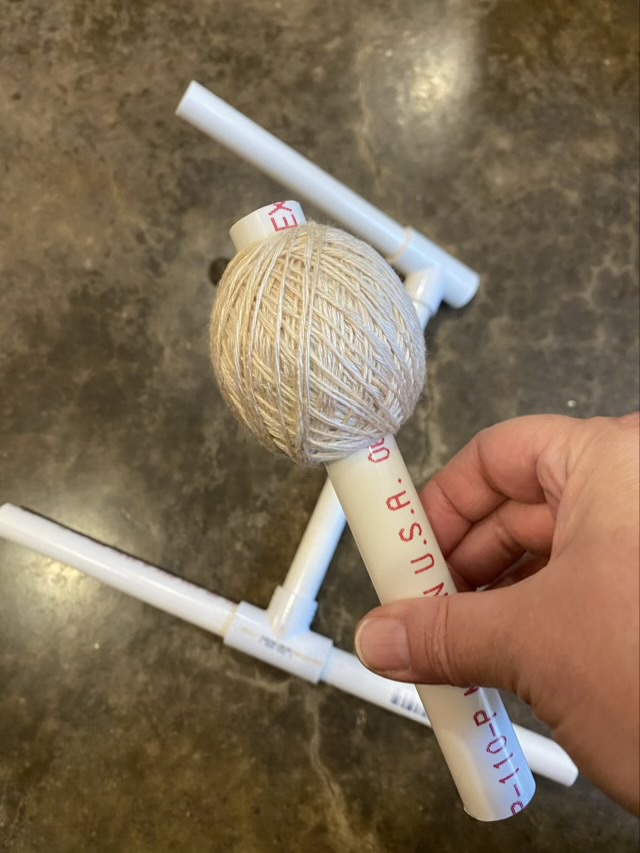
I finished plying the rose combed top fiber, wound it onto my PVC niddy noddy, and gave it a rinse. When it was dry, I took the skein and hung it over the back of a chair, but I went to wind it into a ball, and couldn’t find my nostepinne, or the rolled card stock I had been using. Hm. Then I noticed the PVC pipe is about the right size. Perfect.
Photo description: nostepinne style ball wrap on a PVC pipe from a home made niddy noddy
Are swifts and ball winders and wooden niddy noddys nice? Yes, of course. Are they necessary to the yarn making process? Nope. The back of a chair, or an extra pair of hands, and a rolled paper or a length of pipe will do.