I’ve two plied the angora yarn I spun.

The yarn is still quite thin, so I think I will ply it again to make a four ply cable yarn. The bumpy texture of cable plied yarn will complement the fluffy nature of the yarn, I think.

I’ve two plied the angora yarn I spun.
The yarn is still quite thin, so I think I will ply it again to make a four ply cable yarn. The bumpy texture of cable plied yarn will complement the fluffy nature of the yarn, I think.
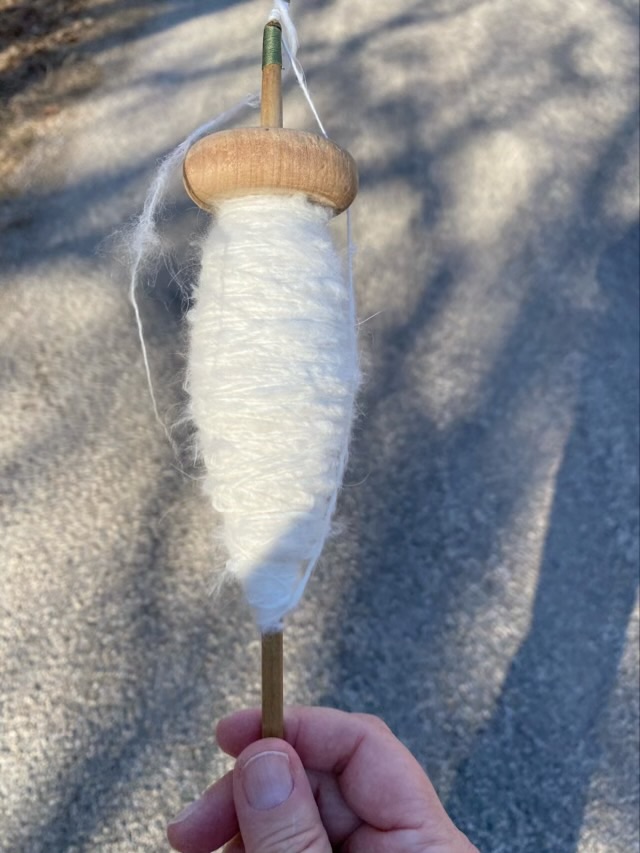
I finished spinning the angora rabbit fur I purchased from a Texas rabbit farmer. I didn’t wash, card, or comb the fiber, just took it out of the bag and started spinning, which resulted in a more uneven spin, but was worth the experiment.
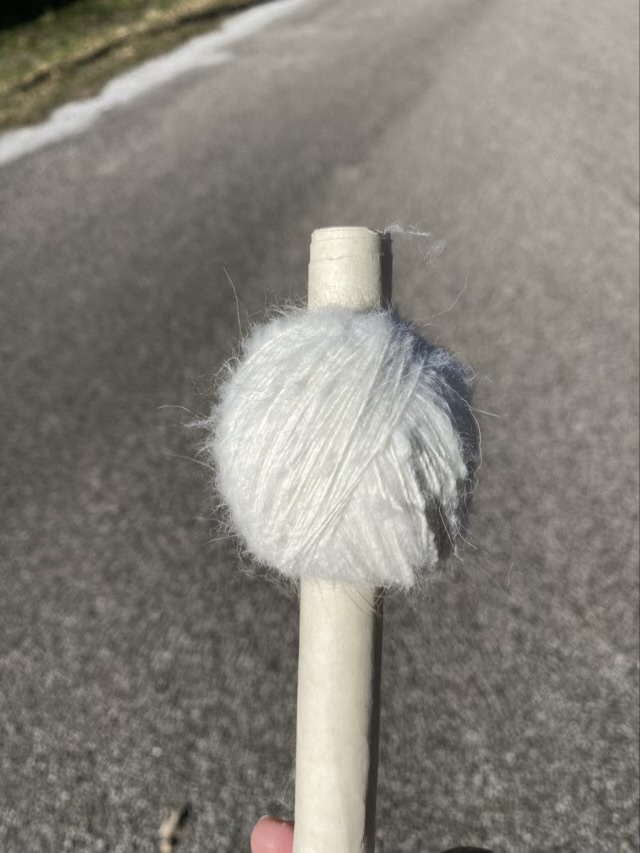
The next step is to ply the yarn. In preparation, I wrapped the yarn into a center pull ball.
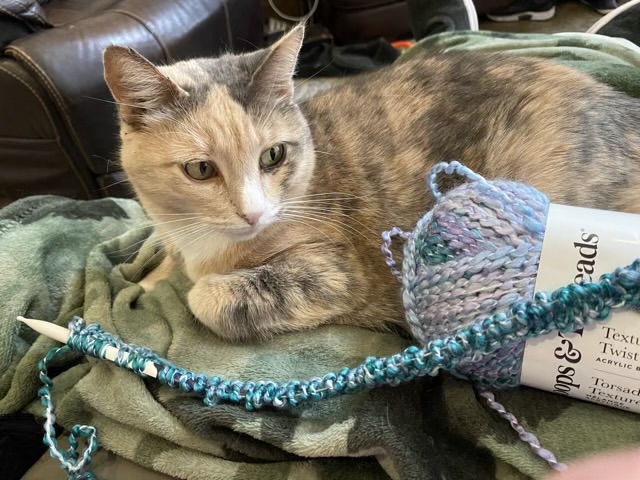
This is not my usual lap cat. Sophie, the outside cat that adopted us and moved inside, has decided that laps are warm and cozy, especially with a fuzzy blanket. She has not learned knitting etiquette yet, though, and thinks the yarn is for play. We’re working on it. Right now it is a balance of encouraging lap time and gently discouraging yarn gnawing.
The new project is a meditative piece using yarn gifted to me by my youngest. It will be a wide scarf done in garter stitch, so no pattern lines to follow, no perl stitches, just knit and turn.
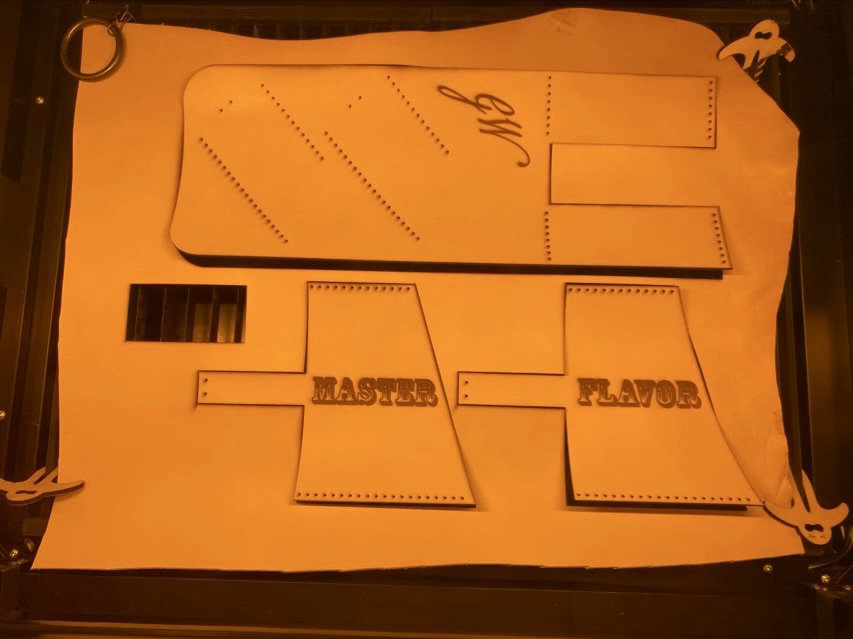
My Dad has been experimenting with making hot sauce. I thought he needed a hot sauce holster for either sauces or spices so they are easy to grab, so I made him one from leather. I started the design process with card stock, so I could get the sizes and shapes right.

Once I was comfortable with my design, I used Adobe Illustrator to lay it out digitally, including engraving and lace holes. I included a “test” rectangle, which was very helpful and something I will include in future design projects, because I was able to use those elements to test my laser cutter settings before committing to larger objects.

I rinsed the leather with water to remove the soot and smoke marks, then dyed it with leather dye.

I used waxed linen to sew the pieces together. I absolutely love how even I can laser cut the holes. Neat stitching is 90% hole placement.


I’m had some space at the bottom of the holster and thought that places to hang things are always potentially useful, so installed a gold hued metal grommet. I finally bought a pair of grommet pliers for this size, and it makes installation so much easier than hammering dies together.
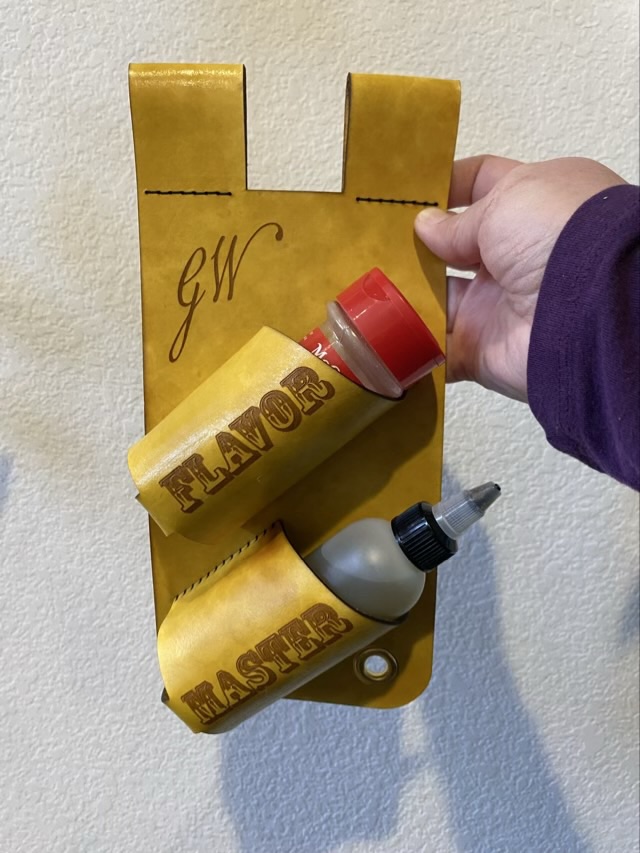
The holster is designed to hang from a belt, and since it is wide, I separated the belt loop into two sections so it can accommodate a belt loop if necessary.
Back in February 2013 I was volunteering at my youngest’s elementary school library, shelving books and decorating their bulletin board. I really wanted to use my CRICUT cutter to make giant flowers and thought they would make a neat wall display.

This is now a rare sight, because paper with that much dimension was deemed a fire hazard and it had to be taken down. The rest of my designs had to be 2D.
