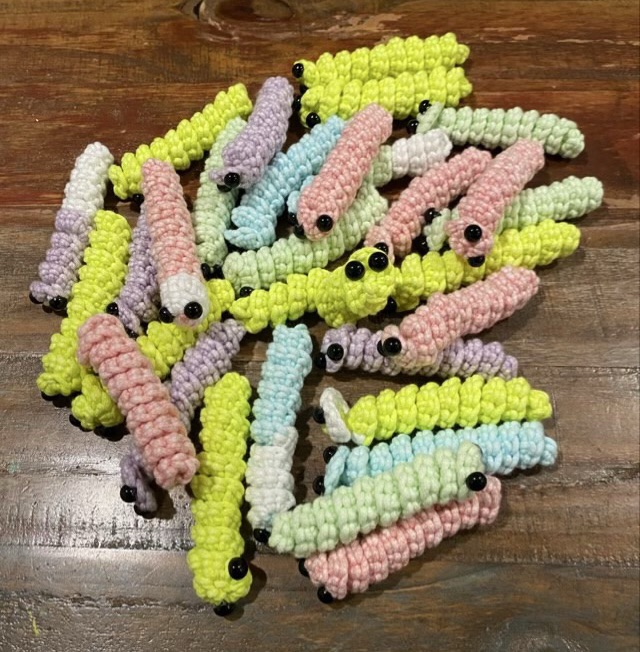
I had left over yarn from my glowing jellyfish hat, so I made glow worms! These are a glowing version of my worry worms.
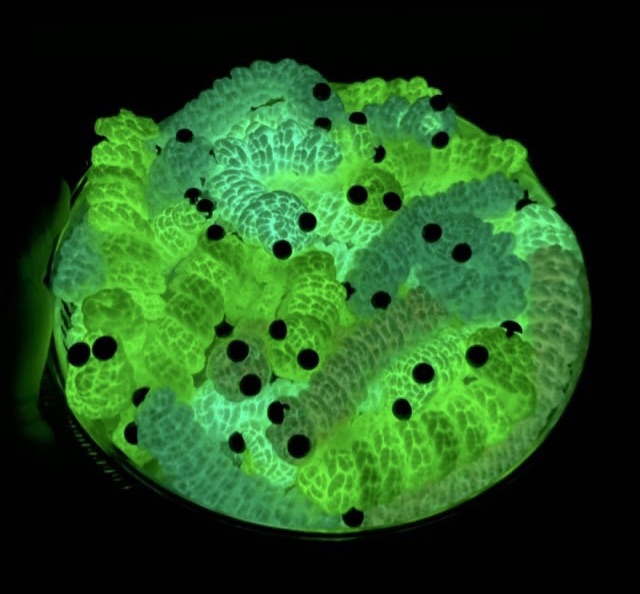
Photo description: worry worms crocheted with five colors of Lions brand DIY Glow Cozy yarn with black sew on eyesPhoto description: glow worms in a dish, in the dark, glowing shades of green
I did enter them in the Lion brand Show us your Glow contest by tagging the picture in Instagram, but did not do a social push because I wanted my friends and family to vote for the jellyfish. Neither made the top 10, but there were some spectacular entries with serious time investment and large social backing. I do have my patterns available for free for the worry worm, and the jellyfish hat!
I’ve started a new-to-me fiber for my spinning walks: Black Welsh Mountain sheep. This is a threatened heritage breed developed in Wales and imported into the Americas in 1972. The sheep are naturally dark brown or black, which I love because there is no possibility of bleeding dye. I purchased roving from Camaj Fiber Arts, and have another Shave Em to Save Em sticker for my Livestock Conservancy Passport.
I’m spinning the fiber up with a top whorl drop spindle that I made, and holding the roving in an arm bag to keep it tidy. The fiber is enjoyable to spin, soft but not slippery with some elasticity and bounce. It spins thin well and I’m finding it easy to keep the yarn thickness even.
Photo description: day one of spinning Black Welsh Mountain fiber, showing a tapered cop of yarn on the drop spindlePhoto description: day two of spinning, the cop of yarn is filling out and developing a shoulder Photo description: day three of spinning, the yarn cop has filled out further and has a pleasant tear drop shape
Building an aesthetically pleasing cop of yarn is a skill, and one that I haven’t found talked about much. I build up several wraps at the bottom (the part farthest away from the whorl), then move up the cop in sections while wrapping. I don’t make an even single layer, but do several wraps at the same level. I find this stays better and looks nicer. It does mean that I unwind a little before wrapping, because before spinning I wrap the yarn down along the cop and back up to the hook to keep it from unraveling while I spin.
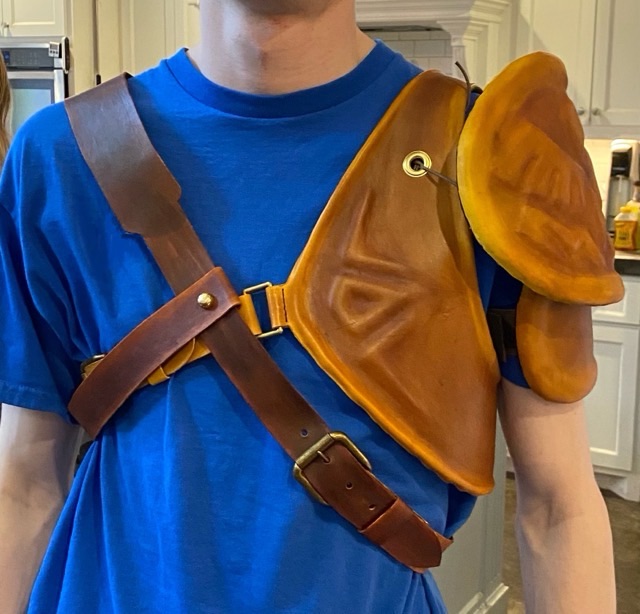
Reveal! Here is a picture of the two leather cosplay pieces I made for a Link costume.
Photo description: leather pauldron, vest, and cross-chest belt made from EVA foam sheet and 3/4 oz tanned leather
I think the pieces came out well, especially for cosplay. I hope that they hold up to use. The sewn areas should be fine, it is traditional construction for leather. It is the foam and hot glue that I worry about.
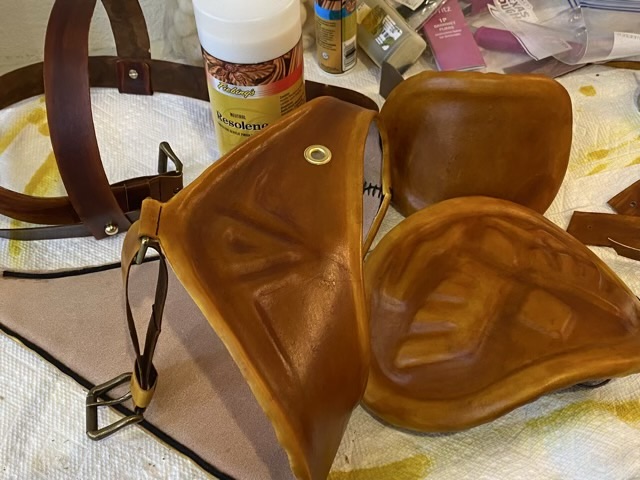
I did put a sealing coat on all the leather to help protect it from accidental spills. It put a nice shine on the leather as well.
Photo description: finished pieces coated with Fiebing’s Resolene
For the finishing touches on the cosplay Link armor, I used leather cement to attach the leather to the EVA foam, so the leather didn’t loose form when worn. To retain the rolled edge, I glued in cotton macrame cord.
Photo description: leather cement used to attach EVA foam and cotton cord to the underside of the vest
I sewed on metal buckles and hardware using a saddle stitch and corset stitch with waxed linen cord.
Photo description: square link sewn into the leather of the vest with a saddle stitchPhoto description: laying out the holes for a belt buckle and leather stayPhoto description: finished leather belt with cross strap attached with brass mushroom screw rivetsPhoto description: inside of the pauldron pieces with the lower one secured with wide elastic, and the upper one with cotton cord ties
For future reference, when placing grommets, make sure your pliers can reach the intended location. I set my grommets in too far, and had to use a vice to attach the metal, which was a pain.
Photo description: useless grommet pliers because I set the hole too deep
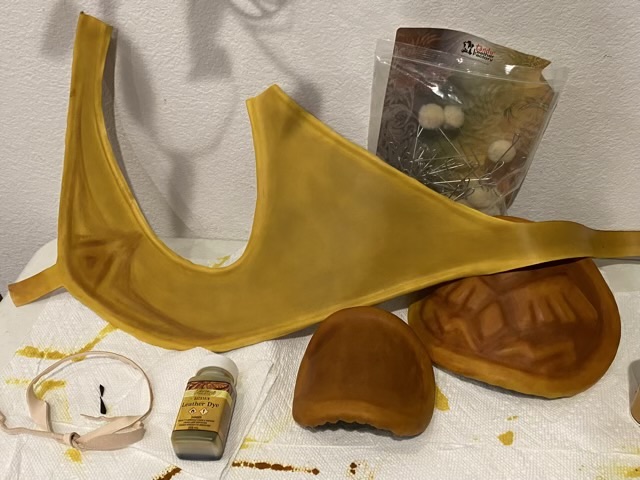
Time to dye the leather cosplay armor pieces. Where I am not partial to dying fiber, I don’t mind dying leather. Fiebing’s leather dyes are easy to use, especially with daubers or large wool pads (synthetic works fine too). First, I lightly dampen the leather, not so much that the color changes, but so that it is cool to the touch. Then I apply the color. The method of application effects the final color variation; small circles with a dauber produces a mottled color, large swipes with a pad gives more even color, but without some of the interesting depth. Applying color over existing color produces different looks as well. I always do a color swatch test when color is critical.
Photo description: freshly dyed leather treated with Buckskin colored dye
When the leather dried, I had a surprise.
Photo description: dried dyed leather, but the vest is several shades lighter than the pauldron pieces
The pauldron was a nice brown, but the vest was yellow, and they should have matched. What happened is that when I dyed the leather, the pauldron pieces were dry, and I rewetted them. The vest was still wet from shaping. They had a similar moisture content by feel, but obviously not a similar dye take up. Rewetting the vest and applying several more coats of dye fixed the issue.
For the straps, I dyed the underside with a dark brown dye, which also changed the surface color. I liked this effect, because Link’s armor is not all one color.