Back in December of 2012 I was into cutting up wine bottles and heating them up to melting in my kiln. I made an ornament from the base of a green bottle, cut a groove in the side with my wet grinder, and wire wrapped it. Using an engraving tool I wrote the first verse from A Visit from St Nicholas by Clement-Clark Moore in a spiral out in tiny lettering.
Photo description: green glass ornament with spiral writing and organza ribbon
As I scroll my photo history, I don’t take every craft project for a throwback post. When I look at a photo, if there aren’t enough words in my head, it doesn’t get picked. There are some projects where I don’t remember what materials I used, or don’t have any in process photos to remind me how I constructed it. So I keep scrolling. Since I’m still picking projects from 13 years ago, I figure I have some leeway.
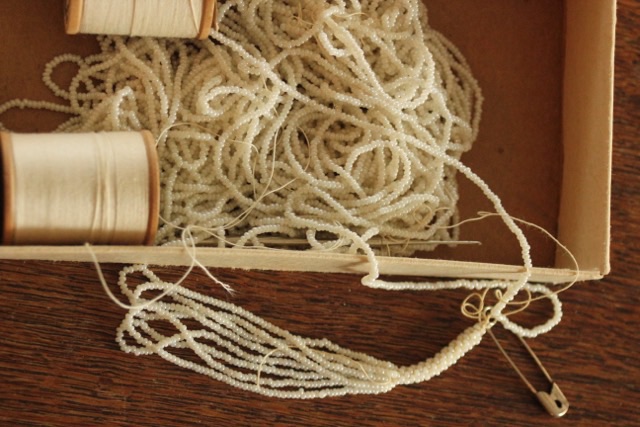
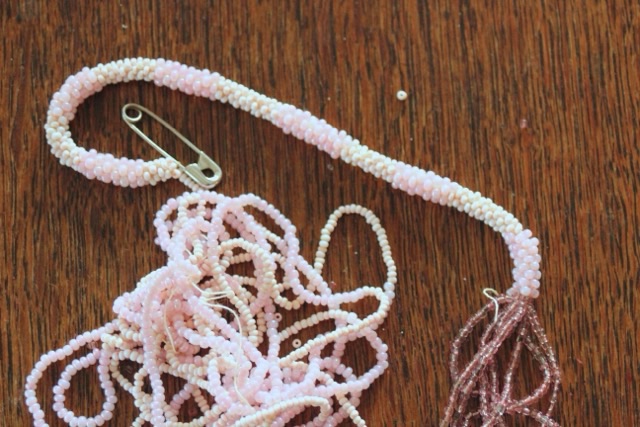
In August 2012 I helped finish a crocheted rope project. Unfortunately I didn’t write down details. I remember that the woman who commissioned me to do the work received the started pieces from a loved family member that passed before finishing the necklaces. She wanted something that she could wear, not just sit in a box. The original intent of the work was to make a long rope with looped beaded tassels on the end. That didn’t suit my client, so we decided they should sit near the collarbone with a magnetic clasp. The original maker had threaded the beads, made the first tassel, and started the crochet with a size 13 steel needle. There was one pink seed bead project and one with white seed beads.
Photo description: box of white seed beads threaded onto cotton thread, tassel and crocheted rope laid on the outside of the boxPhoto description: pink seed bead crocheted rope with wildly different translucent seed beads on the tassel.Photo description: my method of beaded string organization, a huggy spool
I removed the tassels and finished the crochet to the desired length, then ran a piece of 49 strand beading wire through the tube. I attached the magnetic clasp to the wire so that no pressure was applied to the bead work.
Photo description: finished crocheted ropes in white and pink on a reflective black surface
I love the feel of crocheted seed beads ropes, but it is small detailed work that is not fast. The client was pleased and I enjoyed helping a project reach completion.
This was before I learned about the Loose Ends project that matches unfinished projects with volunteer finishers.
As I was wandering outside the dead stalks of last season’s Gregg’s Mistflower caught my eye. I love that the plant took over our front flower bed, and the local insects love the flowers that bloom from Spring to Fall. I started clearing the dried stems in preparation for Spring, and wondered if it would make good weaving material.
Photo description: dried Gregg’s Mistflower stems, stripped of leaves
I did an initial test by wrapping some stems in a wet towel. I left them overnight and in the morning tested pliability. They seemed flexible. The next step will be to harvest more and attempt some weaving.
It would be fantastic if my new favorite plant could also be a craft material.
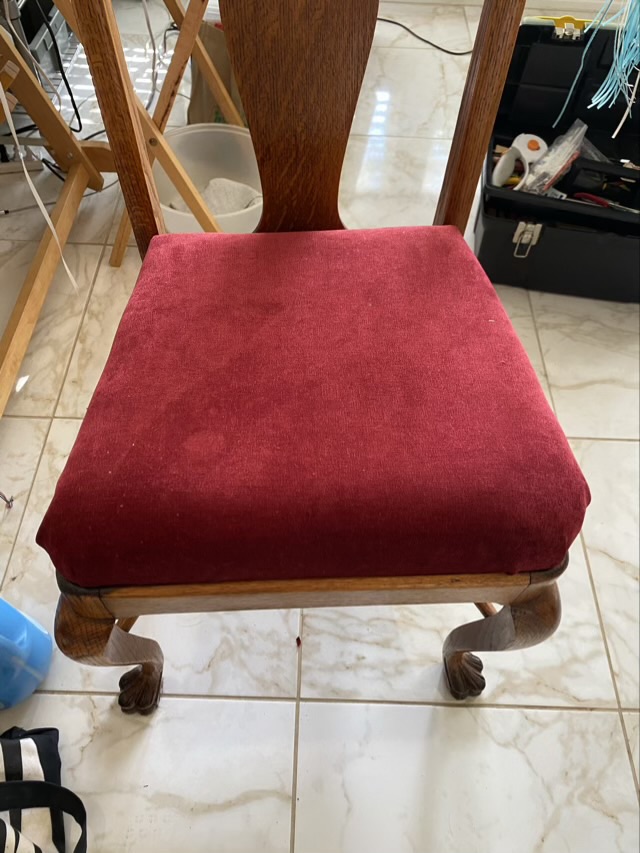
For our monthly craft day, my neighbor and I reupholstered two dining room chairs.
Photo description: before picture of a claw foot chair with worn velvet seat cushion
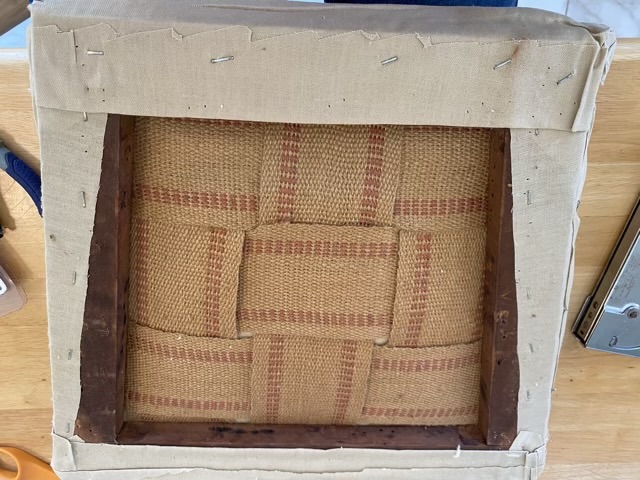
The seat was only laid into the chair frame, so lifting it out was easy, then we removed the staples with flathead screwdrivers and serrated needle nose pliers.
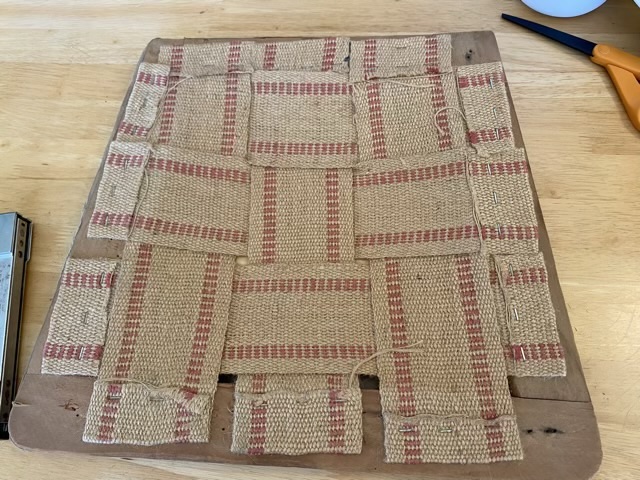
Photo description: underside of the chair pad showing the jute webbing used as support
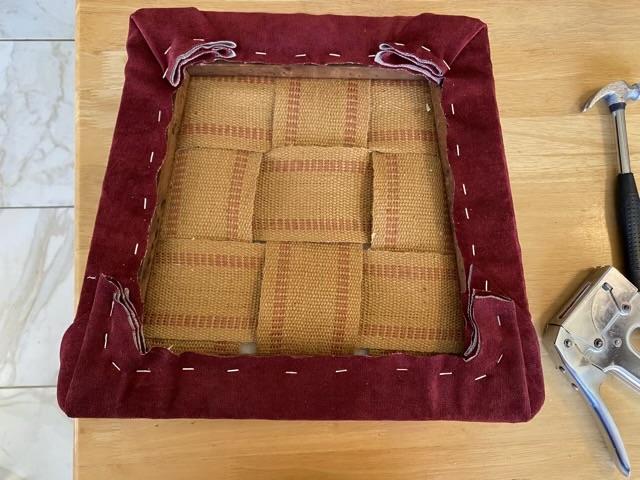
There were so many staples. The velvet had a set of staples, then there were three layers of thick cotton surrounding cotton filler and each layer had a host of staples.
Photo description: cotton cloth layer with more staplesPhoto description: padding made from raw cotton, which condensed and was no longer comfortable to sit onPhoto description: seat frame with jute webbing
When we got down to just the frame, it was obvious that the seat had been reupholstered many times. The jute webbing was in good condition, so we left it in place. To rebuild the seat, we found a 3” dense foam chair cushion, some upholstery quality heavy cotton, and some beautiful red velvet. The cushion was the same depth and width as the chair seat, it just needed some trimming with an electric knife to match the profile. We secured the pad to the frame with the heavy cotton cloth and heavy duty staples.
Photo description: heavy cotton fabric securing the foam pad to the seat frame
Because we used a foam block, we didn’t need as many layers of cotton as was previously installed. The cotton layer did help to do the initial shaping of the pad and make applying the velvet easier.
Photo description: underside of seat frame with velvet secured with staples
We did have to switch to longer staples, particularly in the corners, with the velvet. It was good that I brought along a selection.
Photo description: after picture of the reupholstered seat of a claw foot chair
We were able to refinish both chairs, including shopping for fabric, in about three hours. Chair seat reupholstery is a very doable project with a good heavy staple gun, selection of staples, and a pair of pliers.
My youngest needed Valentine cards for school, but didn’t want store bought. I like toy-type cards, and if I can sneak some science in all the better. This line of pursuit led us to create a Thaumatrope, which is a spinning toy invented in the 1800s with two different pictures on each side of a disc. When the disc is spun, the pictures appear to combine. The original thaumatropes used string to suspend the circle, but a similar action can also be achieved with a stick mounted disc, and rolling a stick between two palms is easier than twisting string. My youngest chose the elements to go on the card, and I drew them up in Adobe Illustrator. Pro tip for getting colors right from screen to print: don’t go by screen color. If you want a bright yellow, go into the color picker and make sure that your CMYK color is all Y, with no cyan or magenta. High contrast images work better for this visual trick as well. I printed the images on card stock, and used my laser cutter to cut the circles (so much more precise than my old electric cutter). I used hot glue to secure the paper stick (I used a 6” stick marketed for cake pops), and keep the front and back together.
Photo description: finished stick-style thaumatropes in the background, glue gun to the left and the front and back of the disc in the foreground
I like that when the disc spins, the bee and sun are smiling at each other. It came out cute. What wasn’t cute was making 35 of them. Phew.