Fat quarter travel pillow

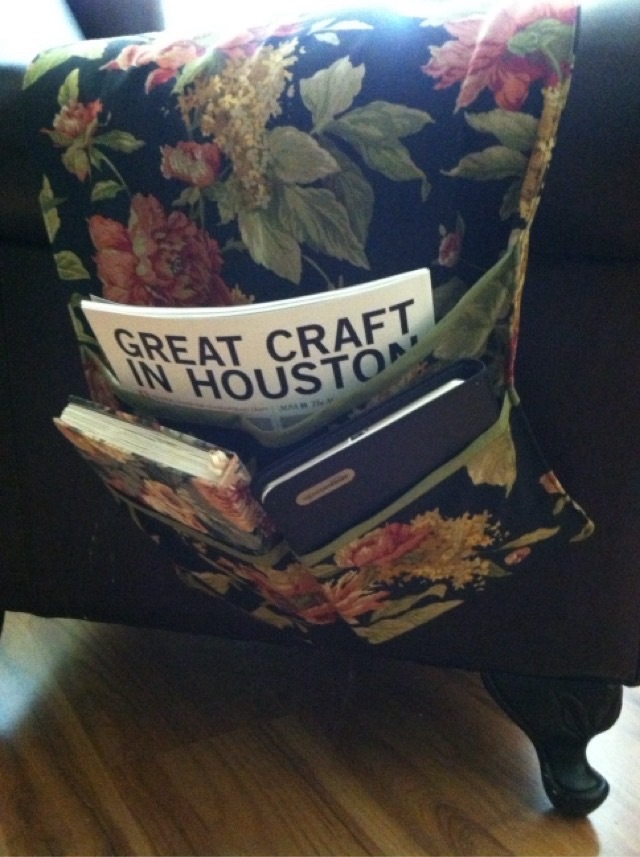
I don’t like the U shaped travel pillows. I’ve tried several, and the bulk pressing against the back of my neck (really anything around my neck) drives me nuts. So I made a different kind of pillow. It is ideal for reclining chairs because it has two side pillows so my neck doesn’t twist too far, and no stuffing behind my head. The best part is that I made it with one fat quarter, some thread, and poly fil stuffing.

Photo description: fat quarter (18”x21”) of quilting fabric with a pineapple motif

To make the pillow, fold a fat quarter in half lengthwise, right sides together (9” x 21”, doubled). Sew along the edges, leaving two 4” gaps on the outside thirds of the long edge (for stuffing later).

Photo description: fat quarter folded in half and sewn with two gaps on the far edge, on a model 66 treadle sewing machine

Clip the corners and turn the pillow right side out. Fold the case in thirds, mark the line, then sew seams along the lines. This divides the pillow into three parts.

Photo description: pillow case divided into thirds and being sewn using the fold as a guide

Fill the outside sections with stuffing, then sew the gaps closed. I usually do this by hand, but the foot on my model 66 has such a nice tiny toe, I thought I would try on the treadle sewing machine. It worked well.

Photo description: sewing the pillow gap closed using a treadle machine fitted with a standard foot
Photo description: finished travel pillow laying on the work surface of a 1916 Singer treadle sewing machine

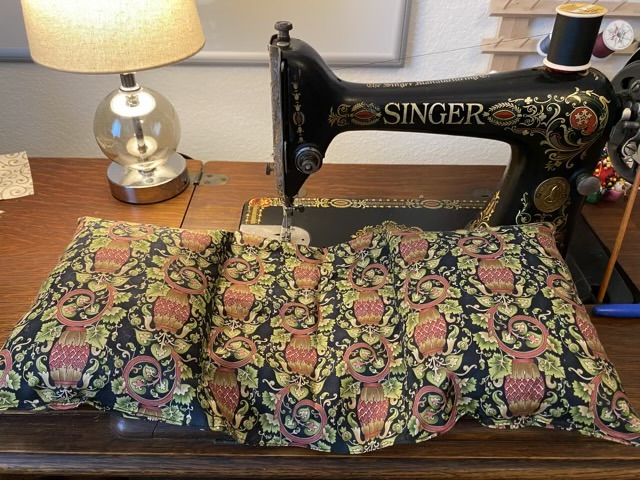
It amuses me that the fabric coordinates with the “red eye” decals on the sewing machine. I can report that the pillow works great, especially for naps.

Throwback Thursday: chair organizer

In May of 2013 I made this arm chair organizer that has pockets on the side for magazines and notebooks. I’m not sure why I didn’t sew on something to hold it down on the seat cushion, instead relying on butt power, but I am pleased how nicely I trimmed out the pockets using bias tape.

Photo description: floral fabric with a black background sewn with three overlapping pockets trimmed in green and filled with books
Photo description: other side of the organizer with different sized pockets to hold different books, electronics, and magazines
Photo description: over exposed photo of the chair from the front and the organizer stretched across the arms of the chair, no butt anchor

If I were to remake this project, I would add fabric to tuck down on the sides of the cushion, or maybe even go all the way around or under the cushion. Hm. Maybe I didn’t have enough fabric so had to rely on butt power. It would have made more sense to run the center section under the cushion.

More Marled

I liked the two-tone Jacob’s sheep roving spun up so much that I decided to make more marled yarn with the other two colors of Jacob’s roving I bought from Sweetgrass Jacobs farm.

Photo description: a dark brown ball of roving and a light brown/gray ball of roving in the bottom of a popup hamper with a jumbo bobbin

I pulled the ends from both balls of roving and am spinning them together on my Ashford Traveller spinning wheel.

Photo description: single spun marled yarn on a regular sized bobbin with a sliding loop flyer

It will take longer to spin this two color yarn, just because there is more. My plan is to chain ply it like I did for my other marled yarn, and then make plans for a warm vest.

Giving it a whorl

I made this spindle whorl awhile back using a laser cutter. The dragonfly design is my own.

Photo description: plywood whorl with dragonfly design and six extended circle shaped spokes

I had an empty shaft and decided to give the whorl a whirl while I was spinning my Black Welsh Mountain fiber.

Photo description: single spun yarn wrapped on a spindle shaft

I should have sanded down the shaft some, the top hook did not stick up far enough which made it difficult to wind yarn on and off. The single layer whorl also didn’t feel substantial, and although the size was large enough to keep momentum, I struggled with it bumping into me. It is slightly better than using a CD as a whorl, but only because it has dragonflies. Back to the design board.

Throwback Thursday: resin earrings

In May of 2013 I was experimenting with circuits and epoxy resin. I made a set of earrings with components striped from a cell phone, epoxy, and sterling silver wire.

Photo description: hand-made, clear epoxy and sterling silver earrings with embedded upcycled phone components

This project did not stand the test of time. The epoxy yellowed and the silver tarnished. I thought I used “non-yellowing” epoxy, but I don’t have a record of the brand or type. I’ve drifted away from epoxy except as an adhesive for this reason.

Photo description: same earrings 12 years later

I have to say that I’m not entirely displeased with the aging of these earrings. The yellow and oxide have a more steampunk look than the newly made earrings. The epoxy is still solid, not cracked or degrading or sticky. I still wear the earrings.