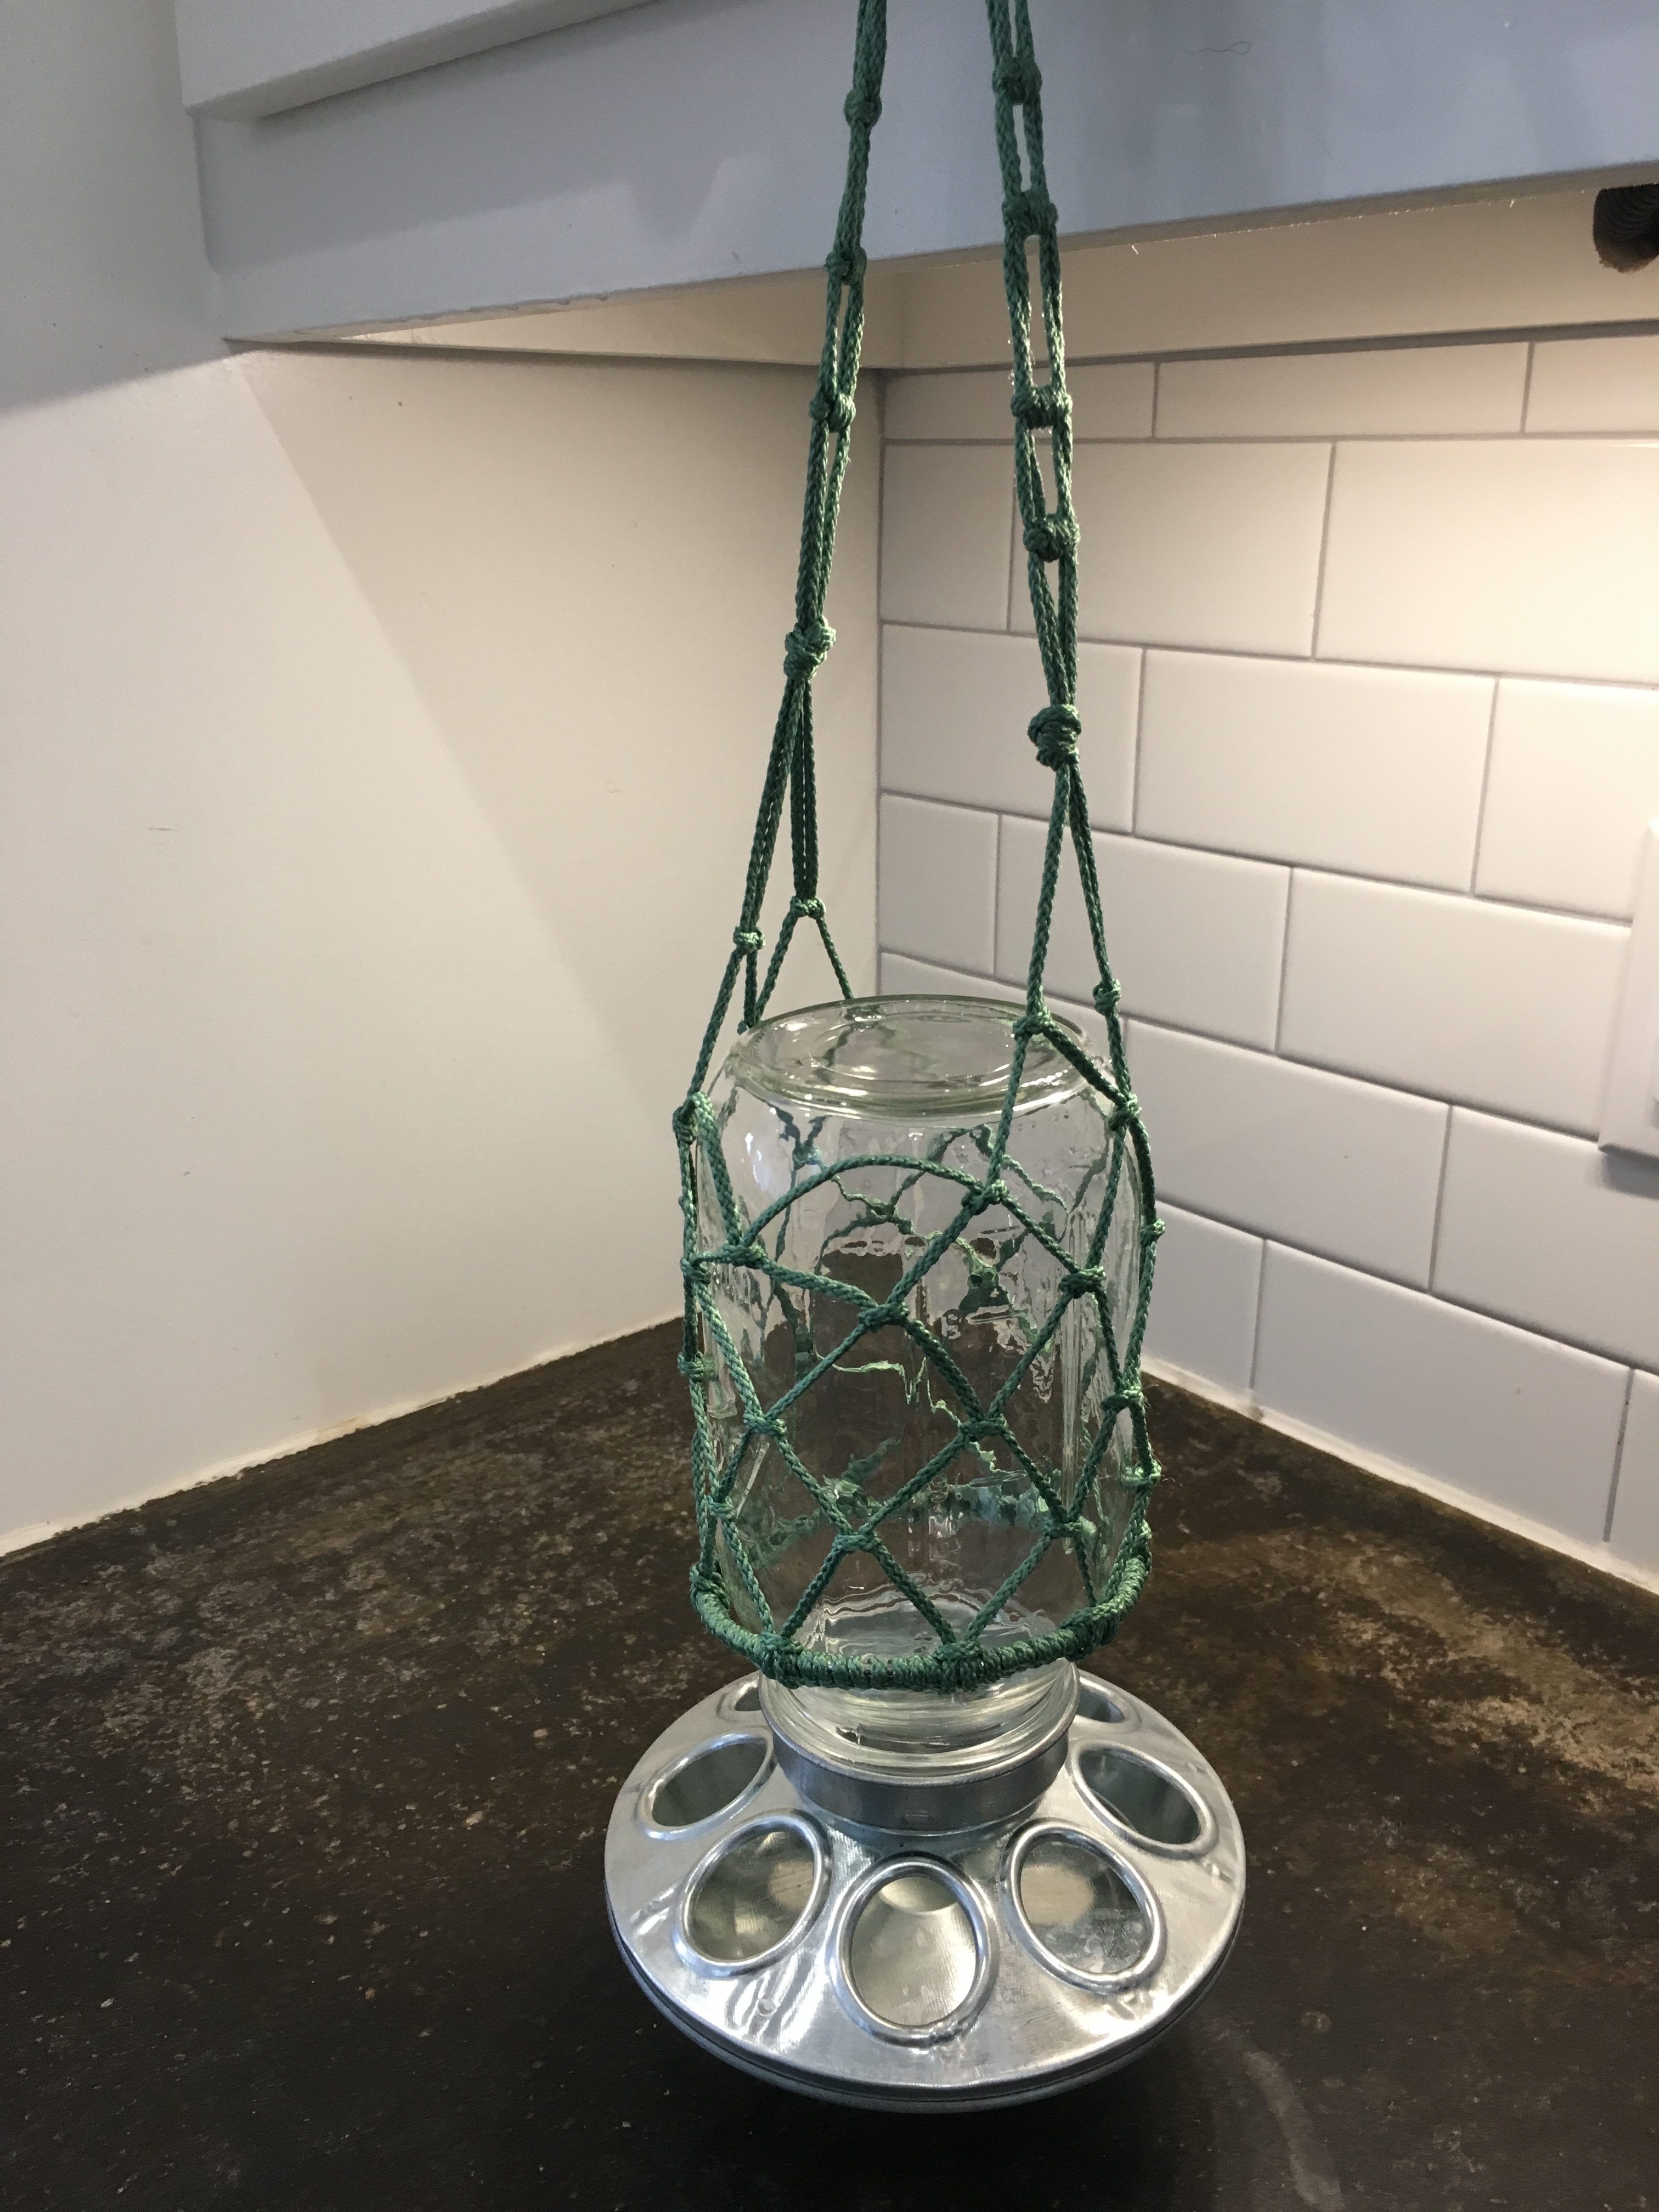
Hanging Chick Feeder

Hanging Chick Feeder

I’ve been reading up on how to feed and water chicks, and all the many different methods available! I’ve read that keeping the feeder at the chick back height is important, and one of my favorite suggestions was to use hanging feeders so the chicks can’t knock them over. Most hanging feeders are designed for wild birds and can get quite expensive (especially if you need 4!) So I came up with my own design for hanging regular, inexpensive chick feeders and waterers using the bases designed to screw onto quart Mason jars. I’m planning on using an old wire dog crate as my brooder, so hanging things from the top of the crate will be quite easy.

I was not able to find the exact instructions I wanted, so I combined a few different techniques. I used a steel ring so the jar could not slip through, made a wrap for the steel ring to protect the jar from bumps, a net around the jar, and “ladder” straps so I could easily adjust the height at which the feeder would hang.

I have written up instructions below, and have also done a “speedy” video for the curious with short attention spans. (My eldest said the video should be 30 seconds. I couldn’t quite get it that short, but I managed to get it down to 5 minutes. It goes fast, but is kind of neat to watch at super speed.)

Here is the materials list:
Metal Chick Feeder Base (usually available at the local feed store)
Quart Mason Jar (also available at the feed store, or at the grocery store)
4 inch Steel ring (you can pick these up in the macrame section of the craft store)
40 feet of craft rope (the kind used for macrame, also available at the craft store, usually for about $5 for 100 yards)
S-hook or carabiner to use to hang the feeder

Instructions: Cut 20 feet of craft rope and seal the ends by melting them (I use a lighted match, but lighters work as well). Cut four 5 foot sections of rope and seal the ends.

Covering the ring: Wrap the 20′ section of rope into a center pull bundle by leaving about 12″ hanging and wrapping the rest around three fingers until there is 12″ left. Use the tail to wrap the bundle and tuck the end through the wraps. Use an overhand knot to tie the rope onto the ring, leaving about 4″ of tail. Then use half-hitches to cover the ring; remember to go over the tail as well to keep it in place.

Making the net: Using cow hitch knots (also called larks head), make 7 even loops around the ring. Use an odd number of loops to make it easy to go to the next row. When you have completed the base row, continue to make cow hitch knots in each loop, making sure to keep the loop lengths even and pulling the knots tight. When you have reached the bottom of the jar, use a few half hitches to secure the end of the rope.

Making the adjustable straps: (This is similar to making a rope ladder.) Choose two opposite pairs of loops on the bottom of the net, and attach one 5 foot section of rope to each loop by folding the rope in half and using the larks head knot. Take two ropes (four strands) and tie them together with an over hand knot. Take one of the left strands under two strands to the right, over two to the left, under the third on the left, and back across the top of the other three strands to the right. Then take one of the right strings and wrap it around the outside of the rung you just made. Open the loop on the left and tuck the end of the rope through, and pull everything tight. On the next rung, use the two strands that did not get used on the previous rung. This will keep the rungs from being able to scrunch together. When you have done 10-11 rungs, about 1″ apart, tie the four strands together with an overhand knot. Do the same procedure on the ropes on the other side of the net. Cut and seal the excess rope. Use the rungs on the ladder to hang your feeder!
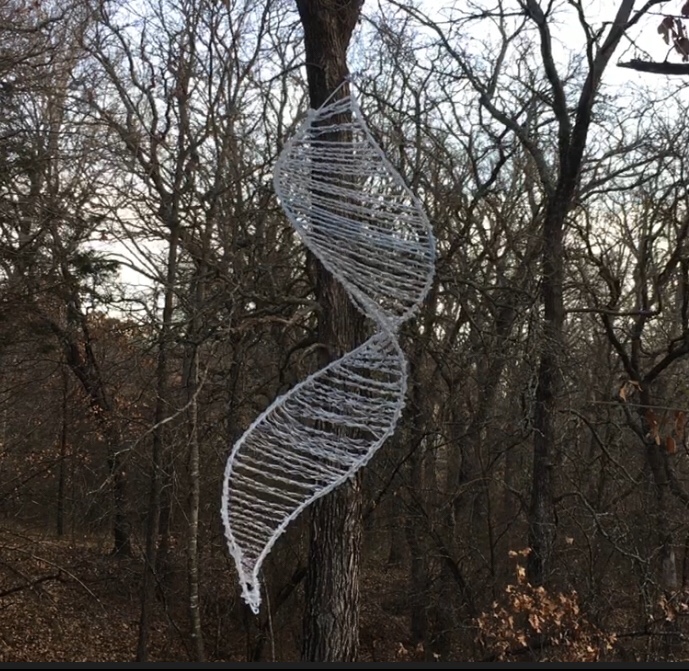
Recycled Bottle Wind Spinner

Awhile back I shared my new obsession with bottle cutters. One of the reasons for the obsession was that I really wanted to experiment with the material, and I had the idea to make a wind spinner.

I love the wooden wind spinners that look like they transform their shape as they spin. I thought: “Could I do that with recycled materials?” Turns out I can! The bottle string is light and strong and fairly easy to shape with a little heat. And if anyone else wants to make a cool looking spinner with recycled materials, I made a video to show how I did it.

Not only is the spinner fun to watch in the wind, I hung it near the coop to scare away aerial predators and wild birds that may be carrying avian bird flu. (That is my story and I’m sticking to it. It is not at all that I have a fixation with kinetic sculpture.)

Brooder table

Brooder table with one shelf

I’ve been working on my chisel skills again. It is a good thing that I’m making stuff for chickens and they aren’t known to be tough critics, as I still need more practice! But I’m pleased with the way this table is coming out, all things said.

I decided a while ago that I wanted to make chicken “furniture” for the coop; items that are movable rather than built-in so I can rearrange. Being a first time chicken owner, I know I’m going to want to rearrange. (Heck, I just like rearranging in general.) So with all our designs, we are thinking flexibility first.

I’ve read that chicks are more traumatized by being picked up from above, rather than approached from the side, not surprising since most threats come from above). I’ve also read that Faverolle chicks are particularly prone to little chicky terror. I have a 2×3 foot dog crate that I planned on using as the brooder, so to raise it up, I decided to build a table. The shelf underneath will hold nesting boxes when the hens reach that age, and the crate will be my isolation unit for injured chickens when I no longer need it as a brooder. Once the whole thing goes in the coop, I will install a 45 degree “roof” over the crate so the chickens can’t roost up there.

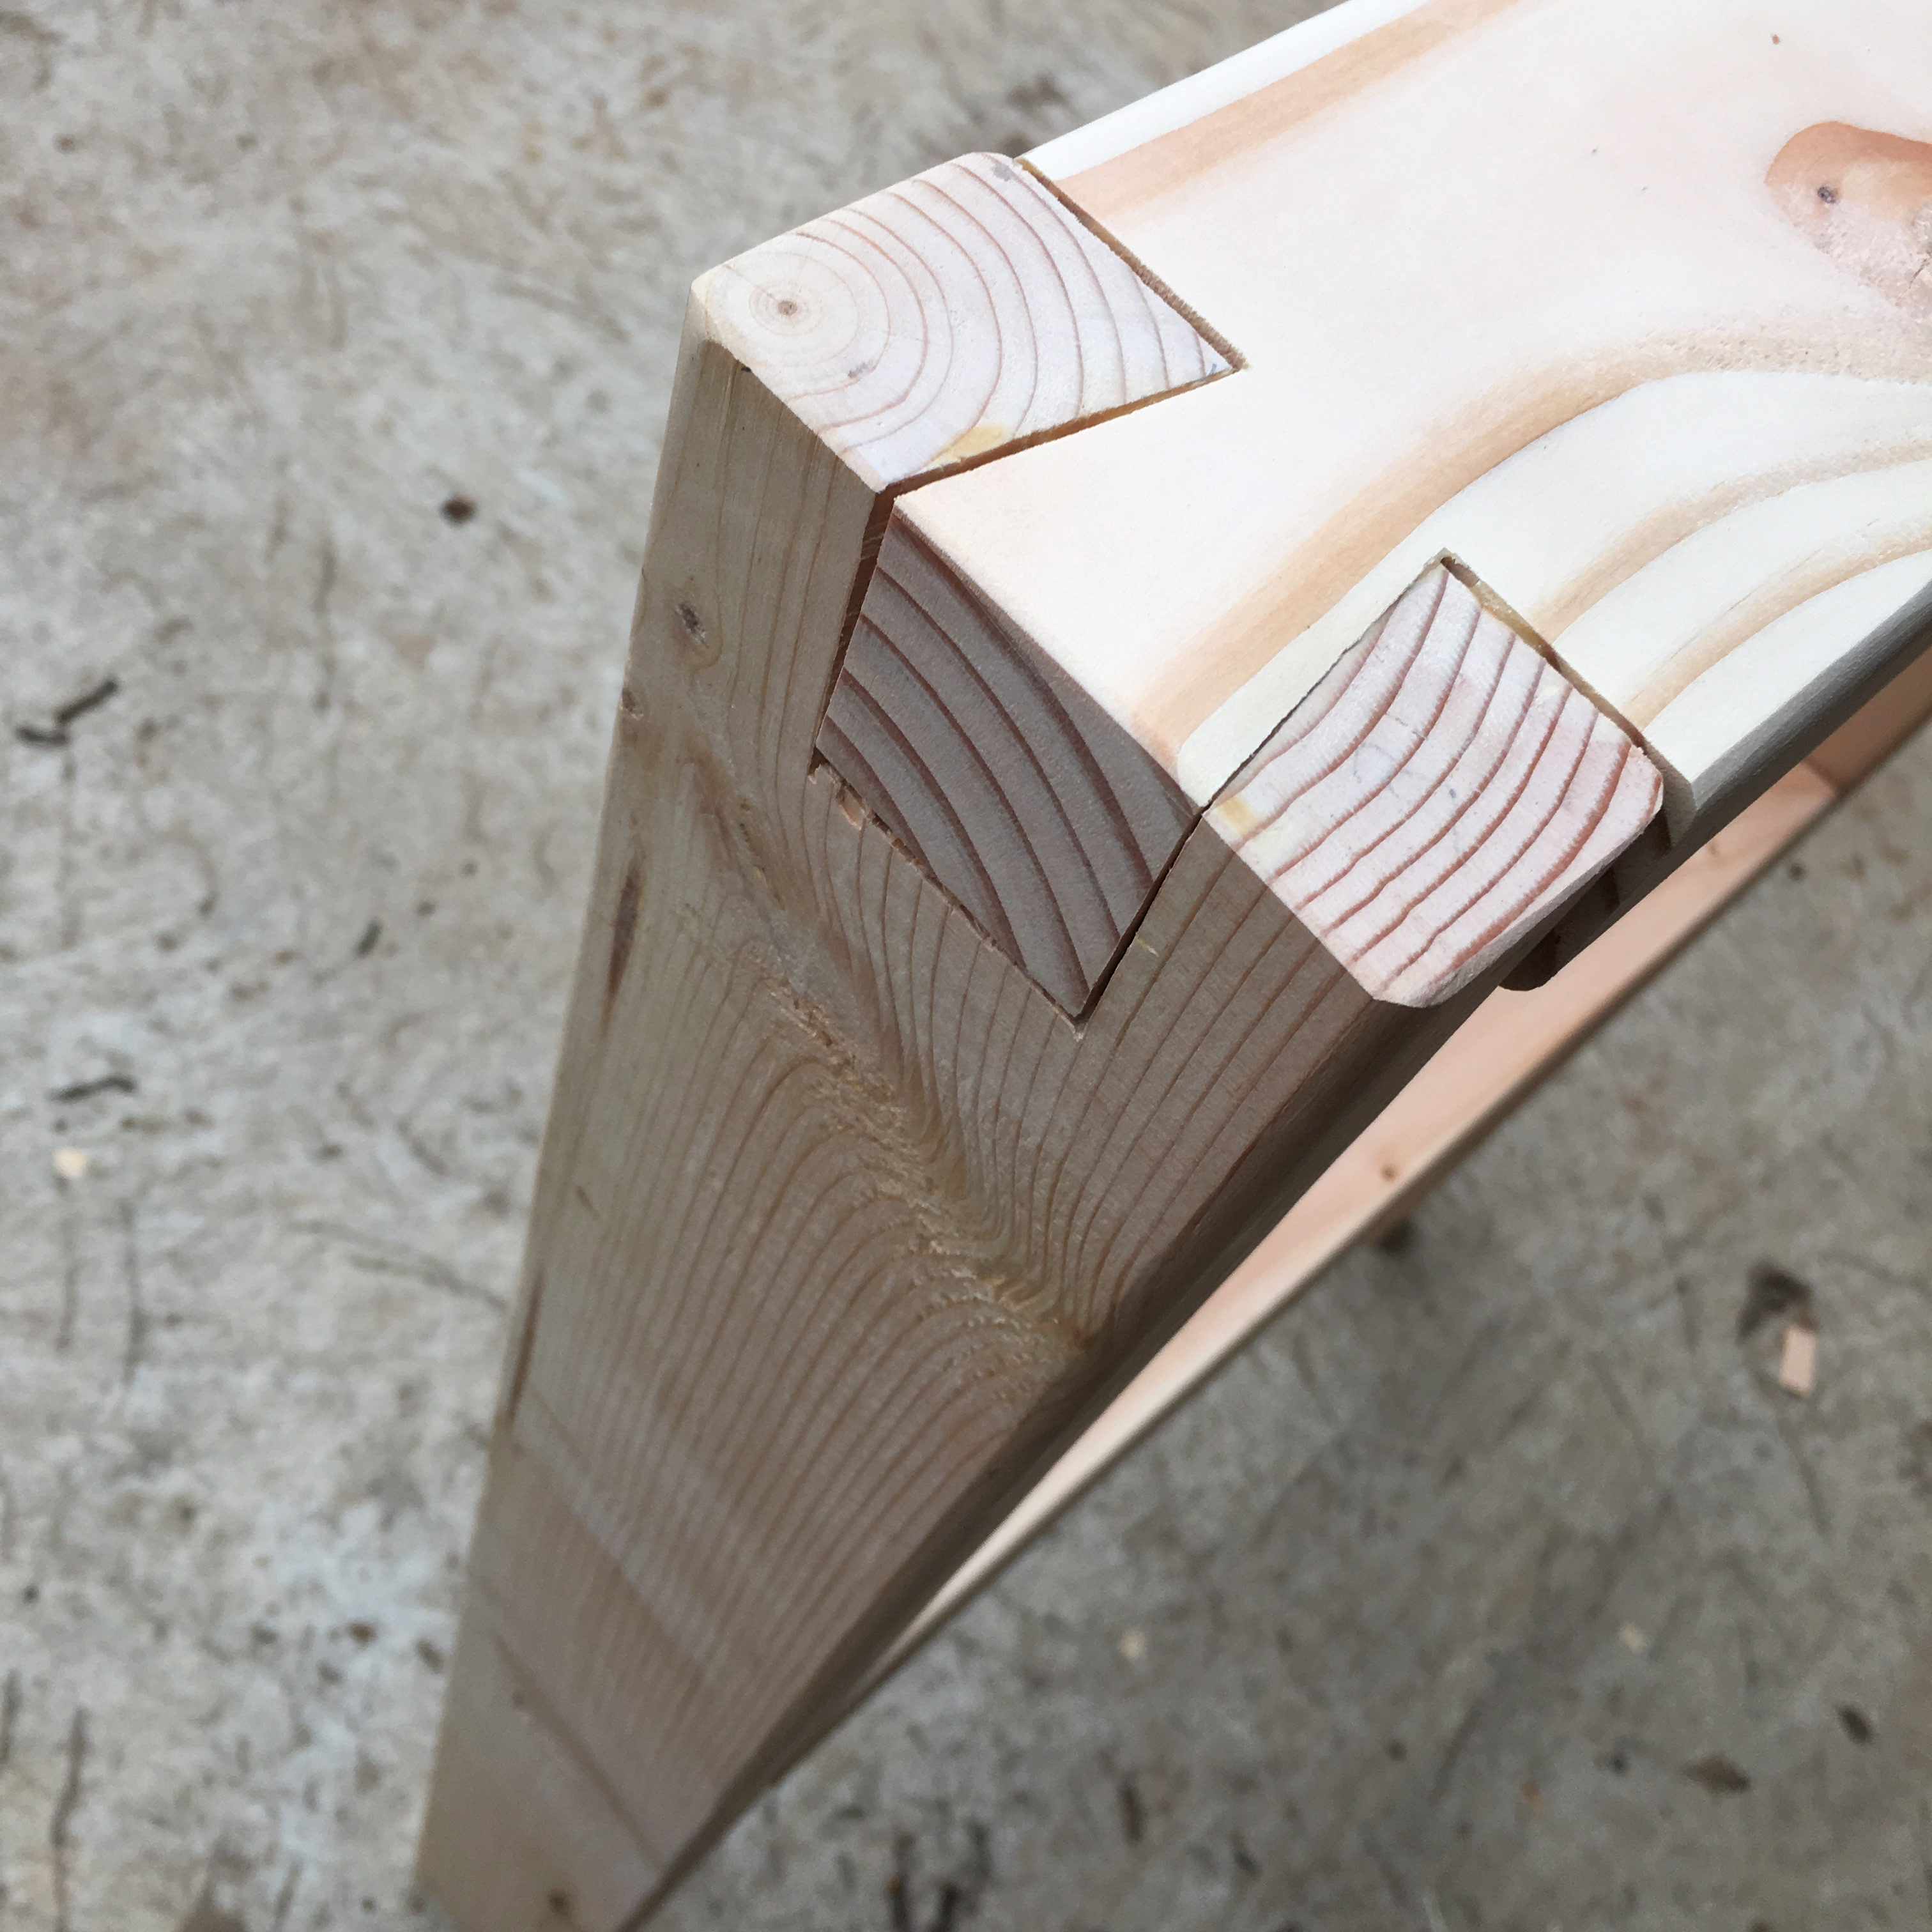
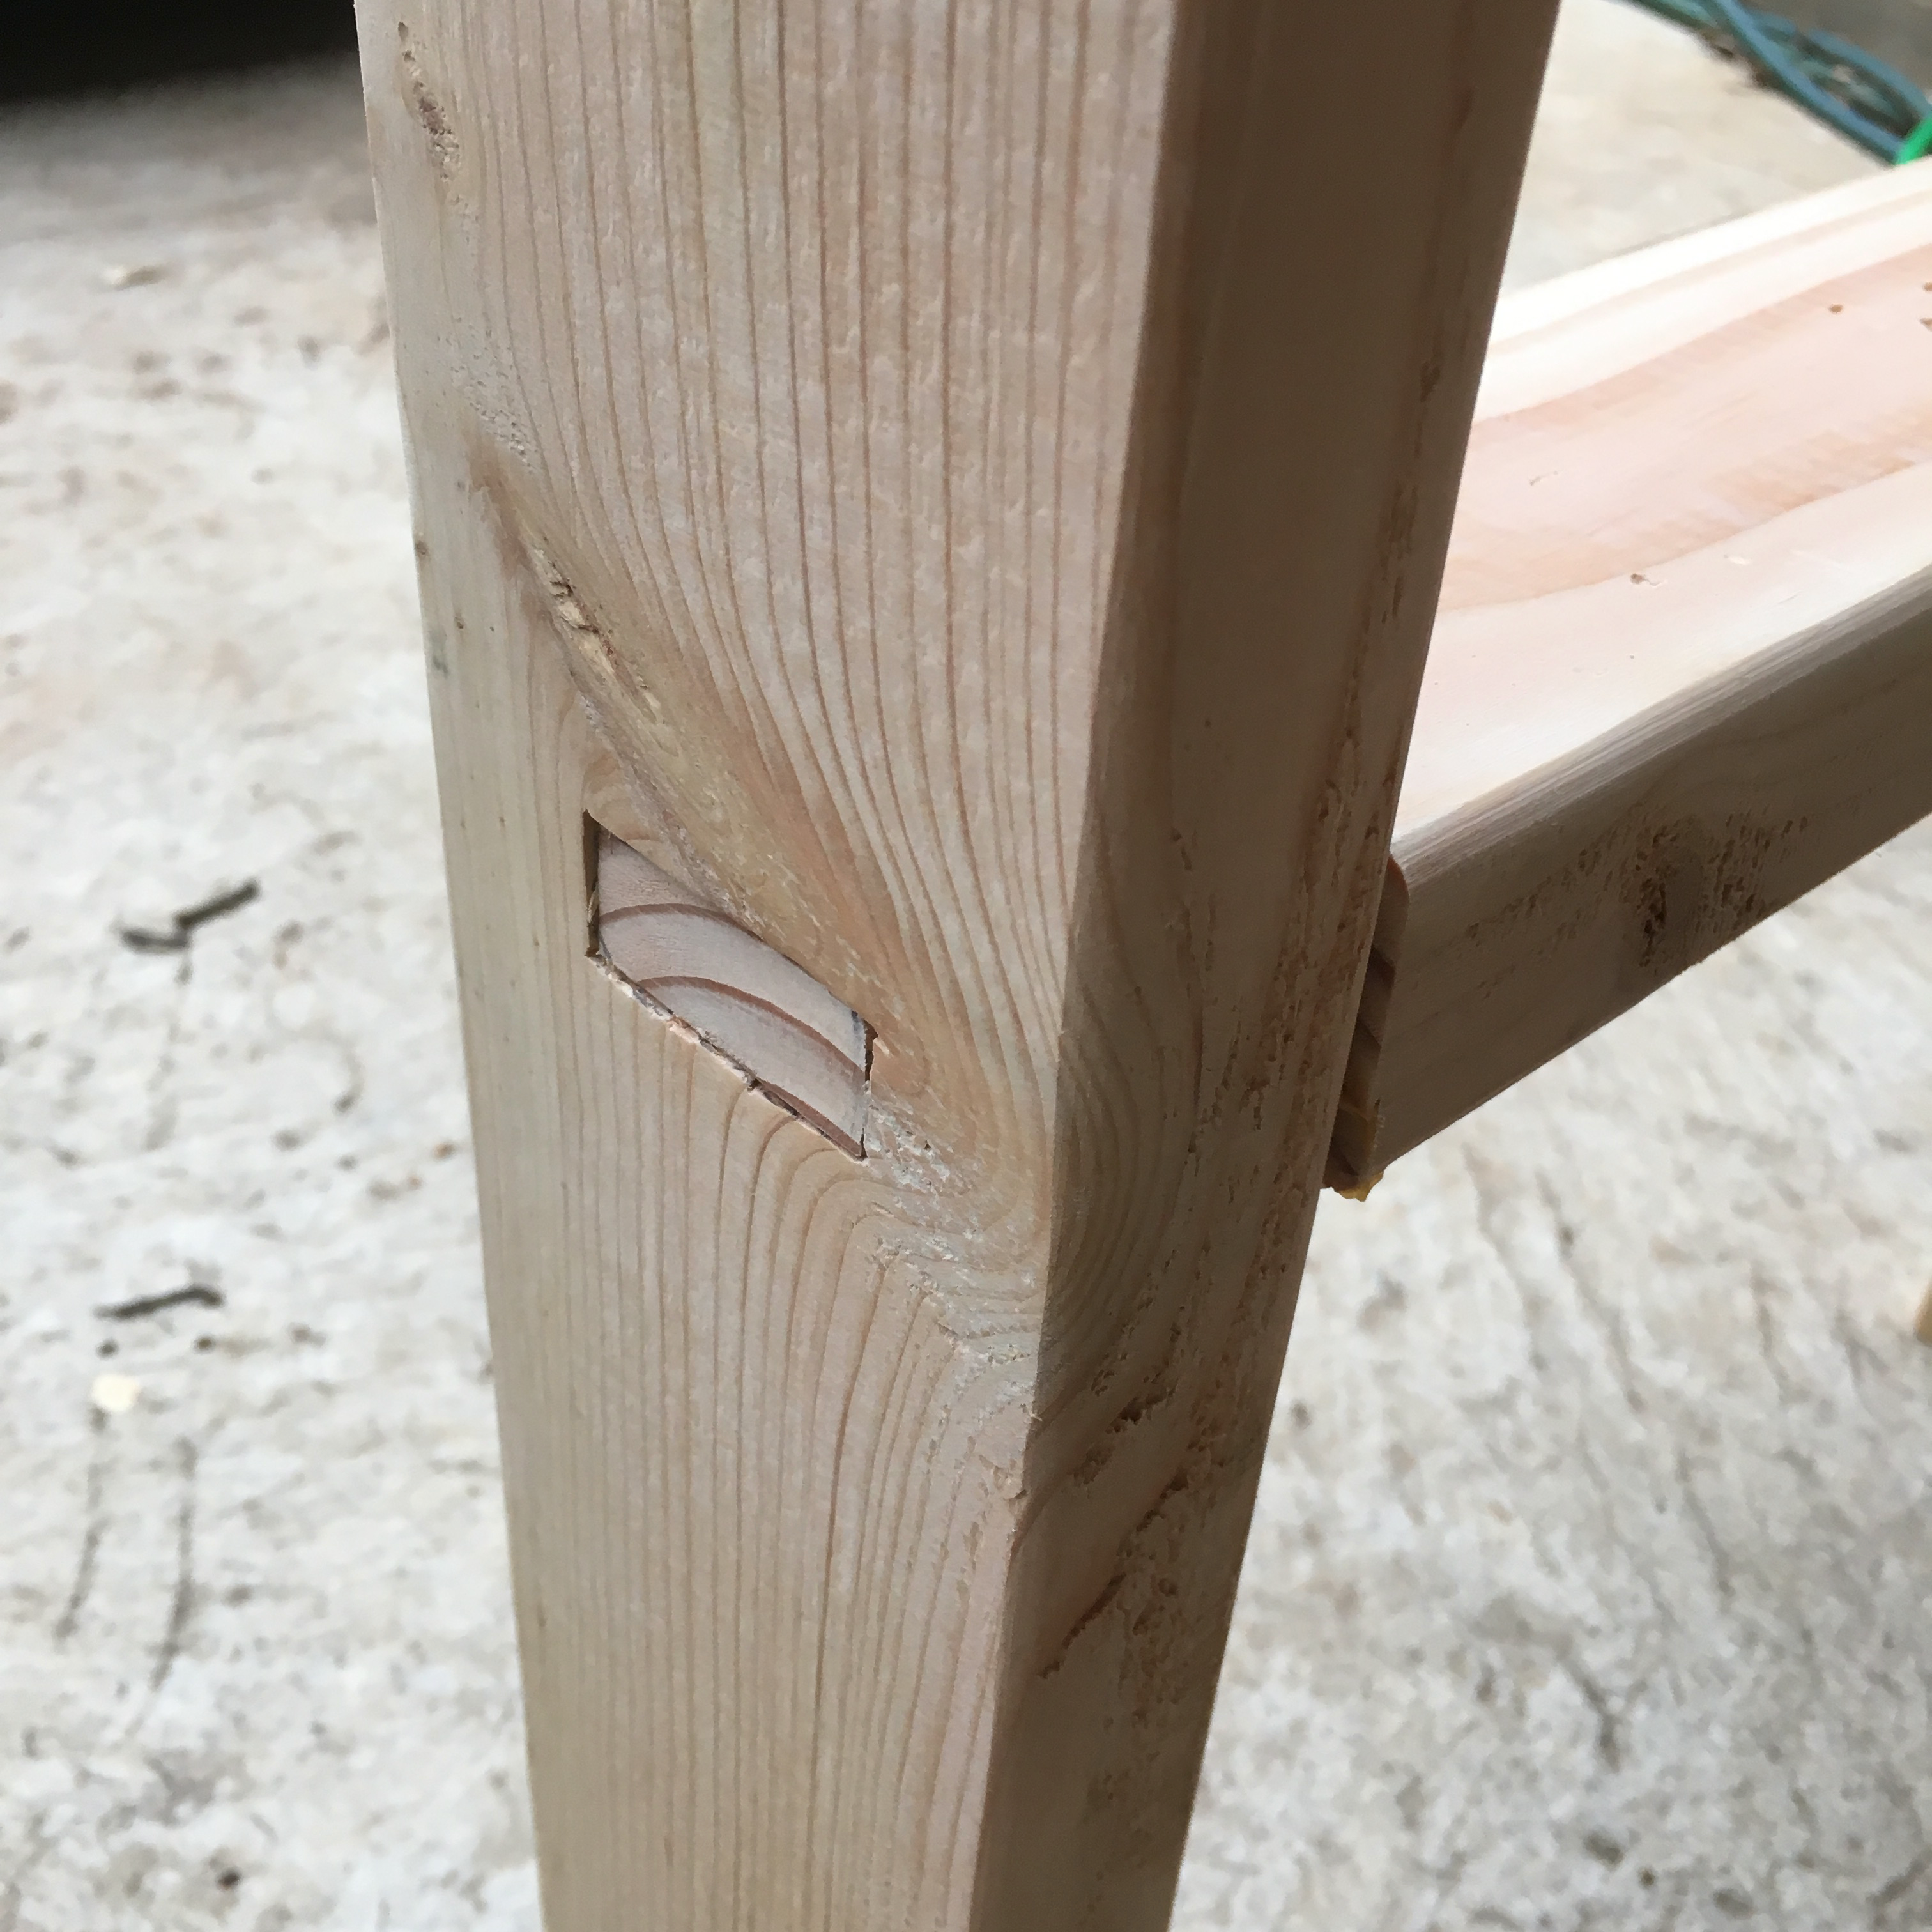
I went to the lumber store and was absolutely thrilled that there were prefabricated slabs in the sizes I was planning to make. (I do have a biscuit joiner, and was going to biscuit together 1×4″ lumber, but this saved me time and, believe it or not, money!) So then I just needed three 2x4x8 pine boards. The legs are 36″ tall, and the outside dimensions are 24″x36″. For the top rail I made a large dovetail joint, and for the shelf (which is 18″ off the ground), I cut mortise and tenons. I did take pictures of the best cuts, but all the joins needed to be filled with wood filler. I sanded down the whole thing and rounded the edges to reduce splintering and potential harm to my hip if I run into the thing.

Dovetail joint joining two 2x4s

I have not finished it yet, but am planning on rubbing it with Tung oil, just to make it easier to clean later. When the coop is done, I will assemble the top and shelves permanently, but for now it will stay in 4 pieces because those are easier to store!

Mortise and tenon joint

Valentine’s Freebie!

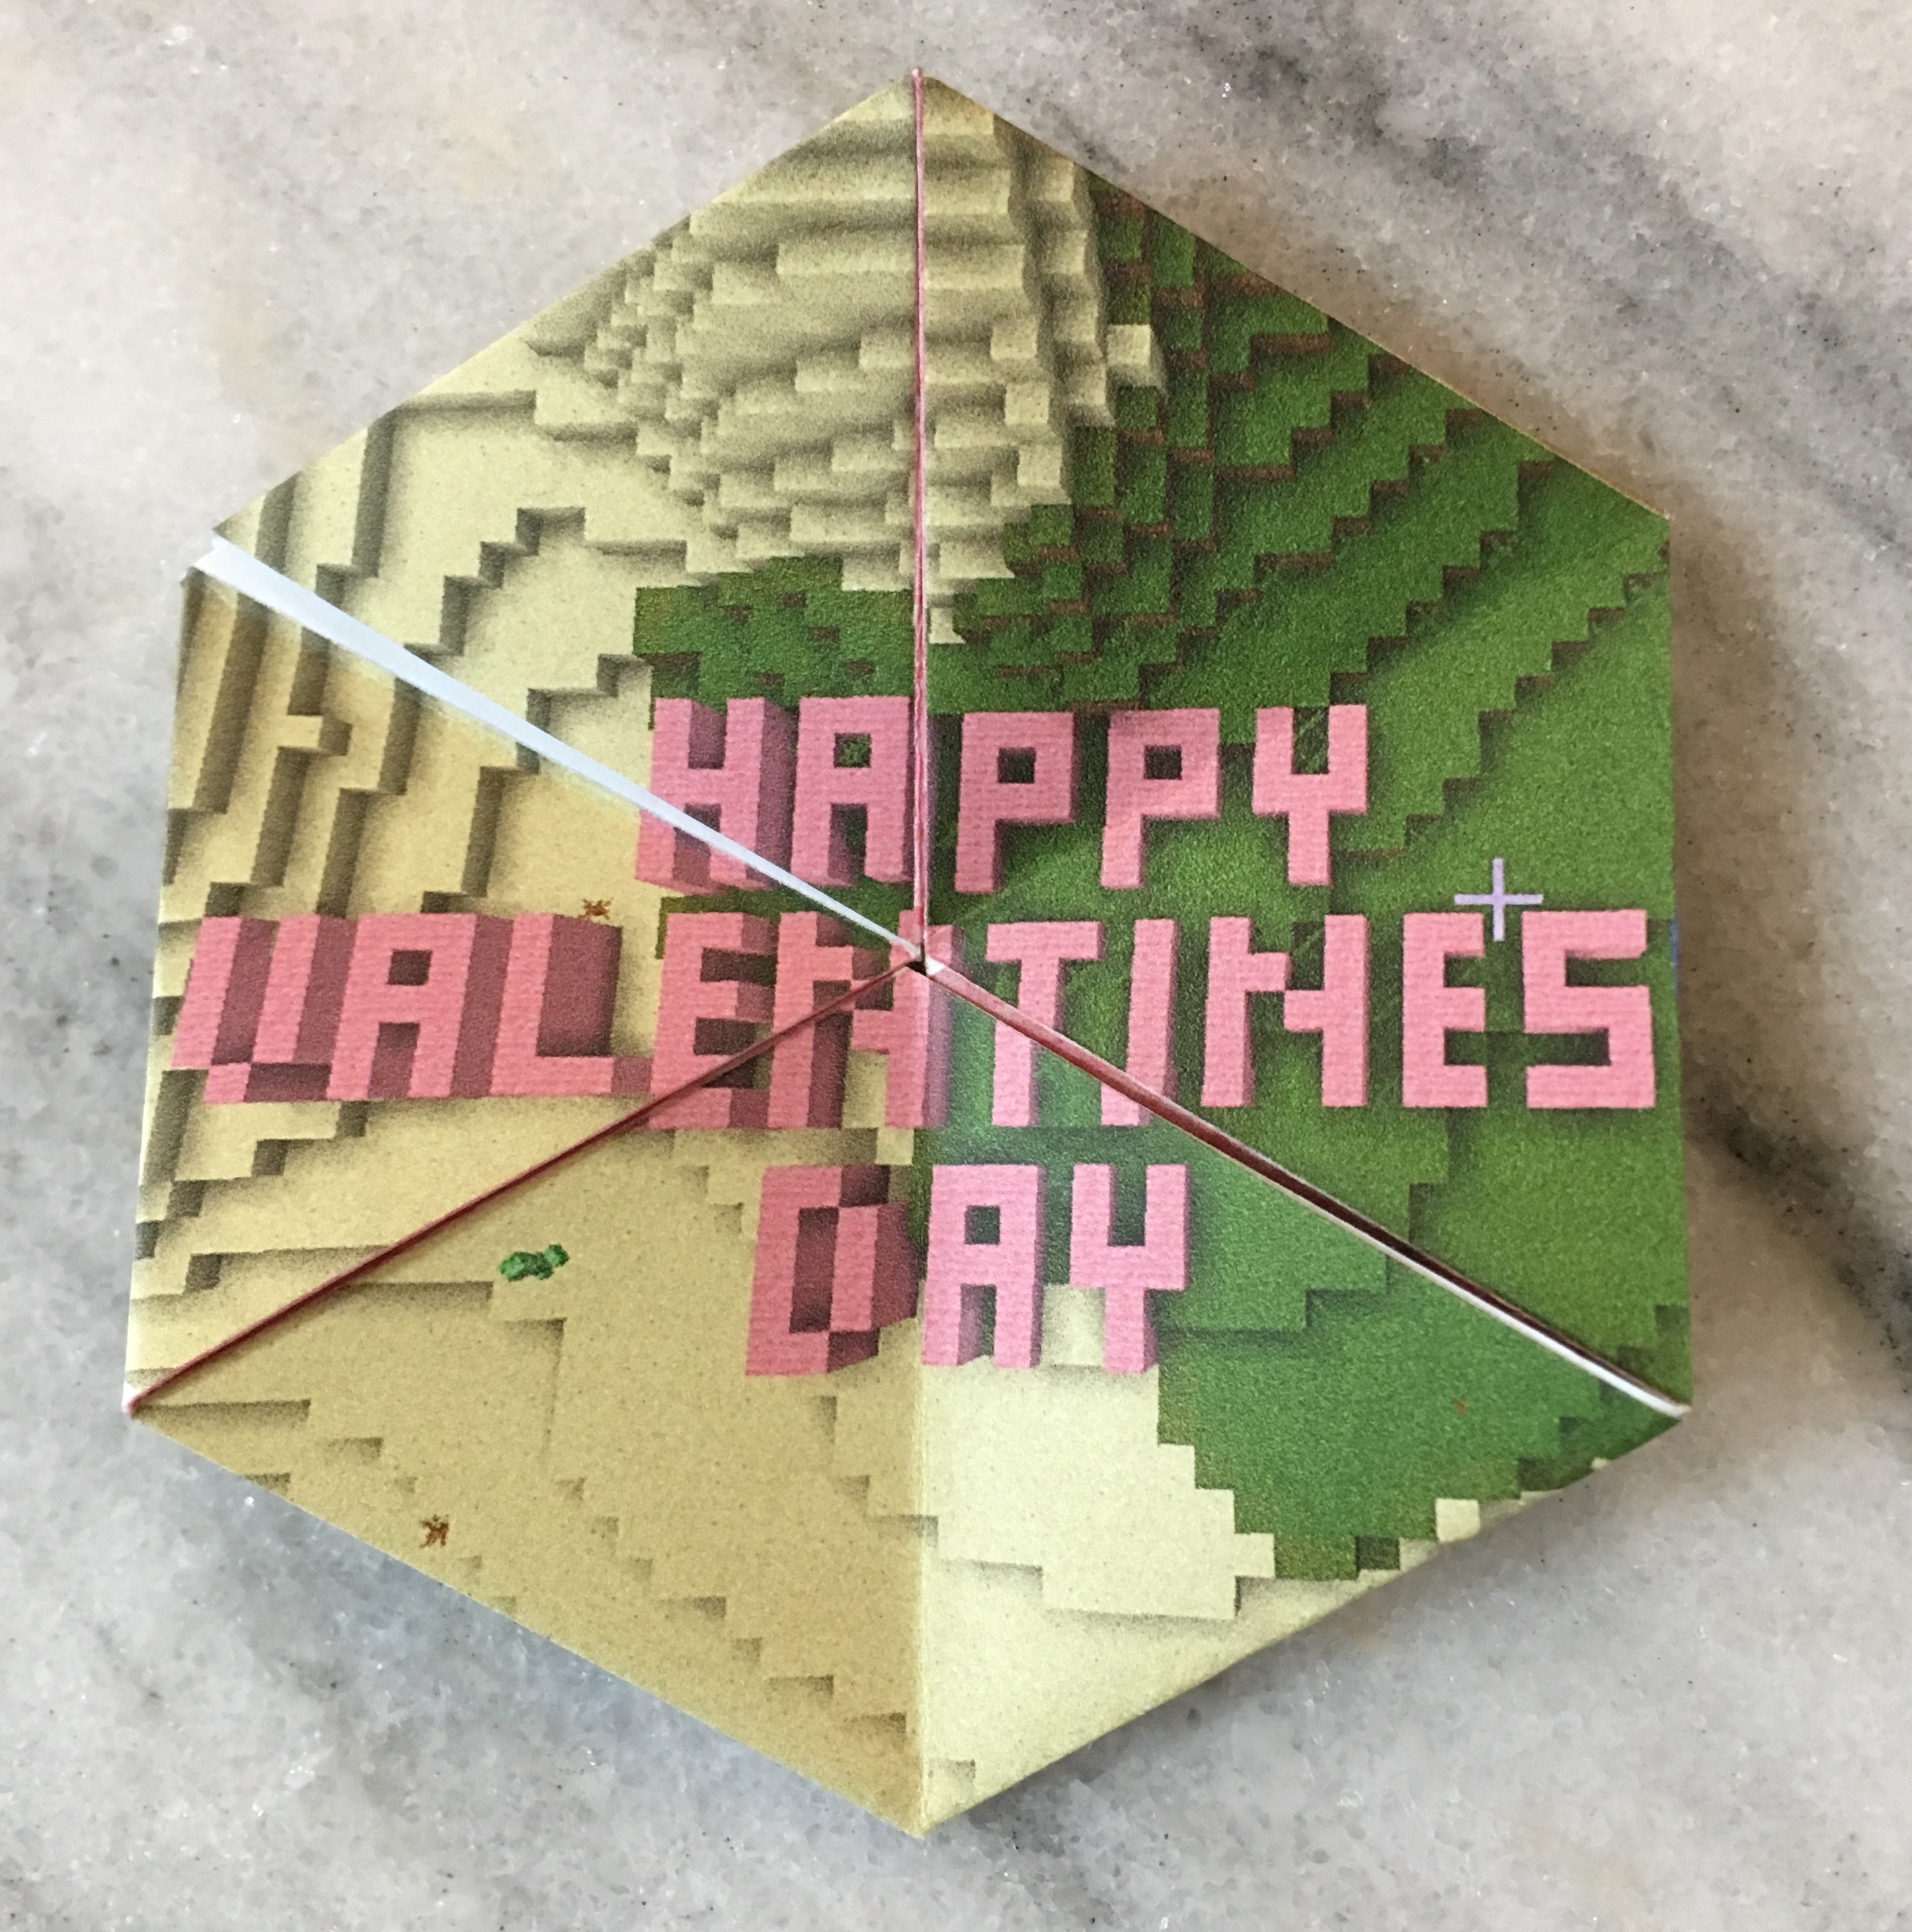
Valentine Minecraft Hexaflexagon

I love hexaflexagons. I first learned about them when I saw Vi Hart’s video on flexagons. Turns out they have been magical mathematical fun since 1939 when Arthur H. Stone was playing with cutoff strips of paper in class. (My kids do this too. Good to know it is not new.)

We do the obligatory elementary Valentine’s cards for the kid’s classmates (and everyone gets one, no singling out!) But I do like to give toys instead of candy (my youngest isn’t a fan of candy anyway, so bonus). And since there are usually at least 20 kids in class, I like paper toys because they are inexpensive. I also love origami, so crafting with paper is no hardship. And introducing more people to the joy of hexaflexagons? Priceless!

So this year I put my Photoshop skills to the test and made a Valentine Minecraft Hexaflexagon. I admit, I played Minecraft when my kids were at school to get the screenshots (my oldest wouldn’t do it for me, bummer). FYI, computer screen shots are much better than xbox screen shots. Just saying. Then I used frames in Photoshop to set up the hexaflexagon. The frames gave me stable shapes, but also the flexibility to adjust the image within the frame to get the final picture to line up nicely. I did have to adjust and tweak while to get everything where I wanted it, but now that I have, it should be easier the next time I want to make a custom printed hexaflexagon! (Want your own customized hexaflexagon? Contact me!)

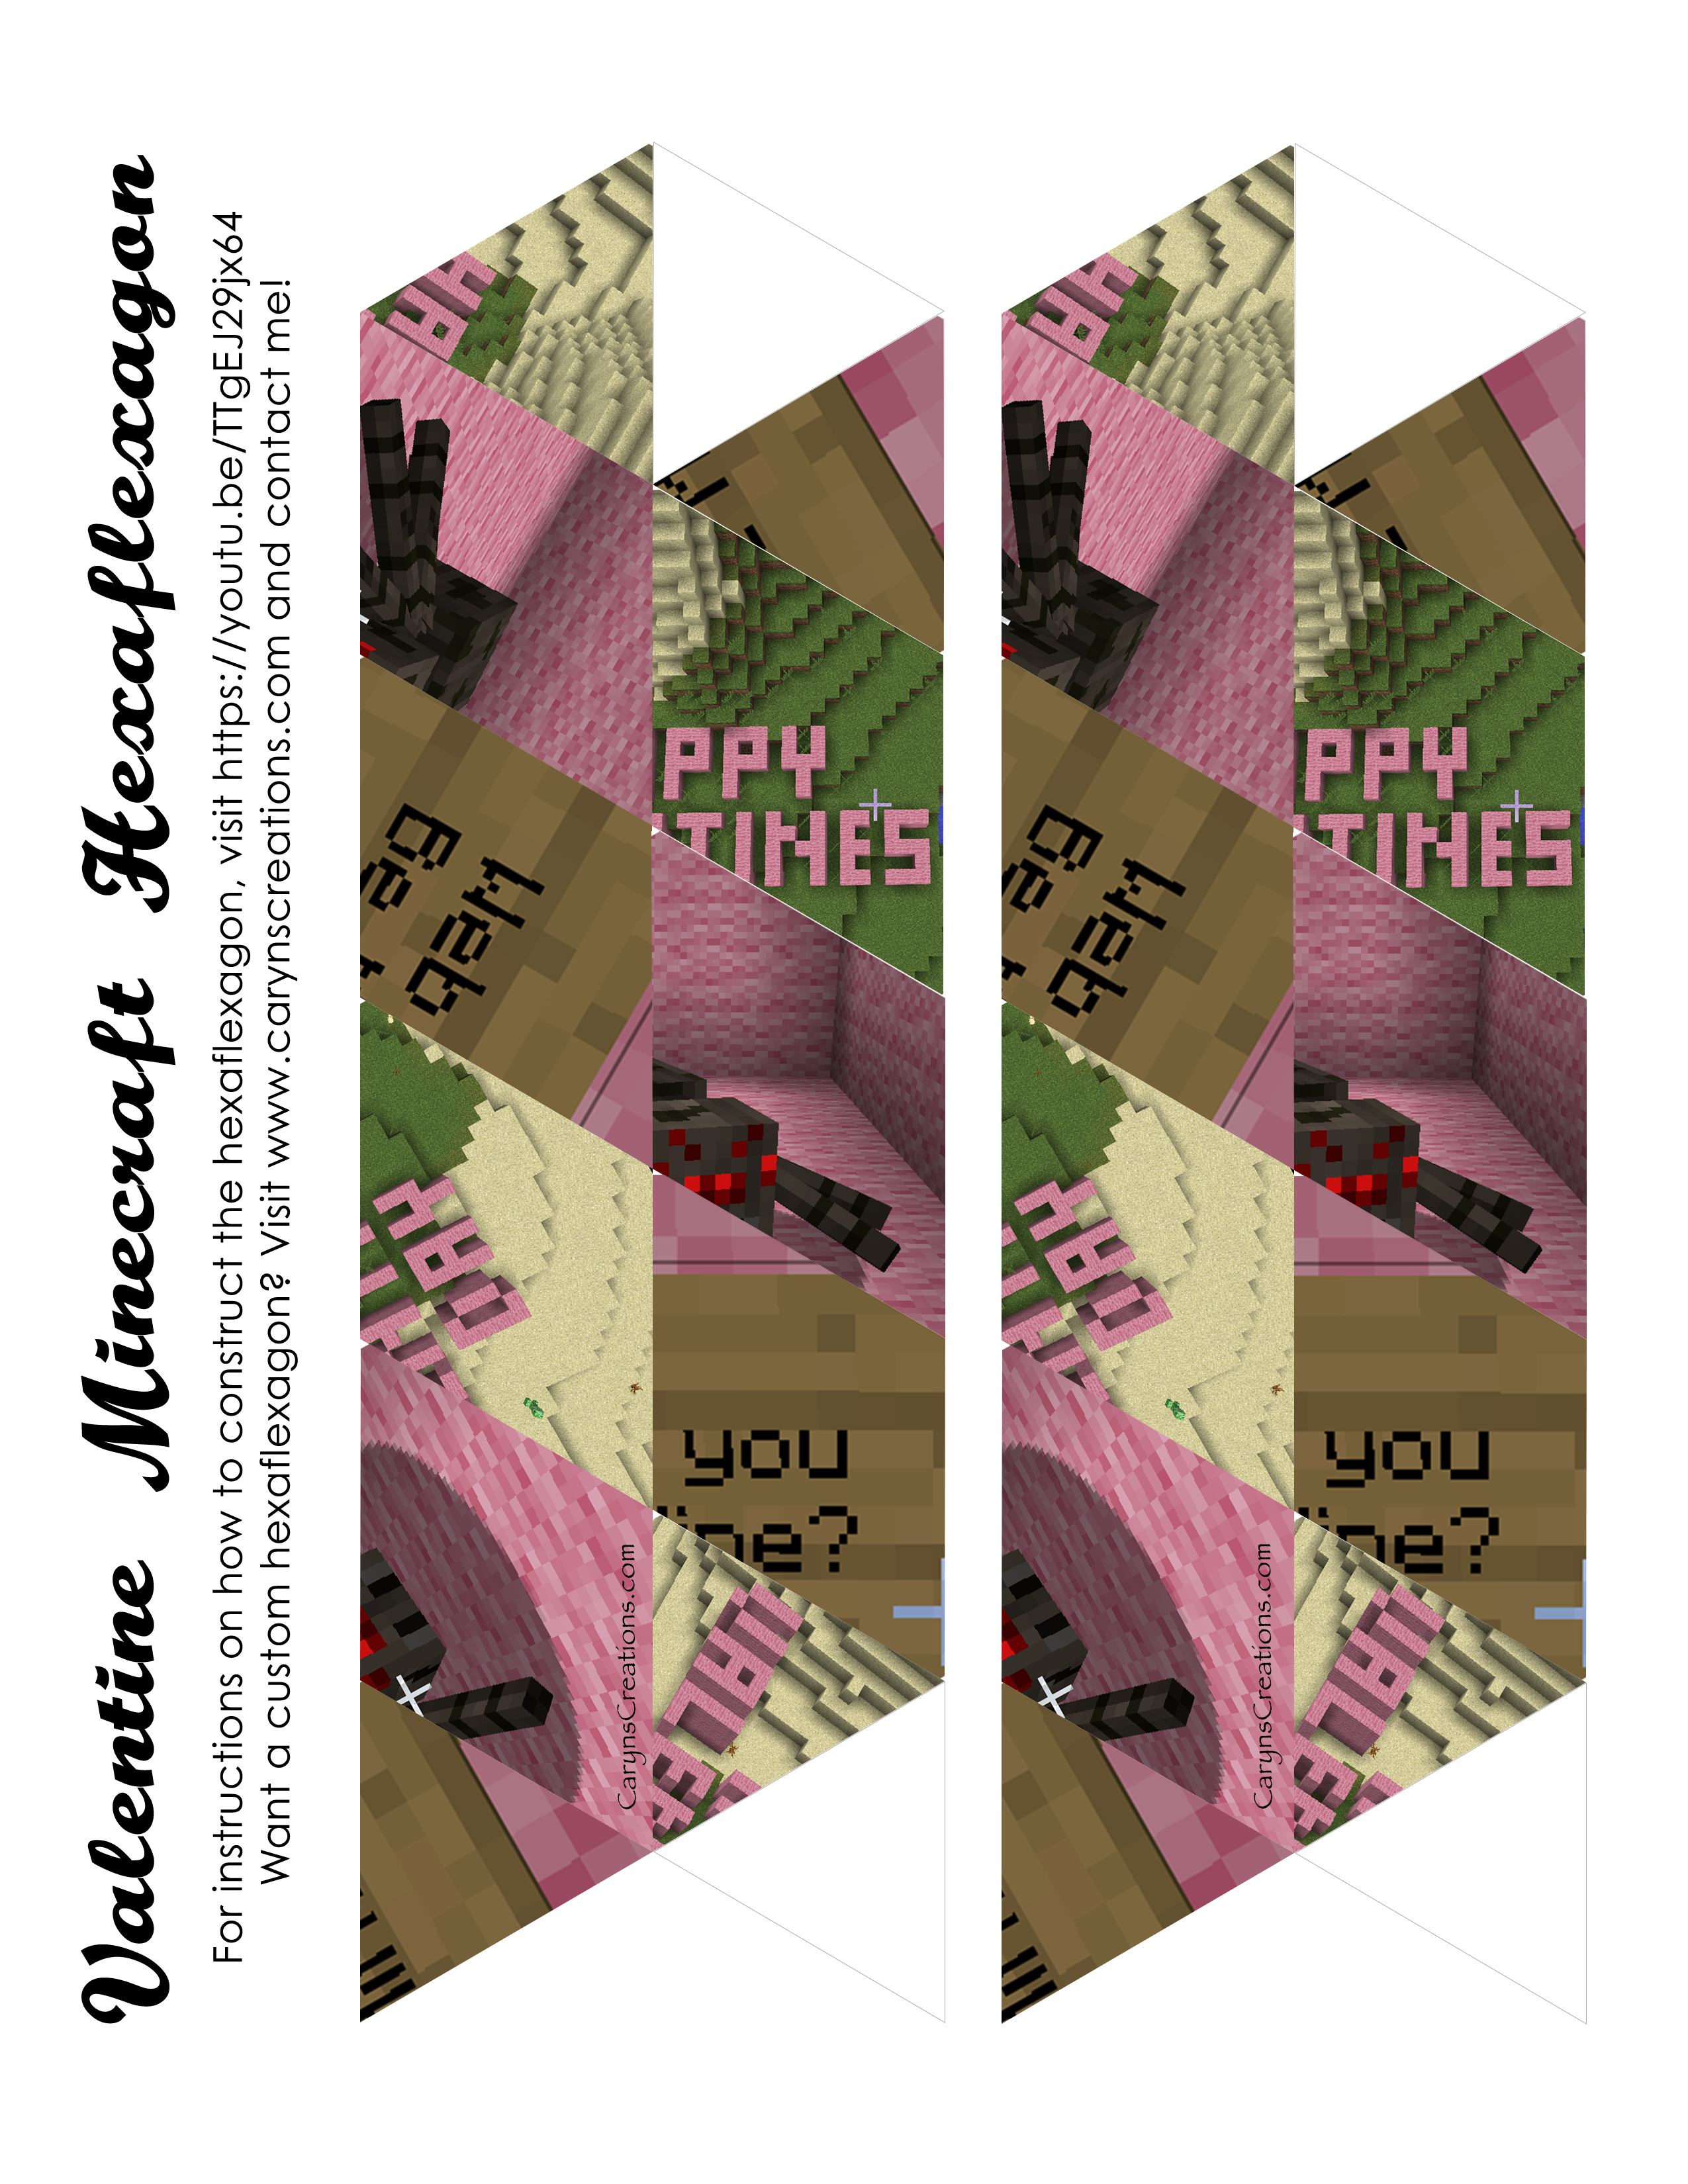
And here is the freebie! Feel free to print the following image (I recommend getting it as large as possible on your paper using your printer settings, mine worked with 93% without cutting bits off).

Valentine’s Minecraft Hexaflexagon Freebie

And here is a video explaining how to get it folded up and flexing!

Enjoy!

Now for some crafting.

I love the pantry in our house, but there wasn’t an area to put spices that made them easy to find. I recently sorted the spices and discovered three containers of garlic salt. Apparently I thought I was out because I couldn’t find any so bought more. Three times.

I decided to make my own spice rack for the pantry door. I’ve tried the wire racks screwed to the door, but they tend to fall off when accidentally bumped. (And I often forget my edges and bump into things! Ugh.) Not to mention cleaning up glass and wasted spice from the floor is not a preferred activity. So I measured my space and my largest containers and made my plan.

I went to the lumber store and picked out 1x4x8 select pine, and found some beautiful embossed pine trim. There are several ways to construct spice racks; I could use rabbet and dado joints, biscuit joints, or mortis and tenon joints. I decided to work on my chisel and hand saw skills and do mortis and tenon joints. It took me a while, but the last mortis was much cleaner than my first! Here is a picture of the side boards with all the mortises cut.

The saw I used is a Marples hand saw, fine cut double blade pull saw, which I absolutely love for fine cuts. (Especially when my band saw is buried at the back of the garage. Cleaning out the garage will take a couple stages and the chicken coop comes first!) I also used a 1/2″ straight chisel that I made sure was nice and sharp before I started.

I was pleased when I glued everything together how well it came out! I was planning on painting it white, but the wood looked so pretty I changed my mind and put on a couple coats of clear. After filling the nail holes and a few gaps with wood filler. (Have you tried the color changing wood filler? I haven’t used it before, but it worked well. A little shocking to spread bright pink paste on my project, but when it was dry it faded to a nice natural color, and sanded well.)

So here is the final project all ready for my spices! I’ve made the mistake of putting items on a finished shelf before the recommended 24 hours, and have had things stick to the shelf. So I’ll give it a good 48 hours then load it up! Yay for pantry reorganization!