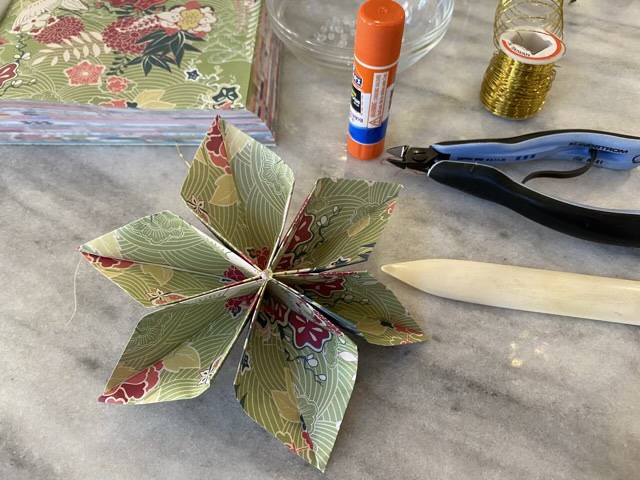
I was feeling weak when I walked through the craft store. I must have been, because a book of origami paper caught my eye and I bought it. A book. Of origami paper. What was I thinking? The pages were glued into the spine, rather than loose as in a package of origami paper, and even though I can bend the spine open to get the pages our relatively cleanly, they aren’t perfectly square. What to do with all this paper that isn’t quite suited for origami as torn? Maybe a wreath?
I found instructions for folded paper flowers (I’m not calling it origami, because it involves more than just folding), that uses wire, glue, and beads. I have wire, glue, and beads.
Paper flower
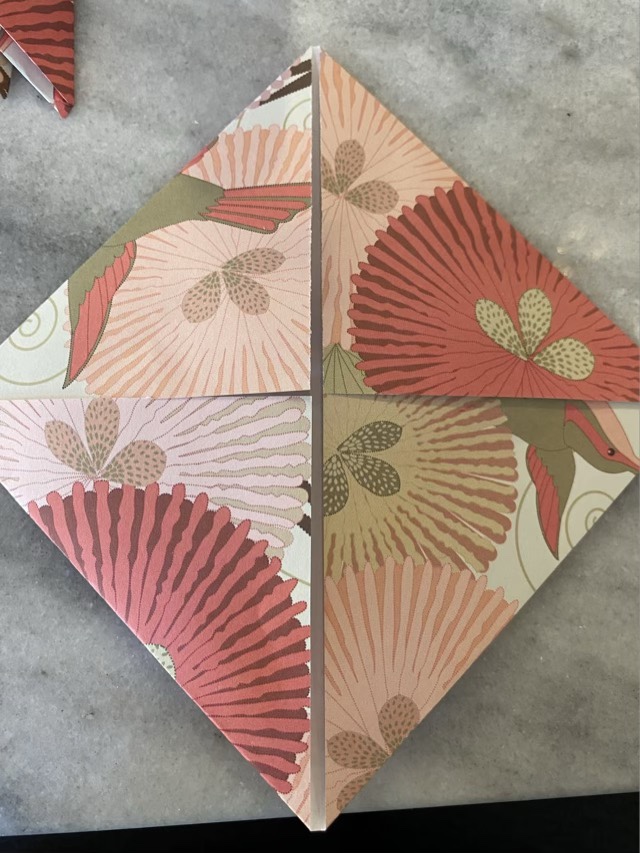
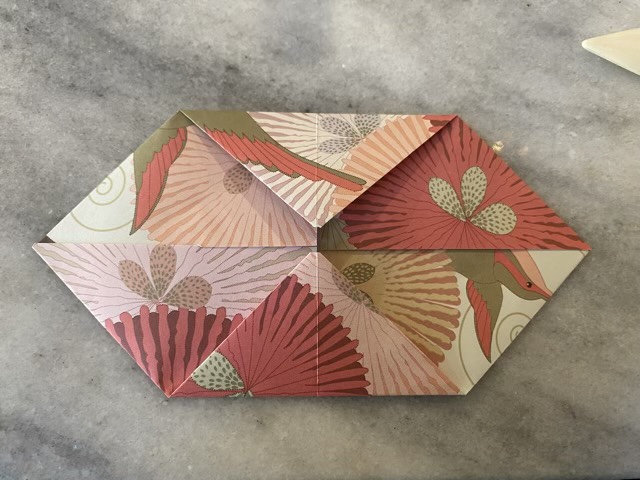
The way the flowers are folded allows me to hide the gaps due to the imprecise paper shape.
Folded paper with gapsGaps hidden in the fold
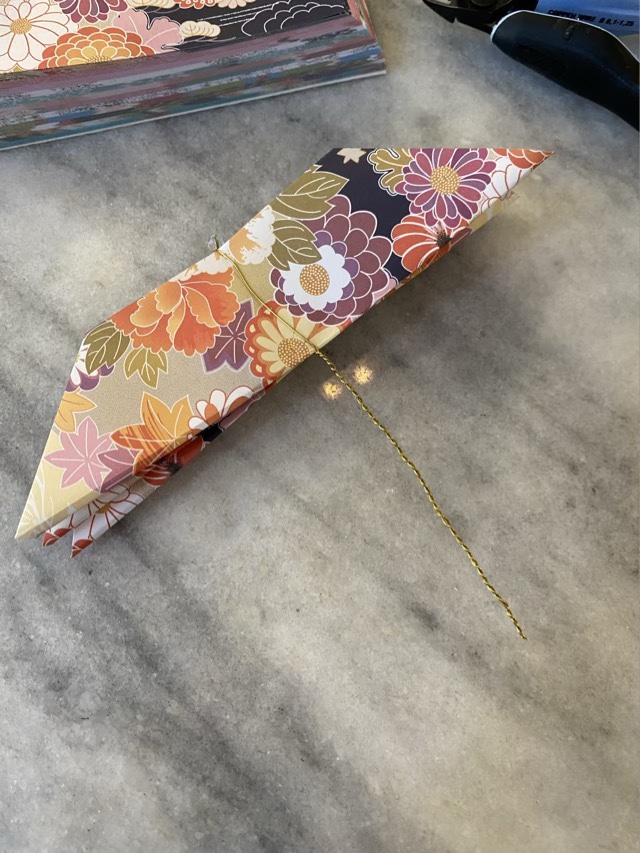
The way the wire goes around the paper, it makes sense to twist the two sides together to make a pick. Picks make it easier to stick the flower into a wreath form.
Wire twisted around three paper units
I’ll update y’all later on how the wreath comes out.
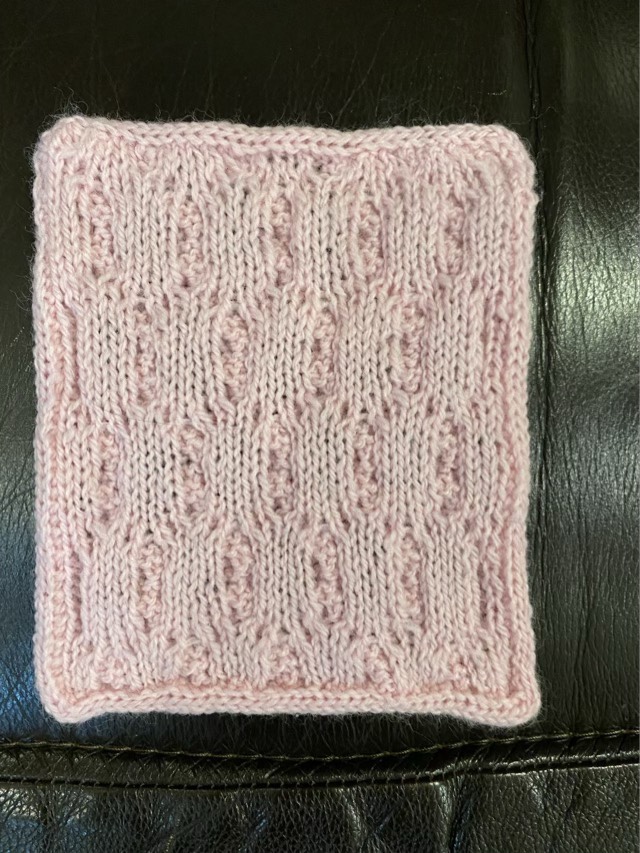
Could it be? Have I found a knitting technique I really enjoy? Maybe! This is another thing that looks complicated on paper, but in practice is not bad at all. I rather like sliding the double pointed needle from one side to the other to start the next row; it is satisfying. In fact, I like knitting it to the edge, rather than sewing on an i-cord, not only because it is a nice finish, but it also hides the edge inside the cord. Neat! There are all sorts of instructions out there, and I admit I did resort to watching a video, so I won’t spell out the steps here. So I remember for next time, though, I used a four stitch i-cord, and used the slip one, knit two together in the back method for decreases at the beginning of a row.
i-cord in progressSwatch with i-cord edging after blockingBack of swatch
I think the i-cord coordinates well with the cables as well. (Well, there is a sentence that flows strangely. I’ll leave you to ponder the depths.)
Before I delve into finishing my Grandma’s blanket, I needed to test knit the pattern to make sure I understood all the notations and how it goes together. It took me a couple goes to get the stitch count correct (take the pattern repeat and add the edge stitches, so I remember for next time), but once the number was right, it came together well.
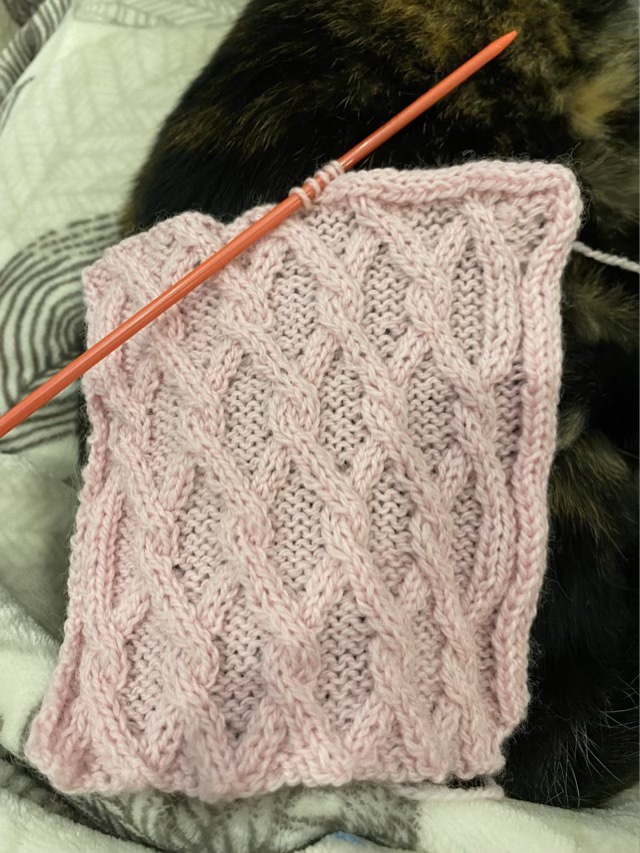
Swatching seems to be a hated or loved knitting activity. I fall on the love side. I would rather see how the pattern or yarn behaves on a small scale before delving into a large project. I used a stocking weight wool yarn, and size 6 circular needle, which is a far cry from the bulky yarn and size 11 needles used for the blanket, but it was the pattern I was investigating.
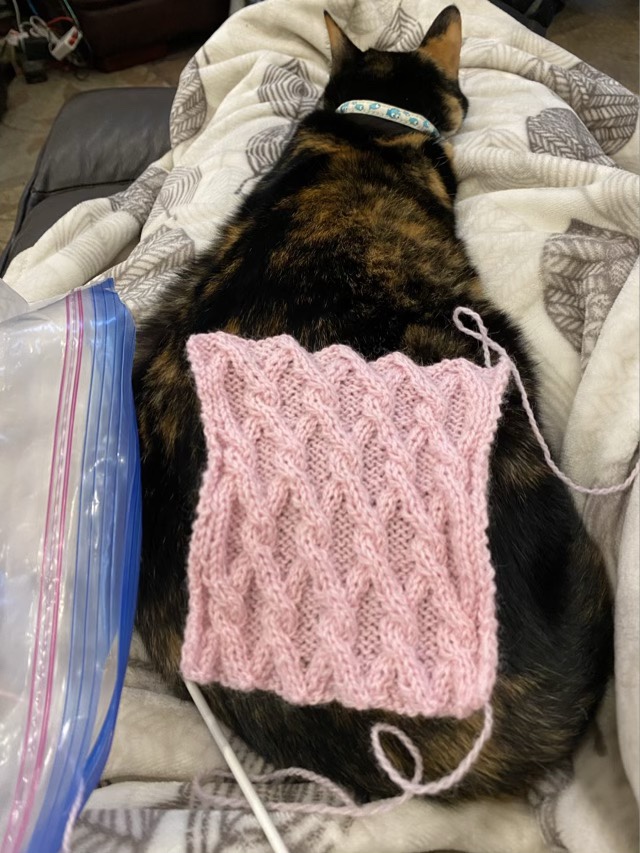
Izzy the cat is fine with being a backdrop for the cabled swatch if it means she gets more fuzzy lap time
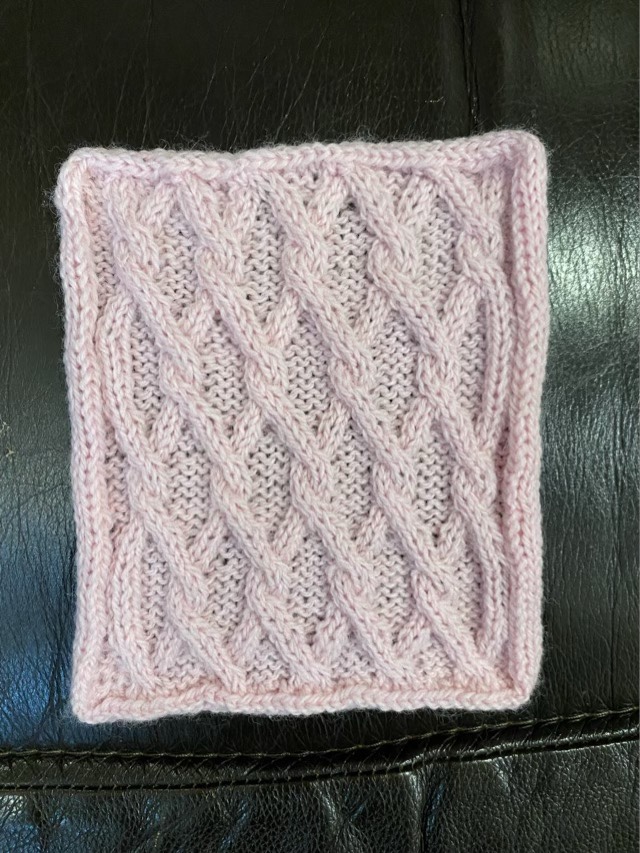
I see why my Grandma liked this pattern, and why she made it so many times. It looks complicated, but it flows well, and it is easy to “read” the prior row of stitches to figure out where you are. Then the back row just follows the previous row’s stitches, and goes in twos or fours predominately, which makes checking for errors easy. The swatch came out OK, and I feel comfortable with the pattern. I do think I will finish off this small piece with a suitable edging, and it can join the doll house blanket army.
Boy, is that title going to be misinterpreted. UFO in this case is “Unfinished Object”, and refers to my Grandma’s knitting projects. I finished one in 2018 (which was before this blog started). Rather than try to match Grandma’s knitting (or rip out to the point the pattern needed, which was probably why she abandoned the project), I made it a patchwork of knitting and crochet, even using the same brand but different colors of yarn. It came out nice and long and finished!
Conglomerate blanket finished in 2018 using sections of knitting and crochet (Grandma’s section is the third from the bottom)
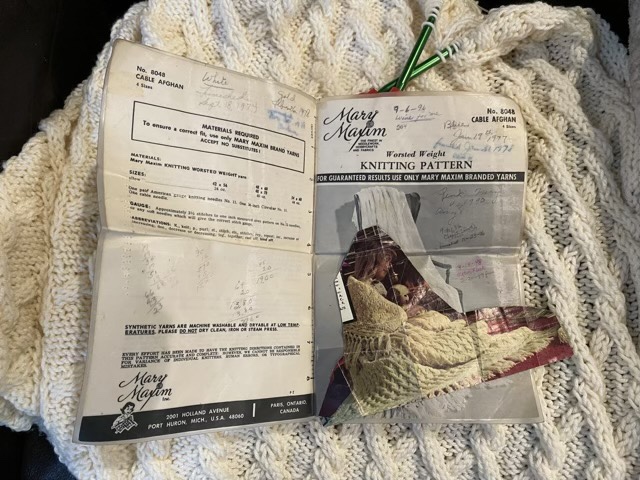
I have another project, which does not appear to need any ripping. It is the start of a beautiful cabled blanket. Grandma laminated the pattern and took notes each time she made a version. It appears that she used this pattern 10 times before this cream one, the first being made in 1974. If I am reading her notes correctly, it seems that she started this cream version in 2006, but then restarted in April of 2013. She passed in November of that year. She marked each row of the pattern with a minus when she started working on the row, then made it a plus when she finished the row, so she could tell exactly where she was (I know because she stopped mid-row, and it corresponds with the markings).
Grandma’s unfinished blanket with laminated and marked pattern, and cutout magazine photo
Yes, I am going to attempt to finish her project, but there are some preparatory steps I need to take first. I need to make a swatch to get the feel of the pattern under my fingers (and make sure I can), and I need to wrap my head around a project that will take me months to finish. Grandma wrote on her pattern that it took her “35 minutes to do two rows, 10 min back row, 25 min front row”. So only the center section of one of these blankets took her 63 hours to complete. And I am not the knitter she was.
The portion of work my Grandma completed on this cabled blanket
I am glad she left notes on her pattern, not only for her own memory, but so she could share that information with me. It would have been better to sit with her to receive instruction, but I am happy that I am still able to learn from her experience.
I made another toy top on my lathe. This time I painted it with red, green, and blue to see what would happen when it was spun. Our standard school book learning that red and blue mix to make purple doesn’t quite hold when it comes to reflected light. So the color is different when I spin the top than when I mix the paint, which is fascinating. The coolest part is when I made a video of the spinning top. Because of frame rate, the colors shift and spin through a rainbow in the video. To the naked eye, the spinning top remains magenta, cyan, and gray until it topples. Very interesting phenomena.
Top painted red, green, and blueAcrylic colors mixed on a pallet (aka paper plate)Colors as the top is spinning
It really is worthwhile to click on the video link, so I’ll give it to you again.