Painting rocks

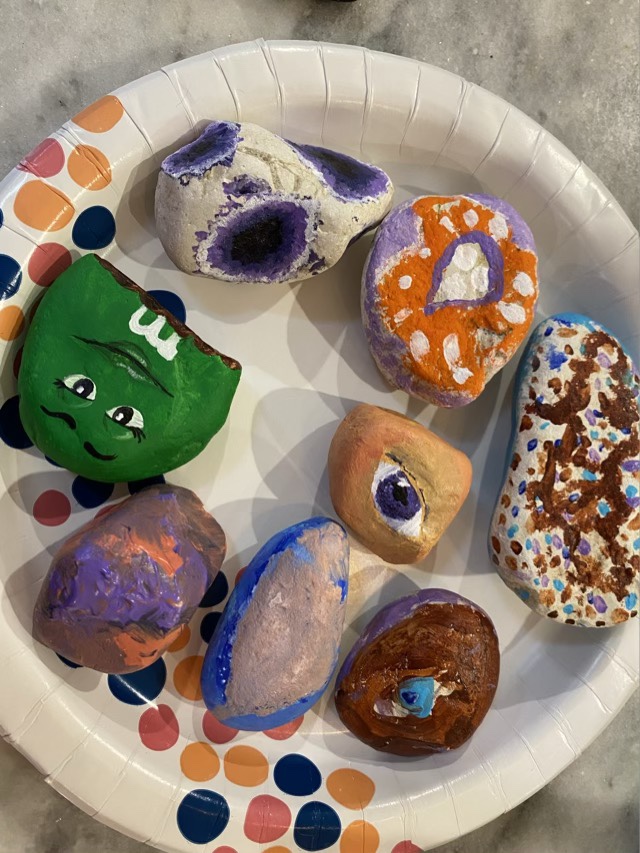
It has been a long while since we’ve painted rocks, I believe since last summer, but it is a great activity any time of year. My youngest brought up the request, but my kids and I all painted. After washing and drying the rocks, of course.

My attempt at a chocolate candy with a bite out

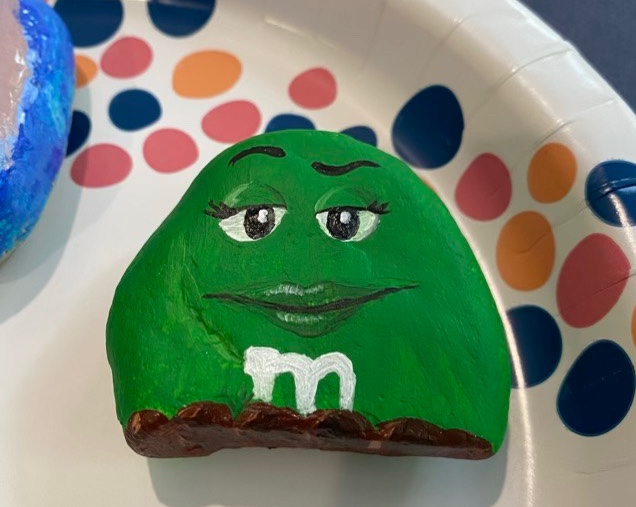
I don’t usually do “commercial” items, but there was one broken rock, and I’ve seen some rather clever M&M designs utilizing the broken edge (thanks Pinterest). We use acrylic paint and paper plates as our palette. I’ve tried various protective coatings, but the freeze thaw cycle of outdoor life is hard on painted rocks. The designs that stay the best are the ones that are kept inside. Still, we will take and “hide” these around town because the idea of bringing someone a bit of joy with found art is worth it. What the finder chooses to do with the rock is entirely up to them. Some post to social media, some keep, some hide again.

All the artistic endeavors from this round of painted rocks (mine is the green one, the rest are my kids’ work)

For more information on the Kindness Rocks movement, visit https://www.thekindnessrocksproject.com. They have a lovely site and sentiment and project ideas for spreading kindness. There are many other organizations as well, and many local groups that post hides and finds on social media as well as organizing rock painting events.

UFO Discovered

I was digging through my yarn stash and found yet another inherited unfinished object (UFO). This one I found in my husband’s paternal grandmother’s basement, along with the yarn.

Unfinished doll sweater

Not sure why the project was abandoned with only one sleeve left. A bit of trial and error led me to US size 6 knitting needles, and I could feel the seam in the other sleeve, so knew it was knitted flat then sewn up. I counted the visible stitches and added two for the seam. I knitted the sleeve from the top down, ending with a few rows of ribbing.

Very fuzzy inside

There was more mystery about the little cardigan; the inside was very, very fuzzy. Was it brushed? What was going on? Some insight occurred when I knit the sleeve. The yarn had a long halo (fibers that stick out from the spun yarn), and when knitting the garter stitch, those long fibers hung out on the purl side of the garment because of the mechanics of forming the stitches. So the inside was significantly more fuzzy than the outside. Some time rumbling about the bottom of several yarn stashes probably helped the condition as well. After finishing the missing sleeve and blocking the cardigan, I decided the fuzzy must be embraced. I turned the sweater inside out and gave it a brush to raise and align the fibers. It is so fuzzy, the inside out seams don’t even show.

Finished sweater, inside out, blocked, and brushed

The cardigan has a very mossy look. There was just enough yarn to complete the sleeve and sew up the seams; I trimmed about 3” of waste once the ends were woven in.

Made to Move doll modeling the cardigan

Spin walk

Alpaca fiber spun on a walk

I’m still nursing my achilles tendon back to health. PT helped with the surrounding muscle strength, and I was approved to start taking walks again! My first walk I paid close attention to the road, so did not take my spinning. The second walk I grabbed my spindle and fiber! I still have quite a bit of build up to get through to take the long walks I used to, by at least I’m back on the road.

Framing the Abyss Shriek

Several months ago my eldest designed a vector graphic of the Abyss Shriek, which is a spell in the game Hollow Knight. (Very very cool graphics in this game; it is a platformer, so I suck at it, but I love the texture and feel of the world.) She used the Cricut to cut out the image in permanent vinyl, then carefully (oh so carefully, so many teeny tiny lines) she weeded out the vinyl. I found a piece of glass in my stash that set off the image nicely and applied the vinyl to the glass. Then it sat. And sat. I had ordered the parts to make a hanging frame for it, the parts had arrived, but it required a bit of soldering. Soldering and I have been historically wary companions. So it sat some more. Finally, when I was avoiding cleaning where the art was sitting, I decided to give the frame a go.

Stain glass came cut to size

The glass had one rolled edge, which both my eldest and I liked, so the idea was to create a frame that left the top open. It was short work with a jeweler’s saw to cut the came to length, even with the angles, and also easy to drill small holes at the top for the chain. Then came the soldering.

Soldering the back first in case everything went pear shaped

I did a test solder first on some scrap came, and was pleasantly surprised when the soldering iron and solder did was it was supposed to do. The tip cleaned well on a bit of brass wool, the came heated up nicely, and the solder flowed well from the tip to the piece. Color me shocked. So I moved onto the actual piece, but the back, in case my usual soldering skills came to fore. They didn’t. I was able to solder the back two joints, then flip the piece and solder the front of the joints. I did use a small file to clean up the sharp edges, but the joints were holding! Huzzah!

Abyss Shriek hanging (art work by my eldest, frame by me)

I did add a bit of super glue to the top of the frame. The chain holds everything in place nicely when it is hanging, but when it is not under tension there is a risk of separation, so a little insurance helped. It took hardly any time to put the frame together and get the art hung finally. Embarrassing really, that it sat so long, but I’m glad it is now done. And perhaps, perhaps, I may attempt more soldering in the future.

Keychains

Recently finished up a custom order for a favorite customer. I designed the flamingo graphic first in pencil, then refined it in Adobe Fresco, then cleaned it up in Adobe Illustrator. Using my Cricut, I cut out the pattern on permanent vinyl (I did try removable vinyl, but needed the extra stick for those teeny, tiny eyes). Weeding these 1.75” circles was an exercise in patience, but I think they came out well!

Transferring the design to the inside of the keychain cover, and as an aside, my favorite weeding tool
Weeded design and finished keychain

As a bonus, my youngest loved the extras because her basketball team this spring was the “Pink Flamingos”. (I always make extras because there are inevitably errors or scratches on purchased blank keychains. I don’t want those to go to my customers.)