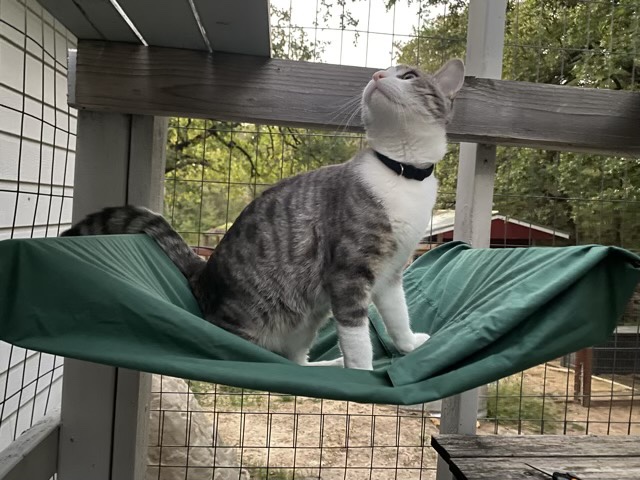
One of the sling beds in the catio gave up under the weight of the kitten and popped its grommet. I removed the rest, it has lasted awhile, and puzzled over a replacement. The two sections of 1 x4” wood that I screwed to the catio supports seemed about the size of a pillow case. It turned out it was a little wider, but with a quick seam and a couple of snipped holes, I converted an old pillow case into a cat sling bed that slides over two parallel boards.
Photo description: Gray tabby sitting in the hammock made with a repurposed green cotton pillowcase suspended by two boards
Cotton does degrade in the sun, but this might be a better design idea than grommets in the corners screwed to the board. I’ll see of the cats use this setup, and if they do, replace the cotton with outdoor resistant fabric.
I’ve periodically been sending cards to my eldest in college so there is mail in the mail box. We all signed a card, and I thought it would be nice if the pets “signed” it too. There are products that have ink on one side of a thin sheet of plastic, so prints of baby’s feet, or dog feet, can be made without getting ink on the foot. I love when people are clever. I made the paw prints on the card stock provided, the animals were mostly cooperative, then I cut out around the prints so I could arrange them the way I wanted. What I didn’t read closely, though, is that the ink doesn’t dry, so is intended to be framed behind glass where the print can’t be smudged. Oops. Thermal laminate sheets to the rescue. Running a lamination sheet through the heat roller without paper makes a nice clear, cuttable sheet of plastic. I trimmed this to my card size, attached the prints with glue dots, then used washi tape for the frame and to hold it all in place.
Photo description: Pre-assambly: Ink pad from Green Pollywog, teal card stock with animal prints on round white paper, clear plastic sheet, black washi tape, roll of glue dots.Photo description: Finished card with the animals names written beneath each print and the year written at the bottom.
Can we talk about the size of Thor’s feet? Wowza. Griffin’s is understandably the largest print, he is the largest dog at about 50 pounds. Missy’s doggy print is next largest (she is 20 pounds). Thor’s print is near Missy’s in size; I haven’t weighed him lately, but he is an almost seven-month-old kitten. Izzy the cat’s print is definitely smaller than Thor’s and at last weigh she was 11.9 pounds. Sophie the cat has the most petite print, and was the most trouble to get a print, and of course is the print I wanted to send most. I was able to trim away most of the unwanted ink drag.
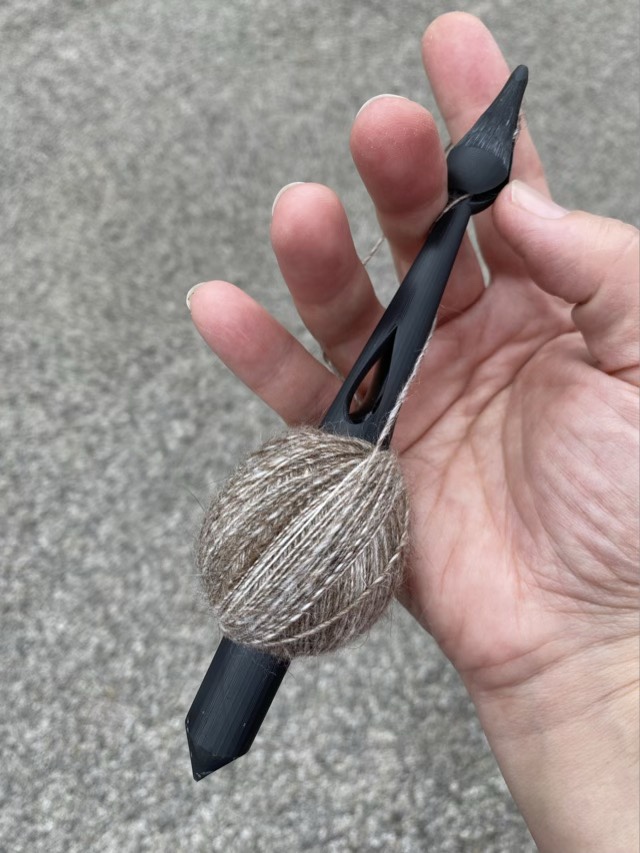
I am still testing the newest spindle design, even though I had a batch run, something was still off, but I couldn’t put my finger on what bothered me. I was having trouble getting a good spin. I thought maybe it was weight, but it didn’t improve as the cop of yarn increased. So I looked at the head, and decided to thin down the top. I used my oscillating drum sander, and with the curve of the drum was able to make just the top of the spindle concave rather than convex.
Photo description: Closeup of the head of my 3D printed spindle, showing a convex surface from tip to midline.Photo description: Same spindle after some sanding with an oscillating drum sander to make the tip to midline concave.
This small change made a huge difference. My fingers now had more contact with the surface of the top of the spindle and I could get it spinning much easier. The grooves left by the rough sandpaper also aided my grip, so I think I will not sand that part smooth. I now need to be careful not to spin the spindle so fast that it flies up sideways, unwinds itself, and falls to the ground. I probably dropped the spindle a dozen times on my walk; there are a couple marks, but it did not break, even when hitting asphalt.
Photo description: 3D printed spindle with a ball of blended single spun yarn on the shaft, held in my hand with the road in the background.
I will sand down the rest of the spindles, then before posting them to Etsy, I still need to develop a decoration and packaging. Development is slow, but inching forward!
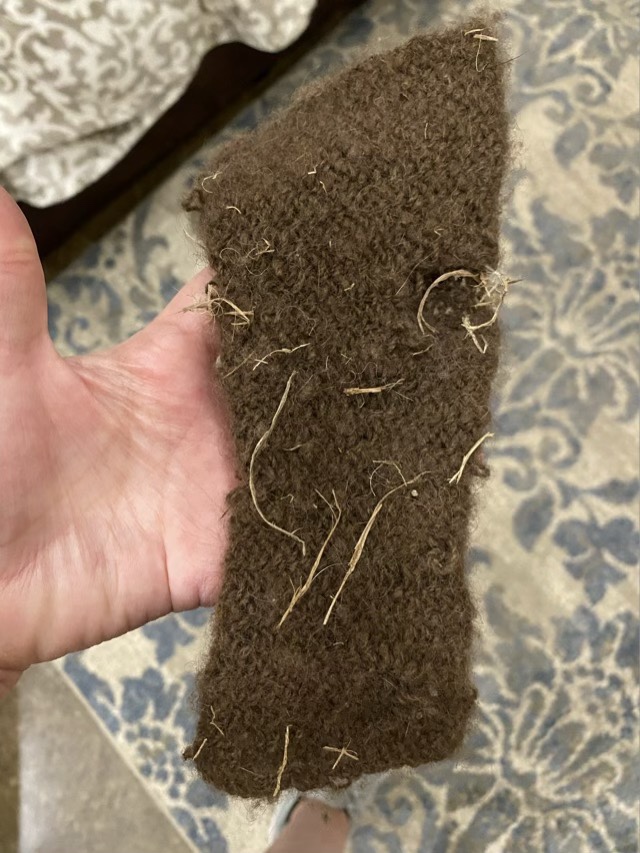
Thor the technical kitten (since he is still under a year old), likes to carry around his toys. One of his favorites is a wrist warmer that I nålbound from home spun bison down. Materials alone make it a pricey toy, but if time invested is considered, it vaults into precious territory. Apparently he took it on a field trip to the catio, then back inside, because I found it on the rug covered in dried grass.
Photo description: Brown wrist warmer made from American Bison fiber, covered with bits of dried grass. There is some felting, and a couple pulled loops in the fabric.
Allowing the wrist warmer to become a toy was a calculated event. The one donated to the cat was a tight fit and I wasn’t wearing the pair. Now it becomes a test of how durable I made the spinning and nålbinding. I’m actually quite amazed that it is holding up to kitten attentions as well as it is.
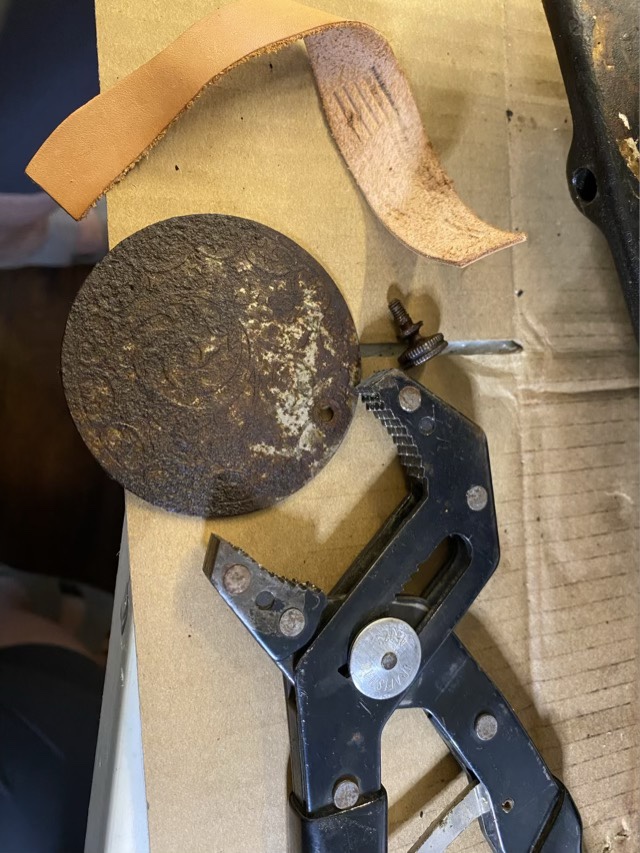
I’m still regularly oiling the Singer 27 treadle machine and attempting to remove more parts for cleaning. My husband has been helping, and he was able to free several bolts! I did take a tool to a thumb screw for the back plate; I figured if it was going to break, better that I’m the one that breaks it. I wrapped the knob in leather, then used an adjustable wrench, and slowly turned the screw. Success!
Photo description: Large adjustable wrench on the bottom, next to a very rusty back plate, next to a small knurled knob that held the plate in place on the machine, and at the top, a 1/2” strip of tooling leather
I photograph all the removed parts and put them in a labeled ziplock bag with a spray of PB blaster. When I get all the parts free, I’ll clean everything before putting it back together (fingers crossed).