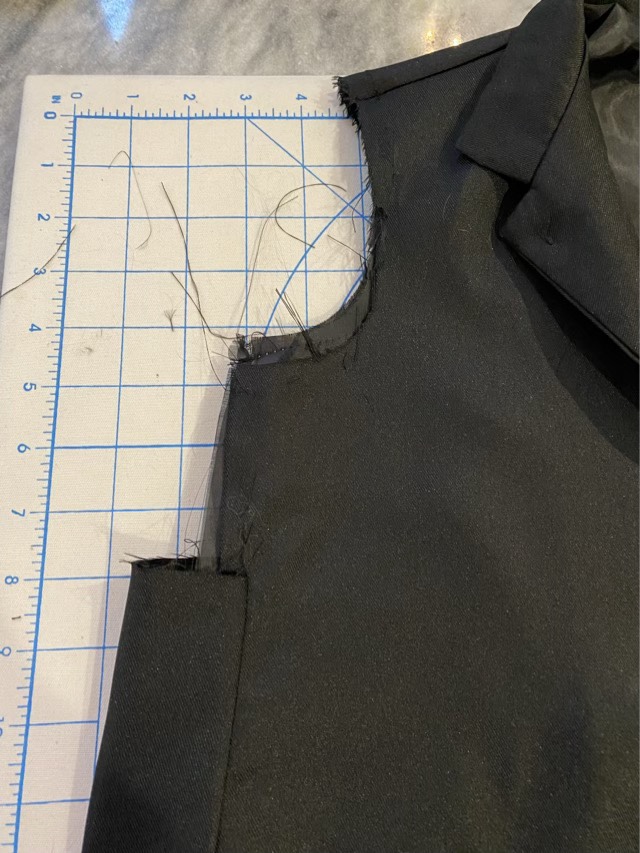
My eldest ordered a size large costume online; when it arrived it was a YOUTH large. Oops. There wasn’t time to return and reorder, and all the critical identifying marks were on the jacket, so we ripped some seams and turned the buttoned jacket into a vest.
Photo description: Right arm hole of black jacket with sleeve removed and a gusset added to the side.Photo description: Same right arm hole, trimmed with black bias tape.
We obtained a black shirt and black pants to go under the vest, and I rather like the crop vest with the long shirt. It is a subtle stylized version of the character.
Turkish drop spindles are very clever, they go together in pieces, spin well, and come apart without disturbing the cop of yarn built up around the arms, but with a Turkish spindle, this bundle of spun yarn is called a turtle. I have seen pictures of some exquisitely wrapped turtles that are art forms in and of themselves. Mine looks more like a nest. I have goals.
Photo description: Squarish bundle of yarn surrounded by 3D printed Turkish spindle parts in the direction they were removed, a turned wooden shaft that was removed first, and a handkerchief with rope wrapped around a distaff.
I had trouble deciding the title for this post, so I combined all the words for maximum misdirection.
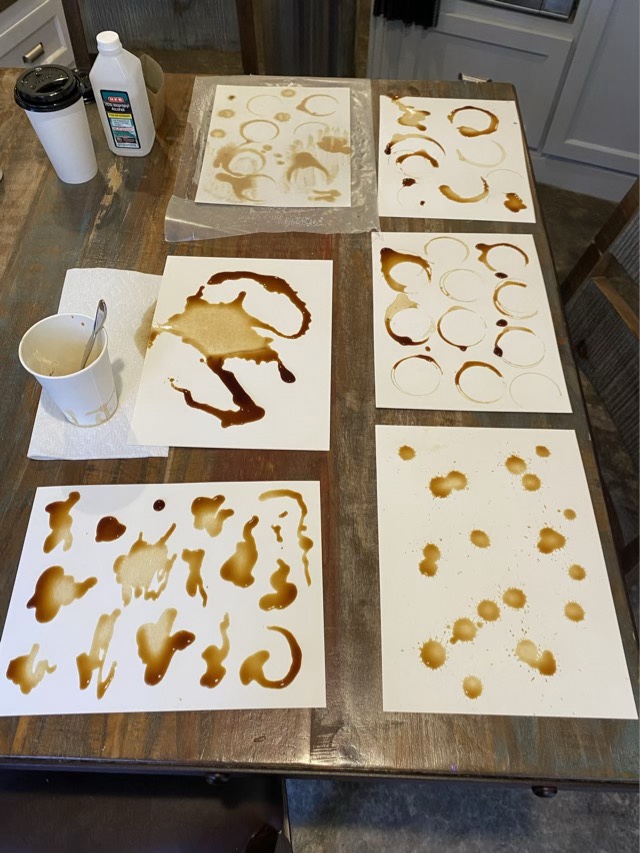
I went to my favorite coffee shop and picked up a latte and a couple shots of expresso to go. I drank the latte, but used the expresso to make lots of shapes on water color paper.
Photo description: Six pages of watercolor paper laid out on the table with an assortment of coffee rings, drops, and splotches of expresso. One page in the back was treated with isopropyl alcohol first, which gave the coffee a diluted/faded effect.
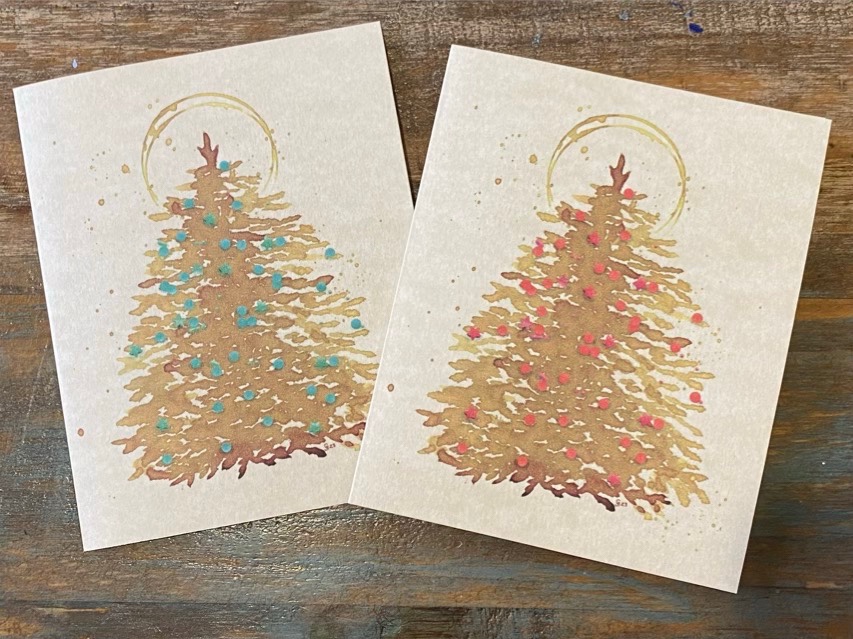
My goal is to digitize the coffee stains to make amalgamated coffee art. First up, a coffee tree. Although I intended to use the shapes to make the tree, I decided to also try just painting an evergreen tree with expresso. It turned out great, so that turned into my base image. I scanned everything, including a scattering of sugar sprinkles. I digitally combined the tree, sprinkles, and a precisely placed coffee ring, and am quite pleased with the result. For fun, I changed the color of the sprinkles in Photoshop so I had two options.
Photo description: Two cards printed on recycled parchment paper, showing a evergreen tree painted in the sepia tones of expresso, topped with a double coffee ring, and festooned with round and star shaped sprinkles. One card has teal sprinkles, the other, red.
These cards are sold exclusively at The Full Cup in Weatherford, TX.
I made a new digital card design for our holiday cards. I started in Adobe Fresco on an iPad with an Apple Pencil, moved to the computer and used Adobe Illustrator, then to print, used Adobe inDesign to do the layout. I like black and gray word art, but to give it a little pop I printed on pearlescent paper.
Photo description: “Dashing through the Snow” in different fonts, with pine needle bunches, holly sprigs, two swooshes, and assorted gray snowflake designs. The shimmer of the pearlescent paper is evident in the upper left corner.
My plan is to put the design in Redbubble and cross post to my CarynsCreations.com site after the design is available.
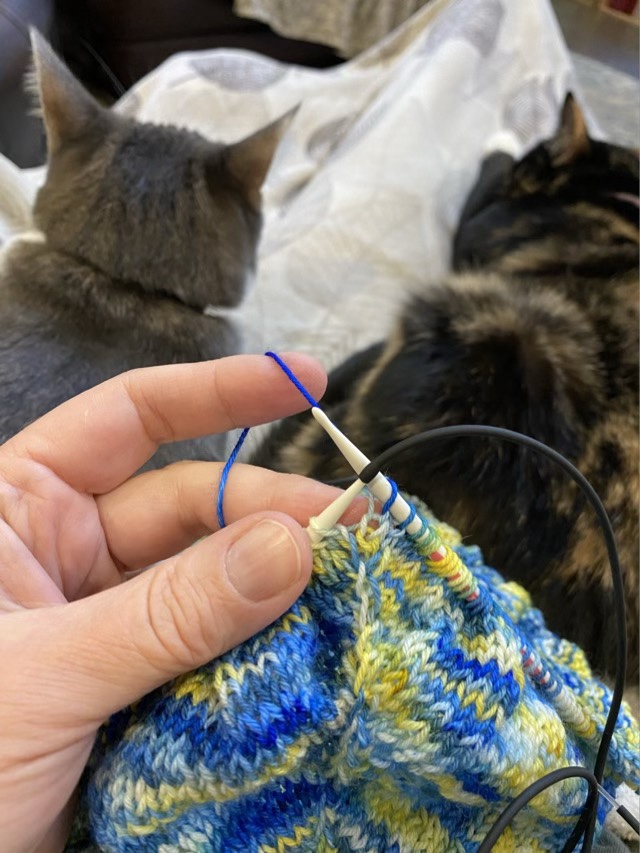
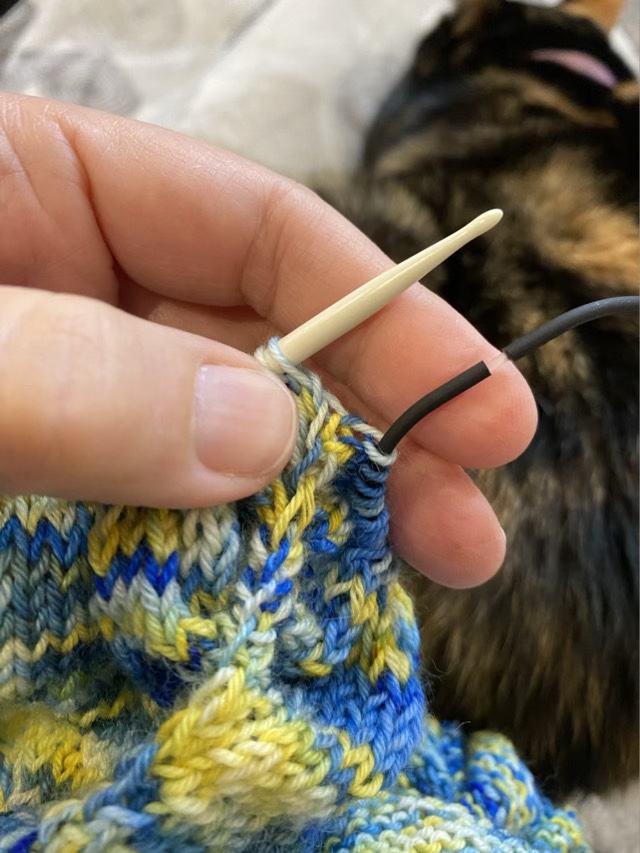
I’ve made it to the split of the arms and body on the cardigan I’m knitting! This is momentous because after I separate the stitches for the sleeves each body row will have less stitches, which will make progress seem faster. There are a couple ways to hold the stitches for the arms, waste yarn, or a stitch holder. I found some pony bead elastic in my stash, which is a thick, but hollow, rubberized cord marketed for stringing beads. The end of this cord fits over the tip of my needle, making it much less scary to slide the stitches off the needle and onto the cord.
Photo description: Black flexible cord slid over the tip of a Prym circular knitting needle, in preparation for sliding stitches. Two cats in the background in close proximity.
The cord comes in long lengths, making it possible to cut it as long as I want it, which in this case is large enough so the garment can be tried on during construction. In the package there are also small connectors that slide into the ends of the cord, closing the loop.
Photo description: Knit stitches slid onto the cord and the cord closed with a clear solid connector. One cat in the background. Thor pushed his luck, Izzy noticed and told him off.