Stitch marker necklace

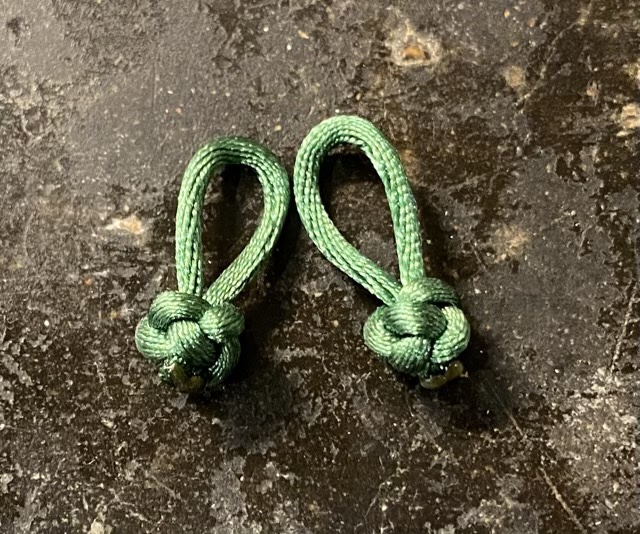
I thought I would make up stitch marker necklaces for the stitch marker swap at the Fiber Fest. I’m good with wire, but not entirely sure that wire is the right material for hand made stitch markers. It seems they would catch on the yarn. So I made holders instead. I have a large spool of square copper wire (20 gauge) that looks awesome twisted. I used satin cord for the necklaces with a simple slide knot so the length is adjustable.

From top to bottom:
Form a loop at one end of the wire,
twist the wire using the loop and a bent angle,
form a hook at the opposite end of the wire,
form a circle and catch the hook around the base of the loop
Many stitch holder necklaces

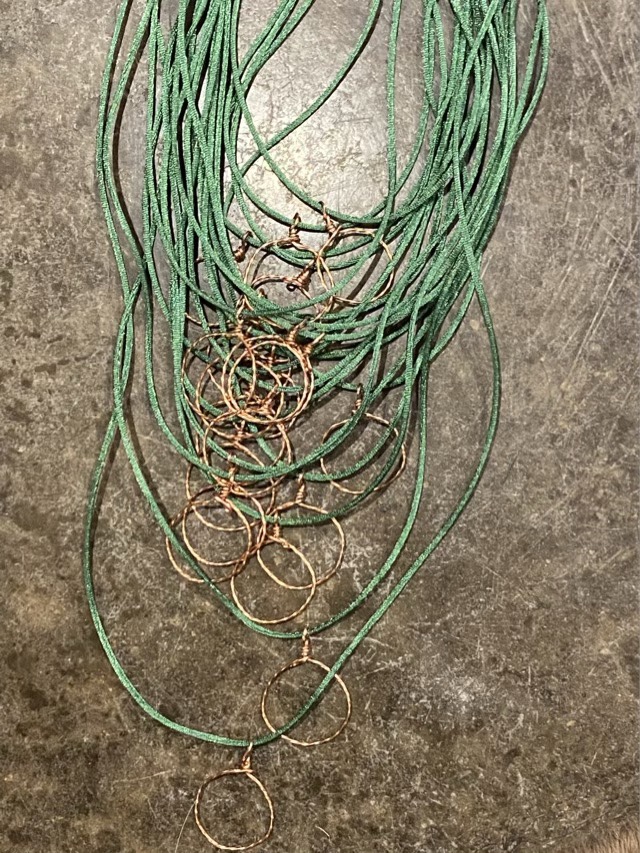
Full disclosure, it has been awhile since I’ve done wire work, and it took my hands a few rounds before they remembered the moves with efficiency. I also didn’t make it to the swap meet. I was quite ambitious of me to attempt a four hour stretch at my first festival in many years. It is OK I only made it an hour and a half. Next year I will plan better. And make markers like these:

Stitch marker made from satin cord (objects in the image are smaller than they appear)

Fake pockets

In the realm of clothing, there is nothing more abhorrent than a fake pocket. All the hard work has been done, with the fiddly finish and neat corners, why couldn’t the designer just add a real pocket? And not one of those shallow useless pockets, but proper pockets. I’ve heard the line “it changes the line of the garment,” well, then they are more concerned with themselves than with their customer. Ok, rant over. Let’s fix the issue.

Fake pocket in women’s pants, with a simple cotton pocket ready to sew in
Clip the seam keeping the fake pocket closed, so it opens
On the wrong side, sew in the pocket over the pocket opening. You can fold in the raw pocket edges, and fold the pocket top out if you want to get fiddly. Sew along the front and back of the pocket opening, don’t worry if there are small gaps at the end of the seams, they will be at the top of the pocket.
Pocket insert installed. Crises averted. Wrongs righted. Balance restored.

What did it do?

The summer left the grass in sad condition; the following rains perked up the native varieties we’ve been planting but showed us how much St Augustine grass was still in the mix as it died off the hardest. (That really doesn’t make me sad, I detest St Aug grass.) There is one particular healthy clump that Sophie the cat likes to “hide” behind. I didn’t get the photo of her stalking pose, but did capture the moment she thought the tuft should die.

Casual arm around the victim
What did you say?
Goes in for the kill

Lining sewing hack

Inevitably when I sew a lining, a section of the lining slips and shows past the edge. I use pins and go slowly, but lining material tends to be slippery, especially when sewing satiny fabric to velvet.

Lining material showing past a edge

At this point there are several choices: hope no one notices (I know it is there!!), rip out the seam and try again (horror), or hand sew it. I have found a rather useful stitch to tuck in the offending blob of material.

Sewing a folding edge

To fold the lining in and keep it there, it works well to alternate small stitches near the original seam, then at the top of the original fold. Keep these stitches loose for four or five repeats, then gently pull the stitches tight. The fabric folds down and is secured!

Lining tucked and tacked
No lining showing on the edge of the velvet

This is part of an adjustment on a purchased velvet tail coat. It was faster and more economical to get a pre-made garment, then make alterations, than to make the jacket from purchased material and a pattern. Although I would have had the same issue either way; linings and velvet always gives me fits.