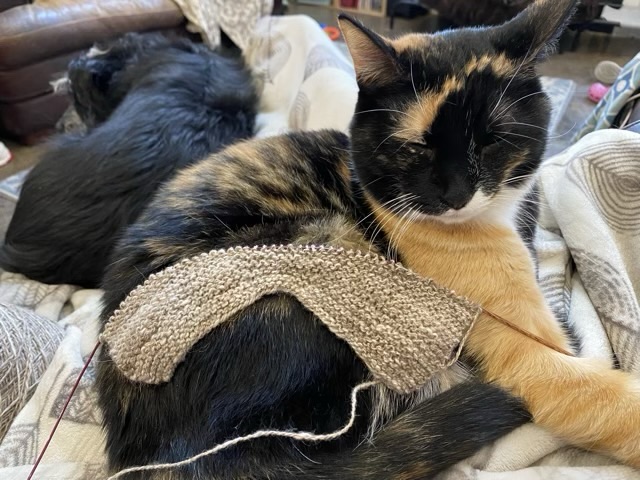
Photo description: beginning of a knitted scarf with short rows lying on a calico cat with a small black dog in the background.
I have cast on the Helix scarf from Spin Off magazine! I did make a modification, casting on thirty seemed very narrow, so I ripped out (only a couple rows) and cast on 50 instead. I adjusted the short rows to alternating 20 and 10. It turns out that I really like short rows, and the wrap and turn method. Izzy the cat doesn’t mind being on my lap as I knit, but Thor the cat thinks the yarn smells really good and keeps trying to take off with it, or chew on my circular needle.
Running out of thread on the sewing machine bobbin two inches from the end of the seam happens on antique machines as well as modern machines. Sigh.
Photo description: empty bobbin on a Singer model 66 treadle sewing machine along side an unfinished seam on yellow and red quilting fabric.
Despite the frustration, this was good practice to see if I remembered how to wind the bobbin and rethread the machine. I didn’t. I rethreaded the machine three times, wondered why the feed dogs weren’t moving, so took off the foot and the needle to look, forgot to disengage the bobbin winder, and put the needle in backward. After another few minutes of troubleshooting I realized the stitch length knob was set for teenie tiny stitches, so fixed that (feed dogs work fine). Then I disengaged the bobbin winder (which is easy to accidentally bump into position). It took seven practice seams before I finally went looking online for reasons for skipped stitches and then discovered the needle was in backwards. Oh for crying in the mud. The machine works great, the operator still needs some training.
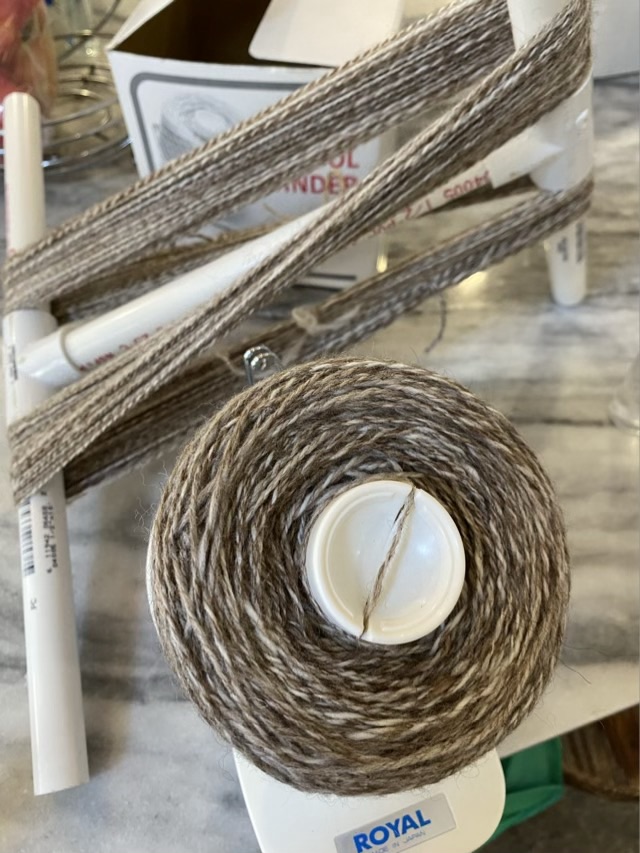
I have spun and plied all my blended fiber from Anniewhere. The blend is Merino wool, Blue-faced Leicester, Alpaca, Tussah silk, and Finn wool. I bought 6 oz and have been using it to test different spindles, so I’m frankly amazed that it turned out somewhat consistent. I joined the skeins with a braided join: split each end in two, then remove one of the four resulting ends, braid those three together, then moisten and roll between your palm. Here is a video.
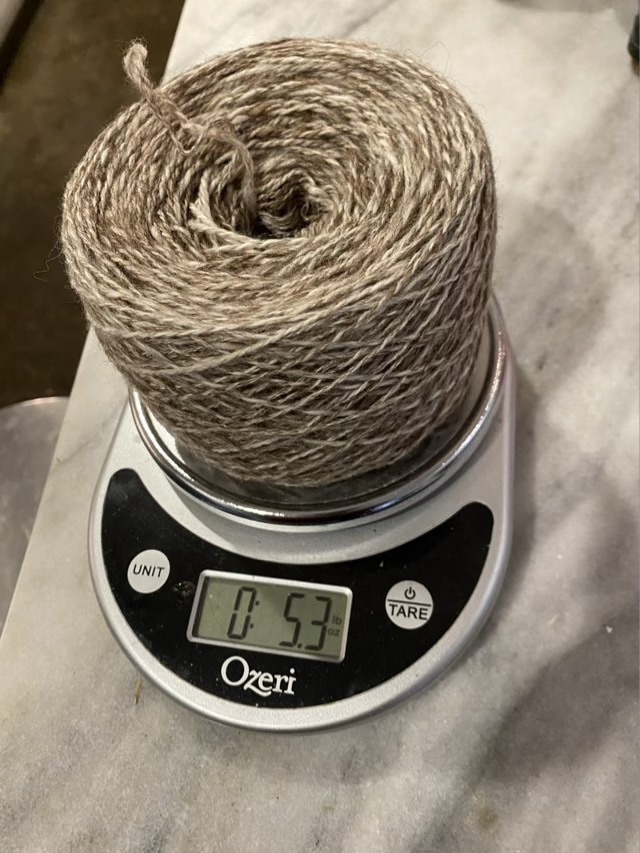
Photo description: yarn cake on a yarn winder with two additional skeins on a PVC niddy noddy in the background.Photo description: finished yarn cake sitting on a scale reading 5.3 oz.
I joined all the skeins together because I intend yo do a knitted project. I spotted a free ruffled scarf pattern while I was spinning, and knew that it would be great for my yarn, so the pattern has been sitting with the fiber. I’m excited to cast on. (I’m might have to admit that I could be a knitter.)
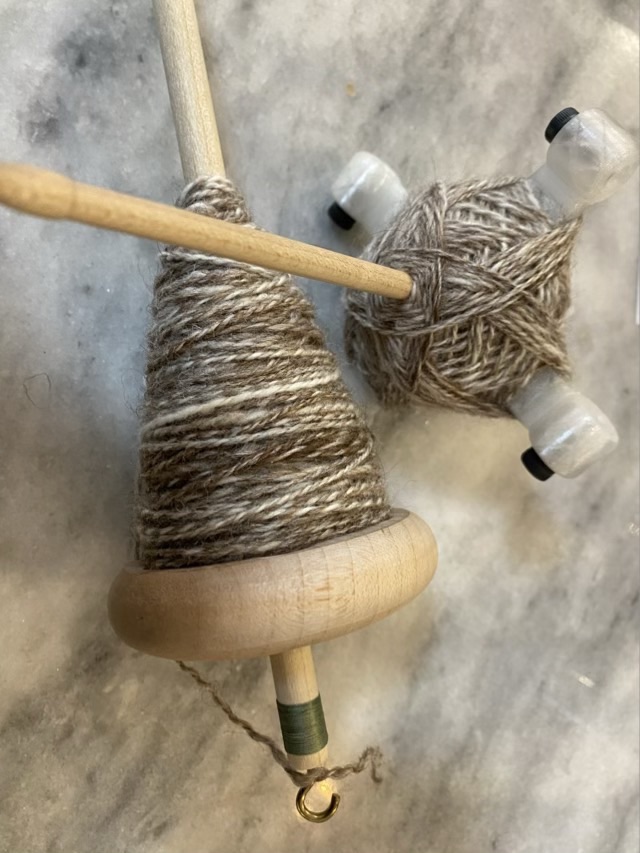
Plying on a Turkish spindle is satisfying, especially now that I’ve figured out how to get the geometric wrap pattern, but it is not fast. I took the other turtle of yarn and pied it with a top whorl drop spindle.
Photo description: Top whorl drop spindle filled with 2-ply mixed wool yarn, my foot and asphalt in the background because I took the picture while walking.
I plied nearly twice as much yarn in half the time with the top whorl spindle versus the Turkish spindle. I can really get the top whorl spindle going by rolling the shaft along the outside of my leg. The Turkish spindle I have to get spinning with a flick of my fingertips.
Photo description: Top whorl spindle on left, Turkish spindle on right, both wound with 2-ply blended wool yarn.
Now there is a difference after plying between the two spindles. The top whorl spindle has to be unwound from the shaft and wound into a ball or cake before it can be used. The Turkish spindle shaft and arms pull out of the yarn turtle and leave a center-pull ball of yarn that doesn’t need rewinding. I like to wind my yarn on a niddy noddy and wet set the twist, so did not save time in that area on this project. If I didn’t want to use the yarn right away, and wanted to let time set my twist, and marvel at the pretty geometric wrapping, a Turkish spindle is a way to go.
Yes, I finished ripping out the sweater and the next day cast on a pair of socks. I am using two circular needles to knit two socks at a time. I have knit socks before, but it has been awhile, so I pulled out a book I found in a stash of craft books. These socks knit top down.
Photo description: two blue and yellow sock cuffs on circular needles in front of my steering wheel. I’m knitting while waiting for school pickup.
I made the mistake of working each sock from the same yarn cake, one strand from the inside, one from the outside. The yarn twists as I turn the work and I’m constantly untwisting as well as untangling from around the circular needles. I have done double pointed needle knitting, but all the ends capable of dropping stitches terrifies me.